Allows the creation of hardware manufacturers, used for associating entities and for being able to attach files to models, such as images or logos.
Steps
Manufacturer Wizard
Essential data for the registration and identification of a manufacturer on the platform.
NOTE: There is the possibility to configure the manufacturer by organization by selecting the equivalent wizard
Create manufacturer model
Allows for the creation of hardware models and the ability to associate files with these models, such as images or logos.
Steps
Creating a Model
Essential data for the registration and identification of a model on the platform.
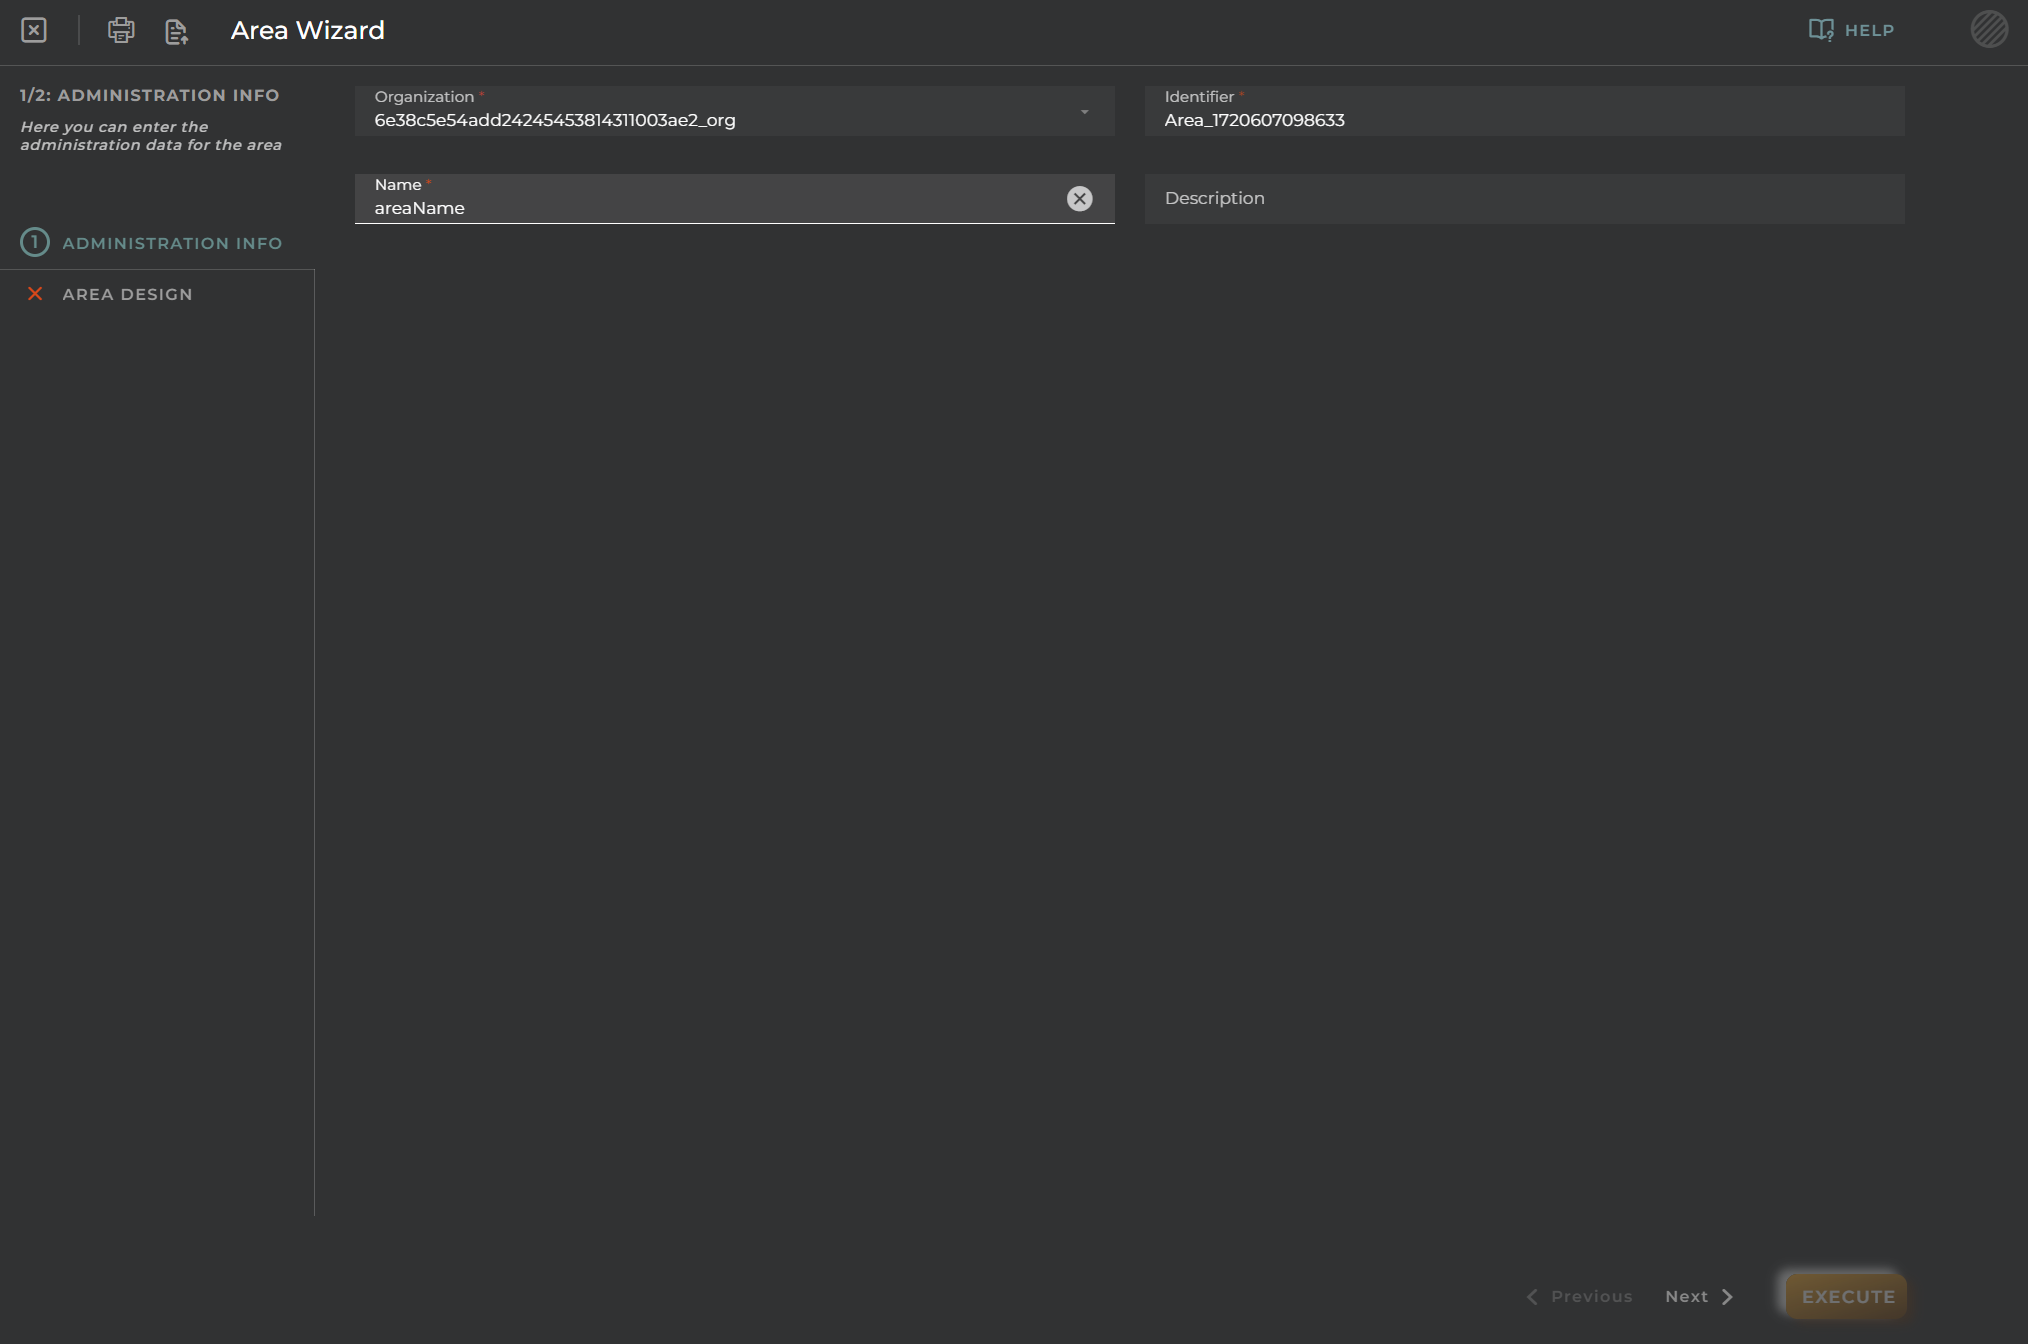
Create new Area
This wizard allows us to create areas.
Steps
Administration Info
Information for the registration and identification for the creation of a new area.
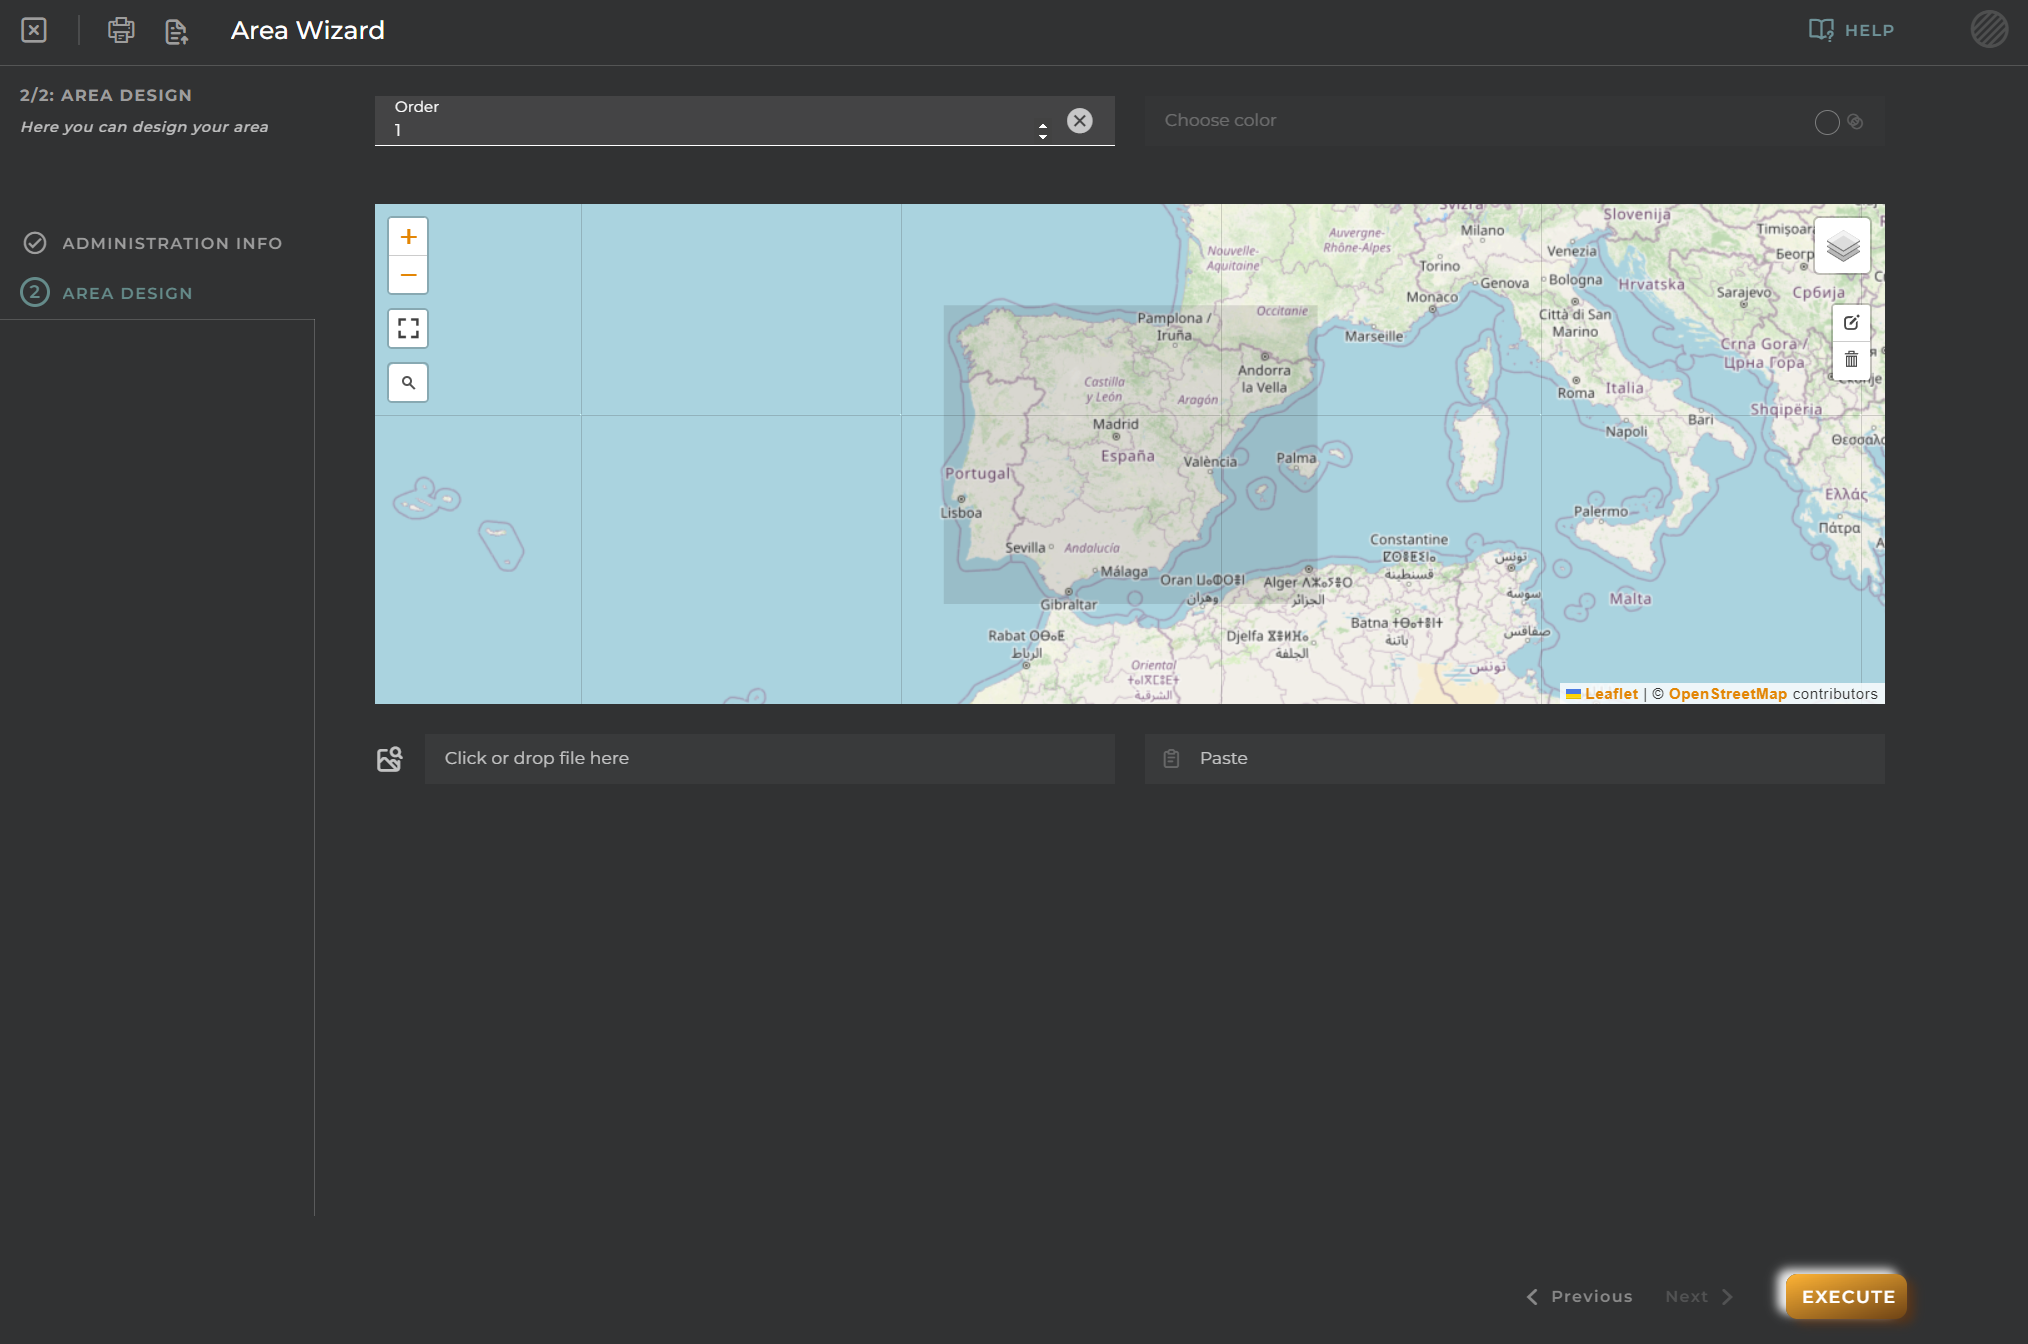
Area Design
In this step, you can build or import the area itself.
Allowed actions:
Import GeoJSON file - Imports a file from the computer
Paste GeoJSON file - Opens the paste tool where you can paste the content of a GeoJSON file from your favorite editor.
In the map, you can see the following tools:
Polyline tool: You can draw a line on the map without an area
Polygon tool: Allows you to create a free form that contains an area on the map
Rectangle tool: Allows you to create a rectangle that contains an area on the map
Circle tool: This tool draws circles that contain an area on the map
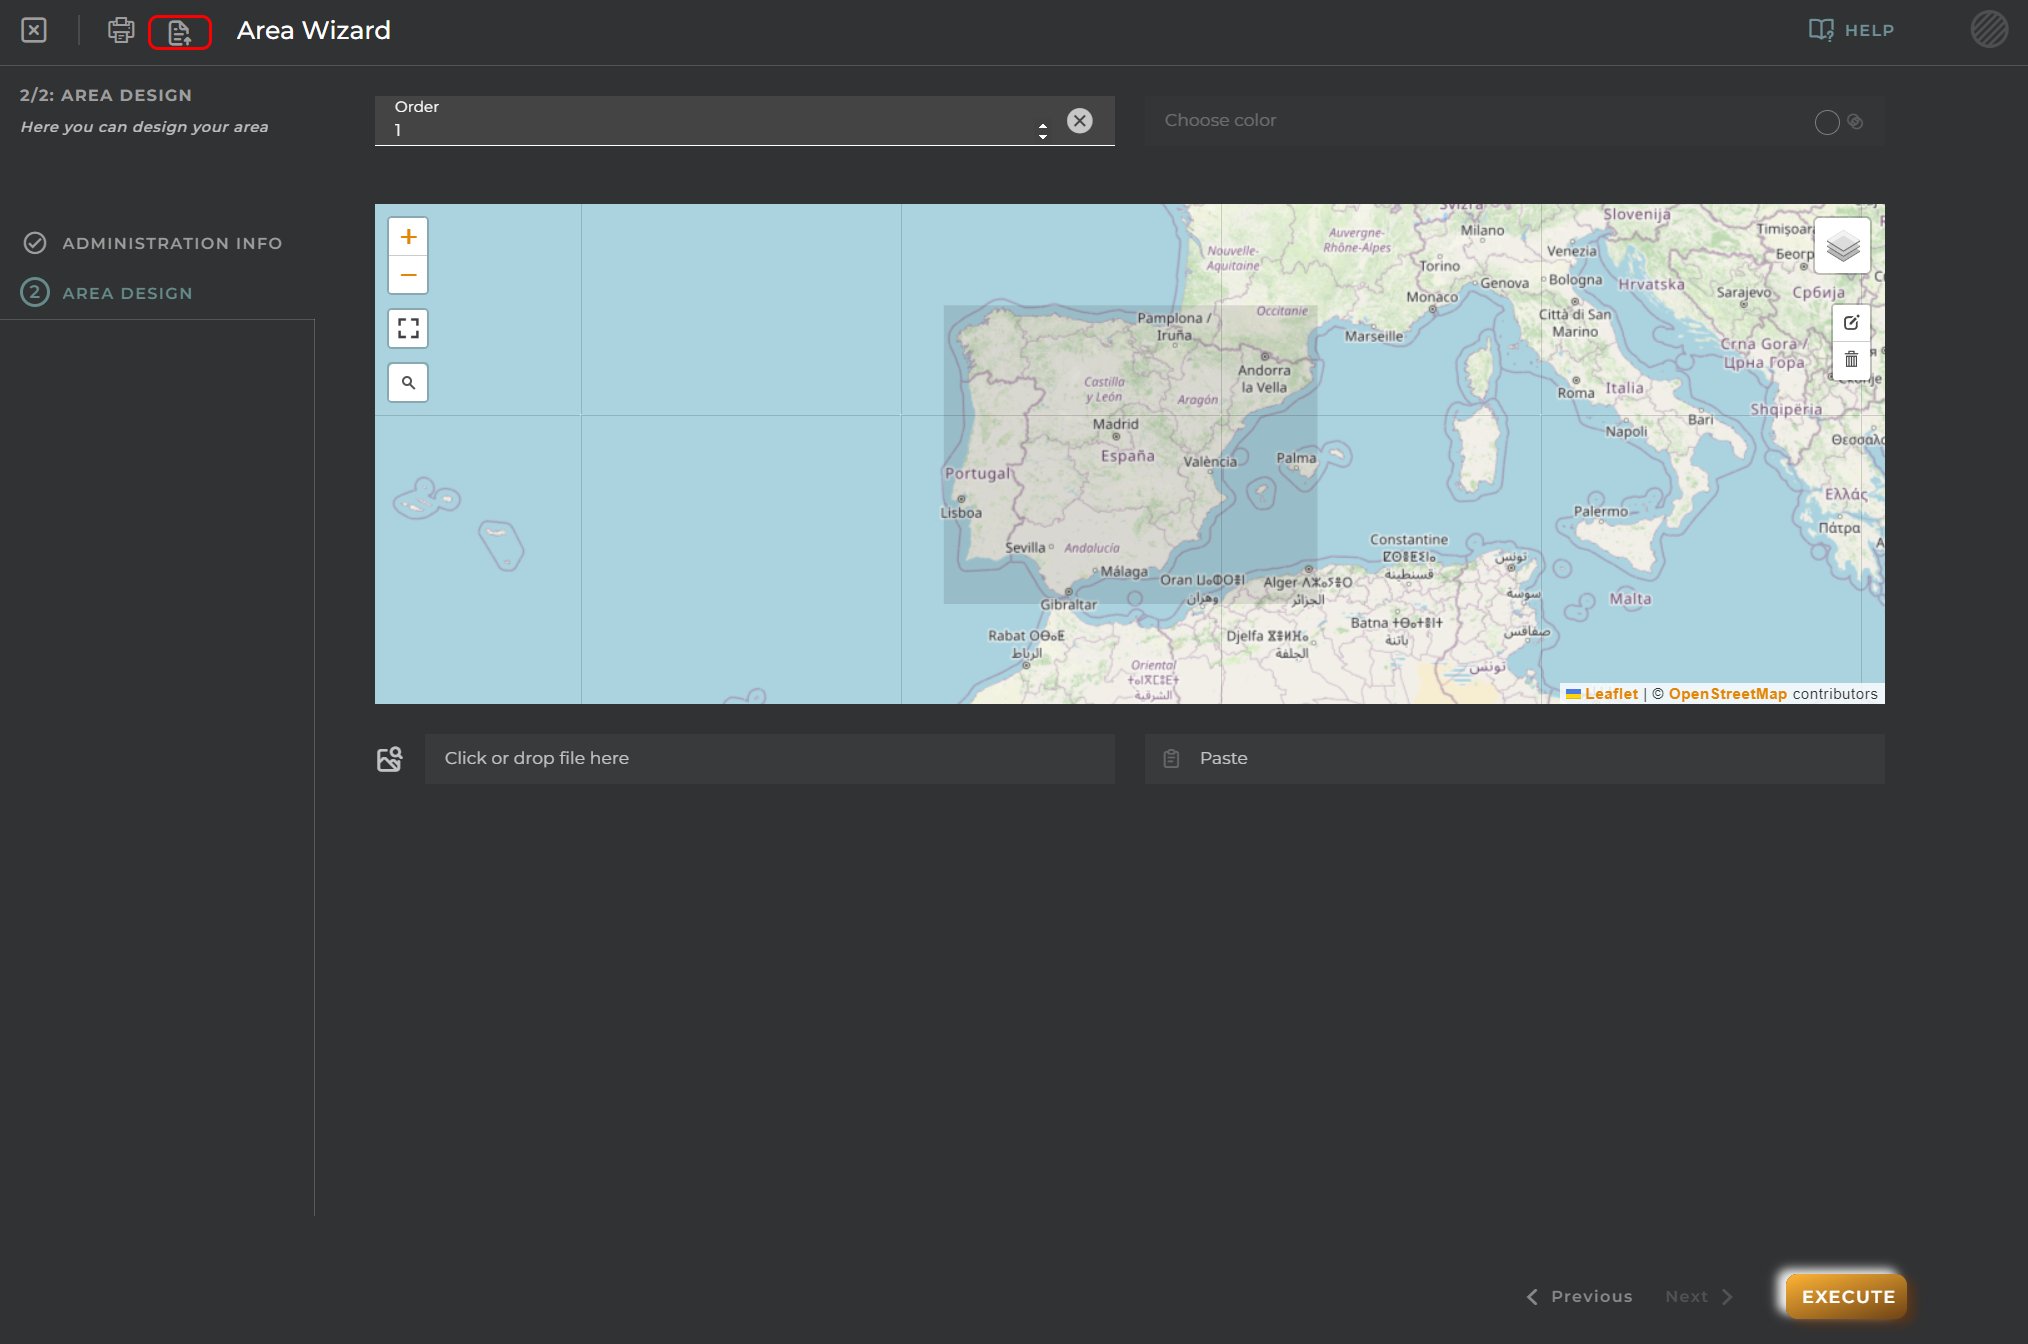
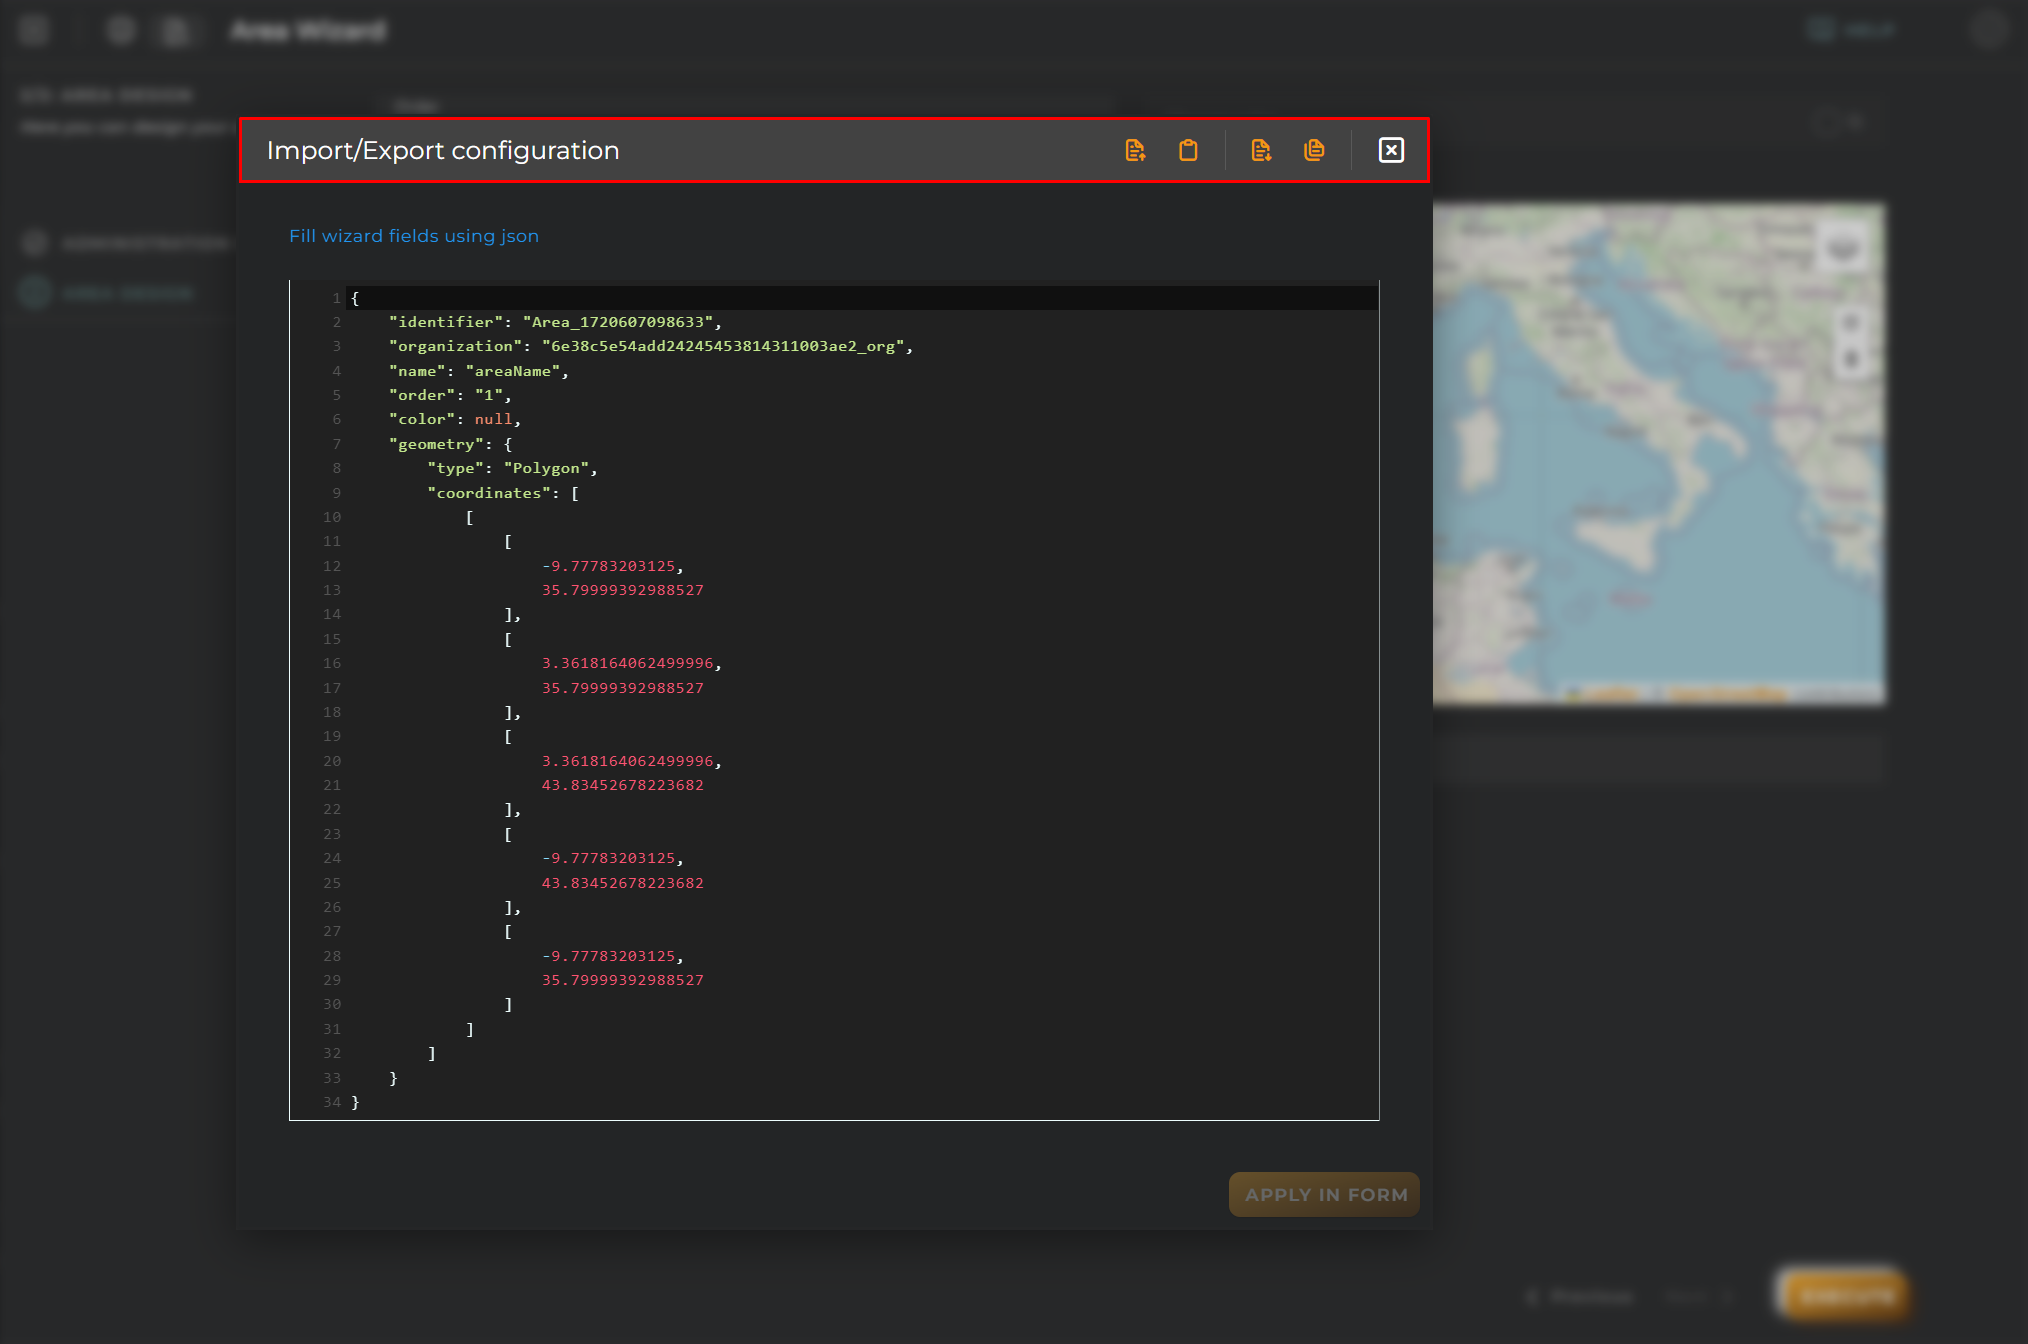
Import/Export Configuration
Allows you to import and export the wizard’s configuration via JSON.
When accessing the import and export functionality, it displays a window with various actions. Additionally, it presents the configuration of the wizard in JSON format.
The available actions are as follows:
Upload Json: Uploads a JSON file and replaces the previous JSON configuration.
Paste from clipboard: Pastes JSON data from the clipboard and replaces the previous JSON configuration.
Download Json: Downloads the JSON configuration as a file with the wizard’s name.
Copy to clipboard: Copies the JSON configuration to the clipboard.
Create new Channel
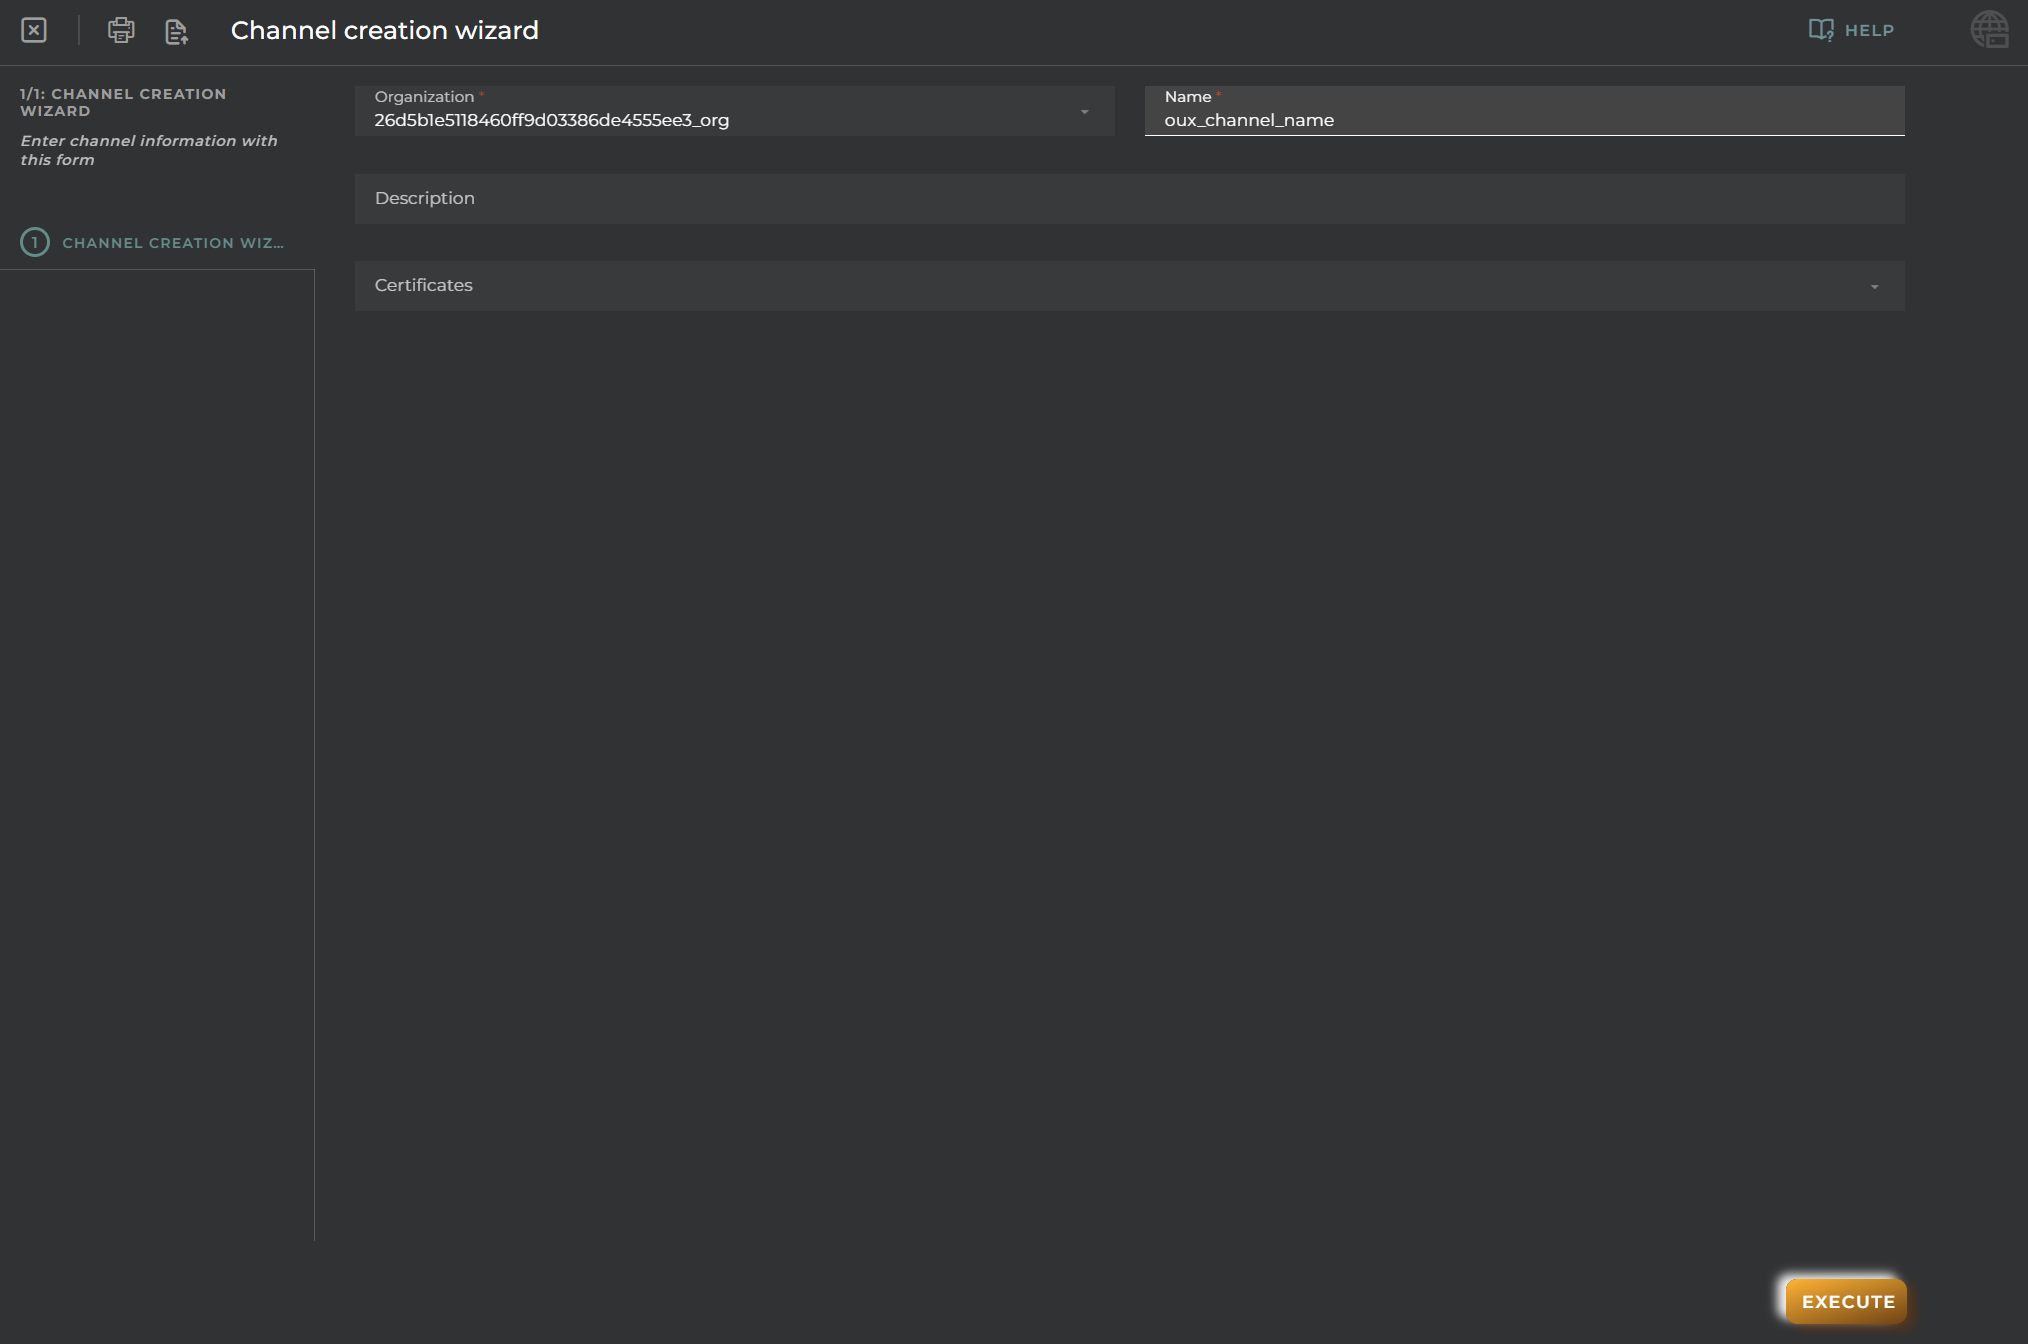
This wizard allows us to create channels to group devices within the same organization.
Steps
Channel Creation
Essential data for the registration and identification of a channel on the platform.
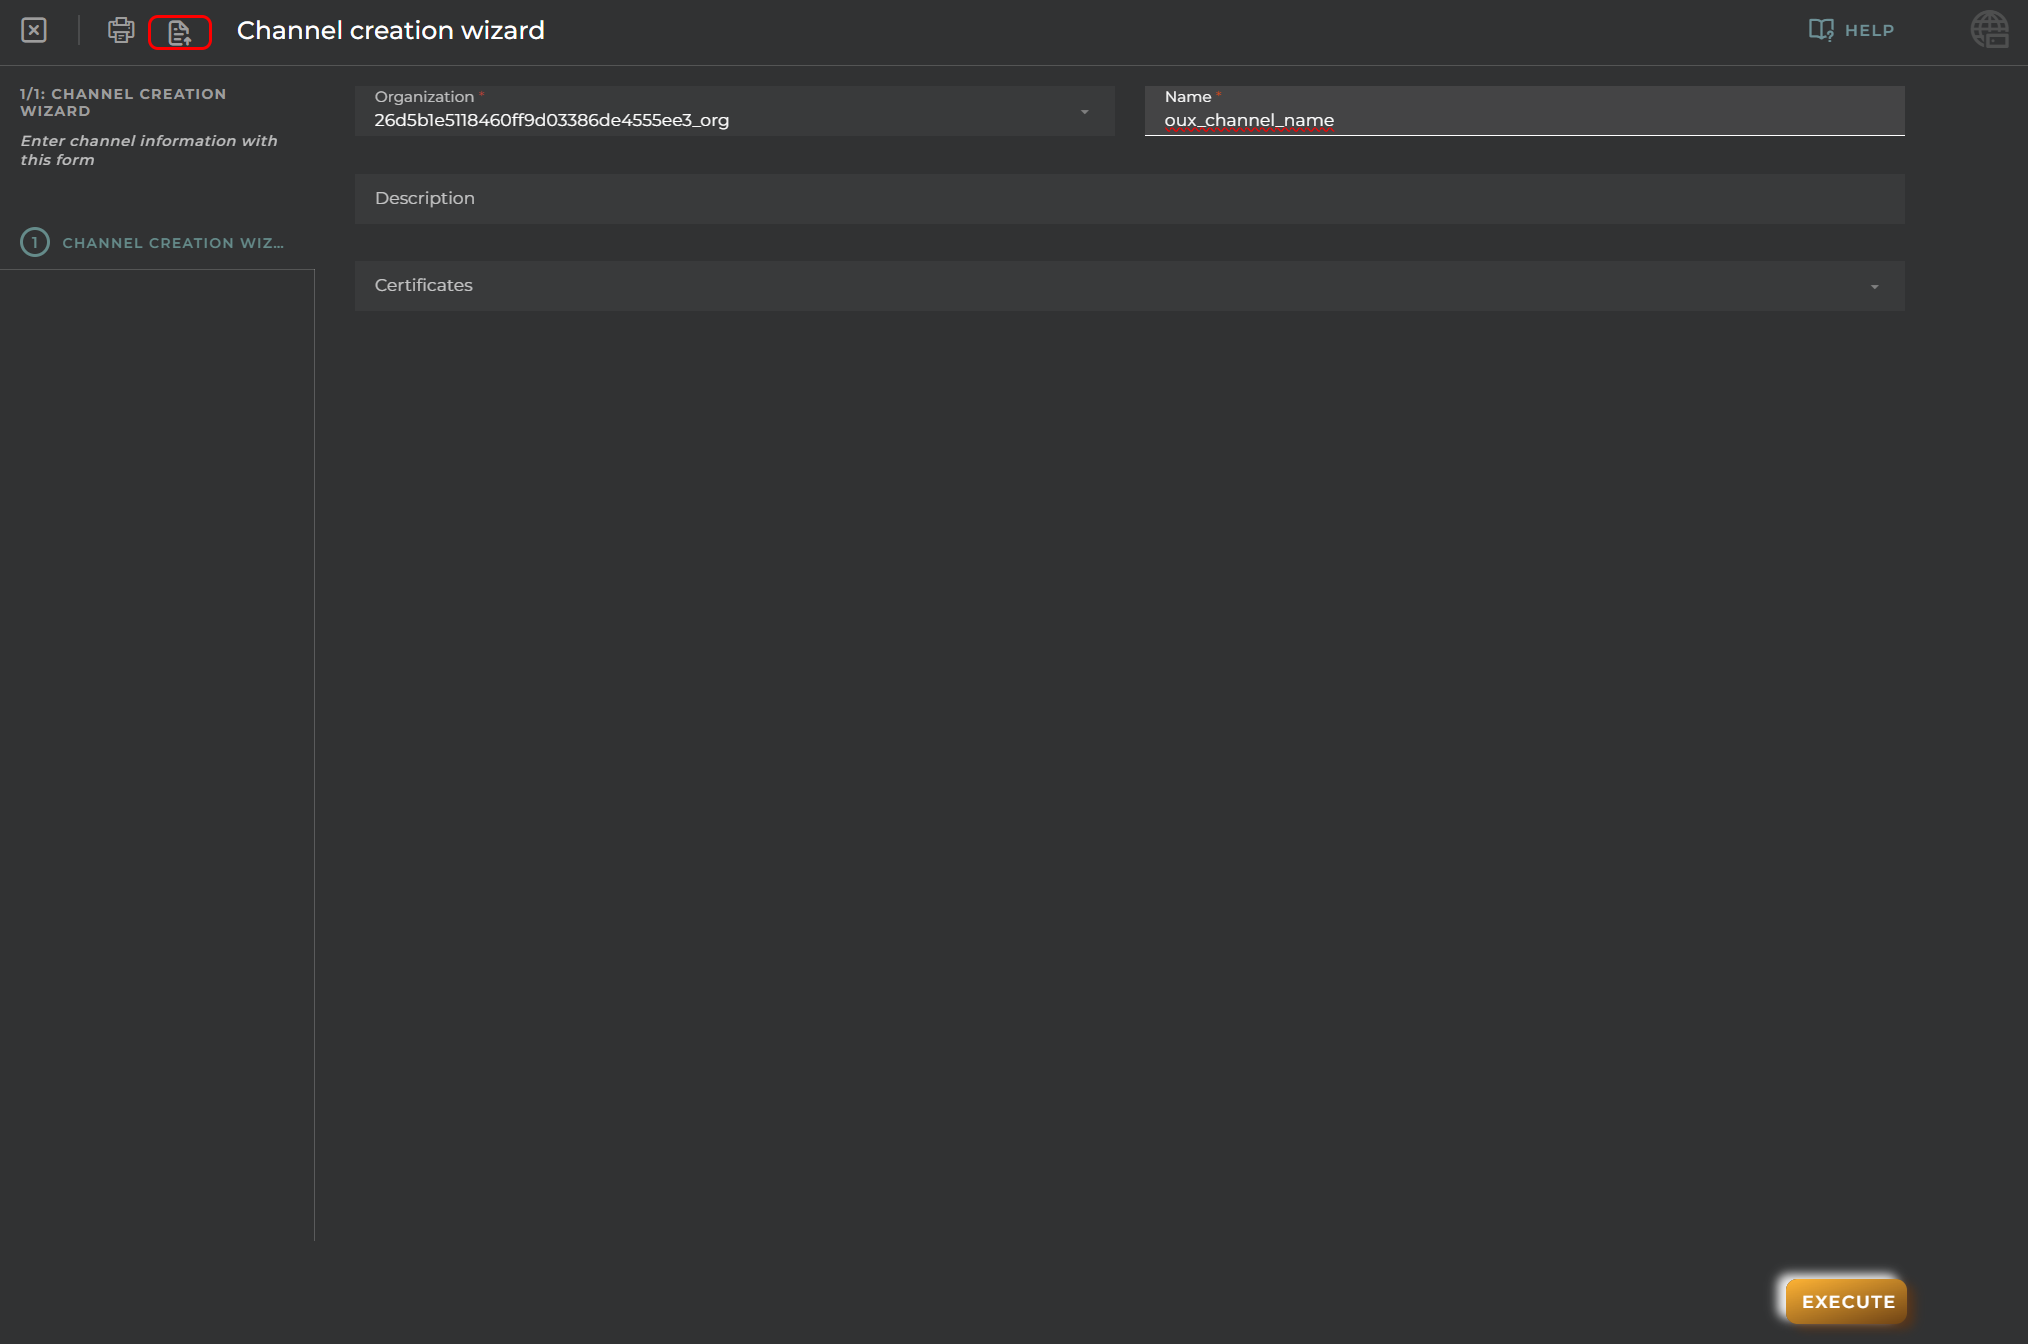
Import/Export Configuration
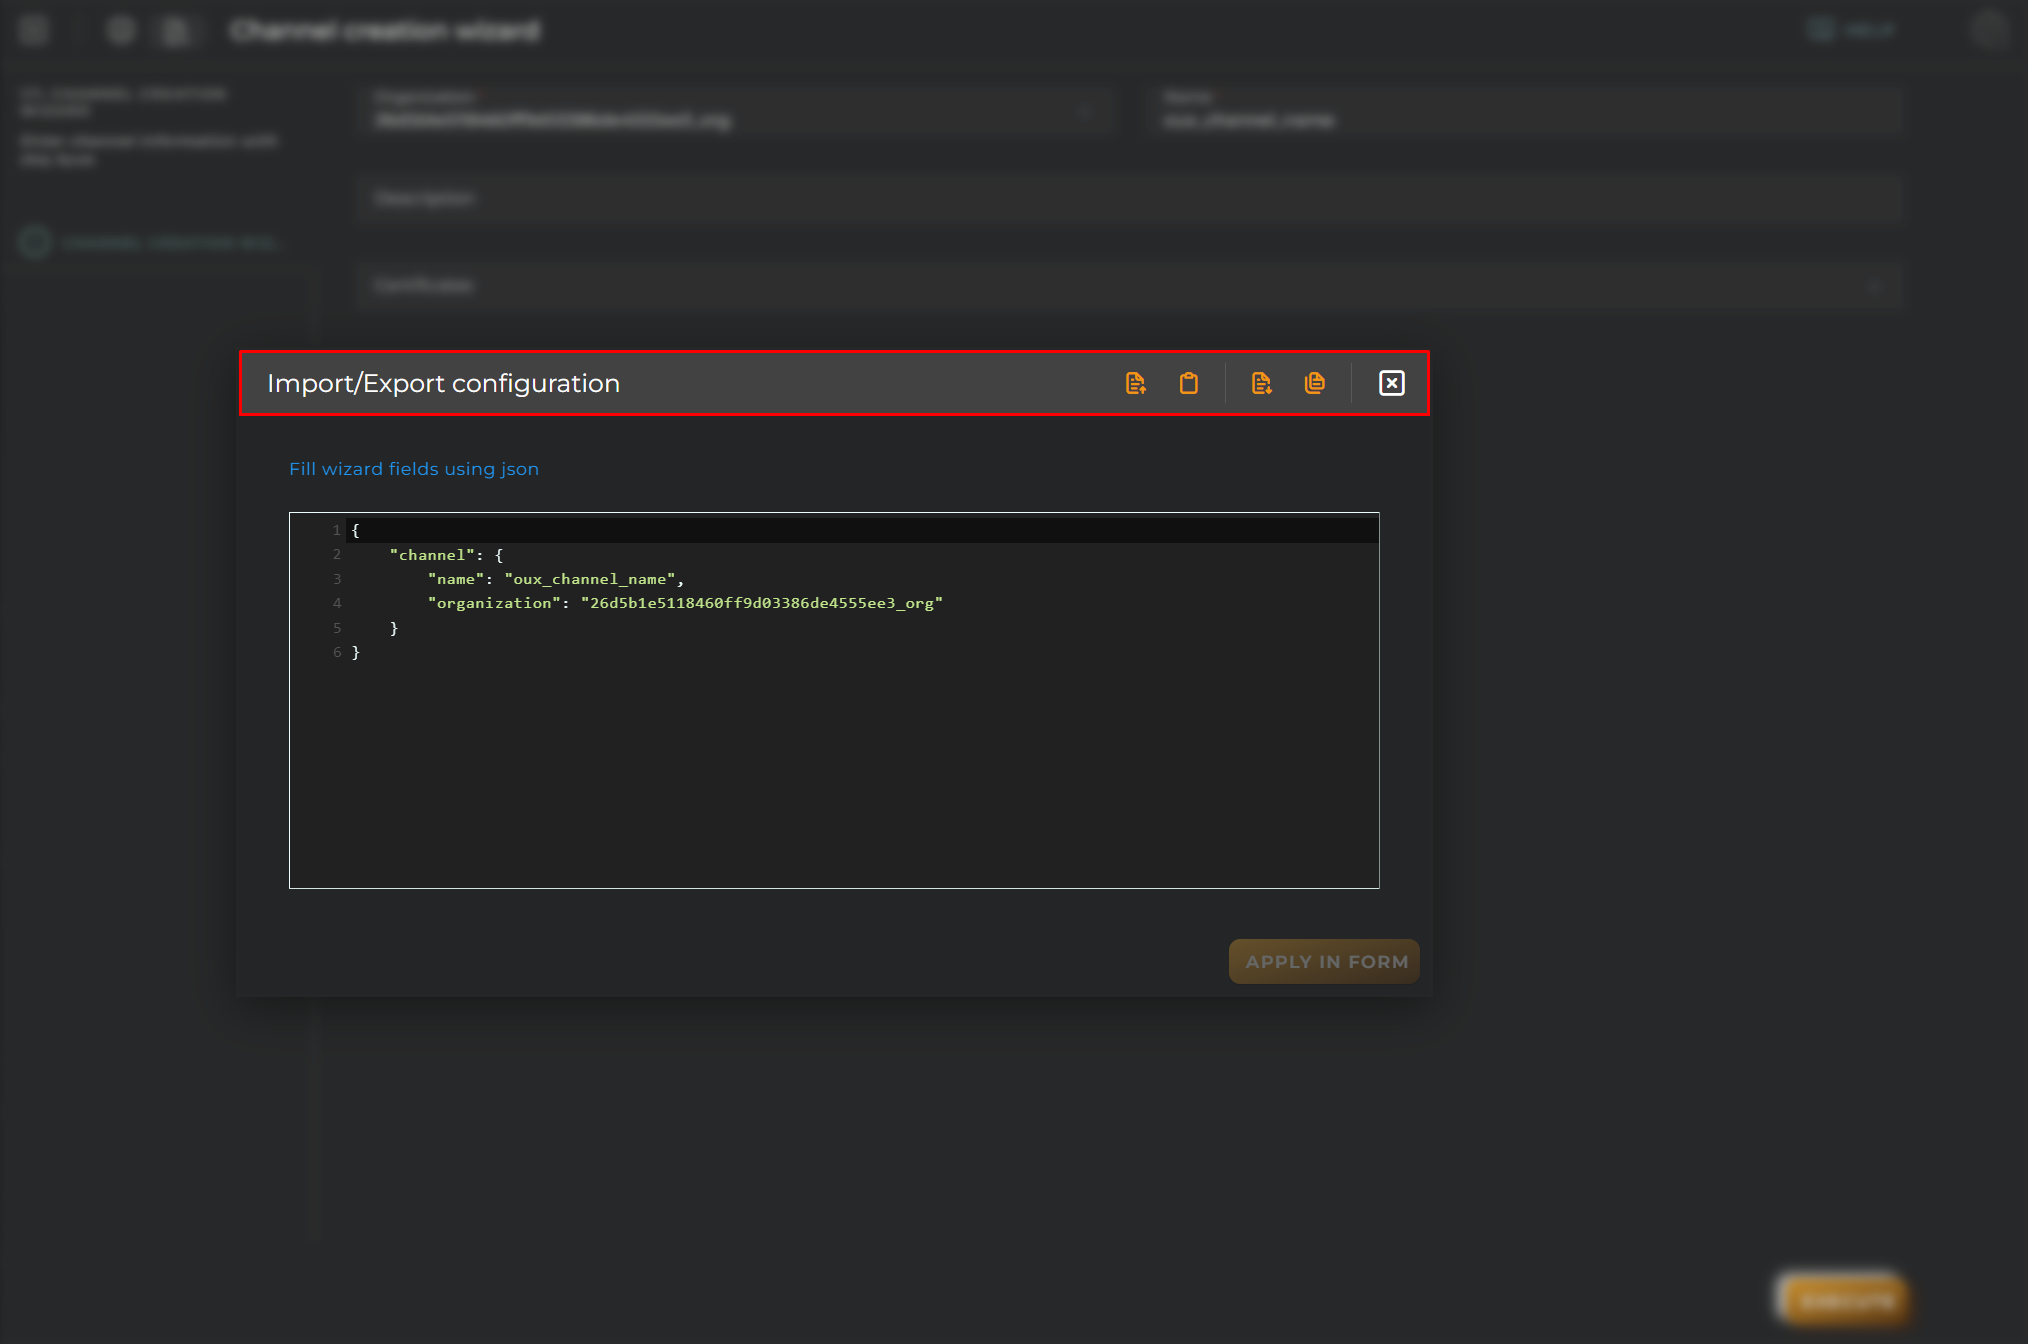
Allows you to import and export the wizard’s configuration via JSON.
When accessing the import and export functionality, it displays a window with various actions. Additionally, it presents the configuration of the wizard in JSON format.
The available actions are as follows:
Upload Json: Uploads a JSON file and replaces the previous JSON configuration.
Paste from clipboard: Pastes JSON data from the clipboard and replaces the previous JSON configuration.
Download Json: Downloads the JSON configuration as a file with the wizard’s name.
Copy to clipboard: Copies the JSON configuration to the clipboard.
Create new Data Model
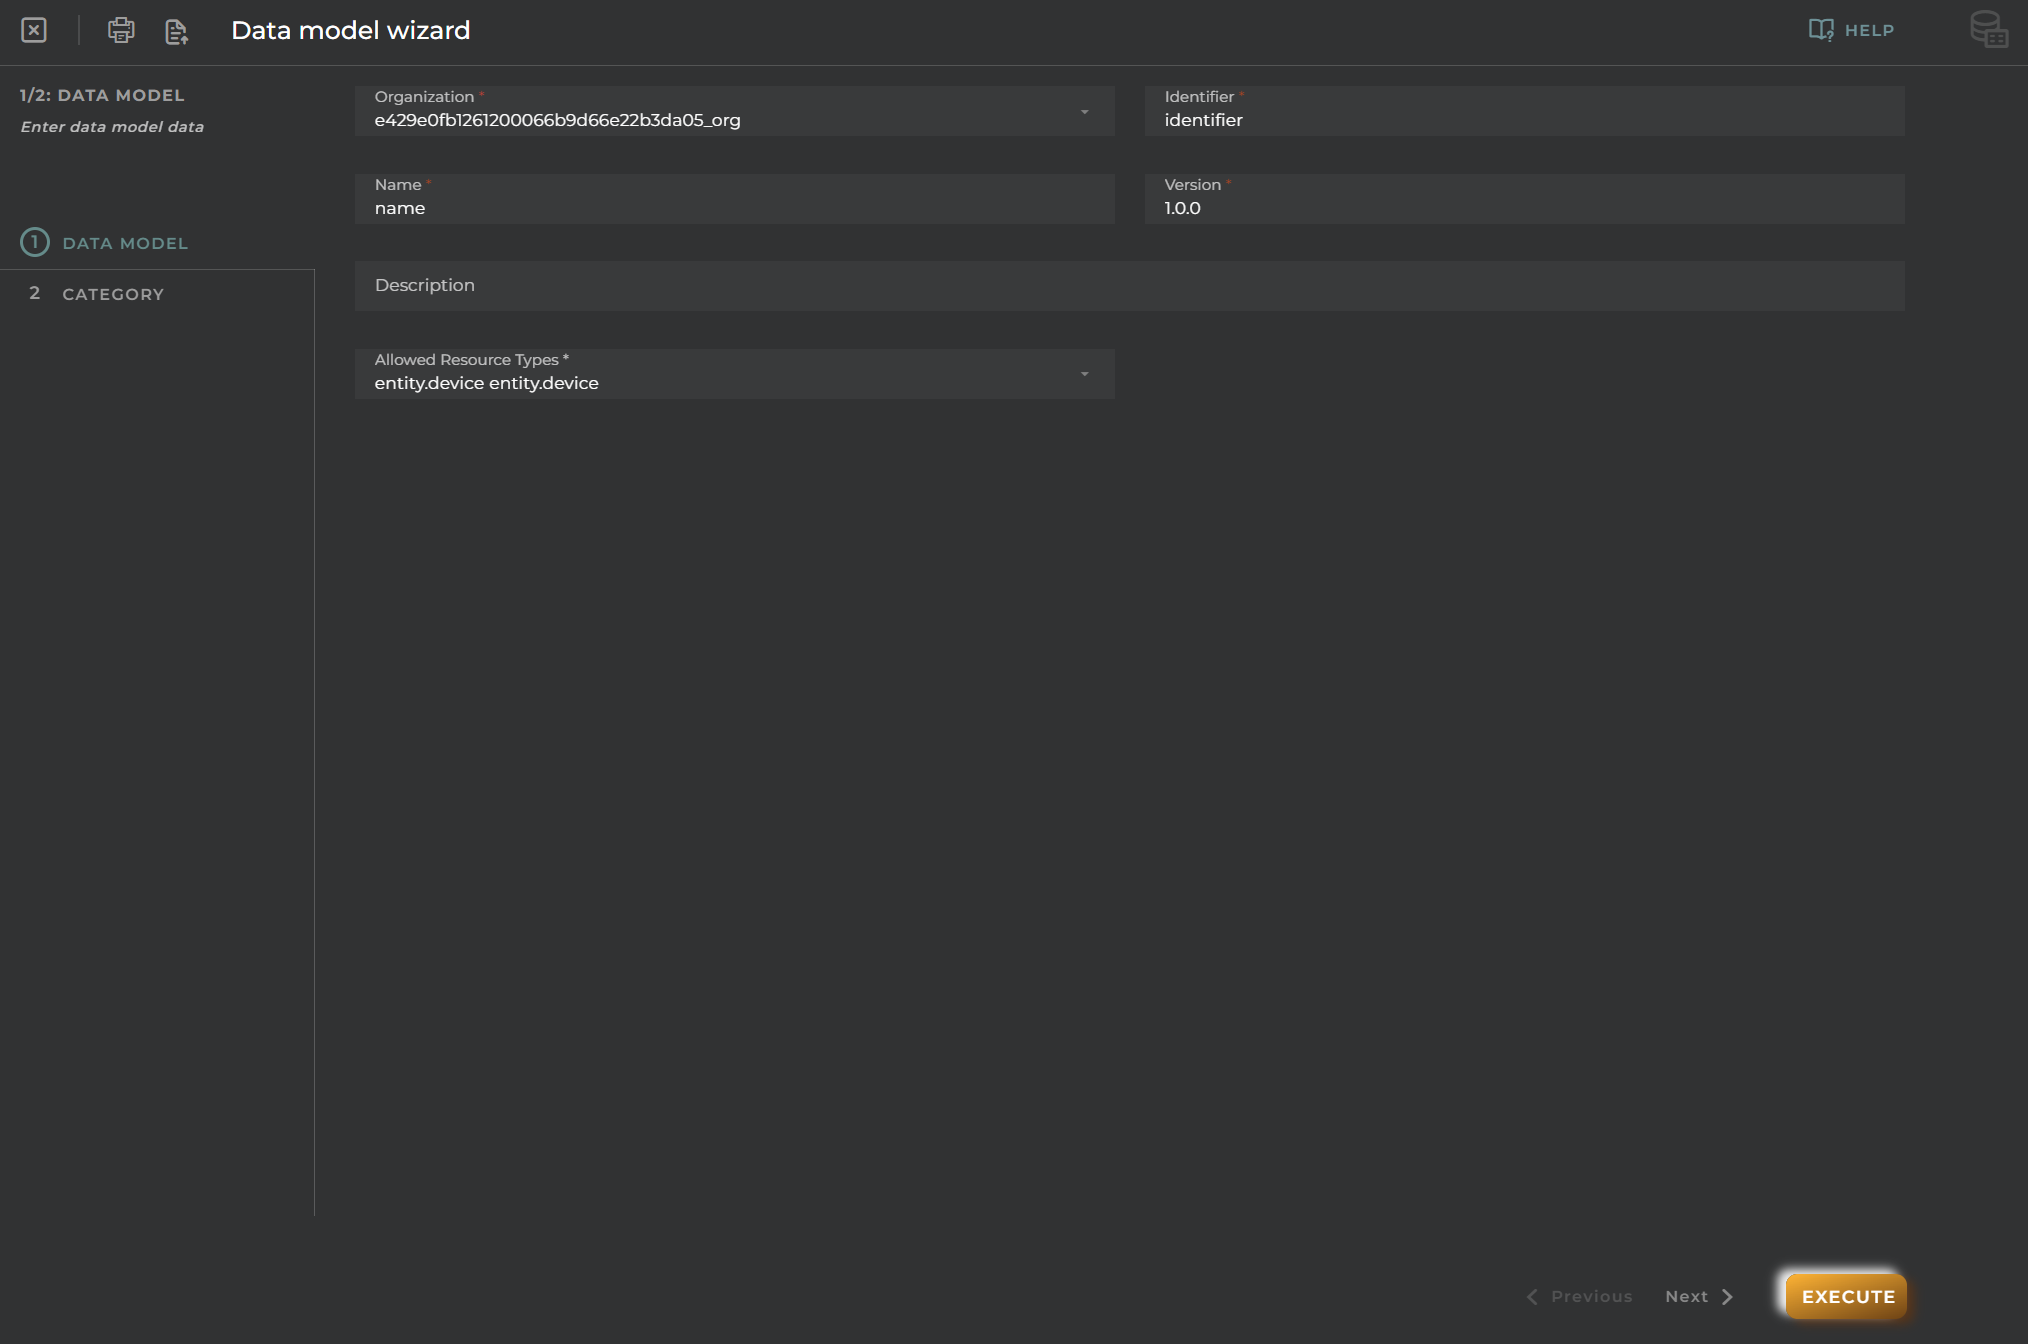
This wizard allows us to create data models for customizing data within the platform’s entities.
Steps
Data Model
Data for registration and identification for creating a data model on the platform.
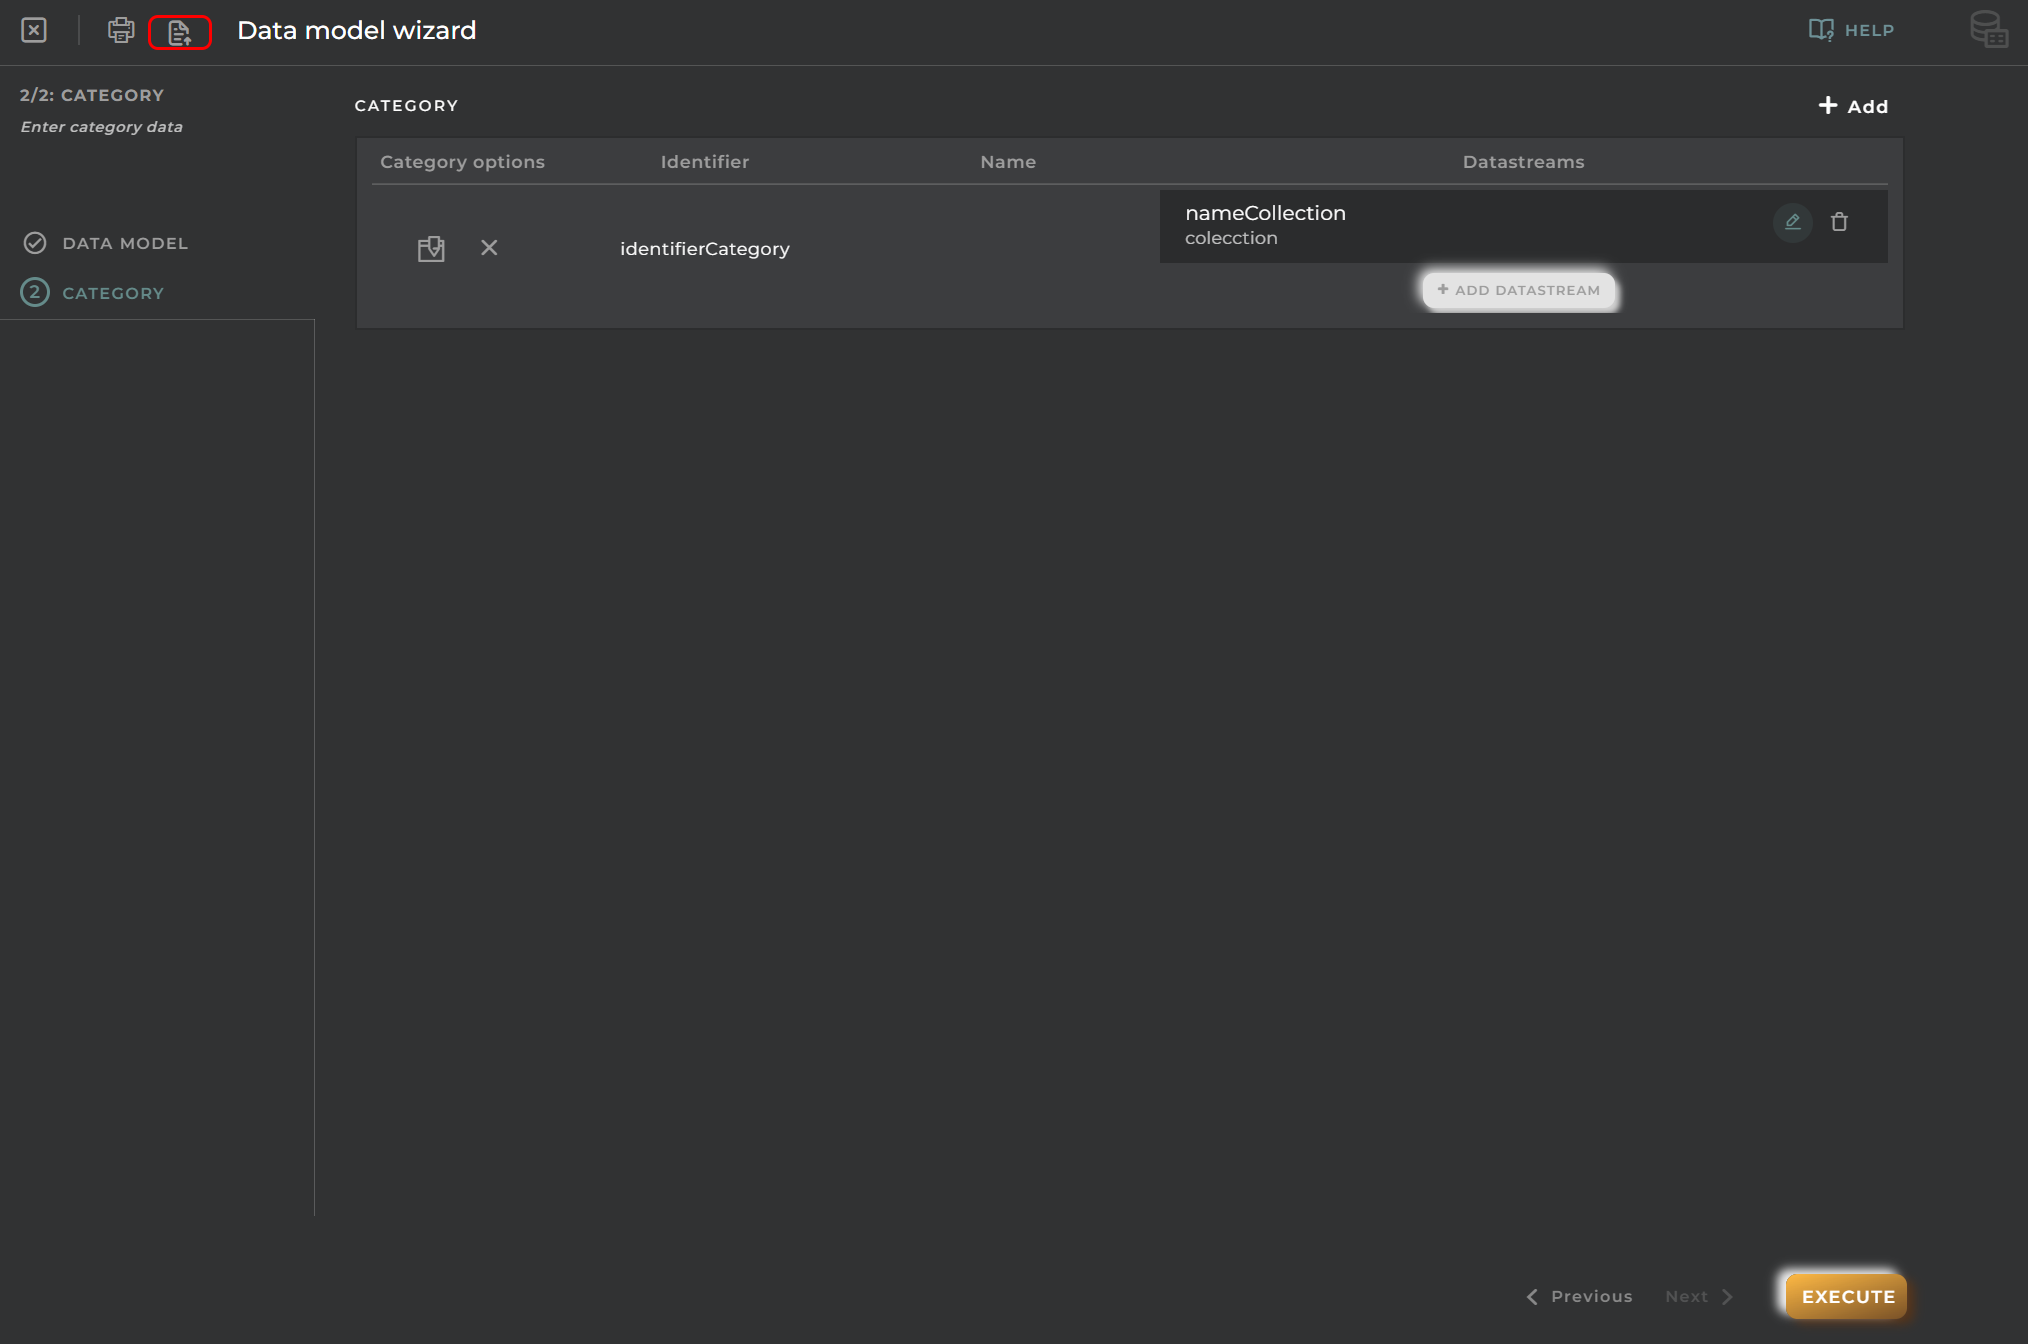
Category
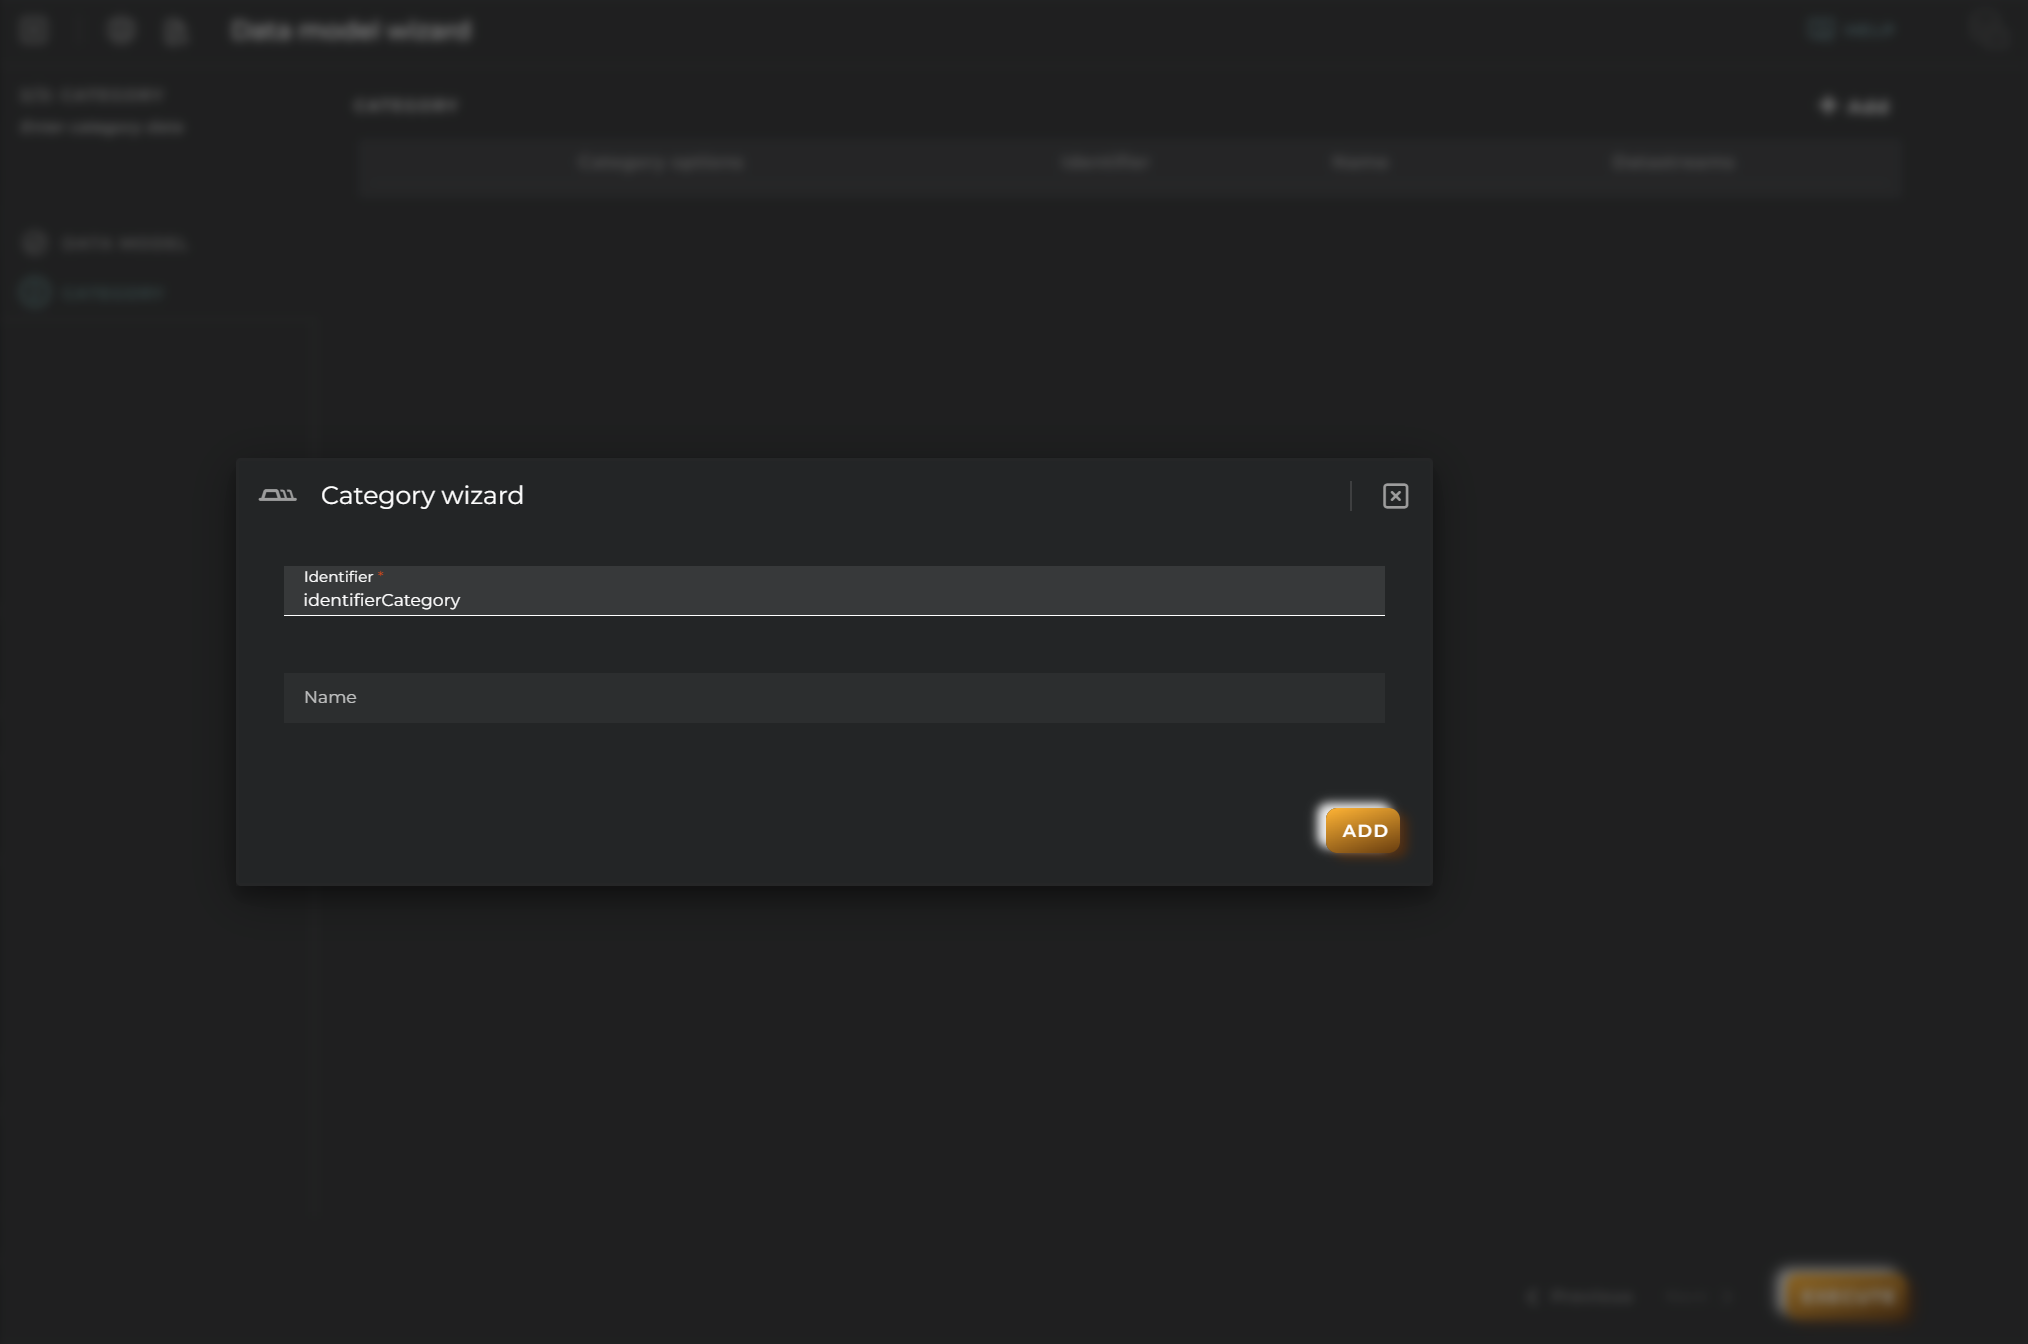
Data for the data model. We will add a category by clicking the + button. We will enter an identifier and optionally a name. Then we click the add button.
General
Boxed: widget will be displayed with background in dahsboard.
About: widget description in Markdown format.
Title: widget title. It can be configured to remain fixed in the widget or only be displayed when it receives focus.
Toolbar: configures the behavior of the widget bar on the dashboard, allowing you to hide it, hide it when not in use, or leave it always visible.
Refresh Frequency: allows configuring the data refresh frequency displayed in the list.
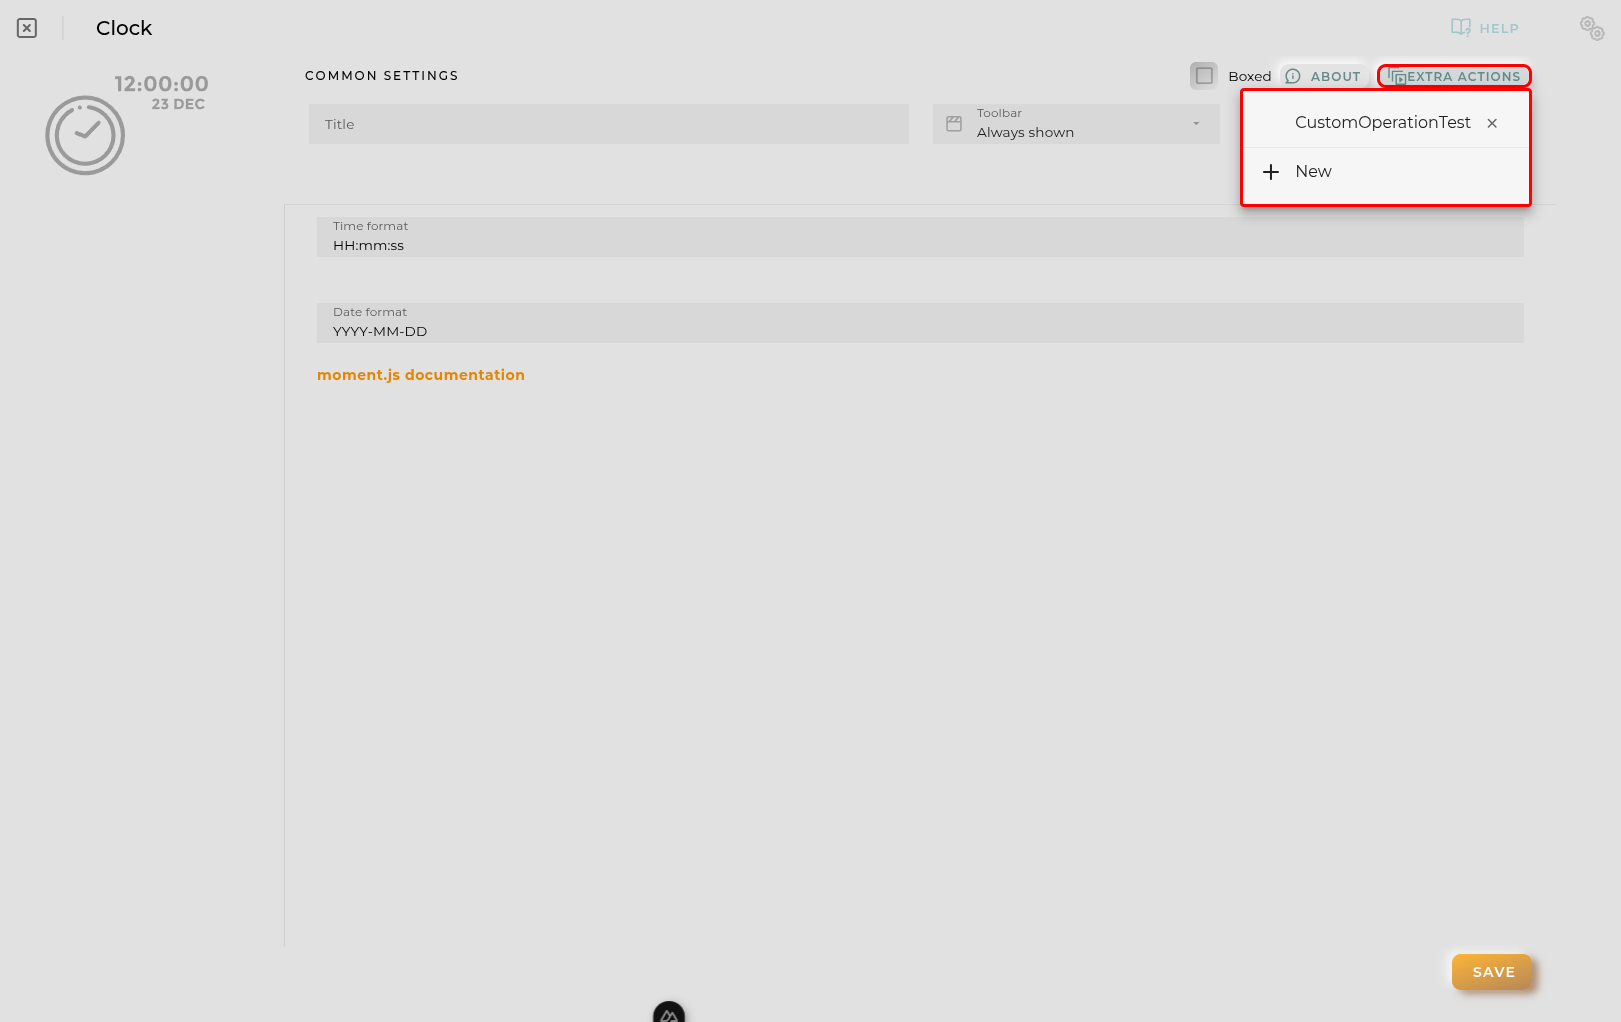
Extra actions: allows user to add new specific actions to the widget with your own code.
You can add a new one by pressing the New button.
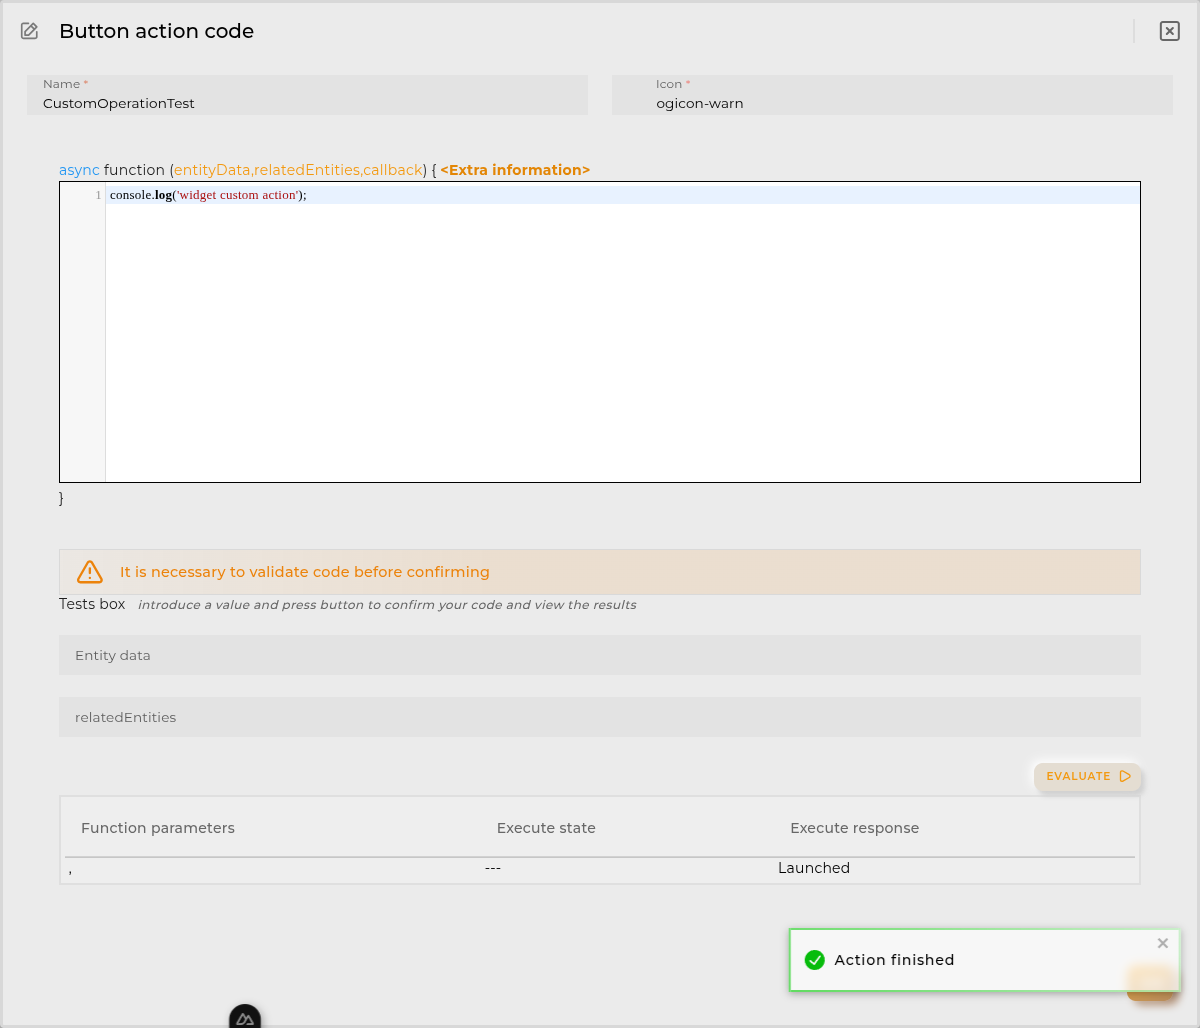
Once you added a custom action it can be modified later by pressing the name in the list.
In order to remove the custom action click the delete icon button on the right.
In extra actions you can write your own code were you can open other dashboards, entities dashboards or execute wizards.
You can find all available functions and methods in Extra Information
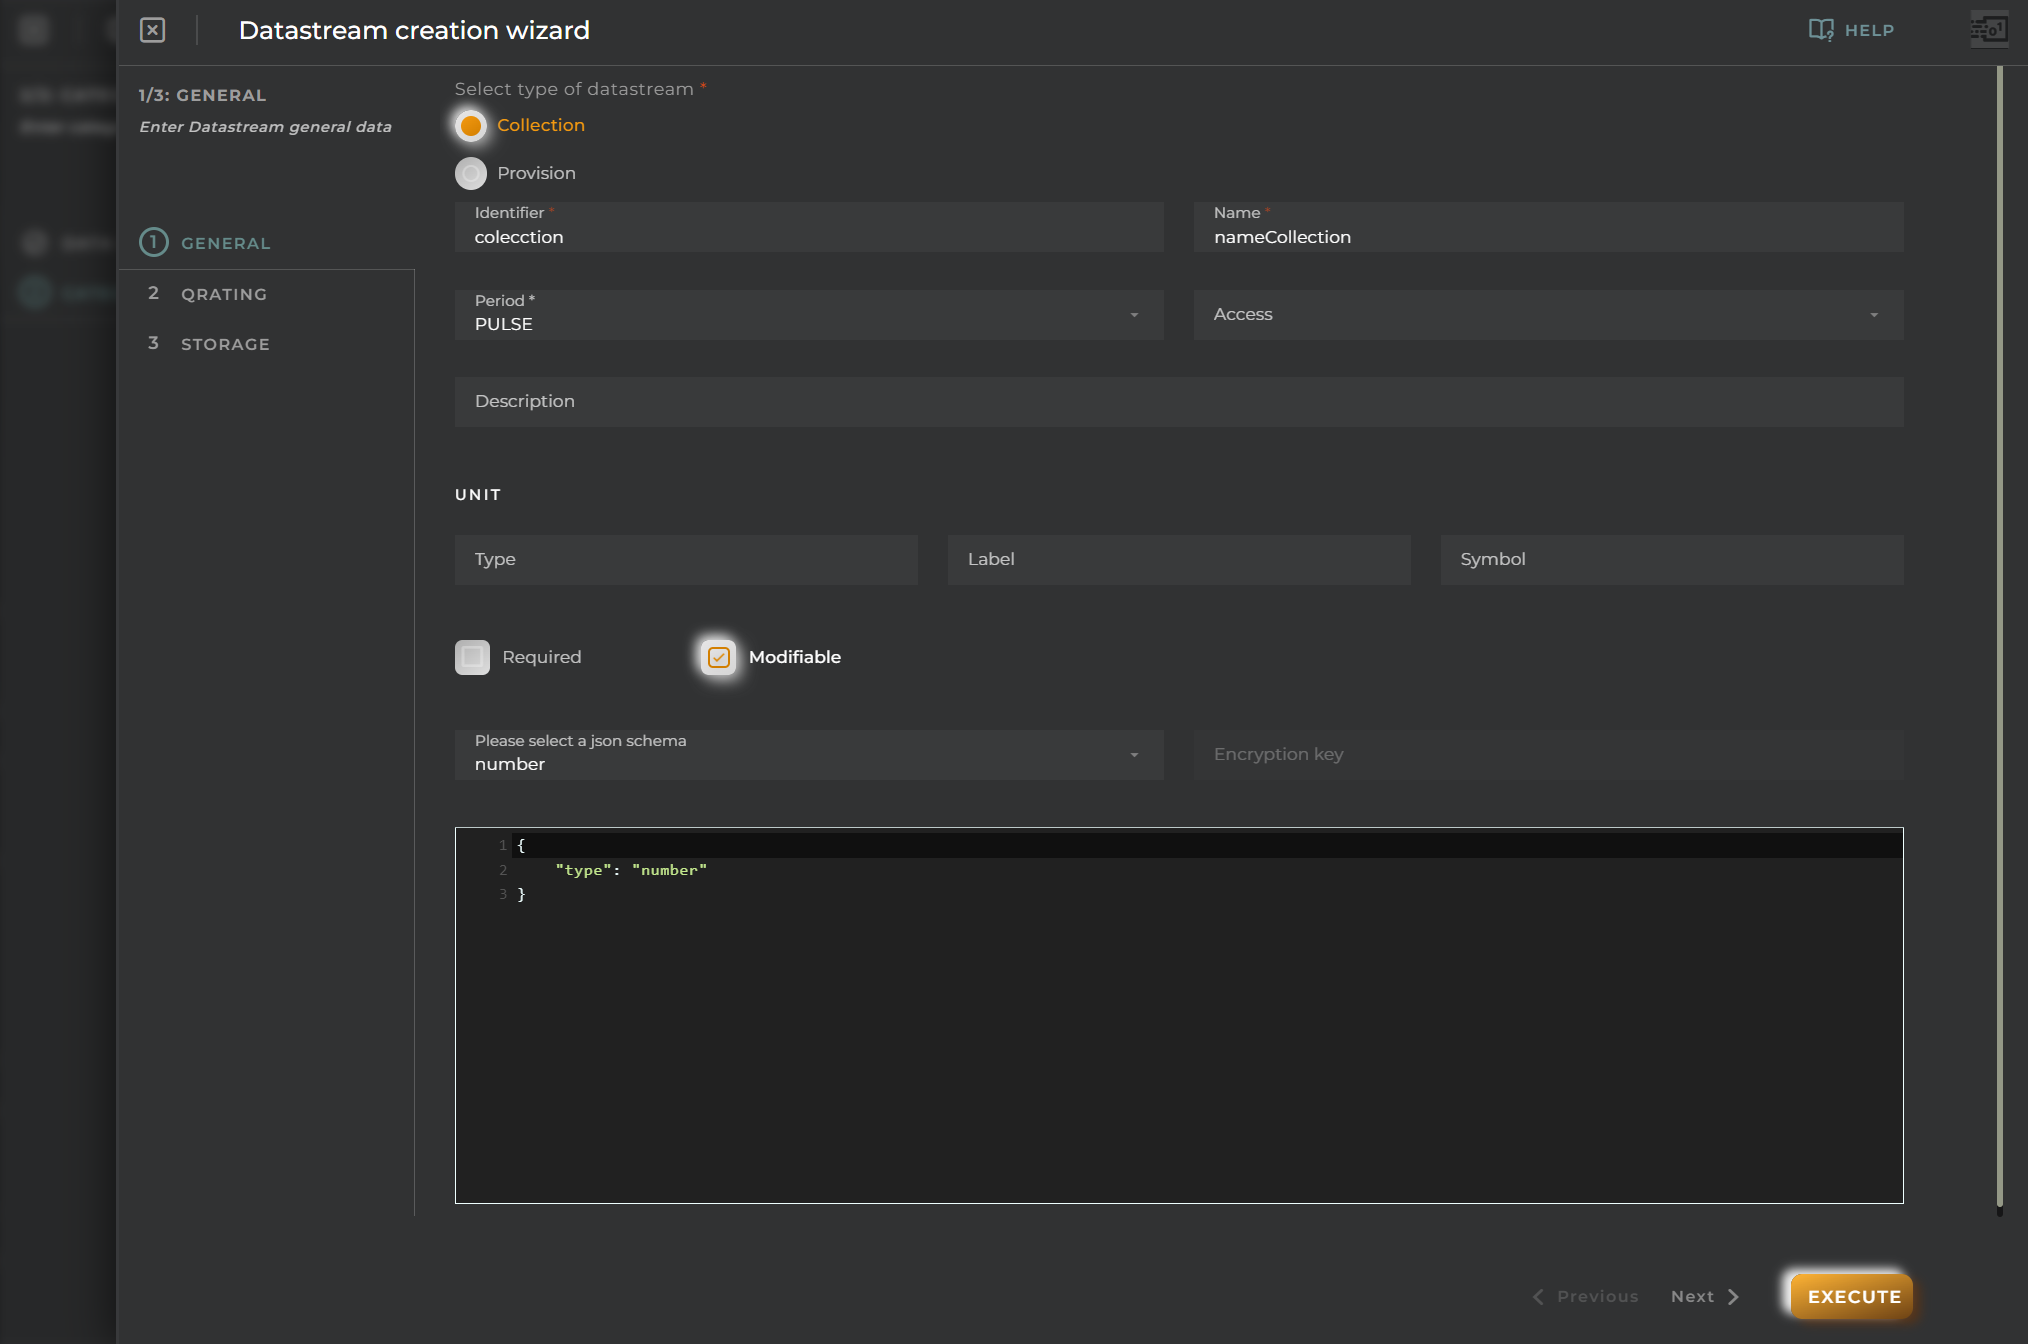
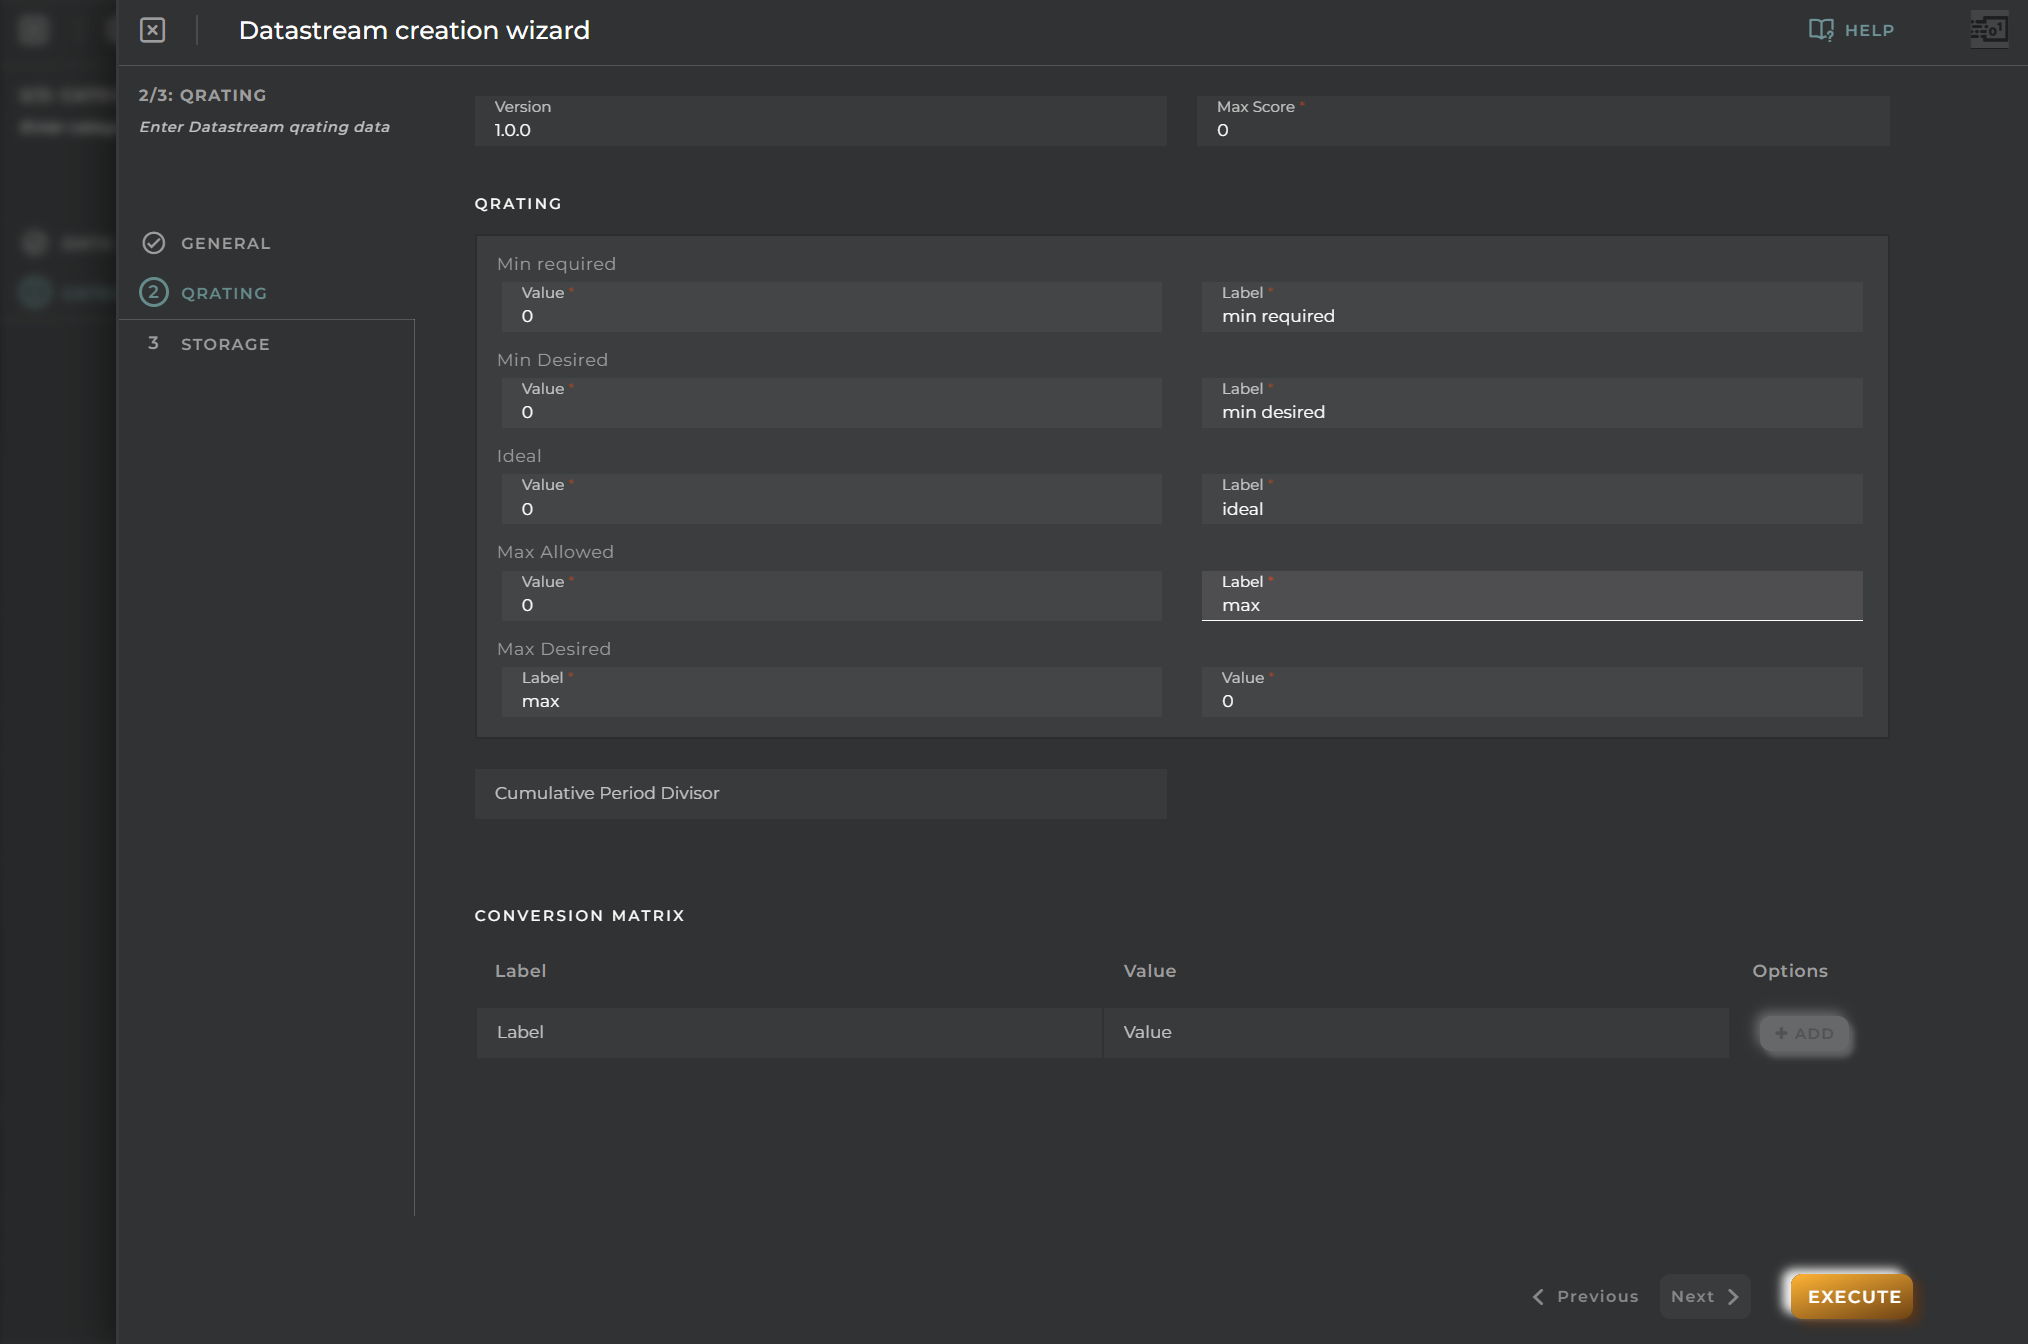
We can add a data stream, and the data stream creation wizard will open.
We will select the type of data stream we are going to create, either collection or provision.
Qrating
If a version number is entered, a series of fields for filling out the Qrating will appear.
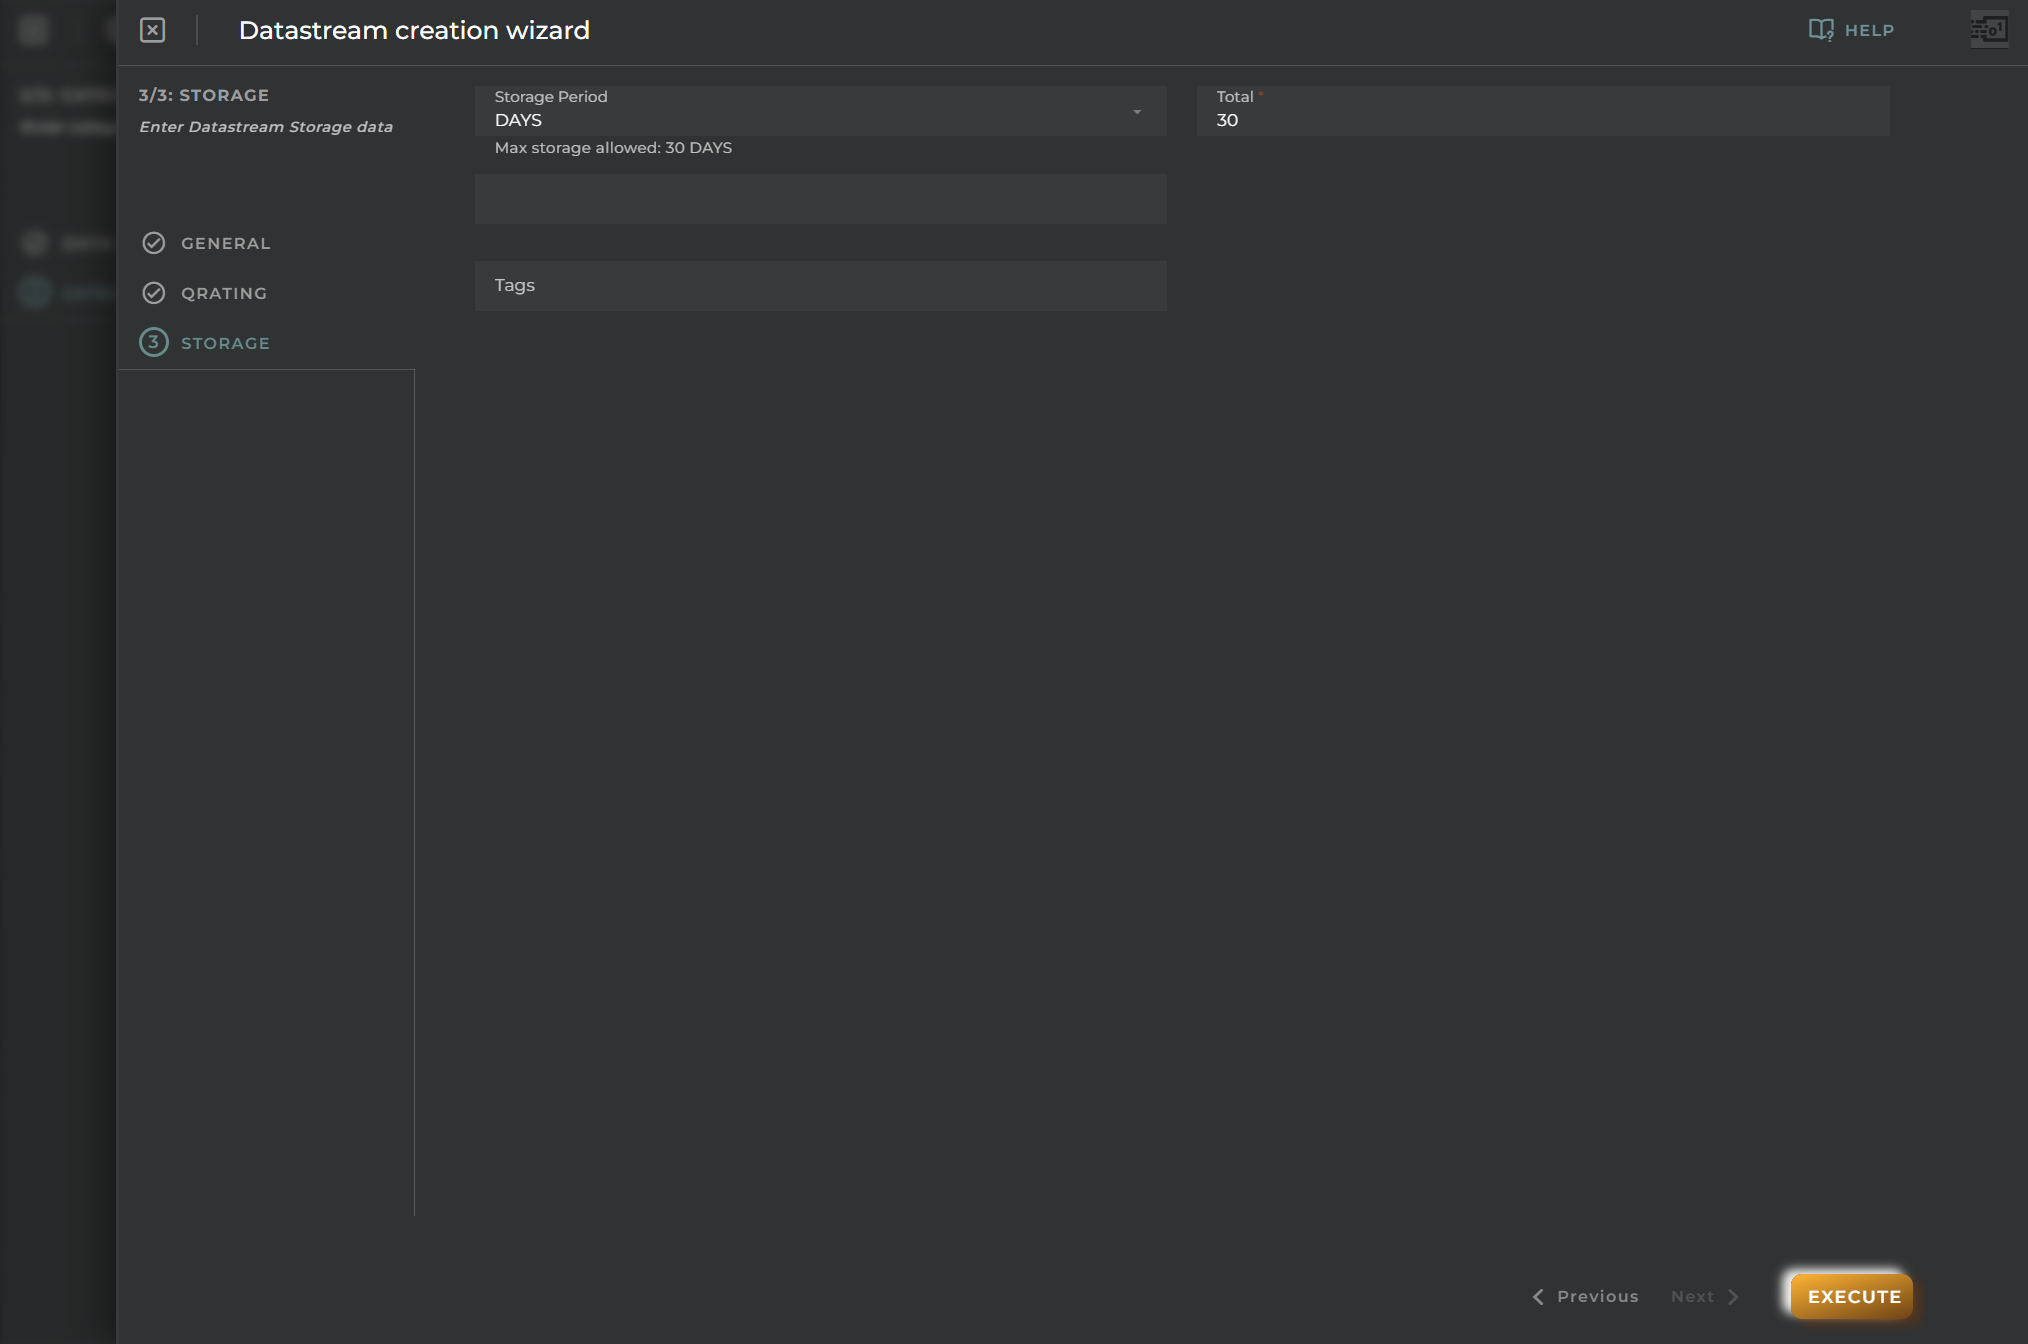
Storage
By default, the storage period will appear in DAYS, but it can be changed to SECONDS, MINUTES, or NEVER.
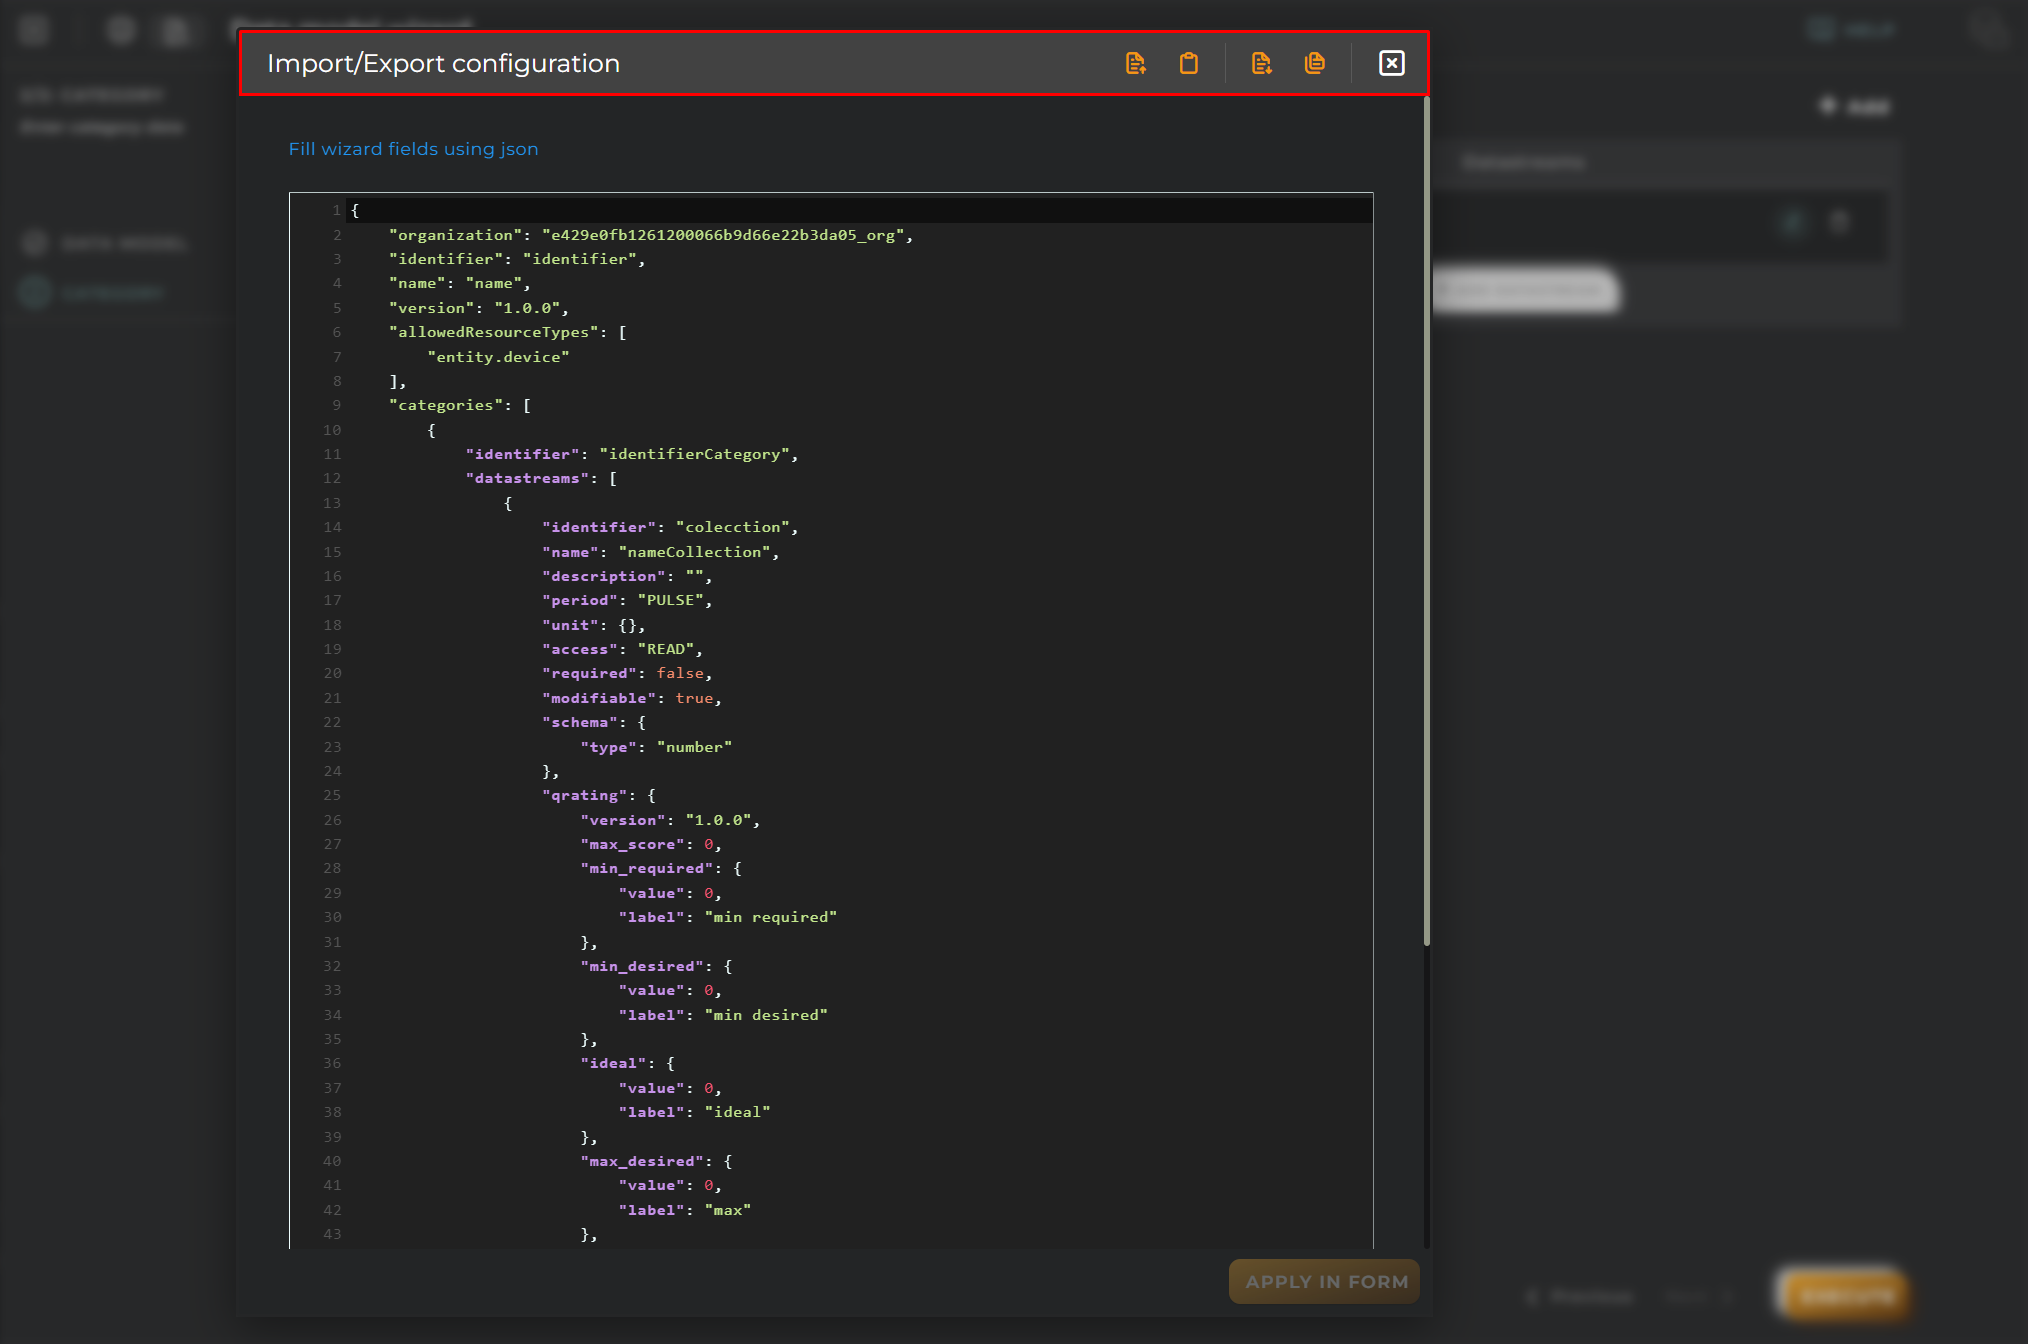
Import/Export Configuration
Allows you to import and export the wizard’s configuration via JSON.
When accessing the import and export functionality, it displays a window with various actions. Additionally, it presents the configuration of the wizard in JSON format.
The available actions are as follows:
Upload Json: Uploads a JSON file and replaces the previous JSON configuration.
Paste from clipboard: Pastes JSON data from the clipboard and replaces the previous JSON configuration.
Download Json: Downloads the JSON configuration as a file with the wizard’s name.
Copy to clipboard: Copies the JSON configuration to the clipboard.
Create new Device Plan
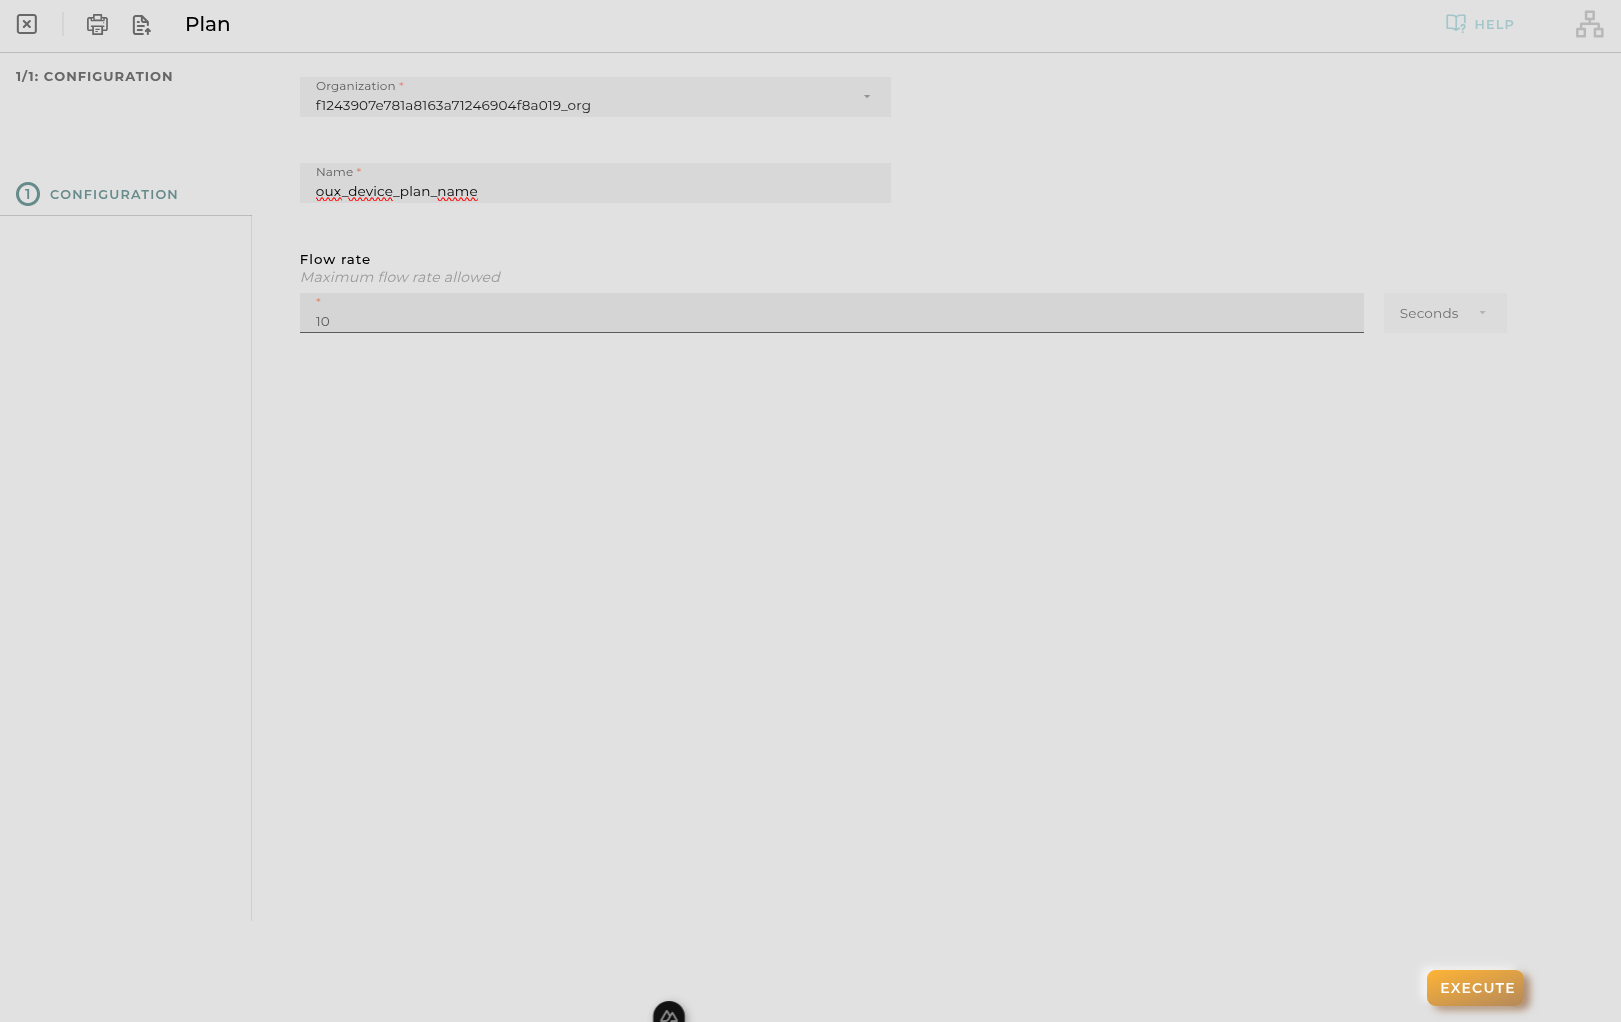
This wizard allows us to manage device plans.
Steps
Device Plan Creation
Essential data for the registration and identification of a device plan on the platform.
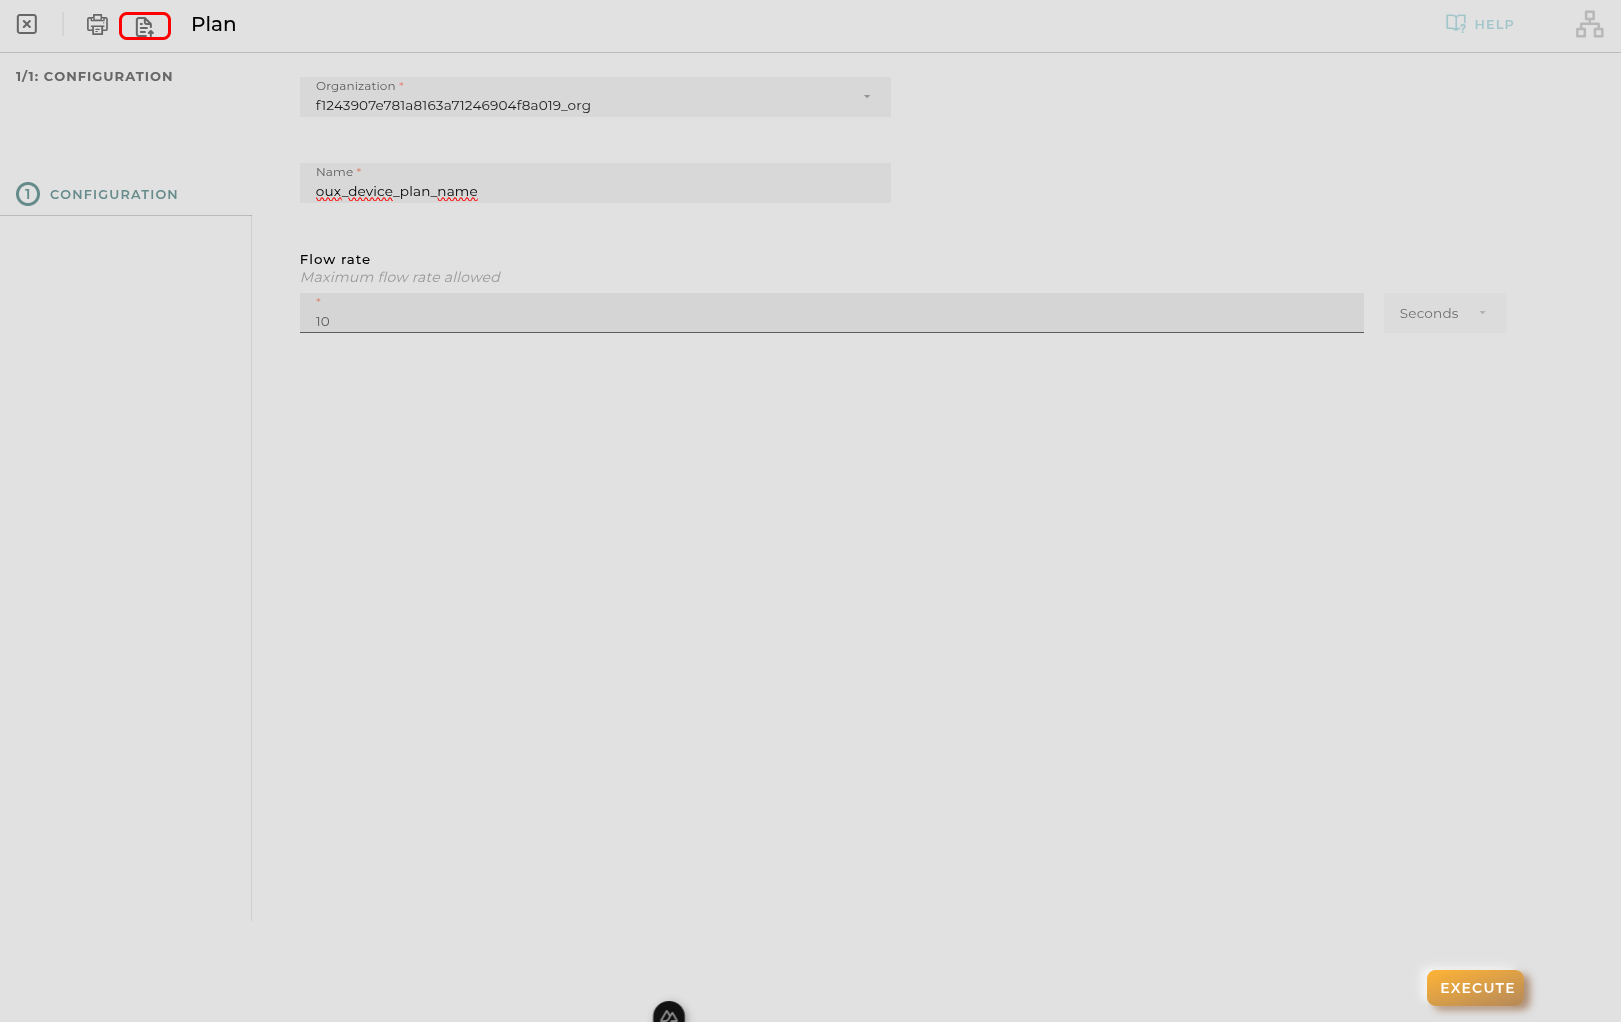
Import/Export Configuration
Allows you to import and export the wizard’s configuration via JSON.
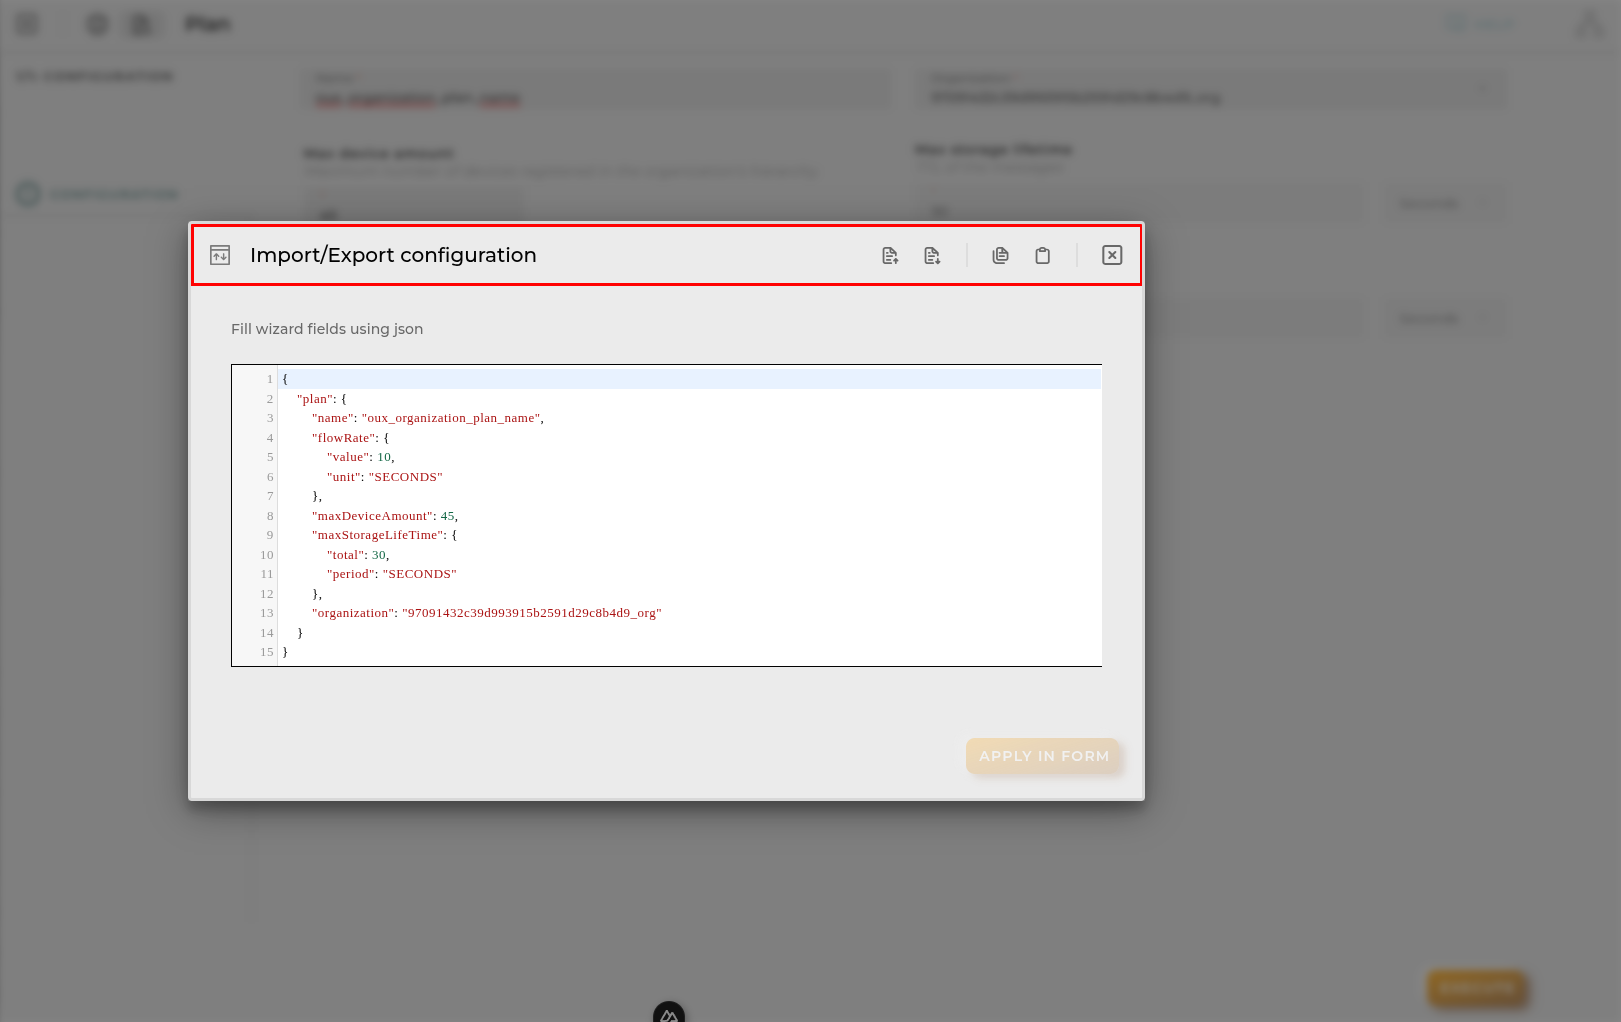
When accessing the import and export functionality, it displays a window with various actions. Additionally, it presents the configuration of the wizard in JSON format.
The available actions are as follows:
Upload Json: Uploads a JSON file and replaces the previous JSON configuration.
Paste from clipboard: Pastes JSON data from the clipboard and replaces the previous JSON configuration.
Download Json: Downloads the JSON configuration as a file with the wizard’s name.
Copy to clipboard: Copies the JSON configuration to the clipboard.
Create new notebook scheduler
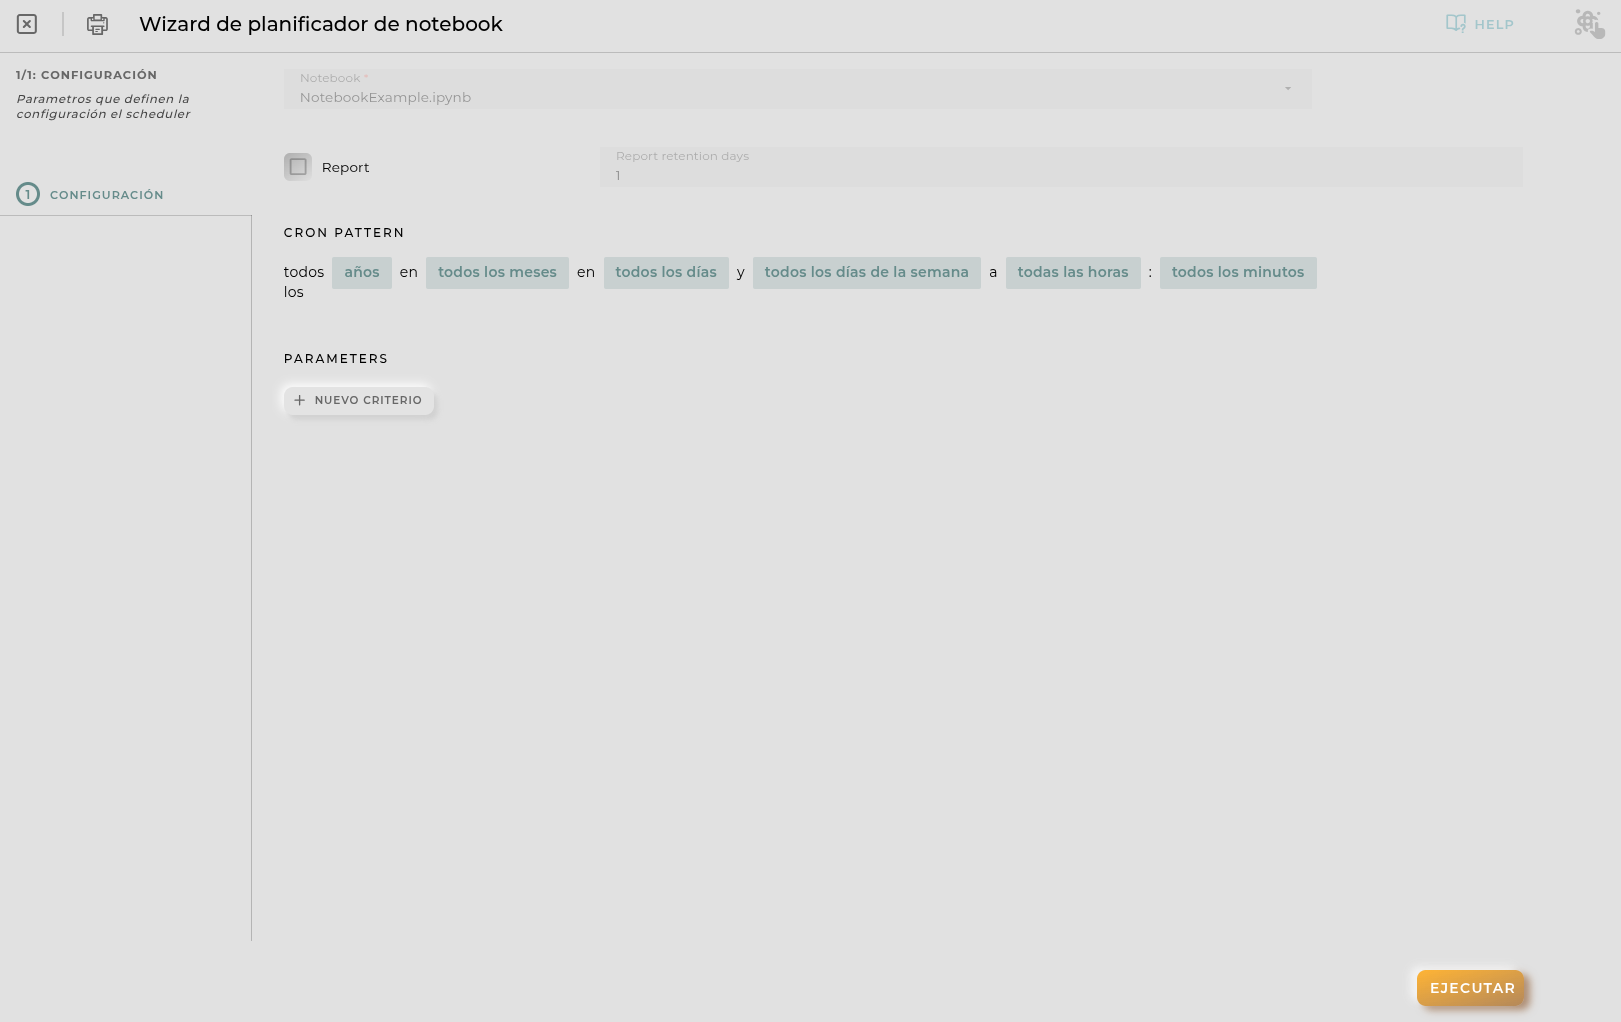
This wizard allows us to create schedulers for the previously created Opengate data lab notebooks
Steps
Configuration
Essential data for the scheduler
You need the next in order to schedule the execution of a notebook:
Notebook: notebook to be executed periodically
Report: enables saving for report generated by the notebook execution
Report retention days: days to be stored report in Opengate data lab
Cron pattern: pattern to configure when the notebook will be executed
Params: list of a pair of names and values to be passed to the notebook execution
Create new Organization
Allows for the creation of organizations.
Steps
Administrative Data
Data for registration and identification for data collection on the platform.
Location
Information about the organization’s location.
Security
Configuration of passwords, policies, and authentication through external servers.
It allows the following configurations:
Default Authentication Method: Default authentication.
LDAP: Authentication via LDAP.
Advanced
Enables the copying of data models, channels, actions, views, data sets, and time series from the parent organization if they have been created previously.
Import/Export Configuration
Allows you to import and export the wizard’s configuration via JSON.
When accessing the import and export functionality, it displays a window with various actions. Additionally, it presents the configuration of the wizard in JSON format.
The available actions are as follows:
Upload Json: Uploads a JSON file and replaces the previous JSON configuration.
Paste from clipboard: Pastes JSON data from the clipboard and replaces the previous JSON configuration.
Download Json: Downloads the JSON configuration as a file with the wizard’s name.
Copy to clipboard: Copies the JSON configuration to the clipboard.
Create new Organization Plan
This wizard allows us to manage organization plans.
Steps
Organization Plan Creation
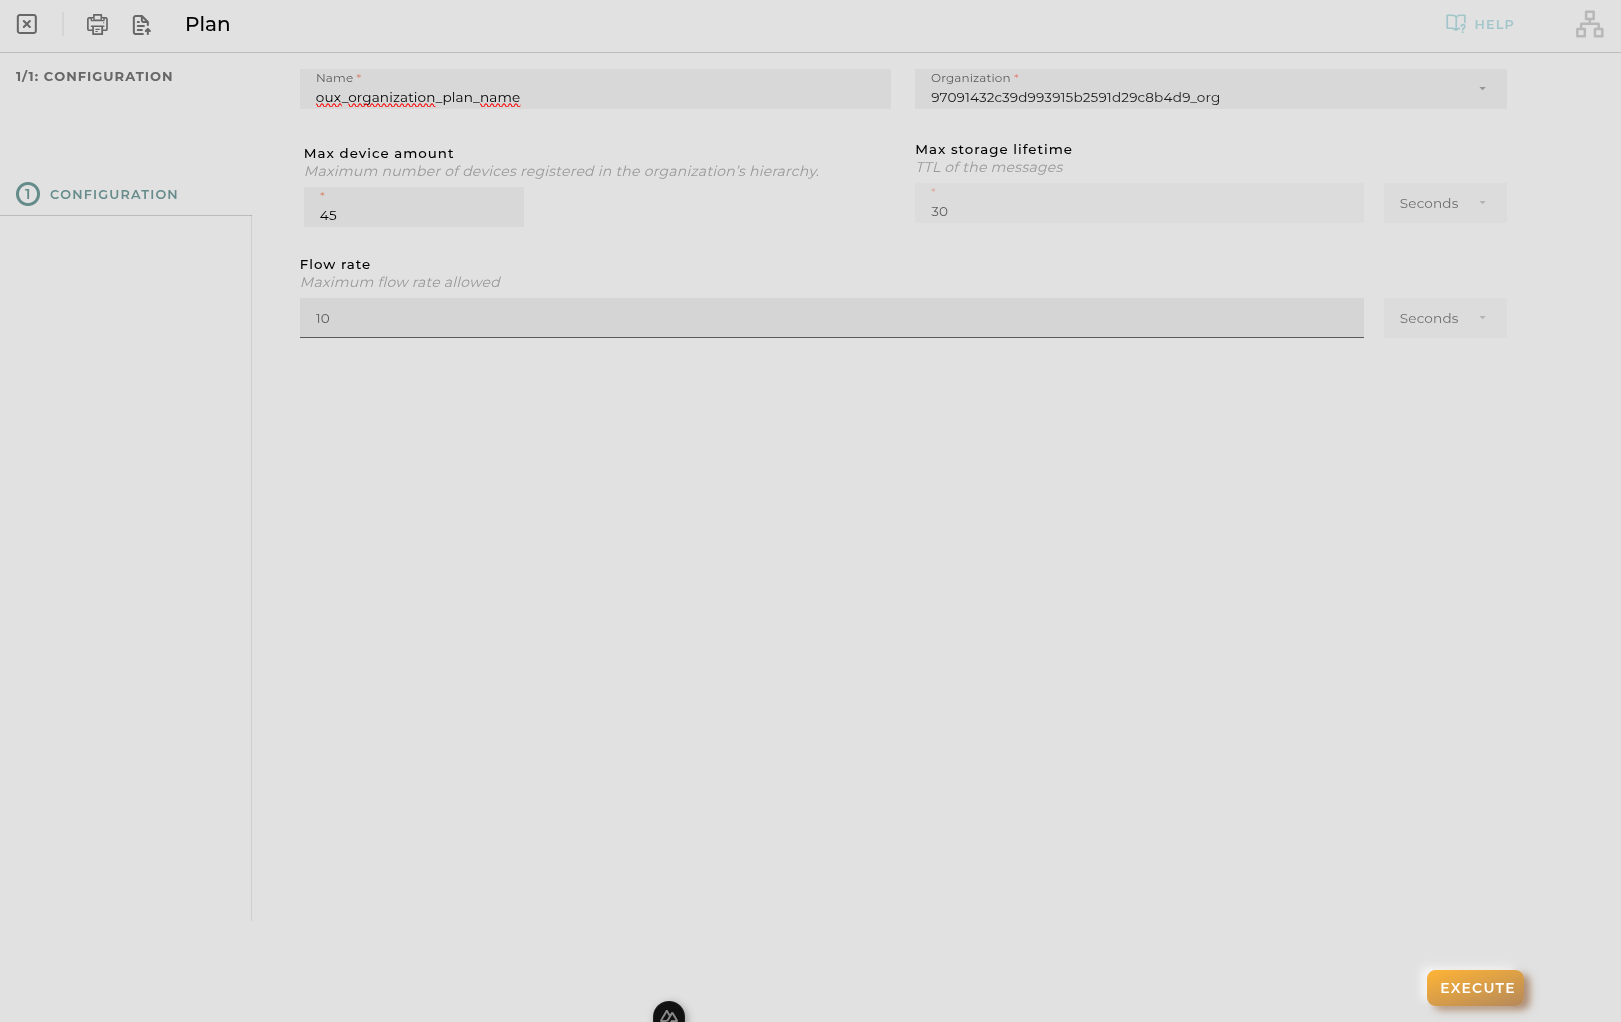
Essential data for the registration and identification of an organization plan on the platform.
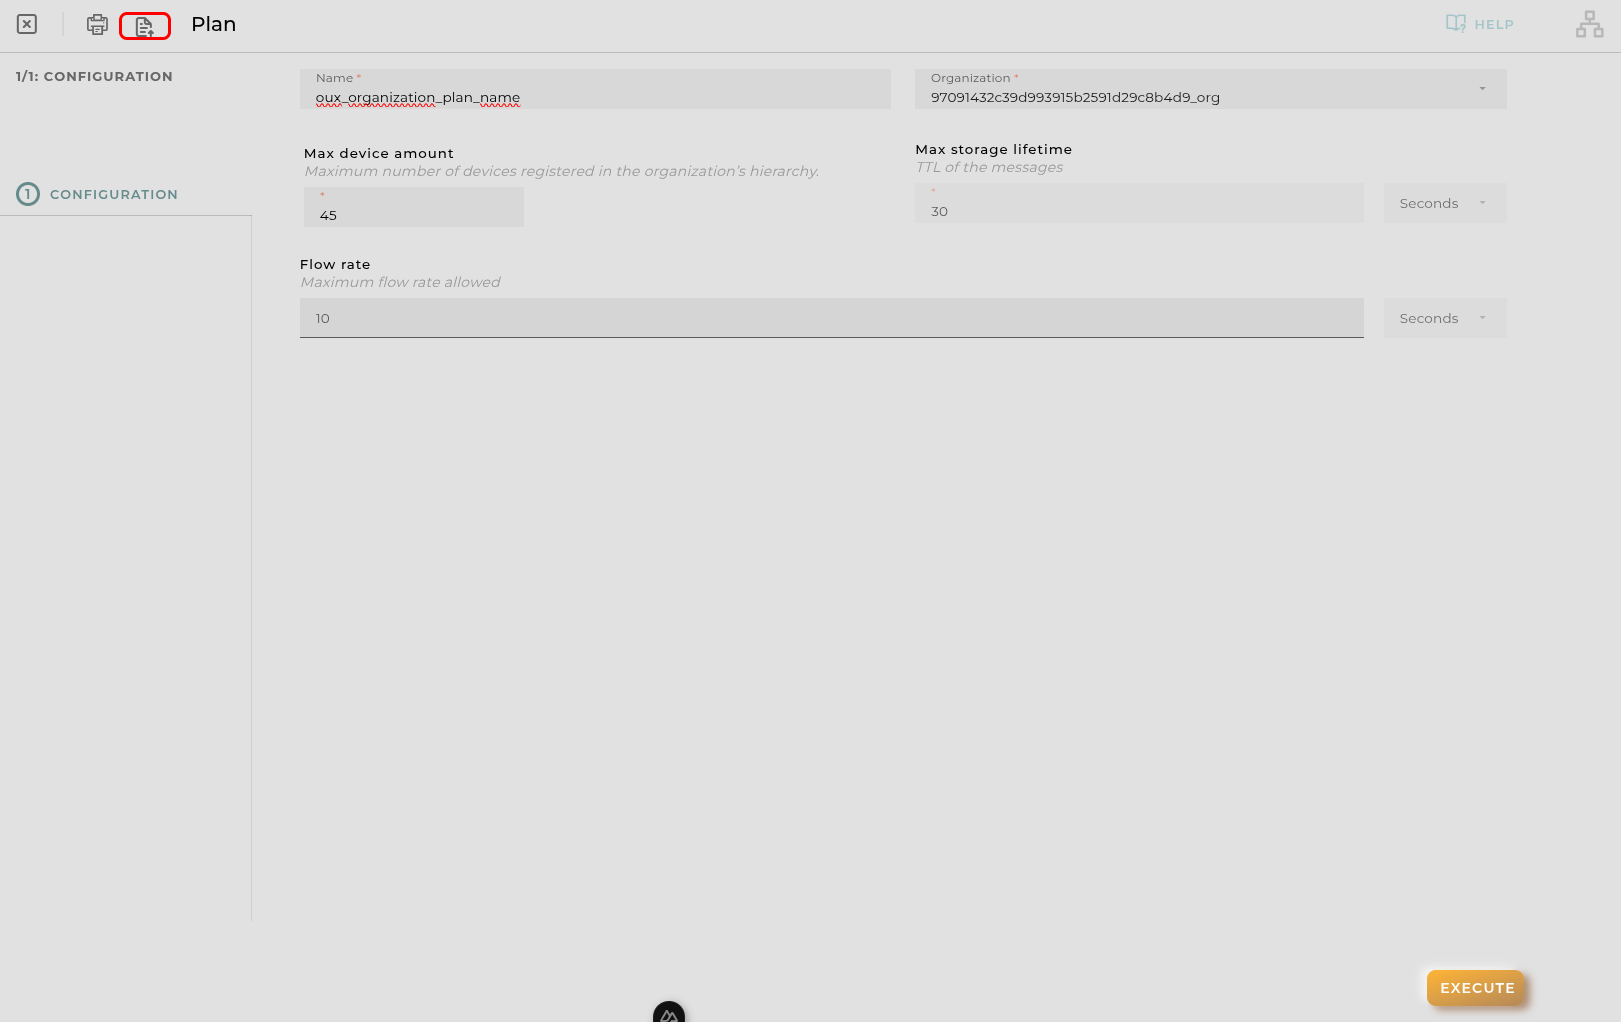
Import/Export Configuration
Allows you to import and export the wizard’s configuration via JSON.
When accessing the import and export functionality, it displays a window with various actions. Additionally, it presents the configuration of the wizard in JSON format.
The available actions are as follows:
Upload Json: Uploads a JSON file and replaces the previous JSON configuration.
Paste from clipboard: Pastes JSON data from the clipboard and replaces the previous JSON configuration.
Download Json: Downloads the JSON configuration as a file with the wizard’s name.
Copy to clipboard: Copies the JSON configuration to the clipboard.
Create new pipeline processor
This wizard allows us to create pipeline processors.
Steps
Administrative Data
Essential data for registration and identification of a pipeline in the platform.
Transformer and AI Model Configuration
Select transformers or models to execute.
Create new Provision Function
A Provision function will have JavaScript code that takes inbound data and calculates the actions to be performed for correct provisioning of entities (Assets, Devices, Subscriptions, and Subscribers).
Steps
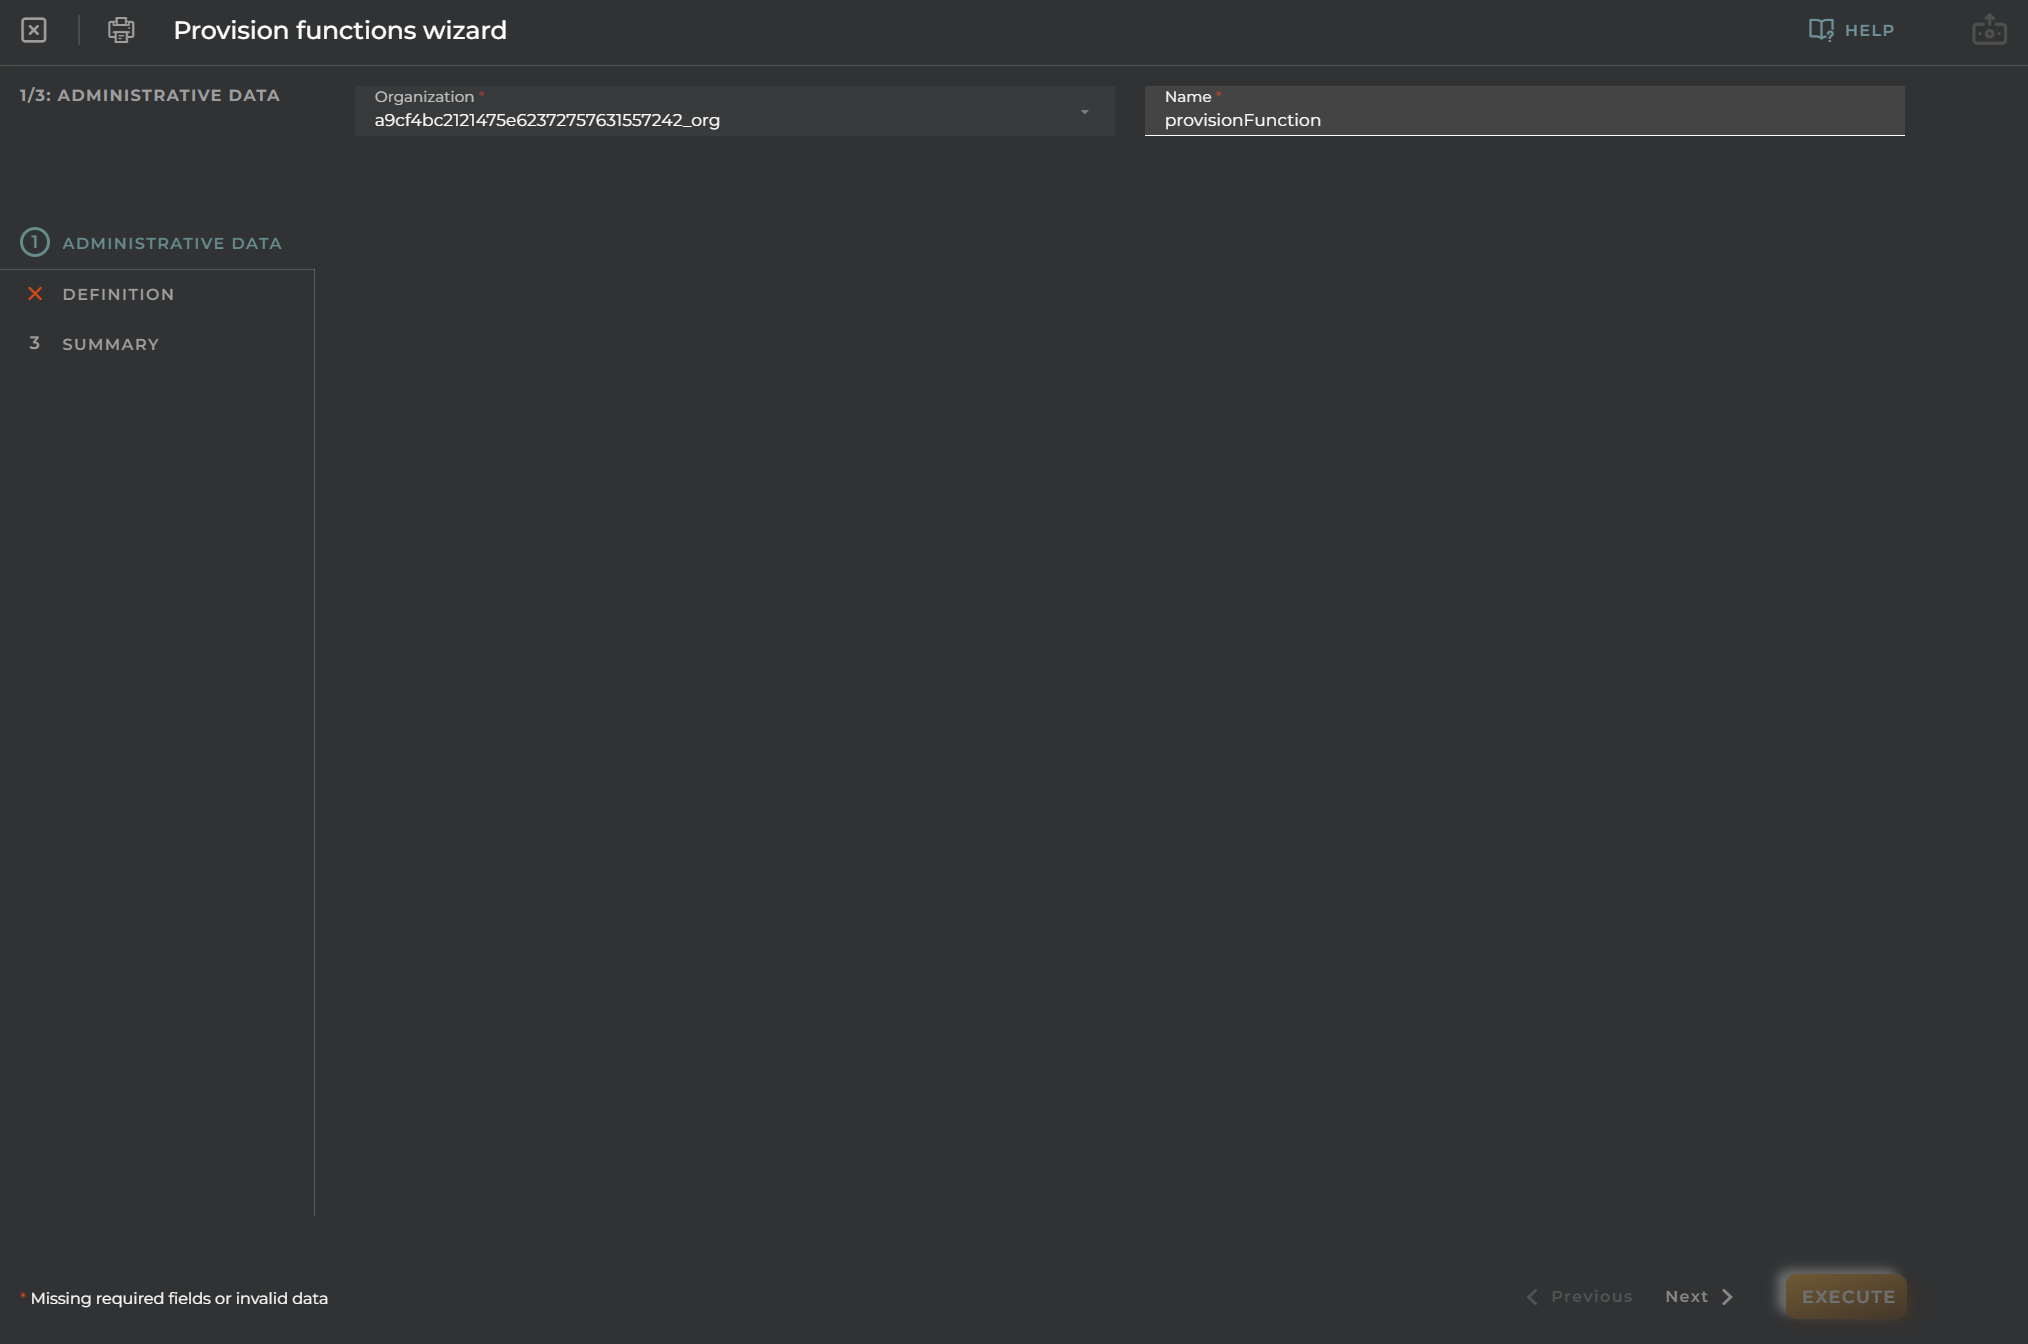
Administrative Data
Essential data for the registration and identification of a provisioning function in the platform.
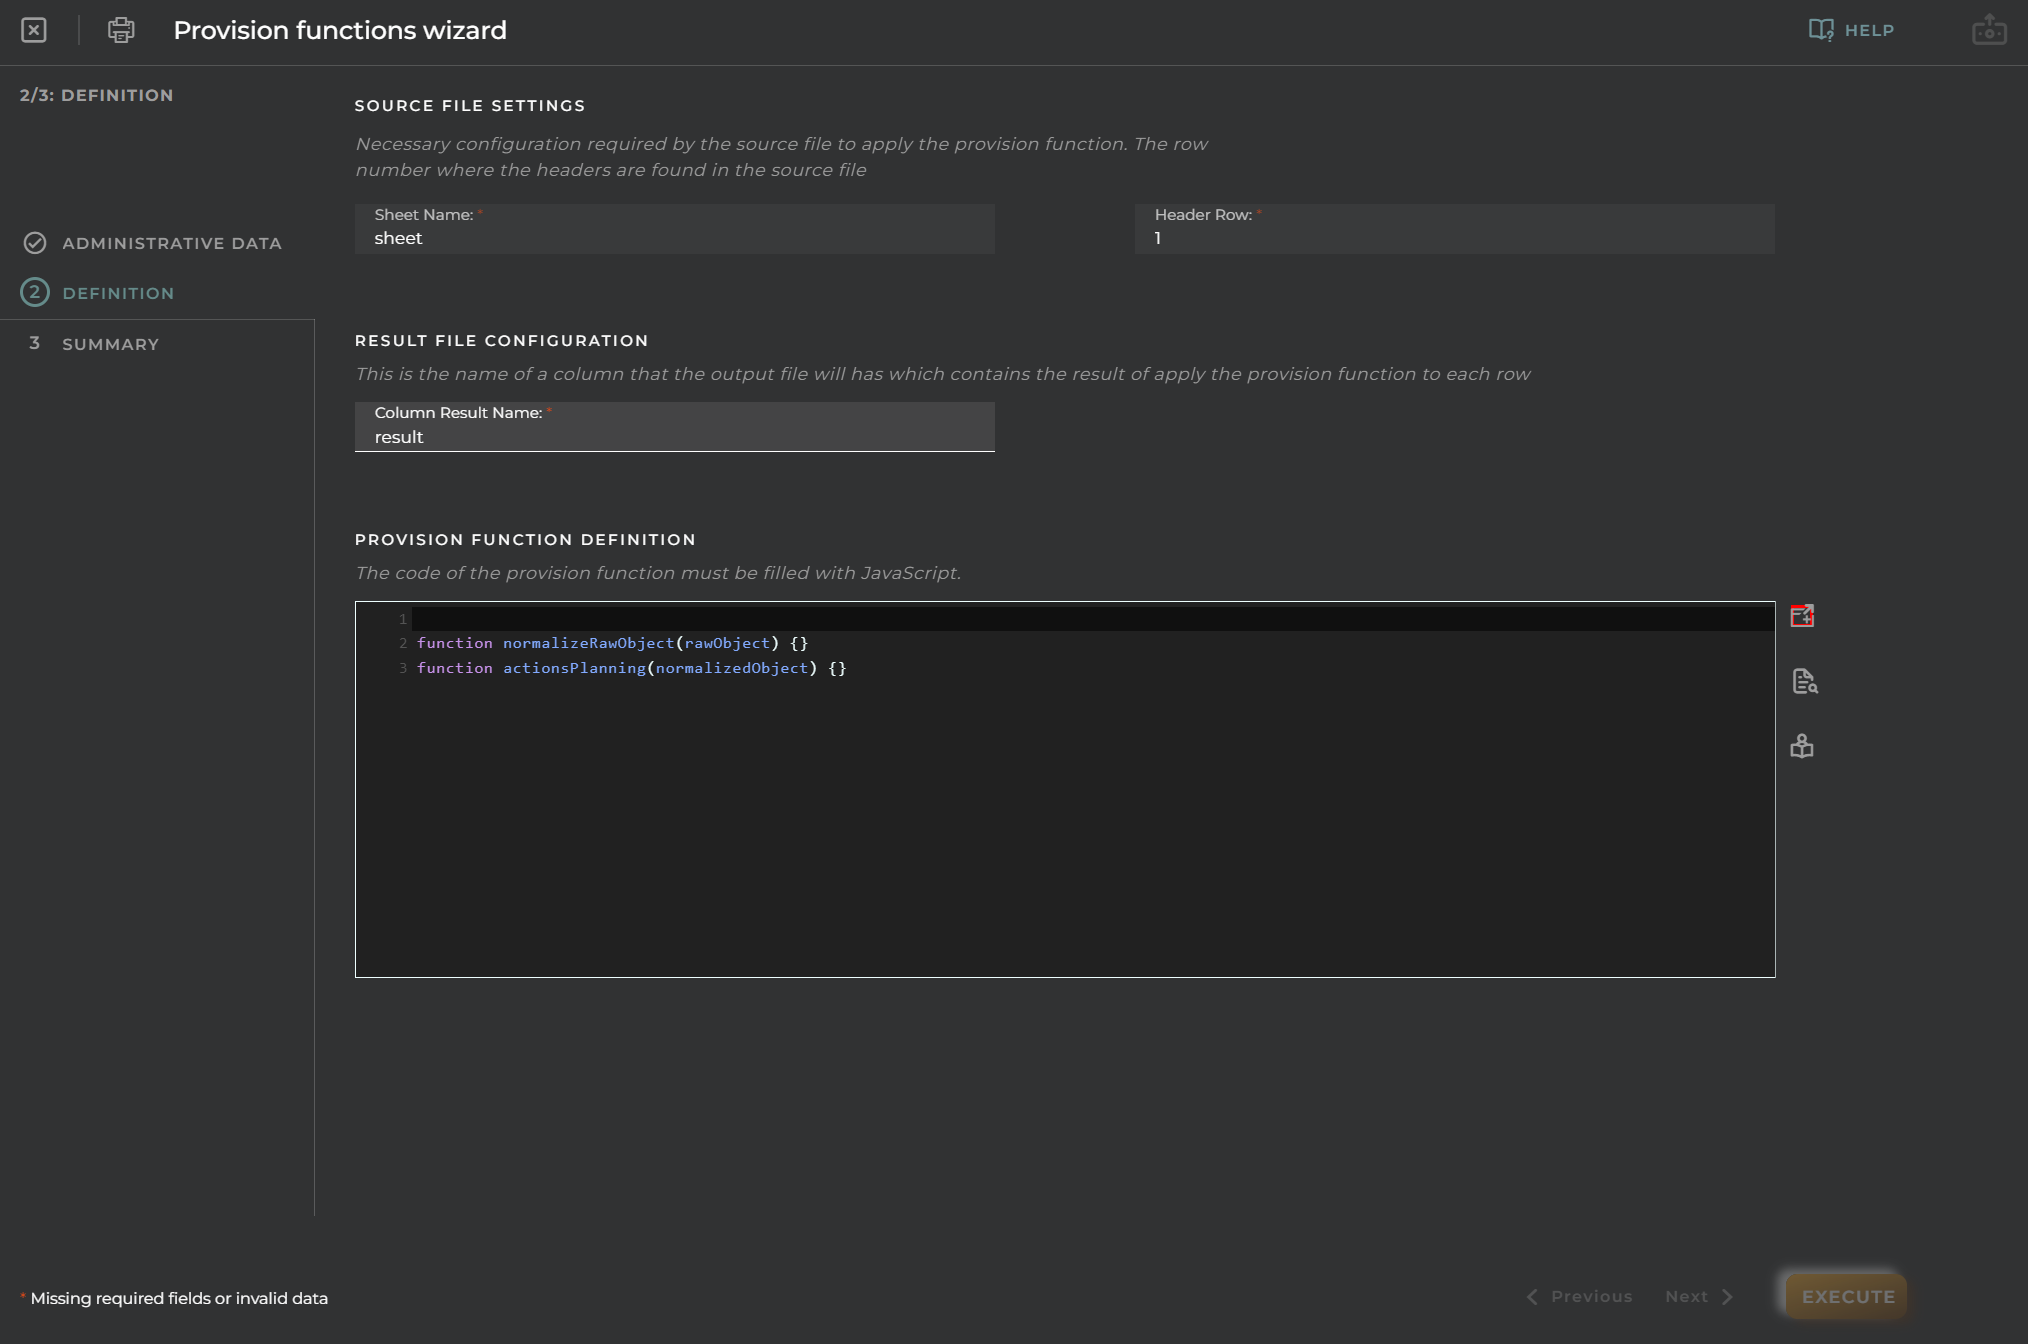
Definition
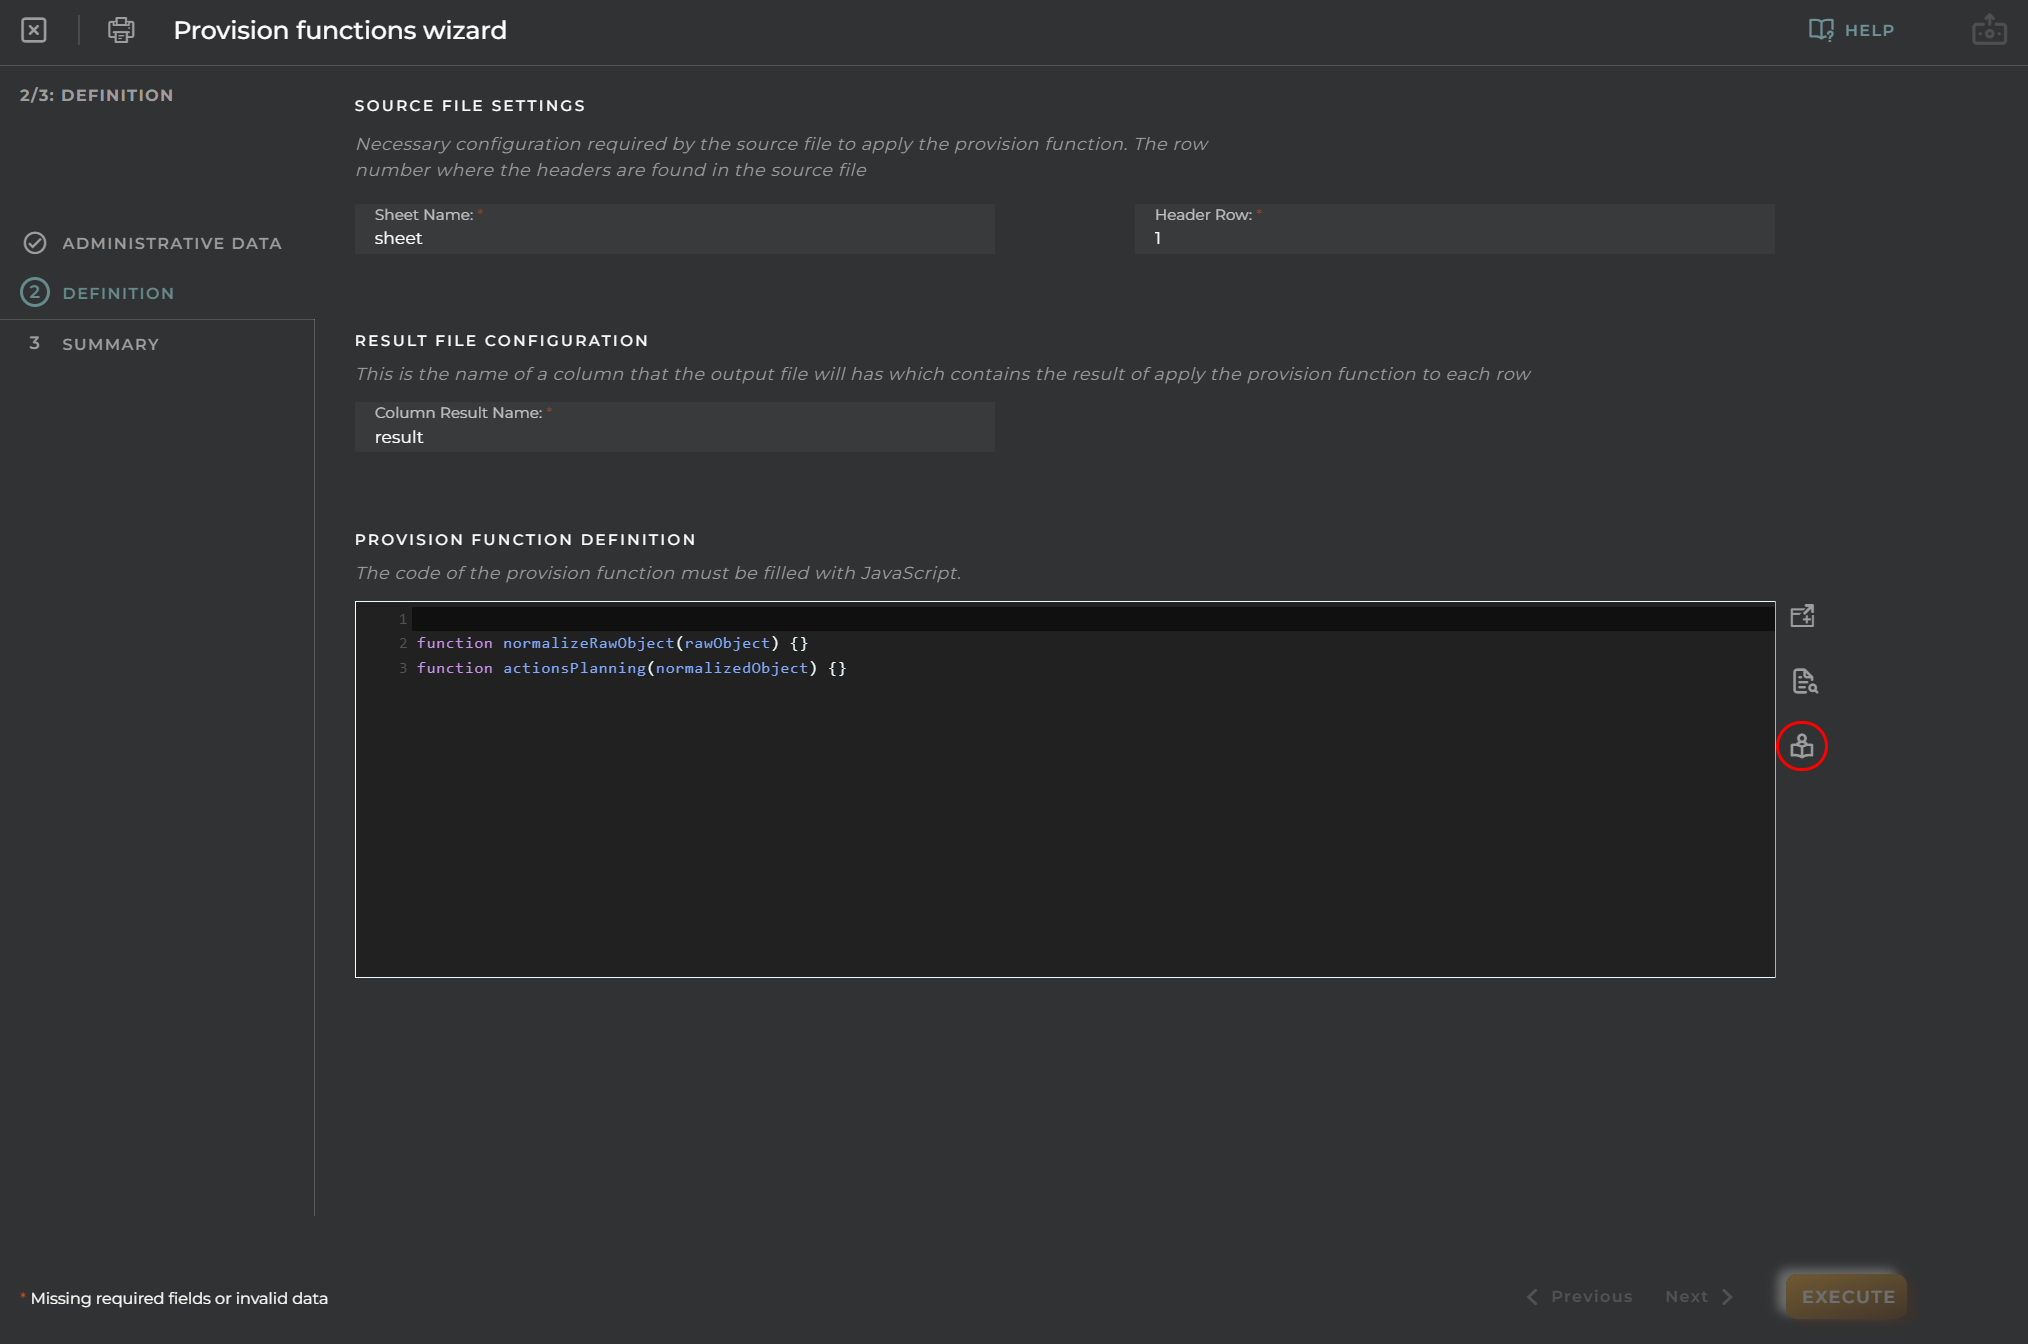
Processor configuration parameters and JavaScript processor specification.
Additionally, the definition of provisioning functions has a menu on the left side that allows for different actions:
- FullScreen - Add Function - Validate Code
FullScreen
Expands to occupy the entire screen, making it easier for visualization.
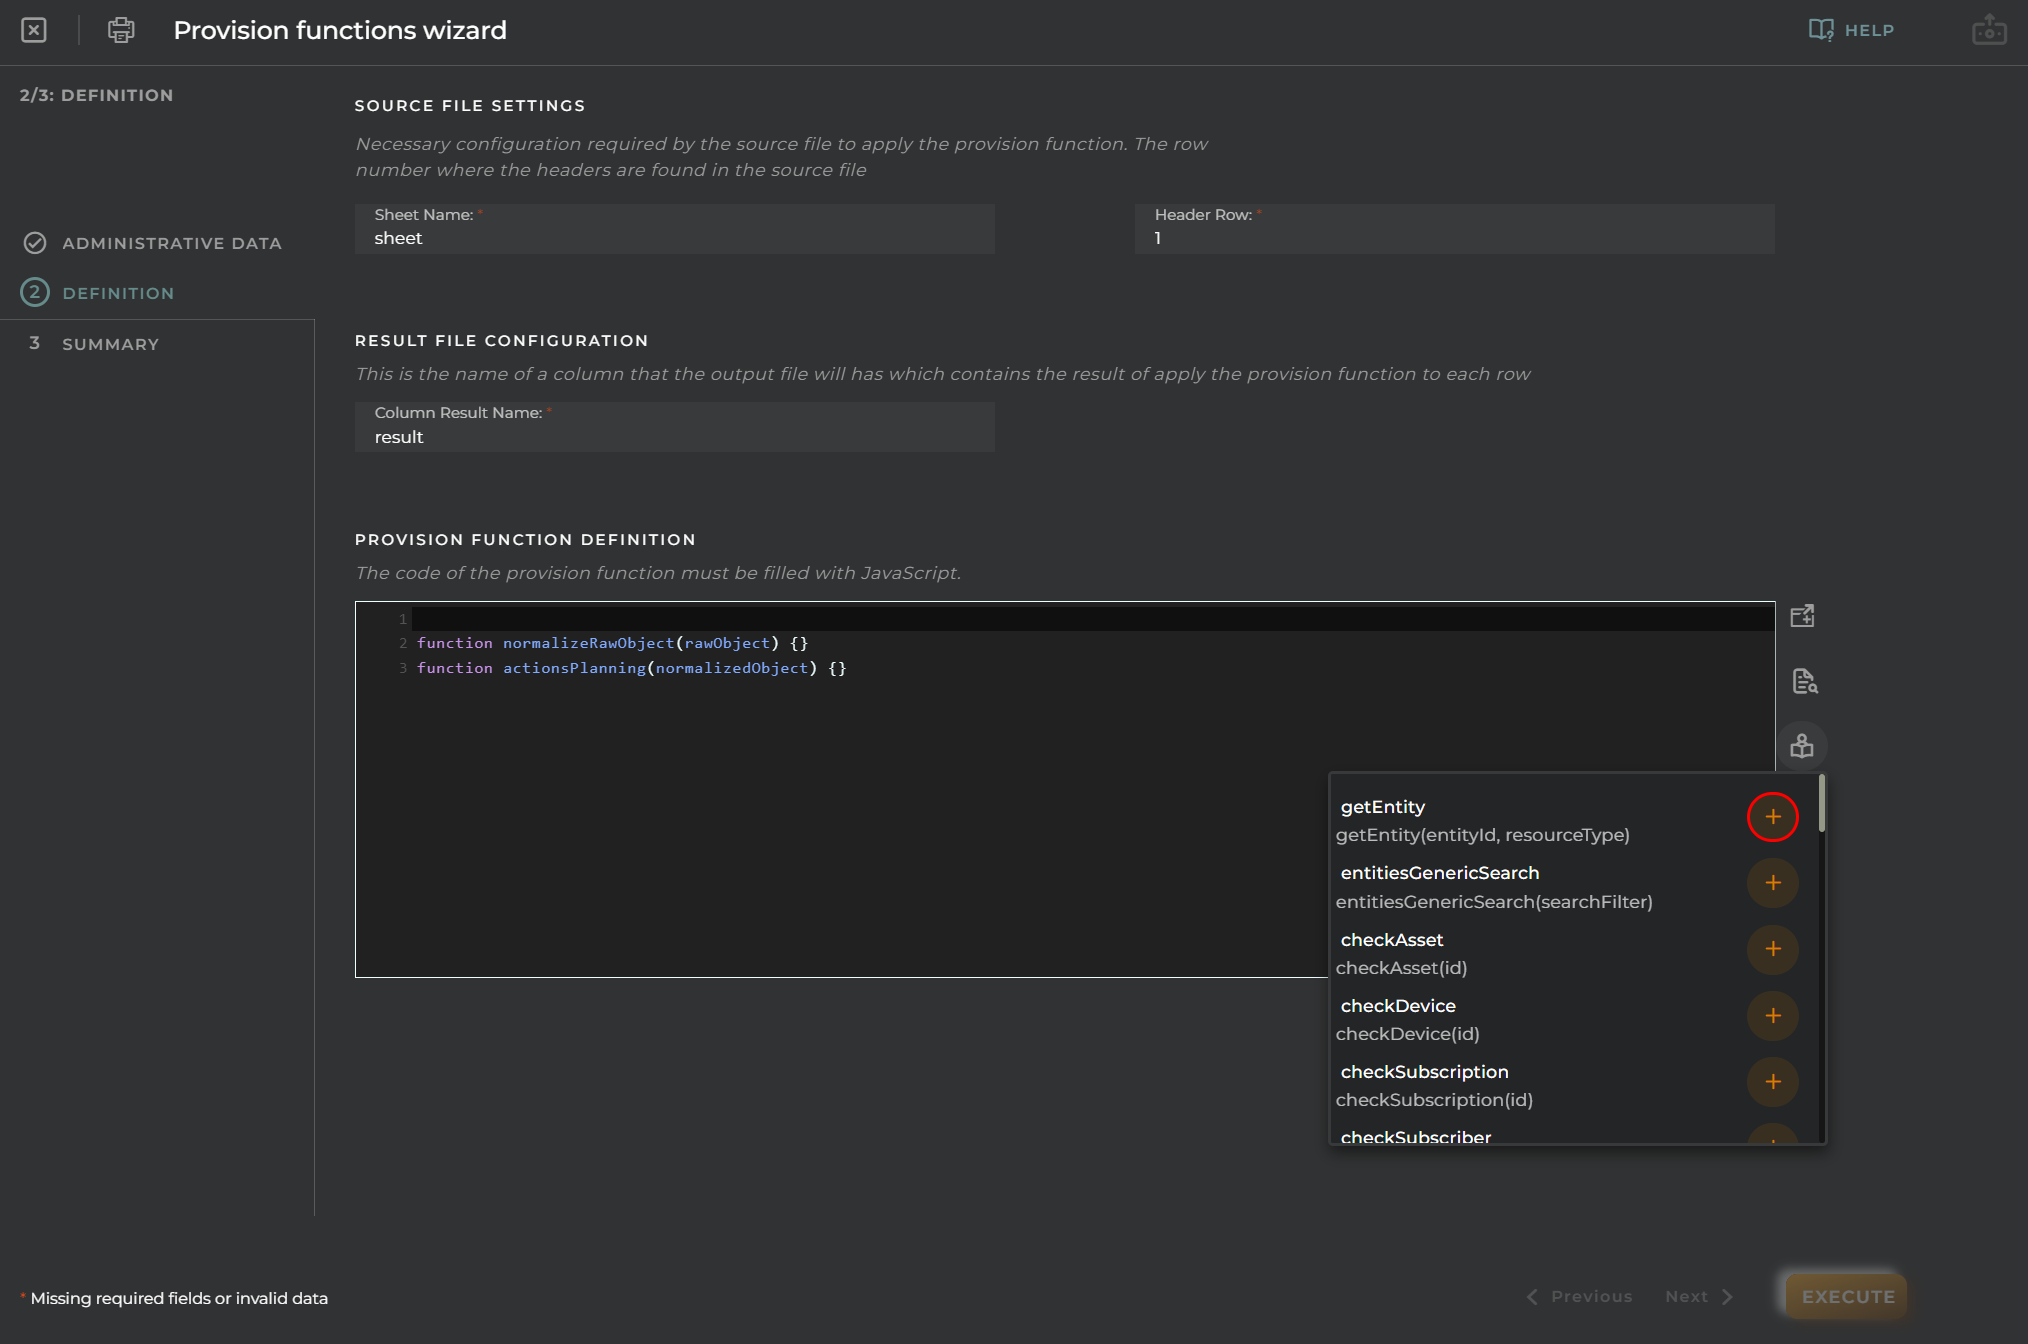
Add Function
Provides the option to add different functions.
Let’s add the “New entity” function.
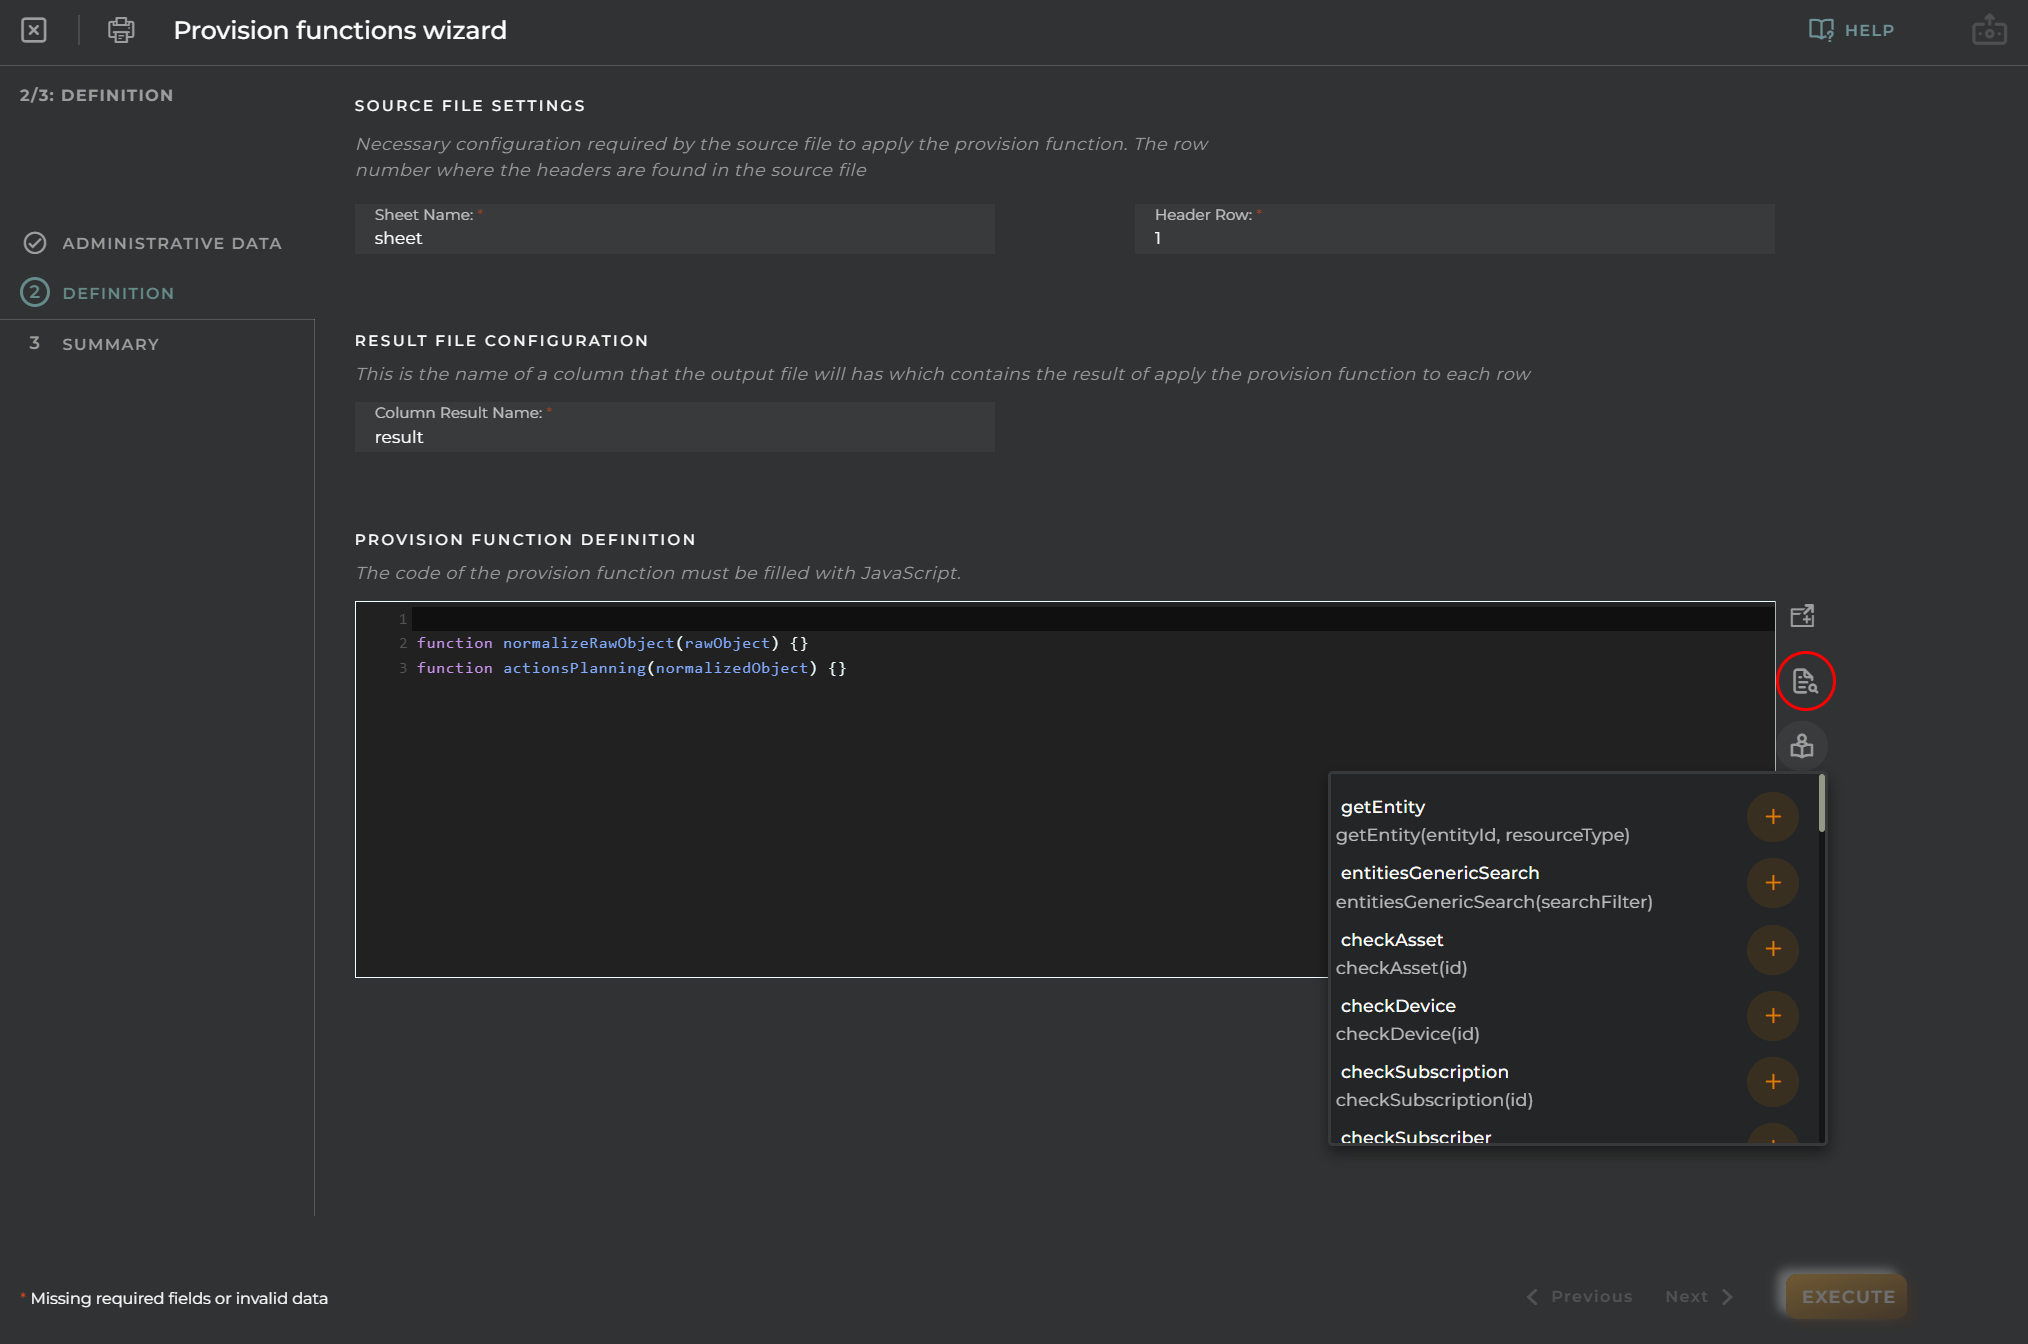
Validate Code
Checks the JavaScript code; if it’s correct, it enables the Next button.
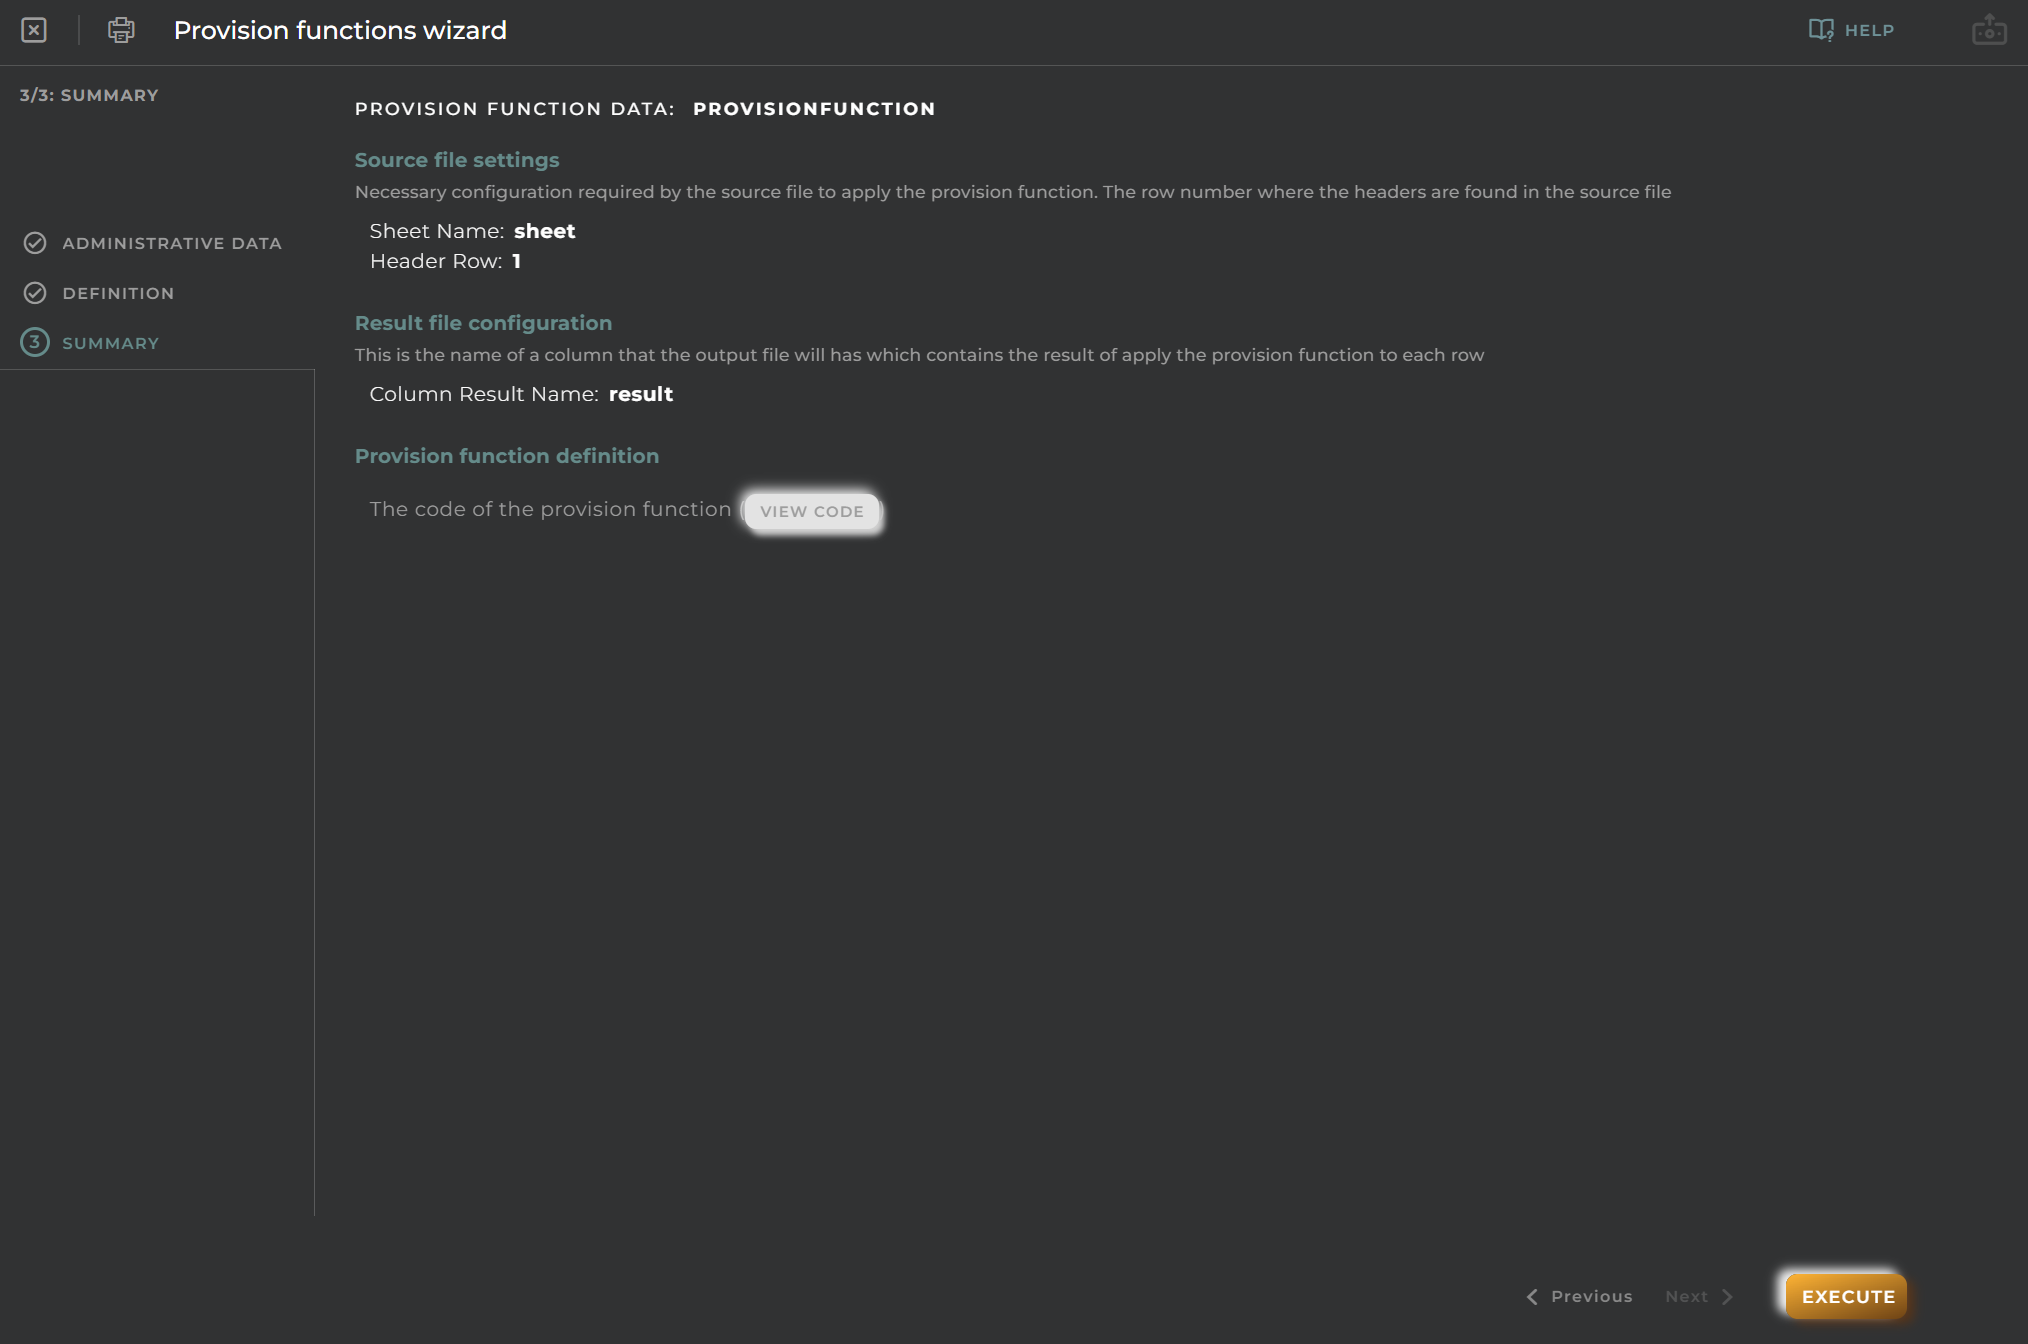
Summary
Summary of the data entered previously.
Create new WorkGroup
Allows the creation of work groups to group different channels and grant administration permissions to different user roles.
Steps
Data
Essential data for the registration and identification of a work group on the platform.
Import/Export Configuration
Allows you to import and export the wizard’s configuration via JSON.
When accessing the import and export functionality, it displays a window with various actions. Additionally, it presents the configuration of the wizard in JSON format.
The available actions are as follows:
Upload Json: Uploads a JSON file and replaces the previous JSON configuration.
Paste from clipboard: Pastes JSON data from the clipboard and replaces the previous JSON configuration.
Download Json: Downloads the JSON configuration as a file with the wizard’s name.
Copy to clipboard: Copies the JSON configuration to the clipboard.
Dataset creation wizard
Allows for the creation of data sets.
Steps
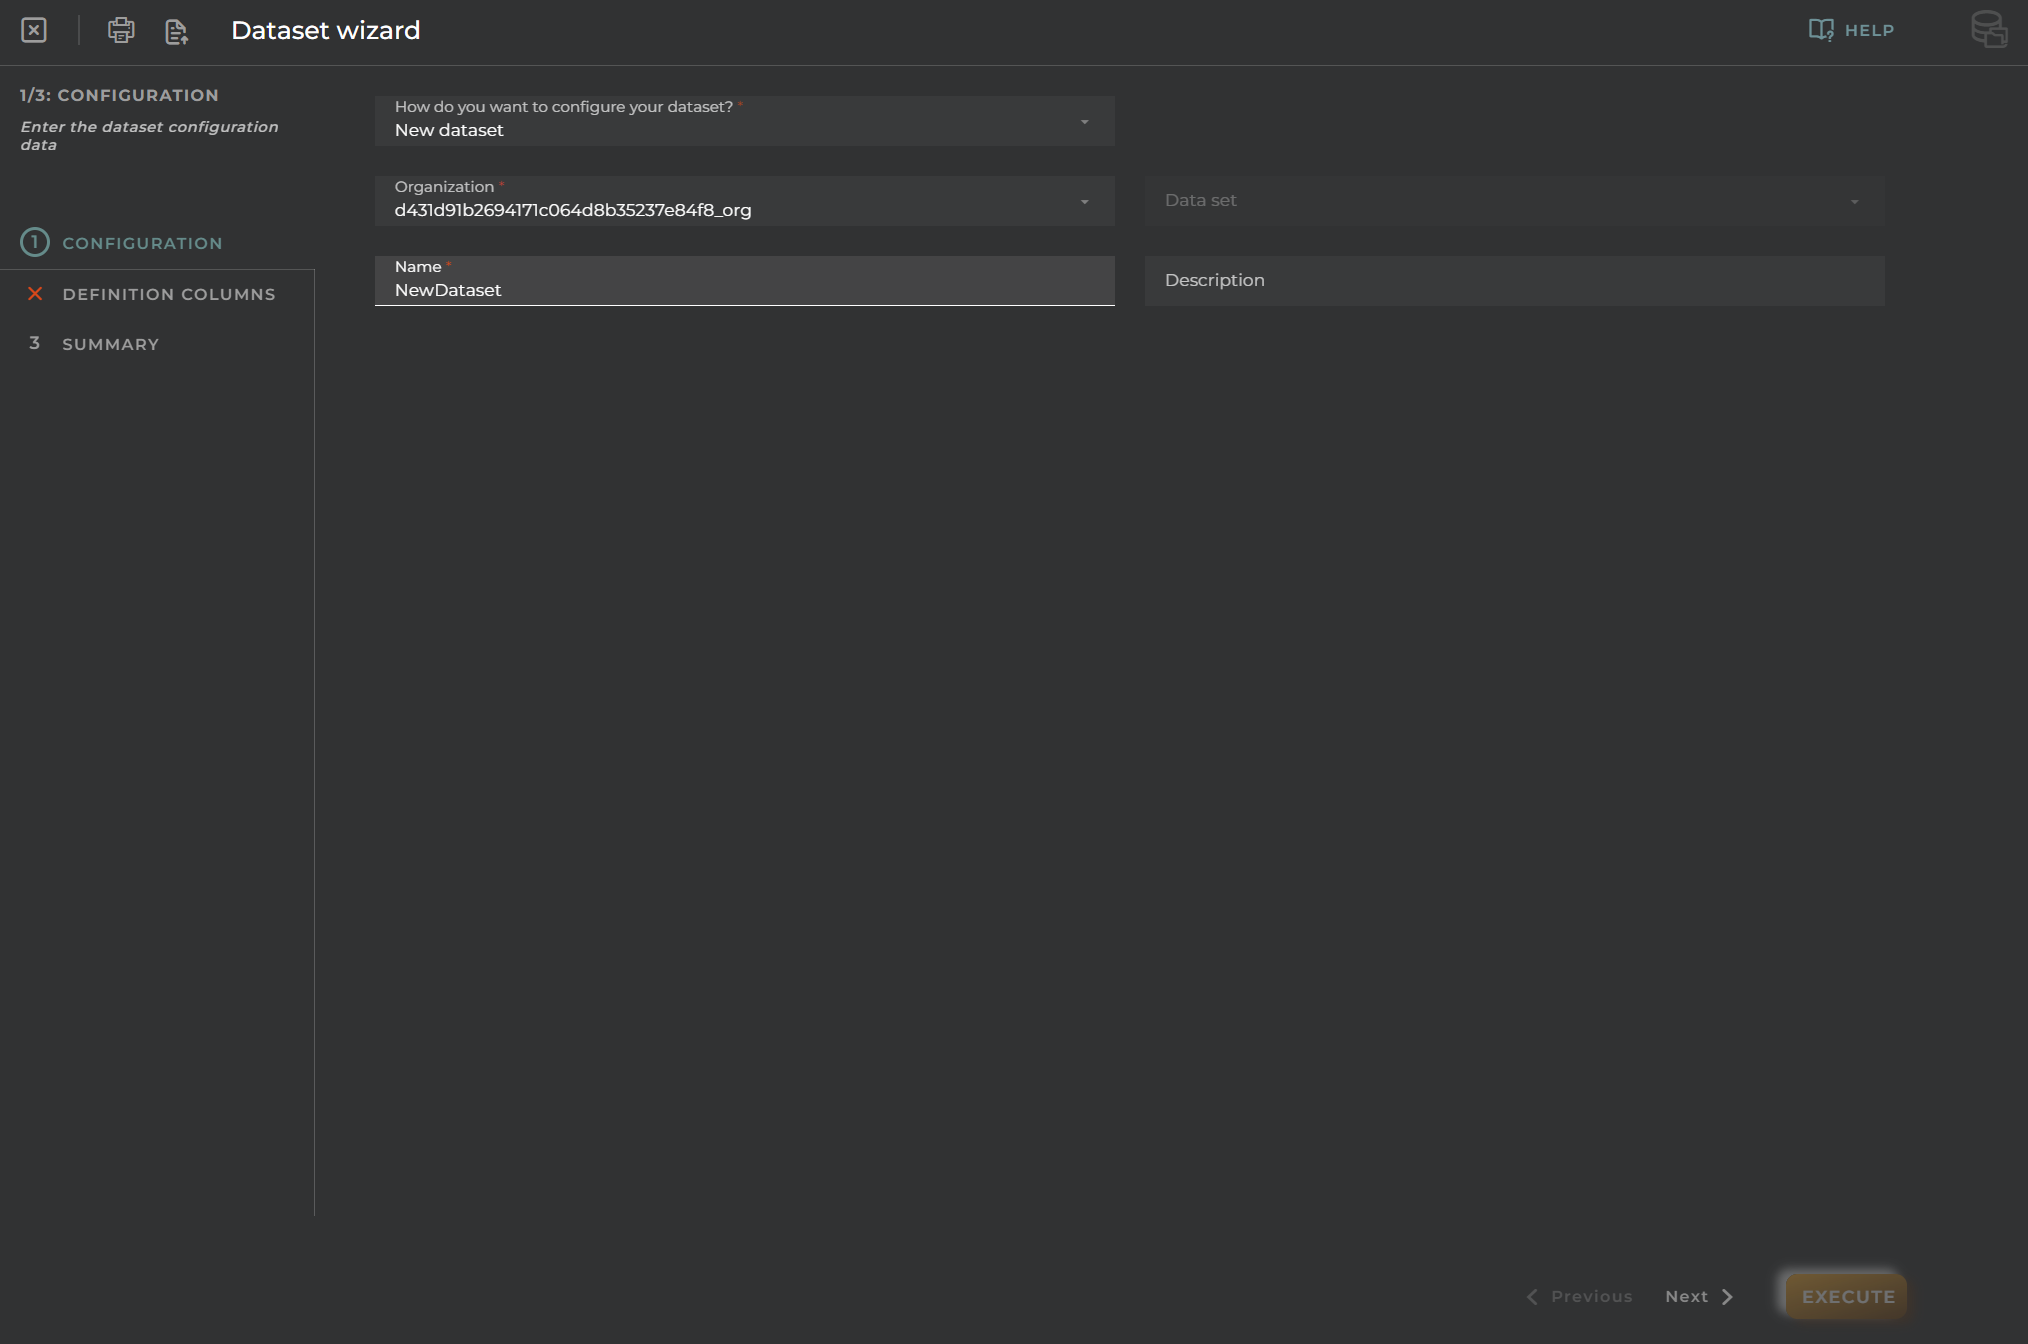
Configuration
Data for the registration and identification for the creation of a new data set on the platform.
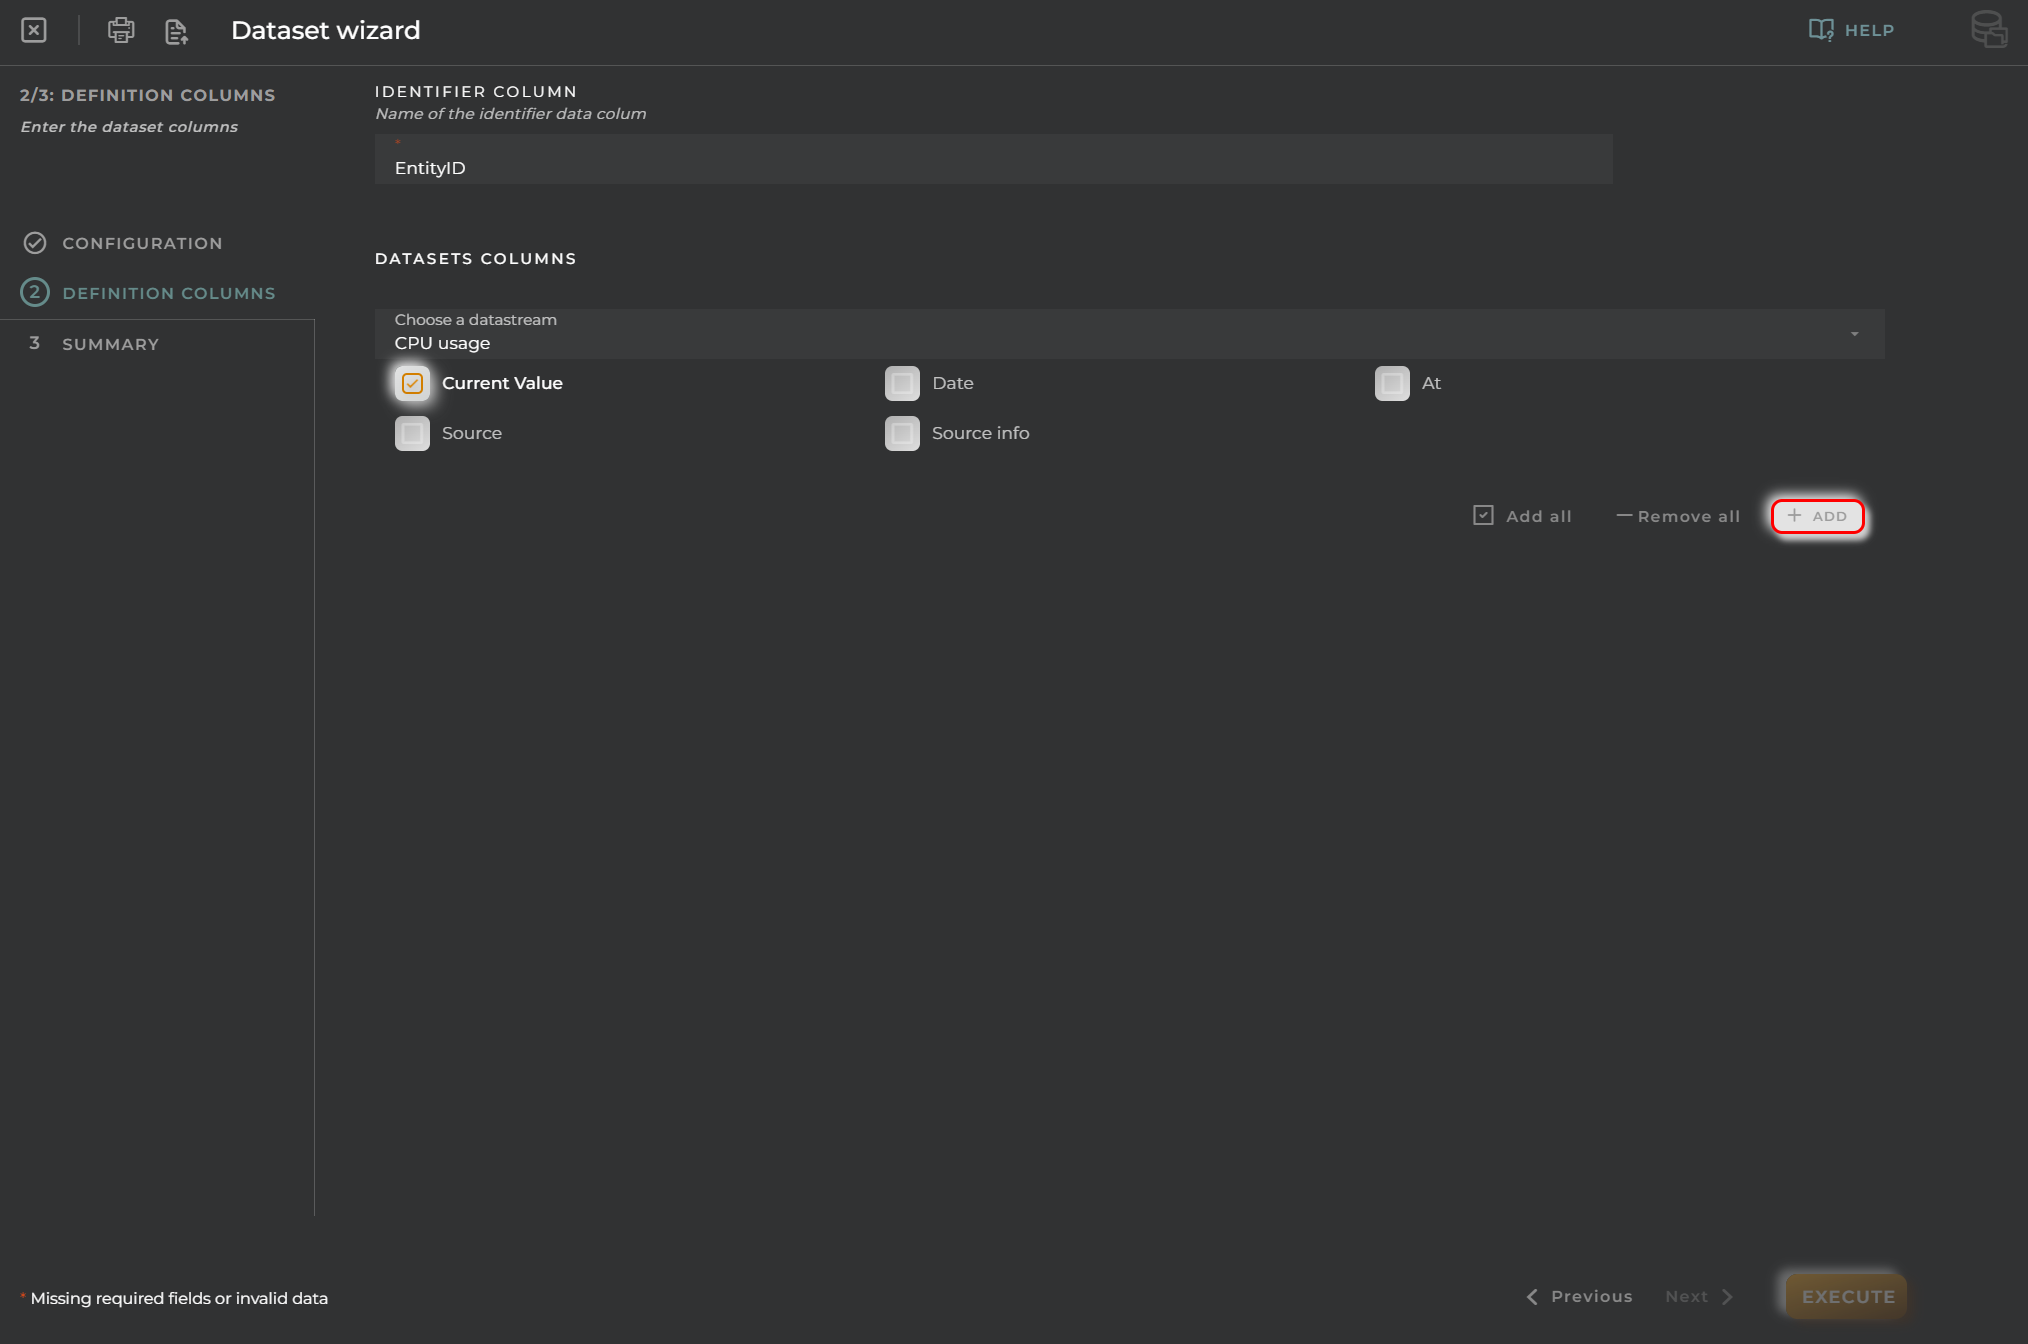
Definition Columns
You need to select one or more data streams for the configuration of columns. Identifier Column is the name of the identification column. Once the data stream is selected, we will press the add button.
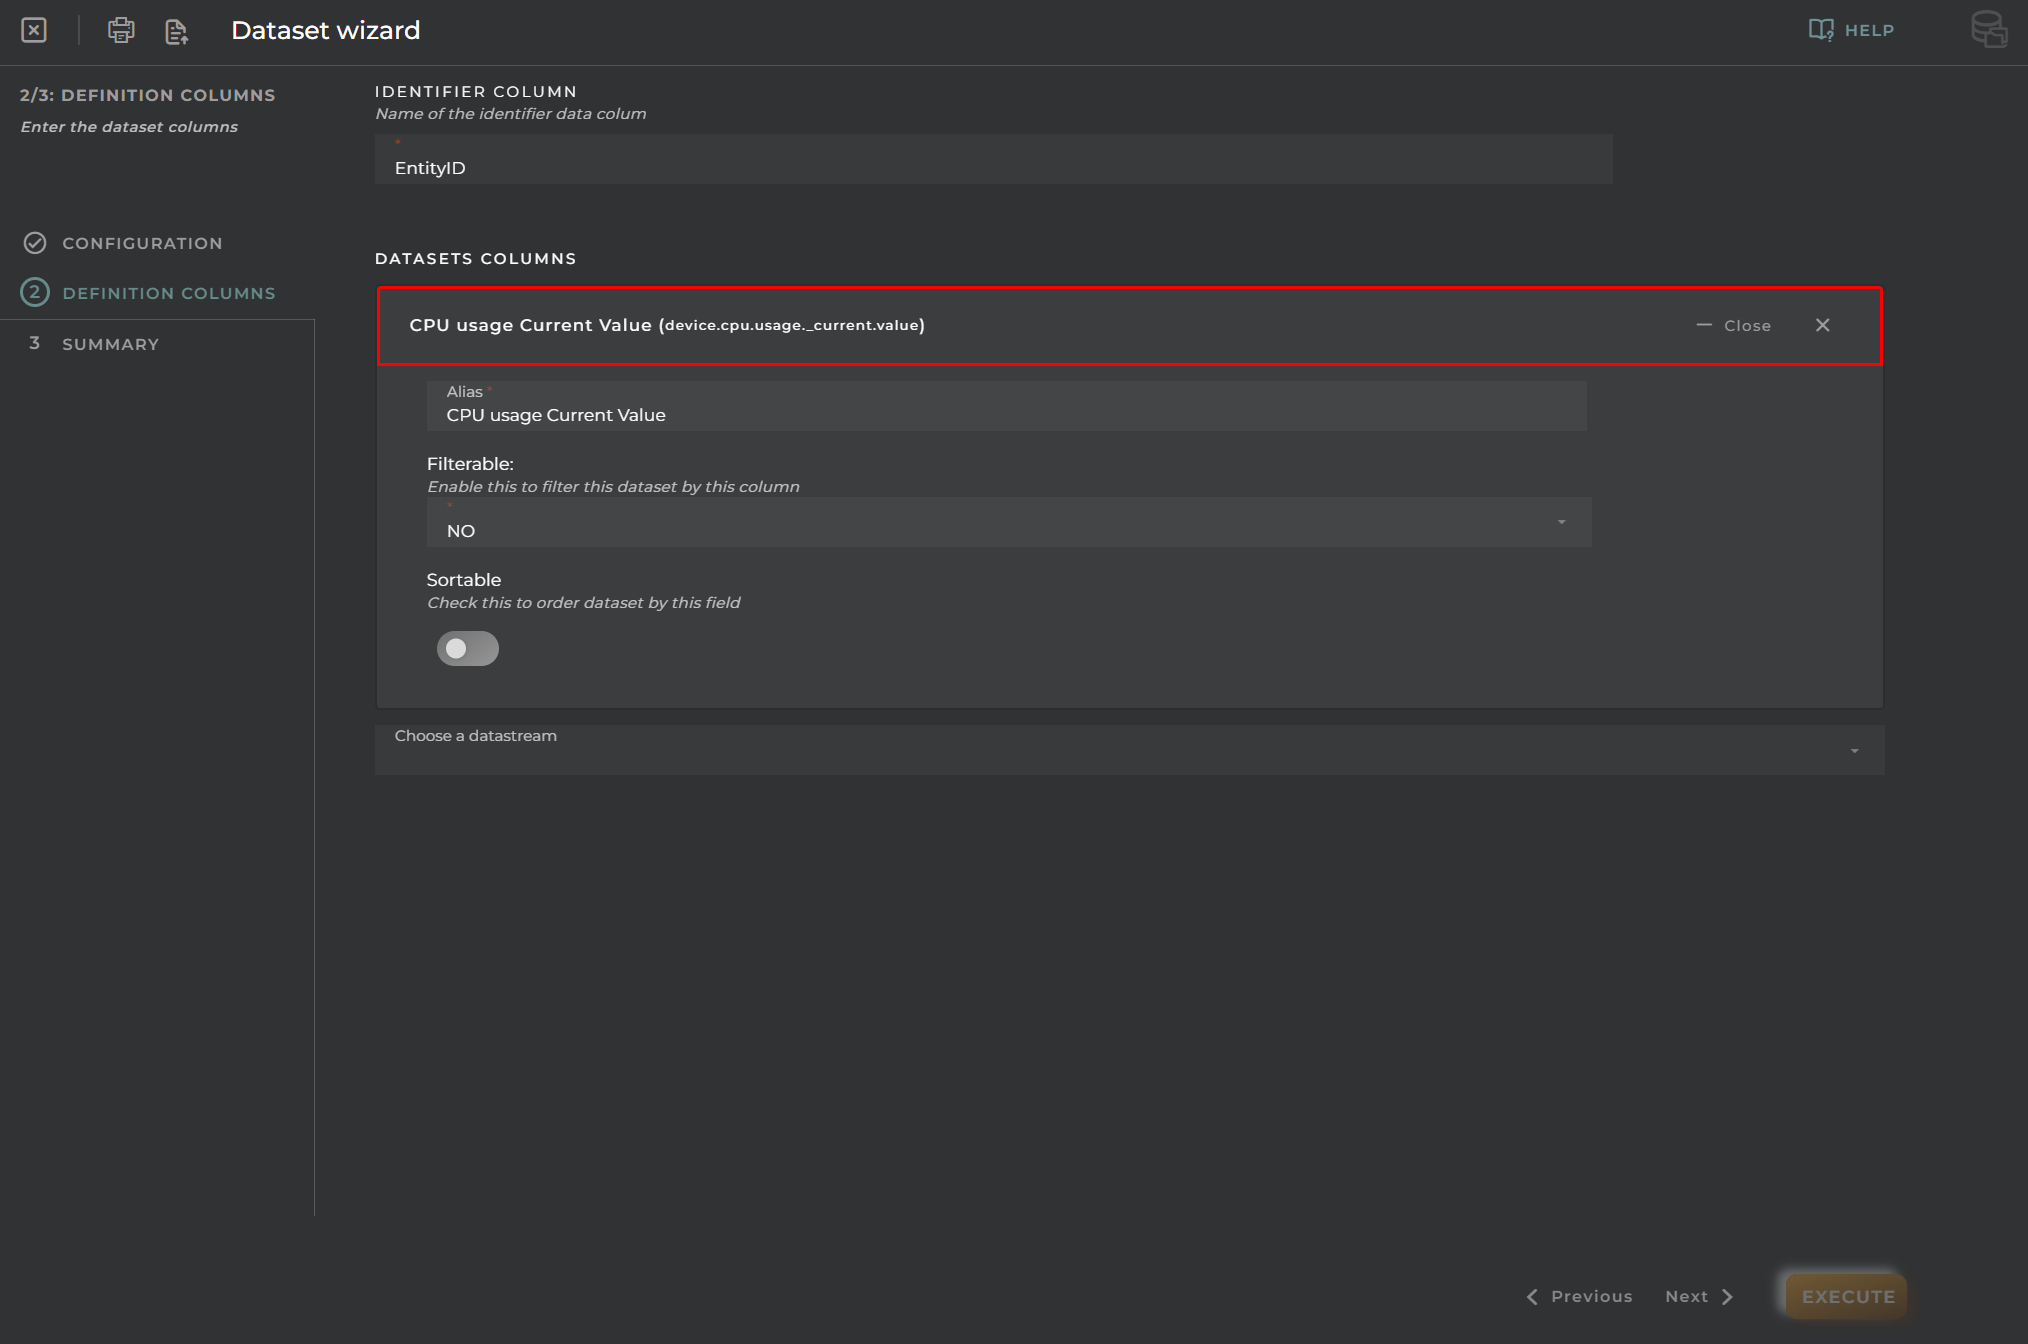
The following data will then appear:
Path: if the data stream value field is selected and its type is not a basic type, then a data path must be selected until you reach a field with a basic type.
Alias: Alias of the dataset.
Apply Filter:
Always: Will always have to be filtered.
Yes: It can be filtered or not.
No: It will not be possible to filter.
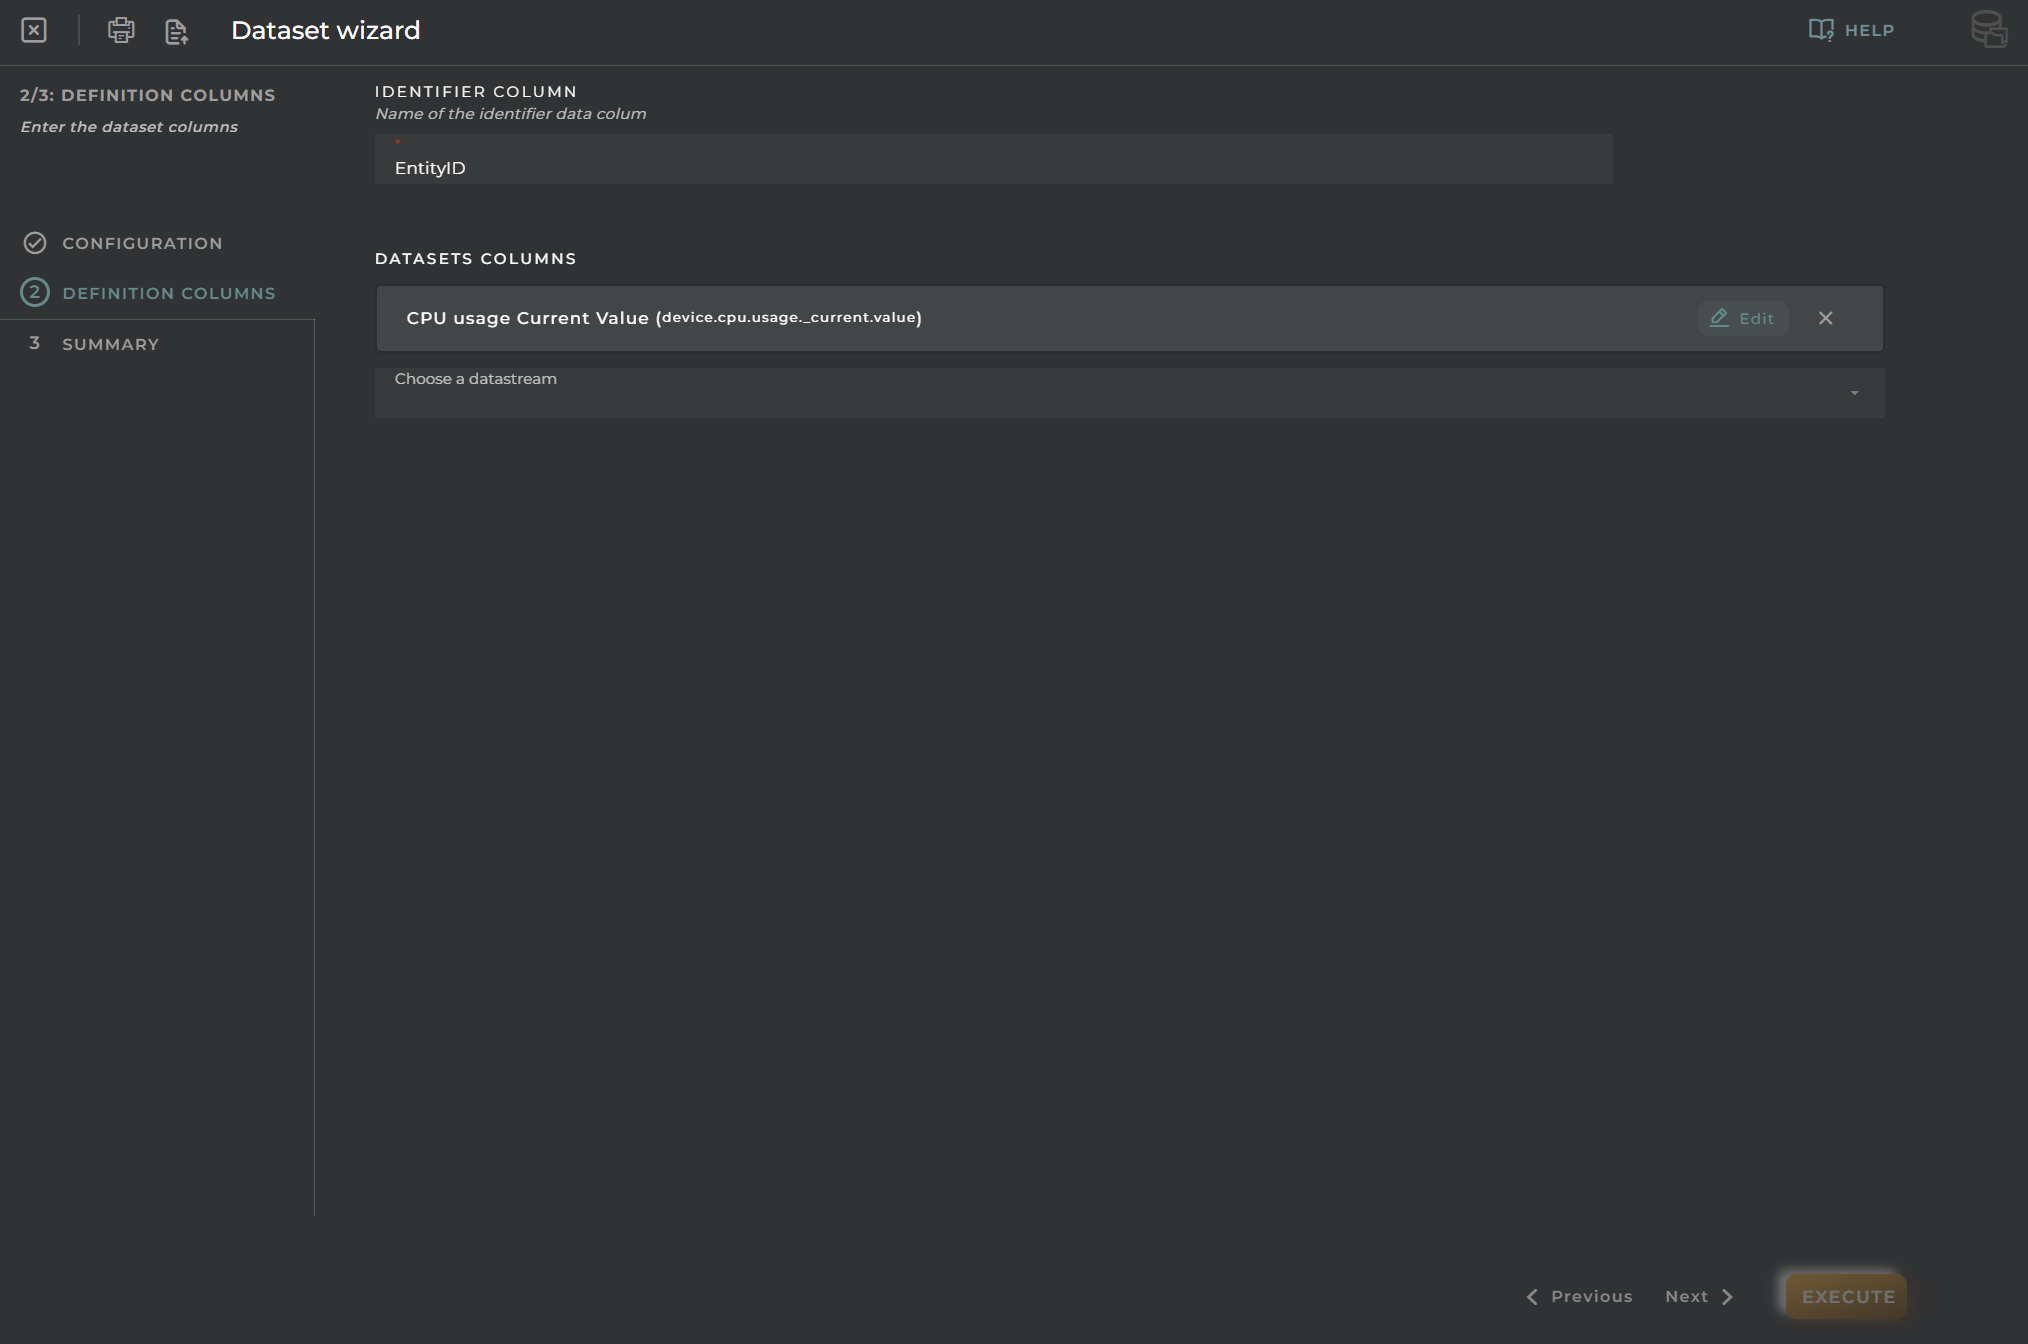
Additionally, we can delete or close the dataset to improve visualization.
Here you can see a dataset in collapse format, with options for editing and deleting the dataset.
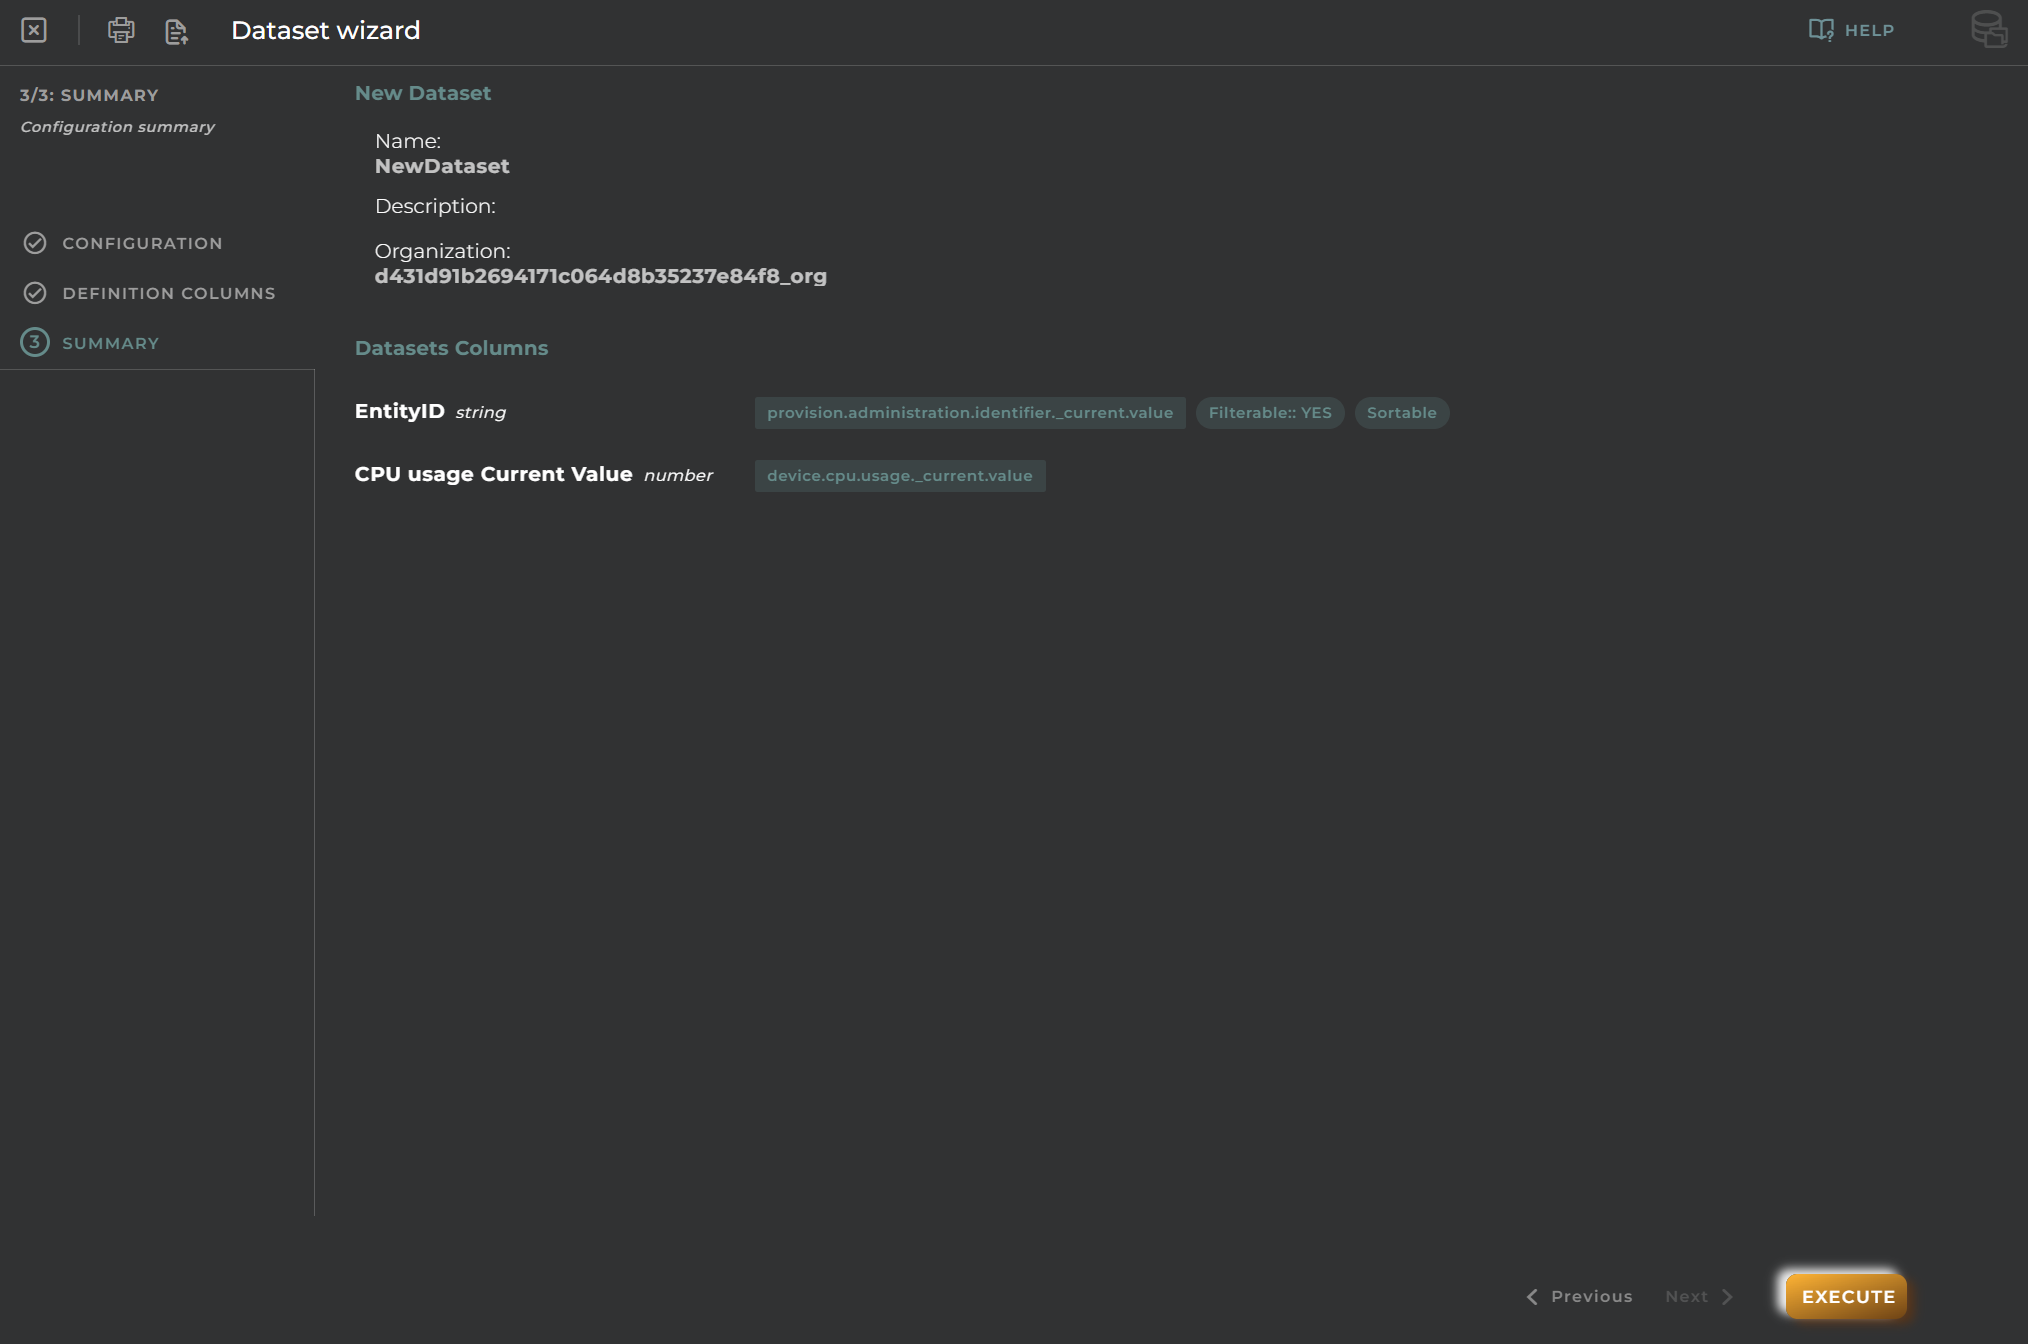
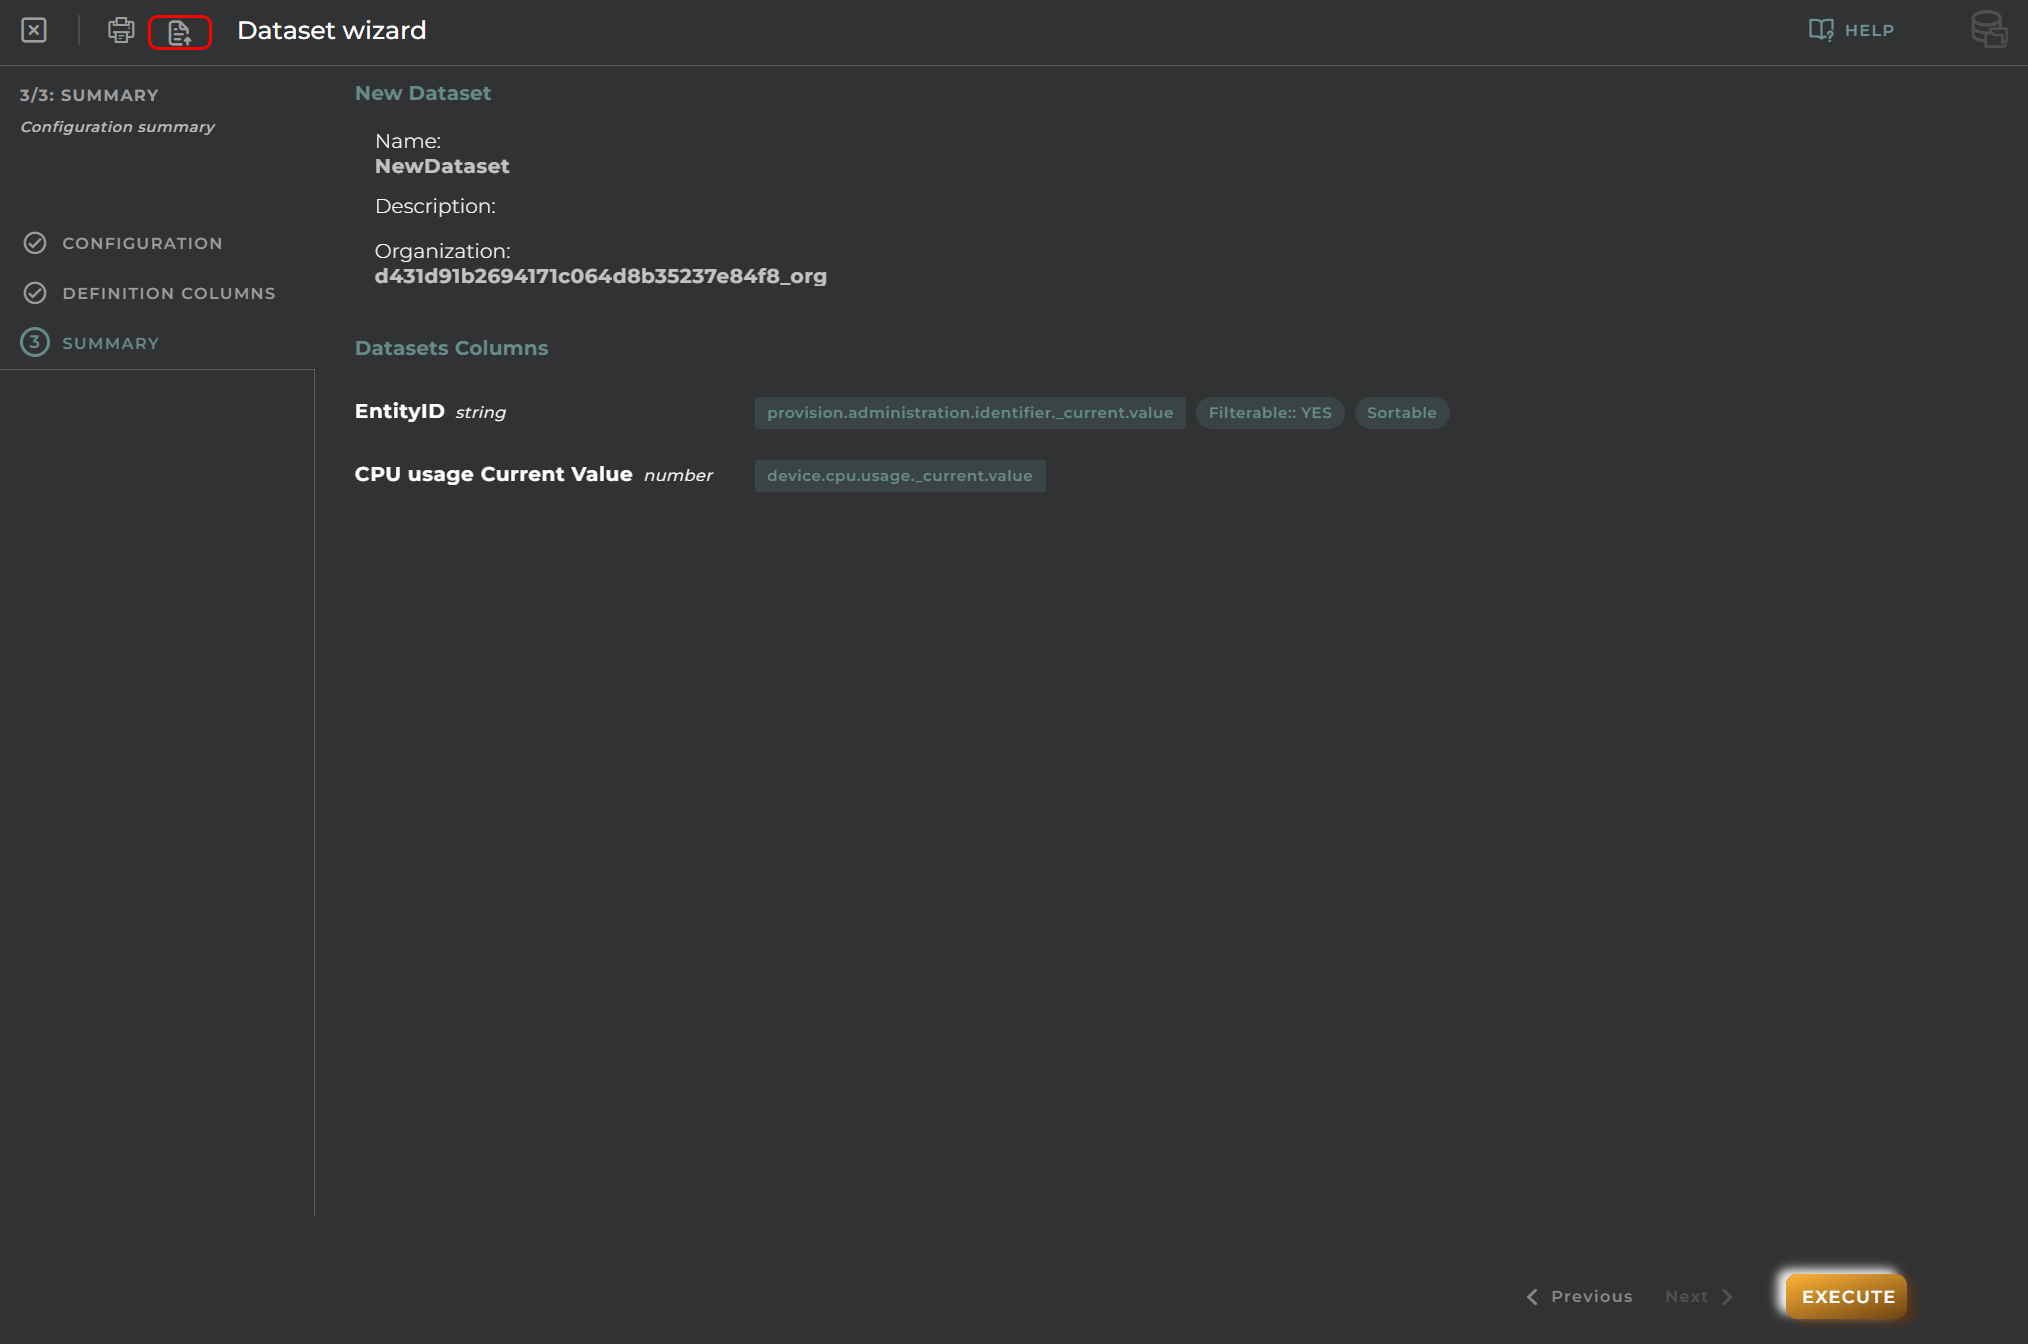
Finally, we have a summary of the data set, where the following data will appear:
Name: name of the organization
Organization: name of the organization
Columns: columns with configured settings
Sorting Columns
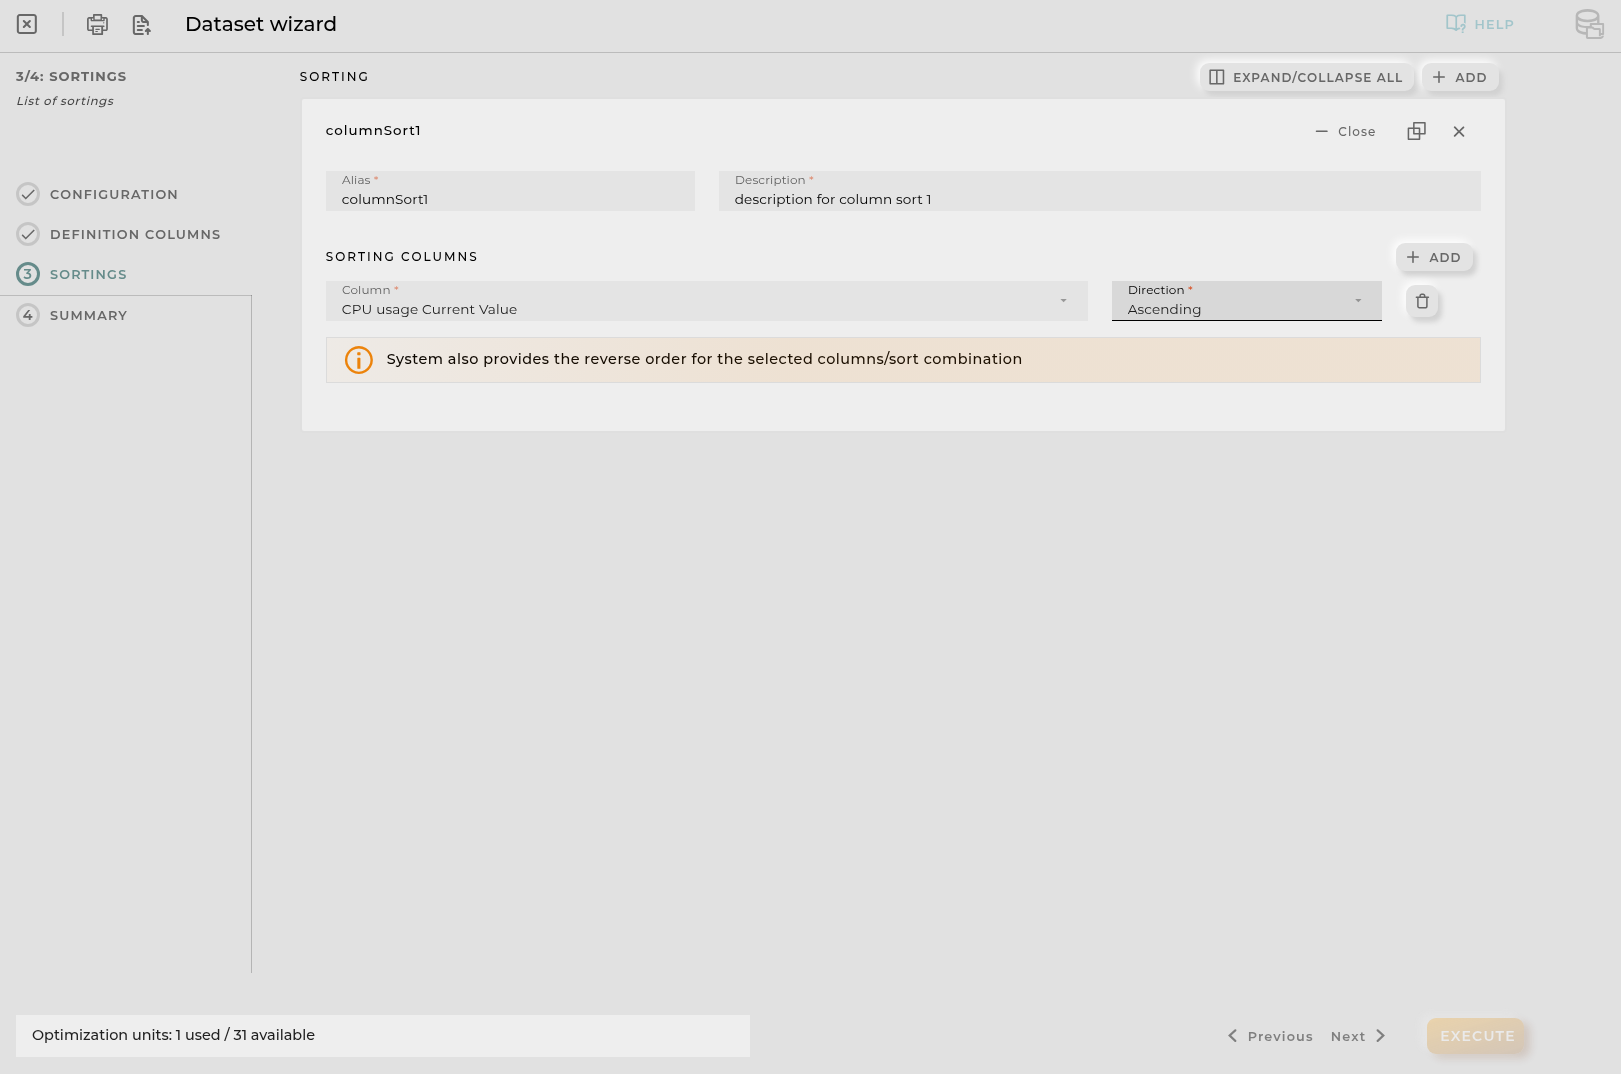
In this step you can define the columns that will be used to sort the time series. You can have multiple sorting configurations, each one with multiple columns.
Alias: Identifier for the sorting configuration.
Description: Description of the sorting configuration.
Columns: List of columns to be used for sorting.
Column: Column from the time series to be used for sorting.
Order: Order to be used for sorting.
Ascending: Ascending order.
Descending: Descending order.
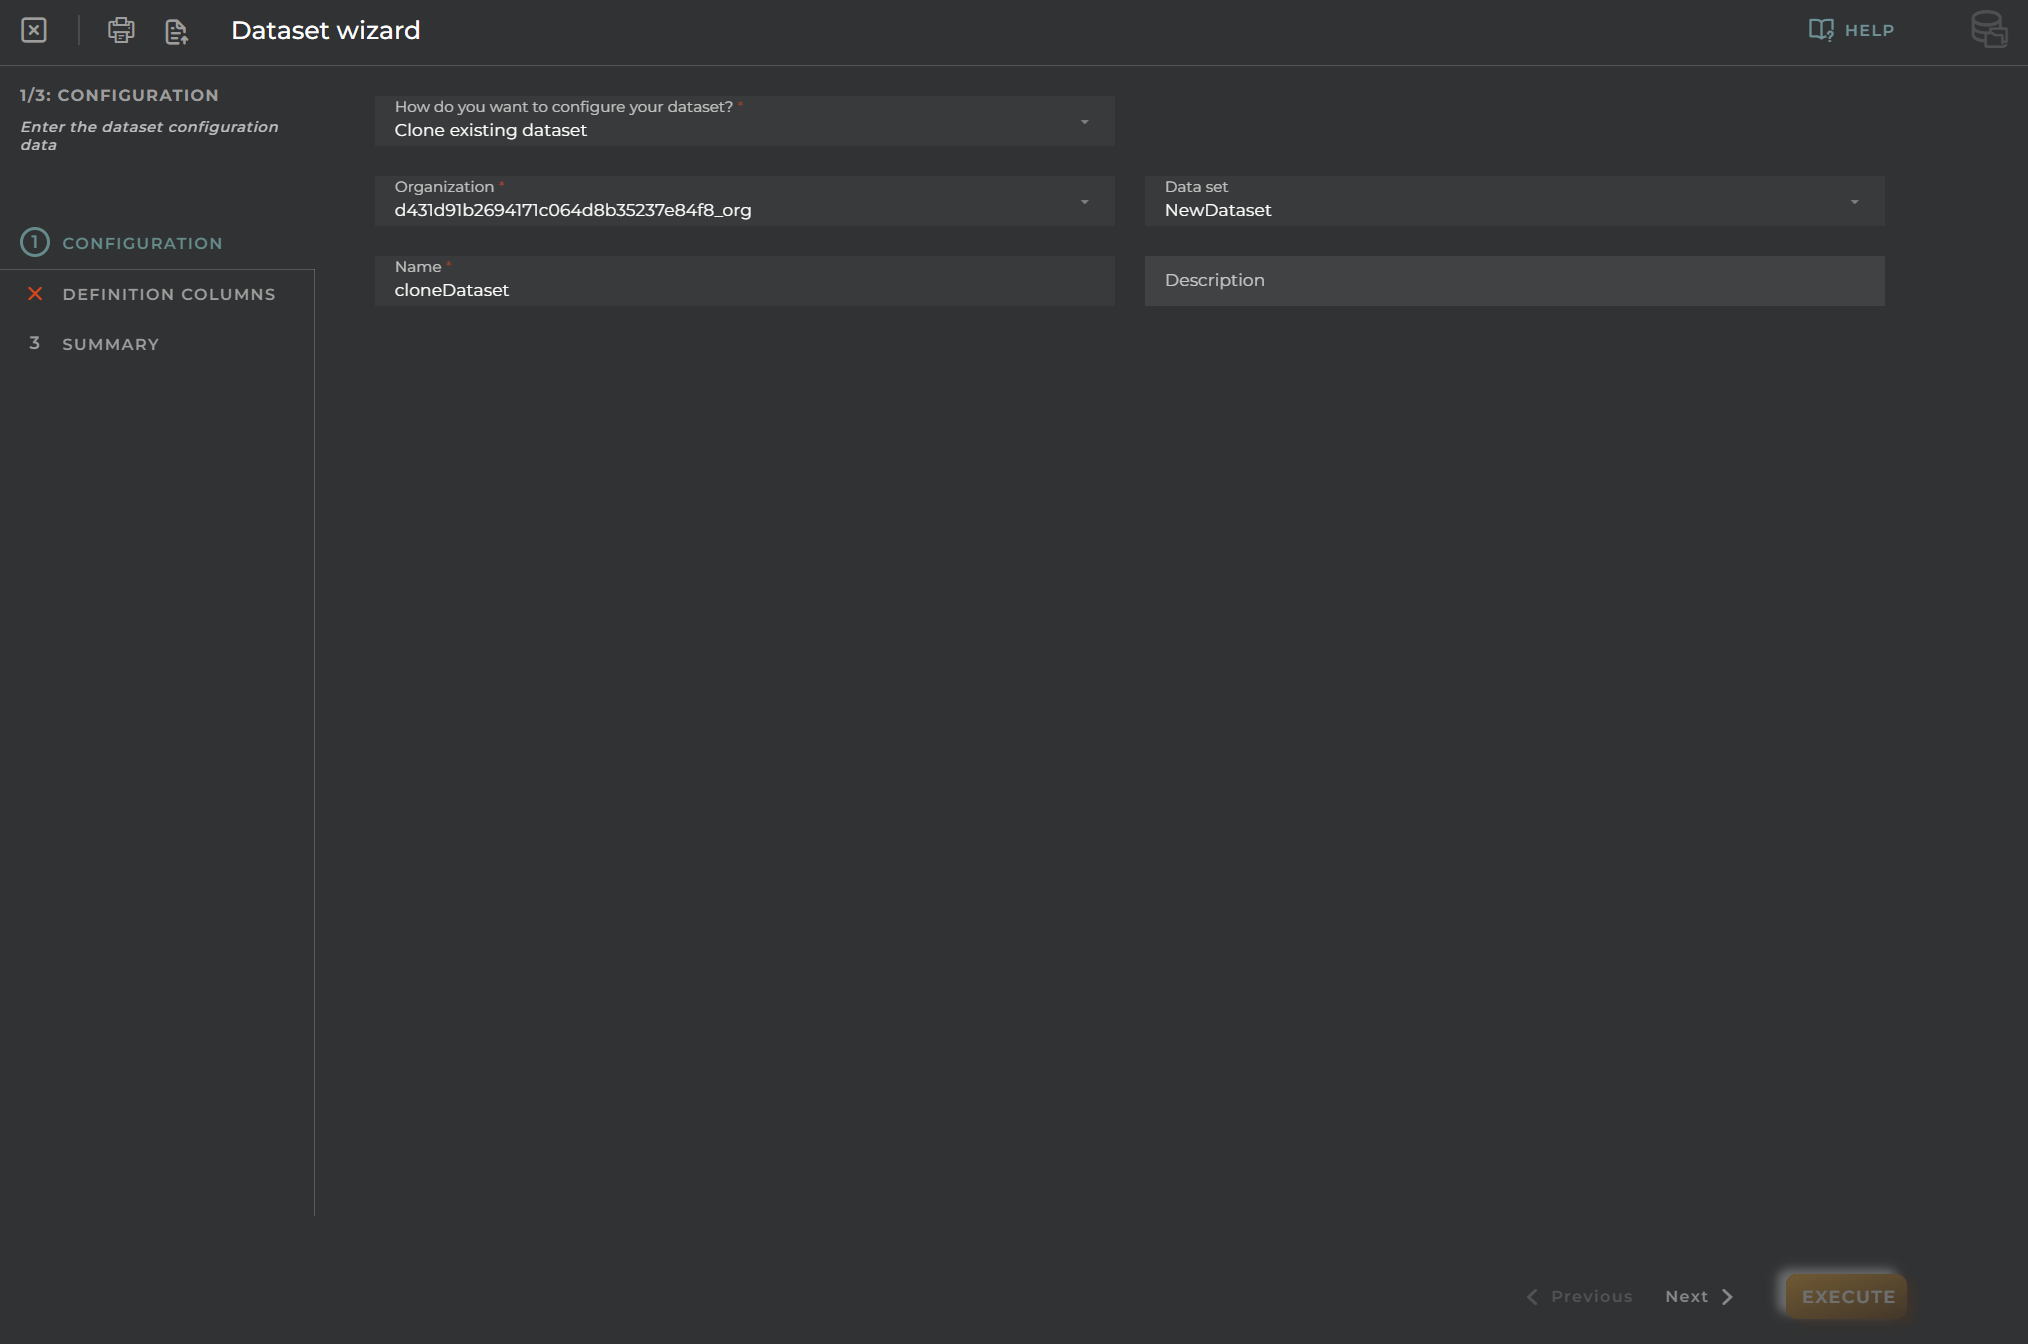
Clone Data Set Configuration
In addition to creating a new data set, we can also clone an existing one and configure it.
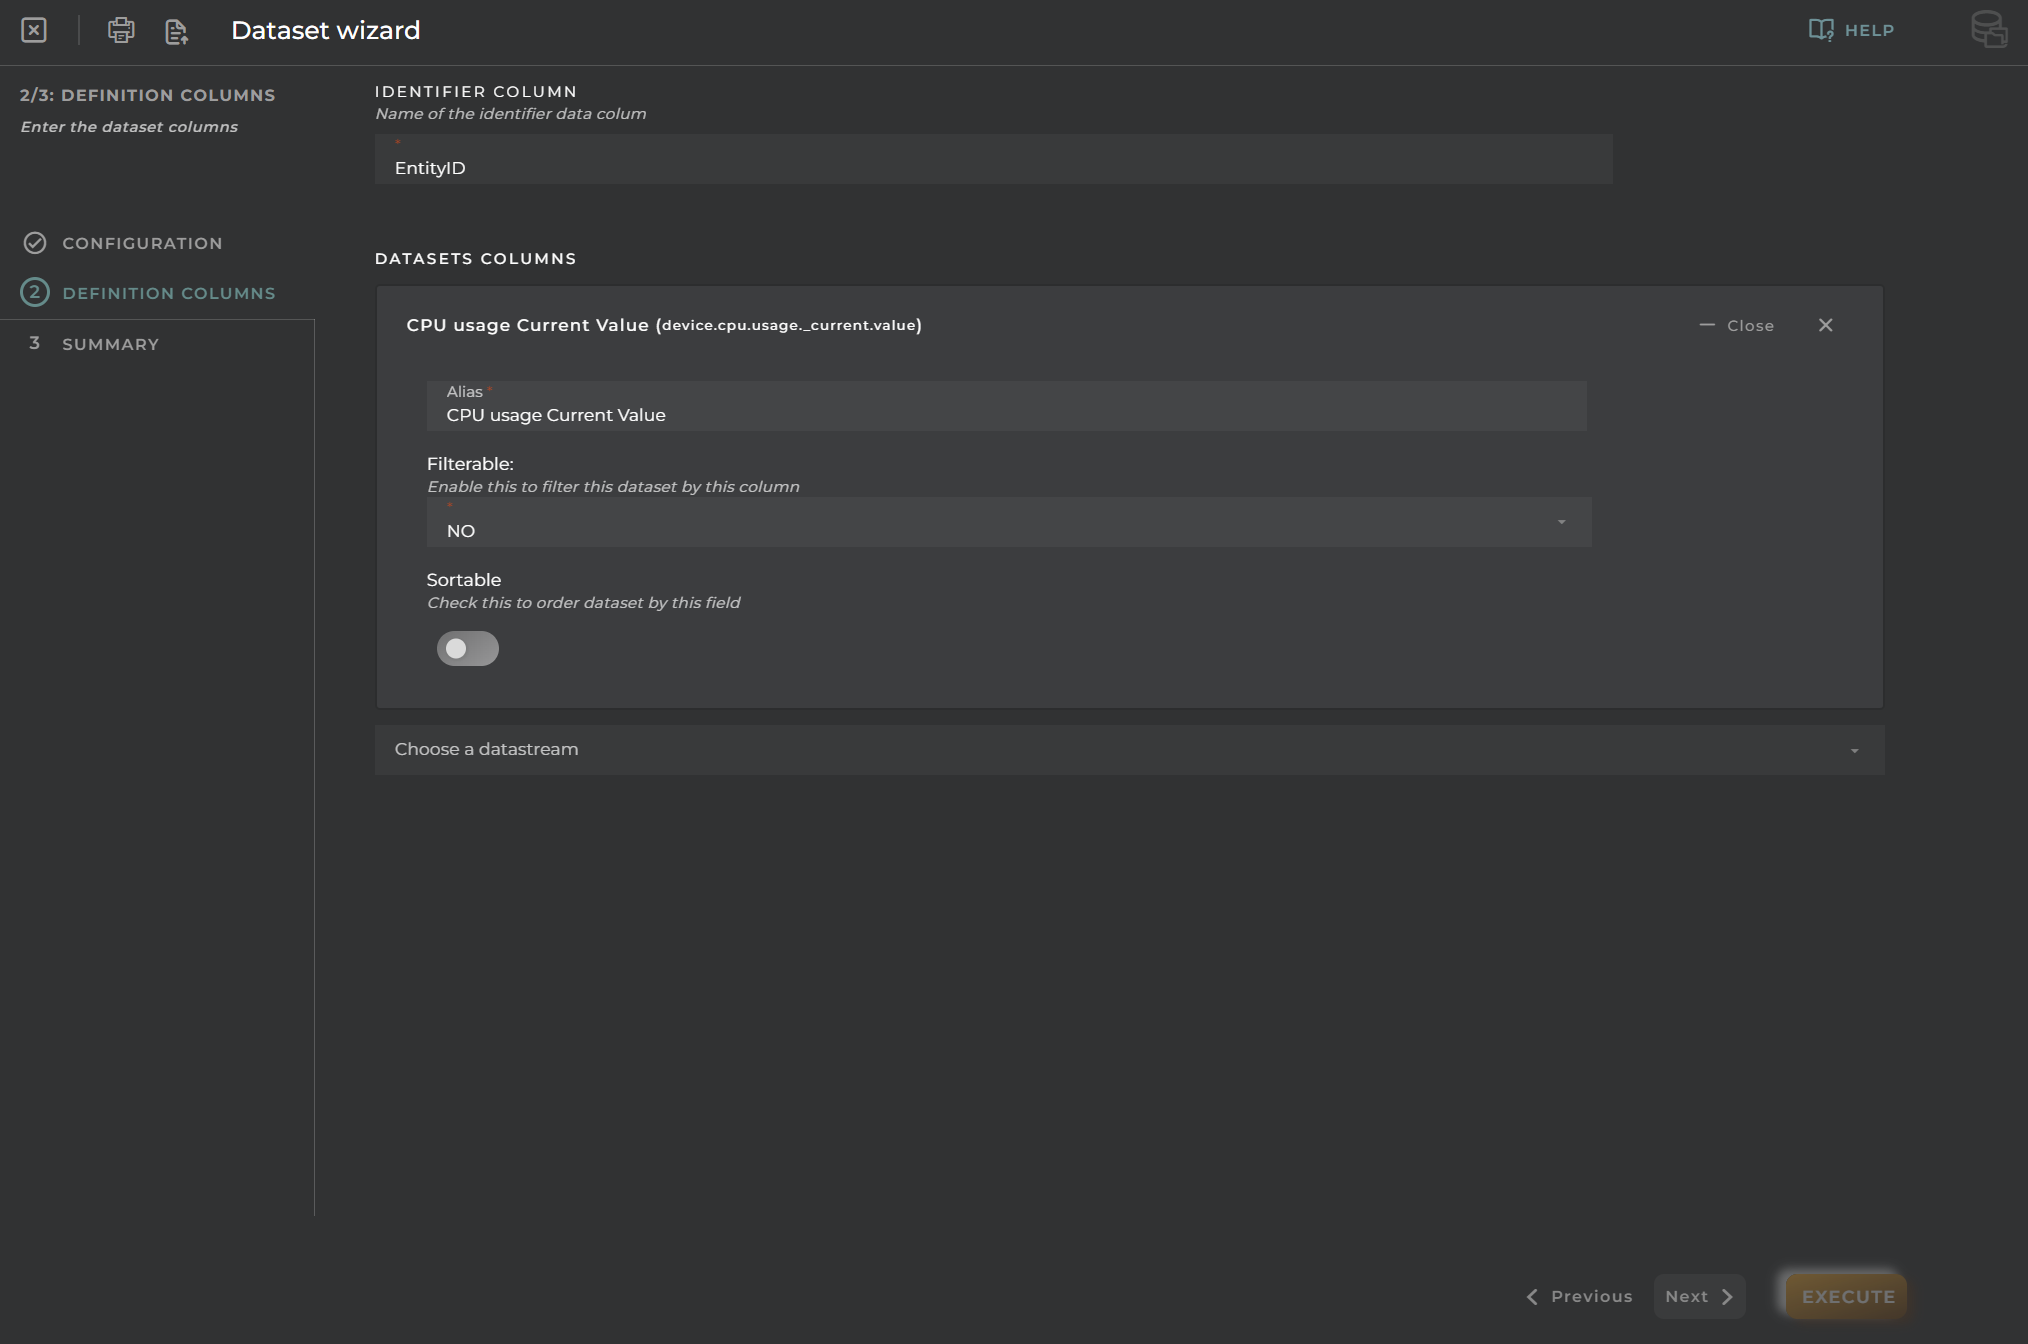
Clone Data Set Definition Columns
Having cloned the data set from a previously existing one, the previously configured columns will appear by default.
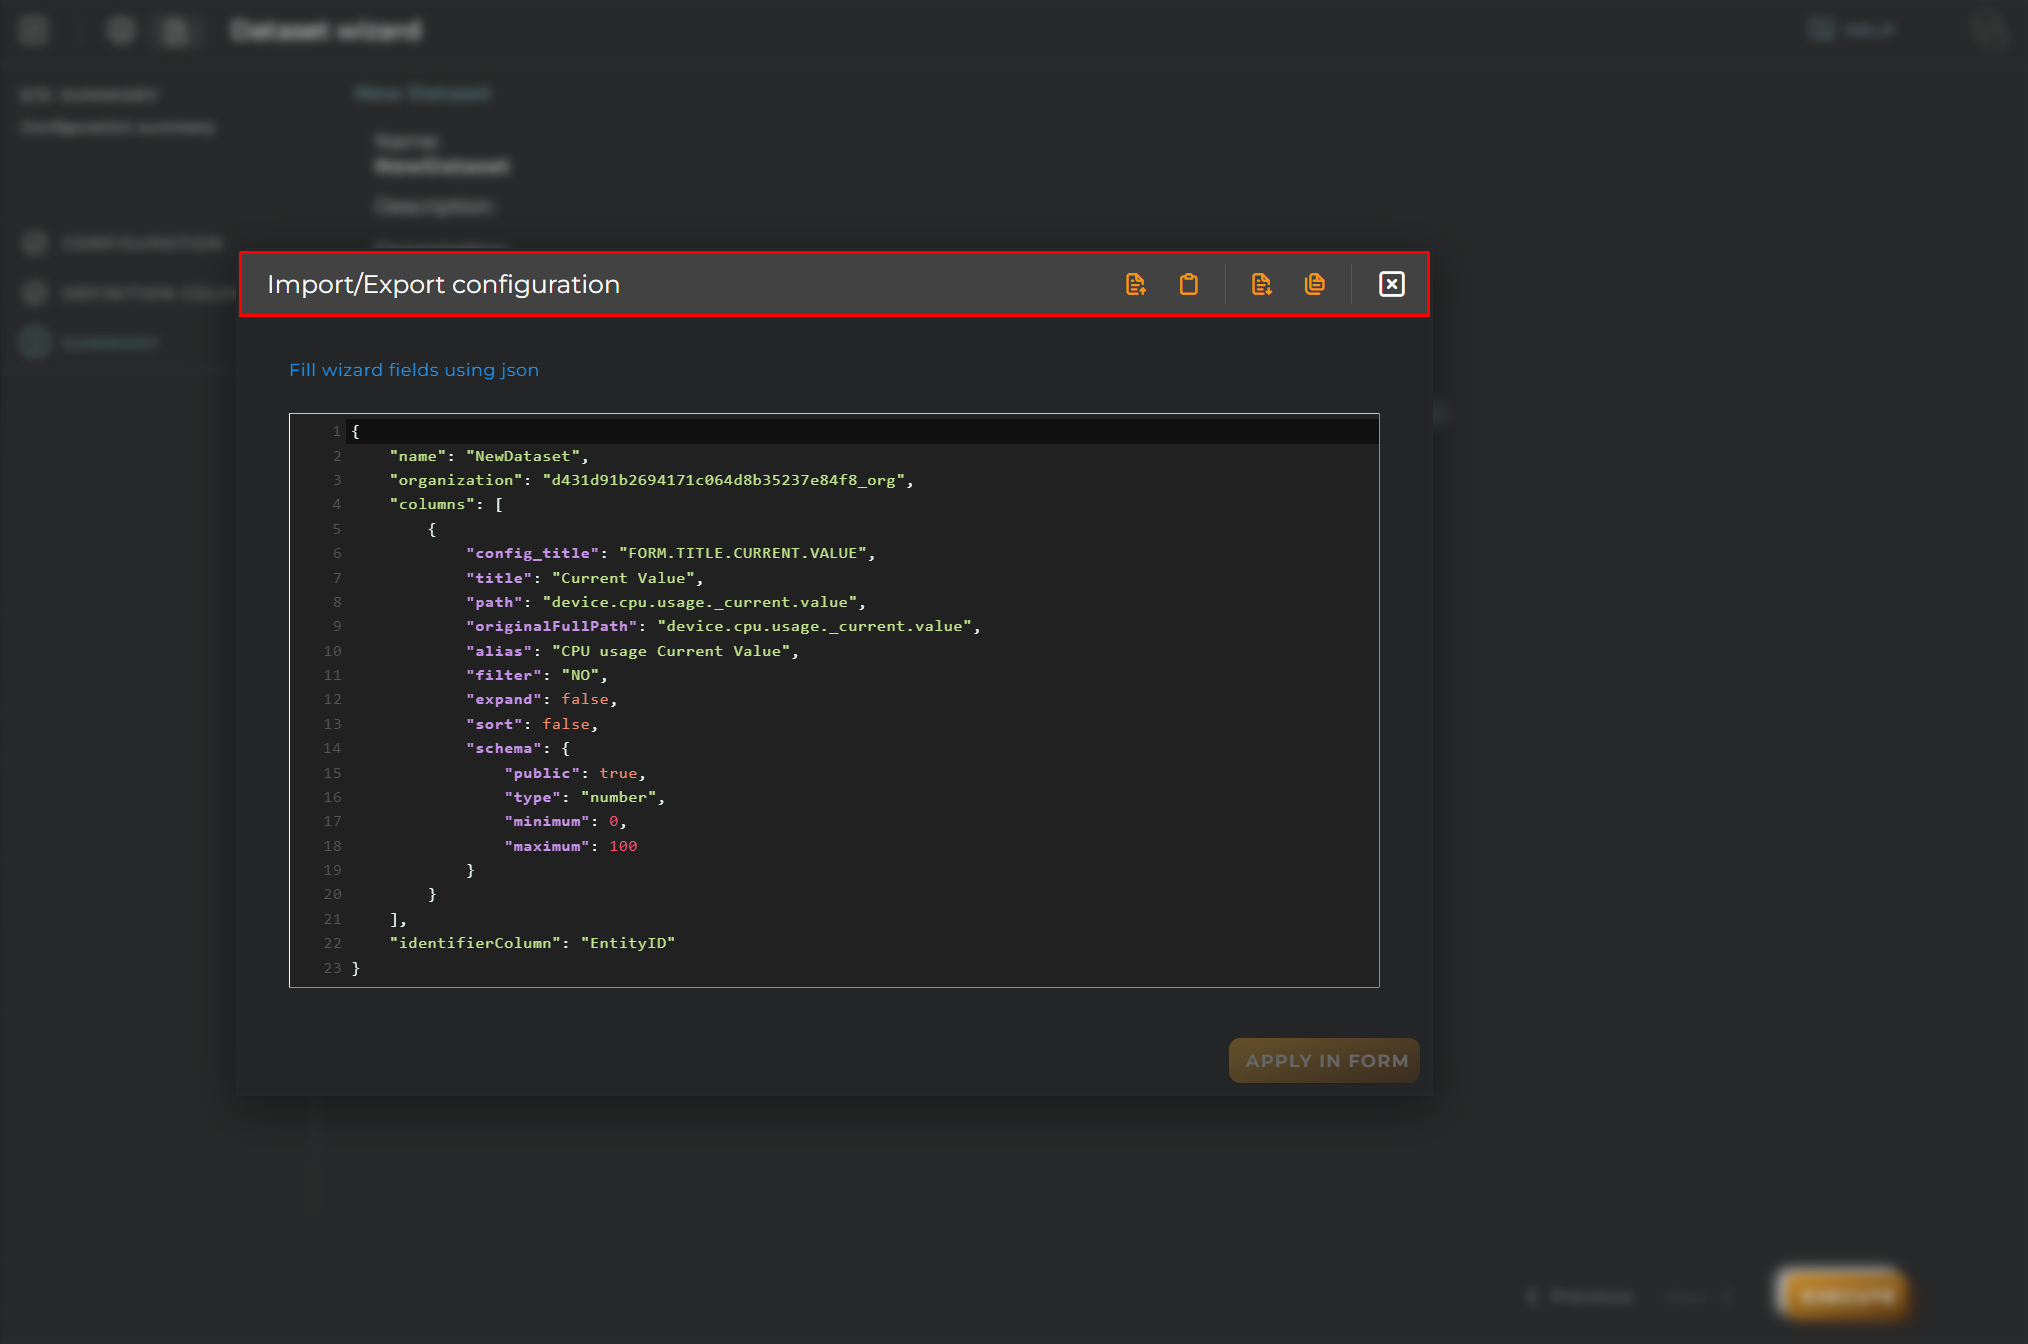
Import/Export Configuration
Allows you to import and export the wizard’s configuration via JSON.
When accessing the import and export functionality, it displays a window with various actions. Additionally, it presents the configuration of the wizard in JSON format.
The available actions are as follows:
Upload Json: Uploads a JSON file and replaces the previous JSON configuration.
Paste from clipboard: Pastes JSON data from the clipboard and replaces the previous JSON configuration.
Download Json: Downloads the JSON configuration as a file with the wizard’s name.
Copy to clipboard: Copies the JSON configuration to the clipboard.
Entities software wizard
Allows the management of the entities software, used for associating entities and for being able to configure in them.
Steps
Entitites Software Wizard
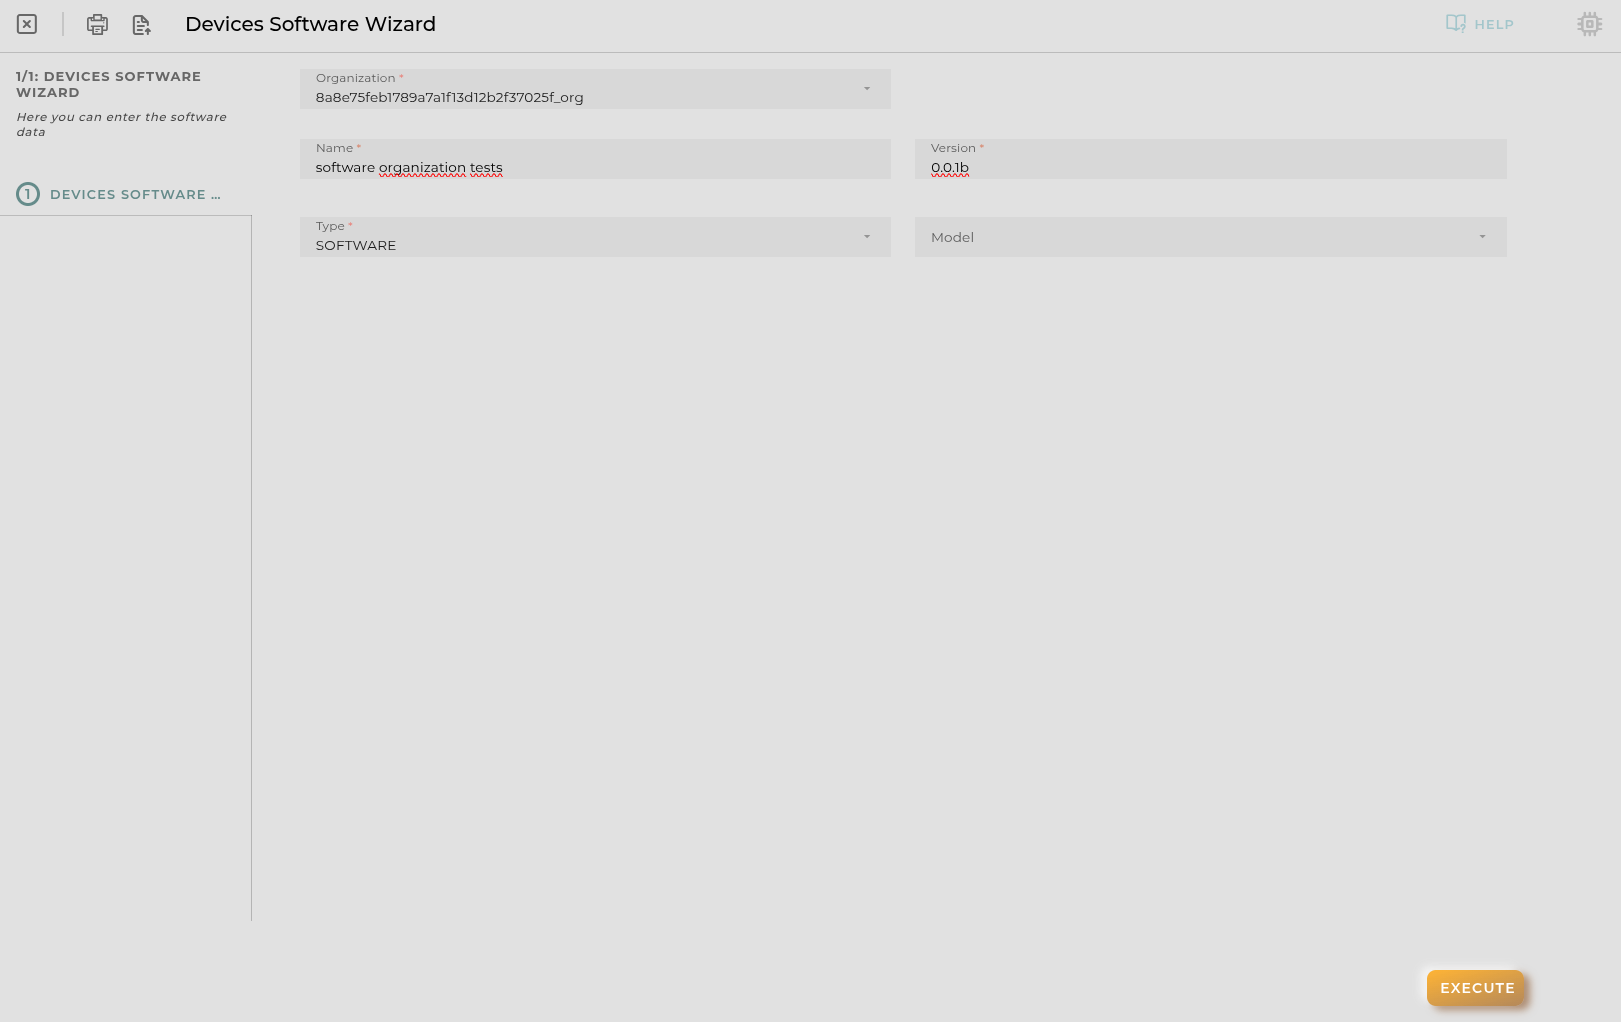
Essential data for the registration and identification of a software in your organization.
Here you can configure the following:
Organization: Organization were the software will be configured
Name: Visible name for the software
Version: Version of software
Type: The purpose of this piece of software. This can be SOFTWARE or FIRMWARE
Model: Models where this software can be selectable
Update related entities: by checking this allows the user to update related entities with the new information introduced (only available in edit mode)
Operations Management
Allows for the creation of new or cloned operations on the platform.
Steps
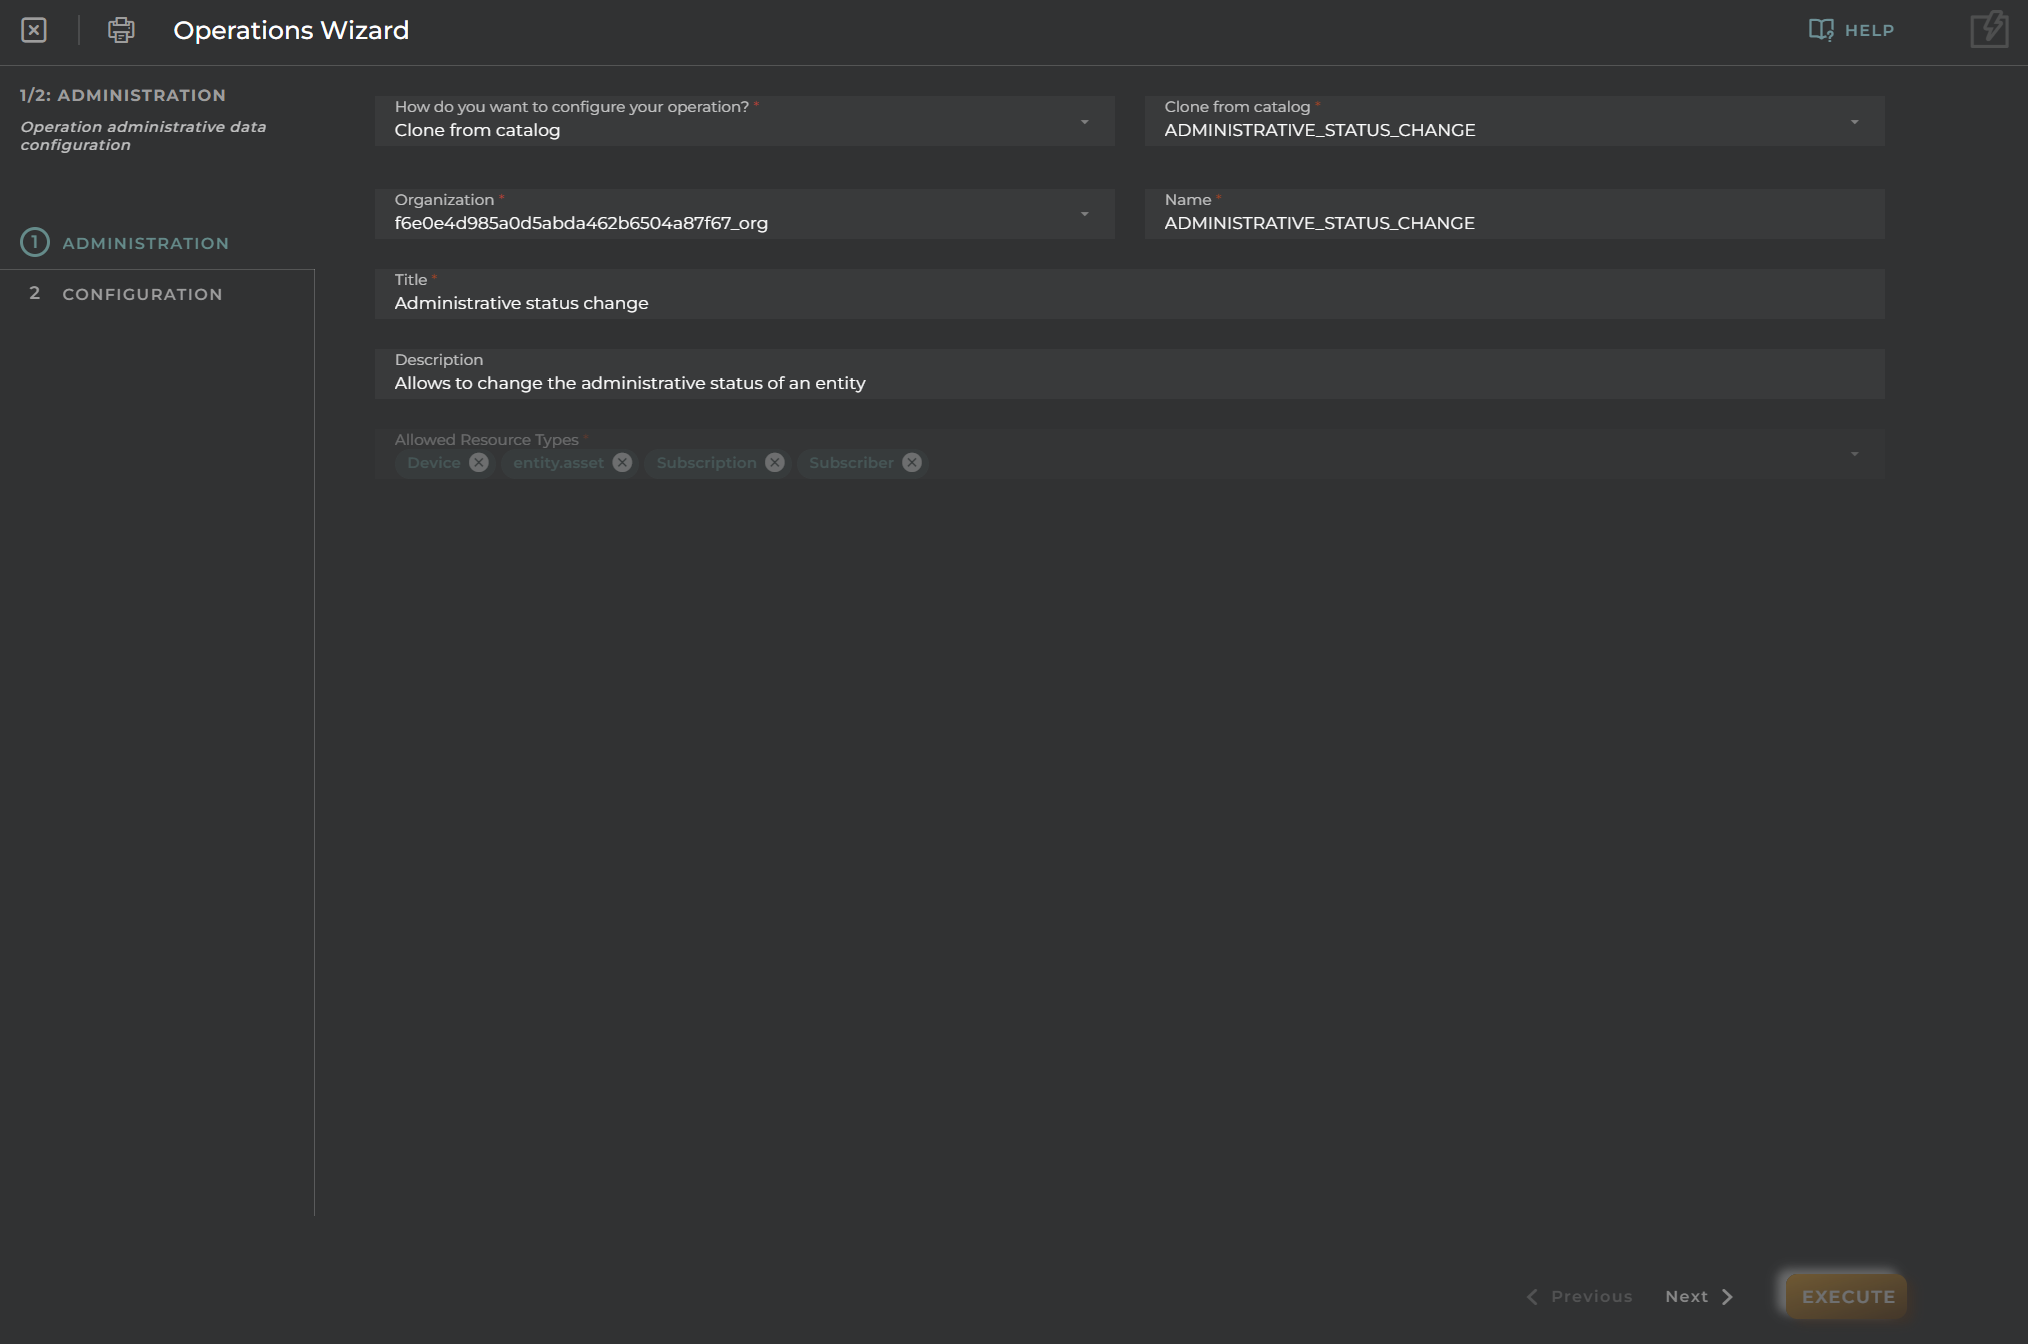
Administration
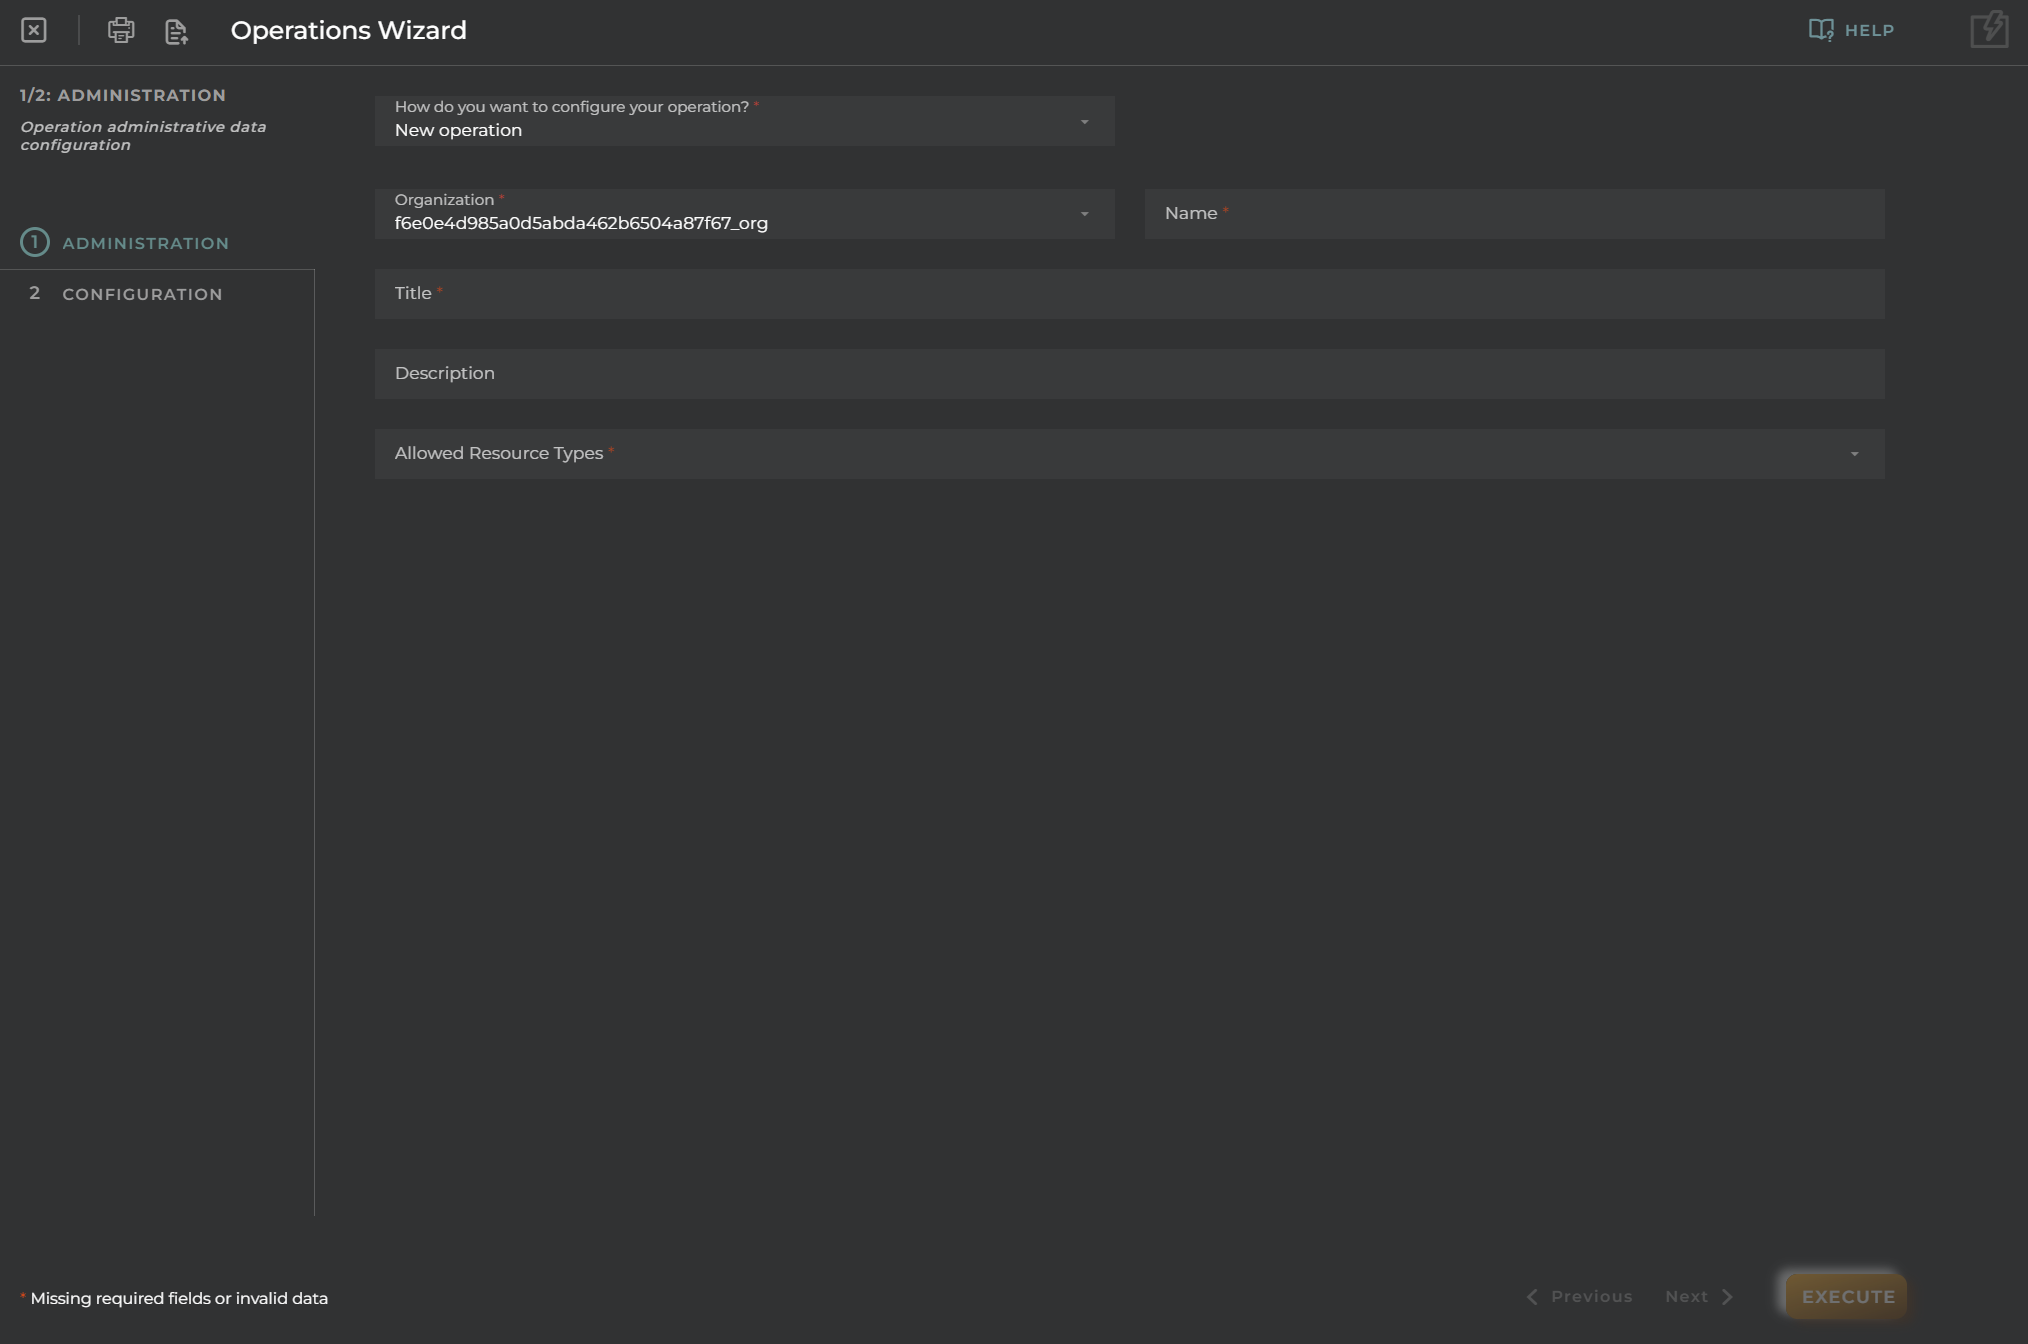
Essential data for the registration and identification of an operation on the platform.
Operations can either be new or cloned. However, existing operations will predominantly be used for cloning and subsequent modification.
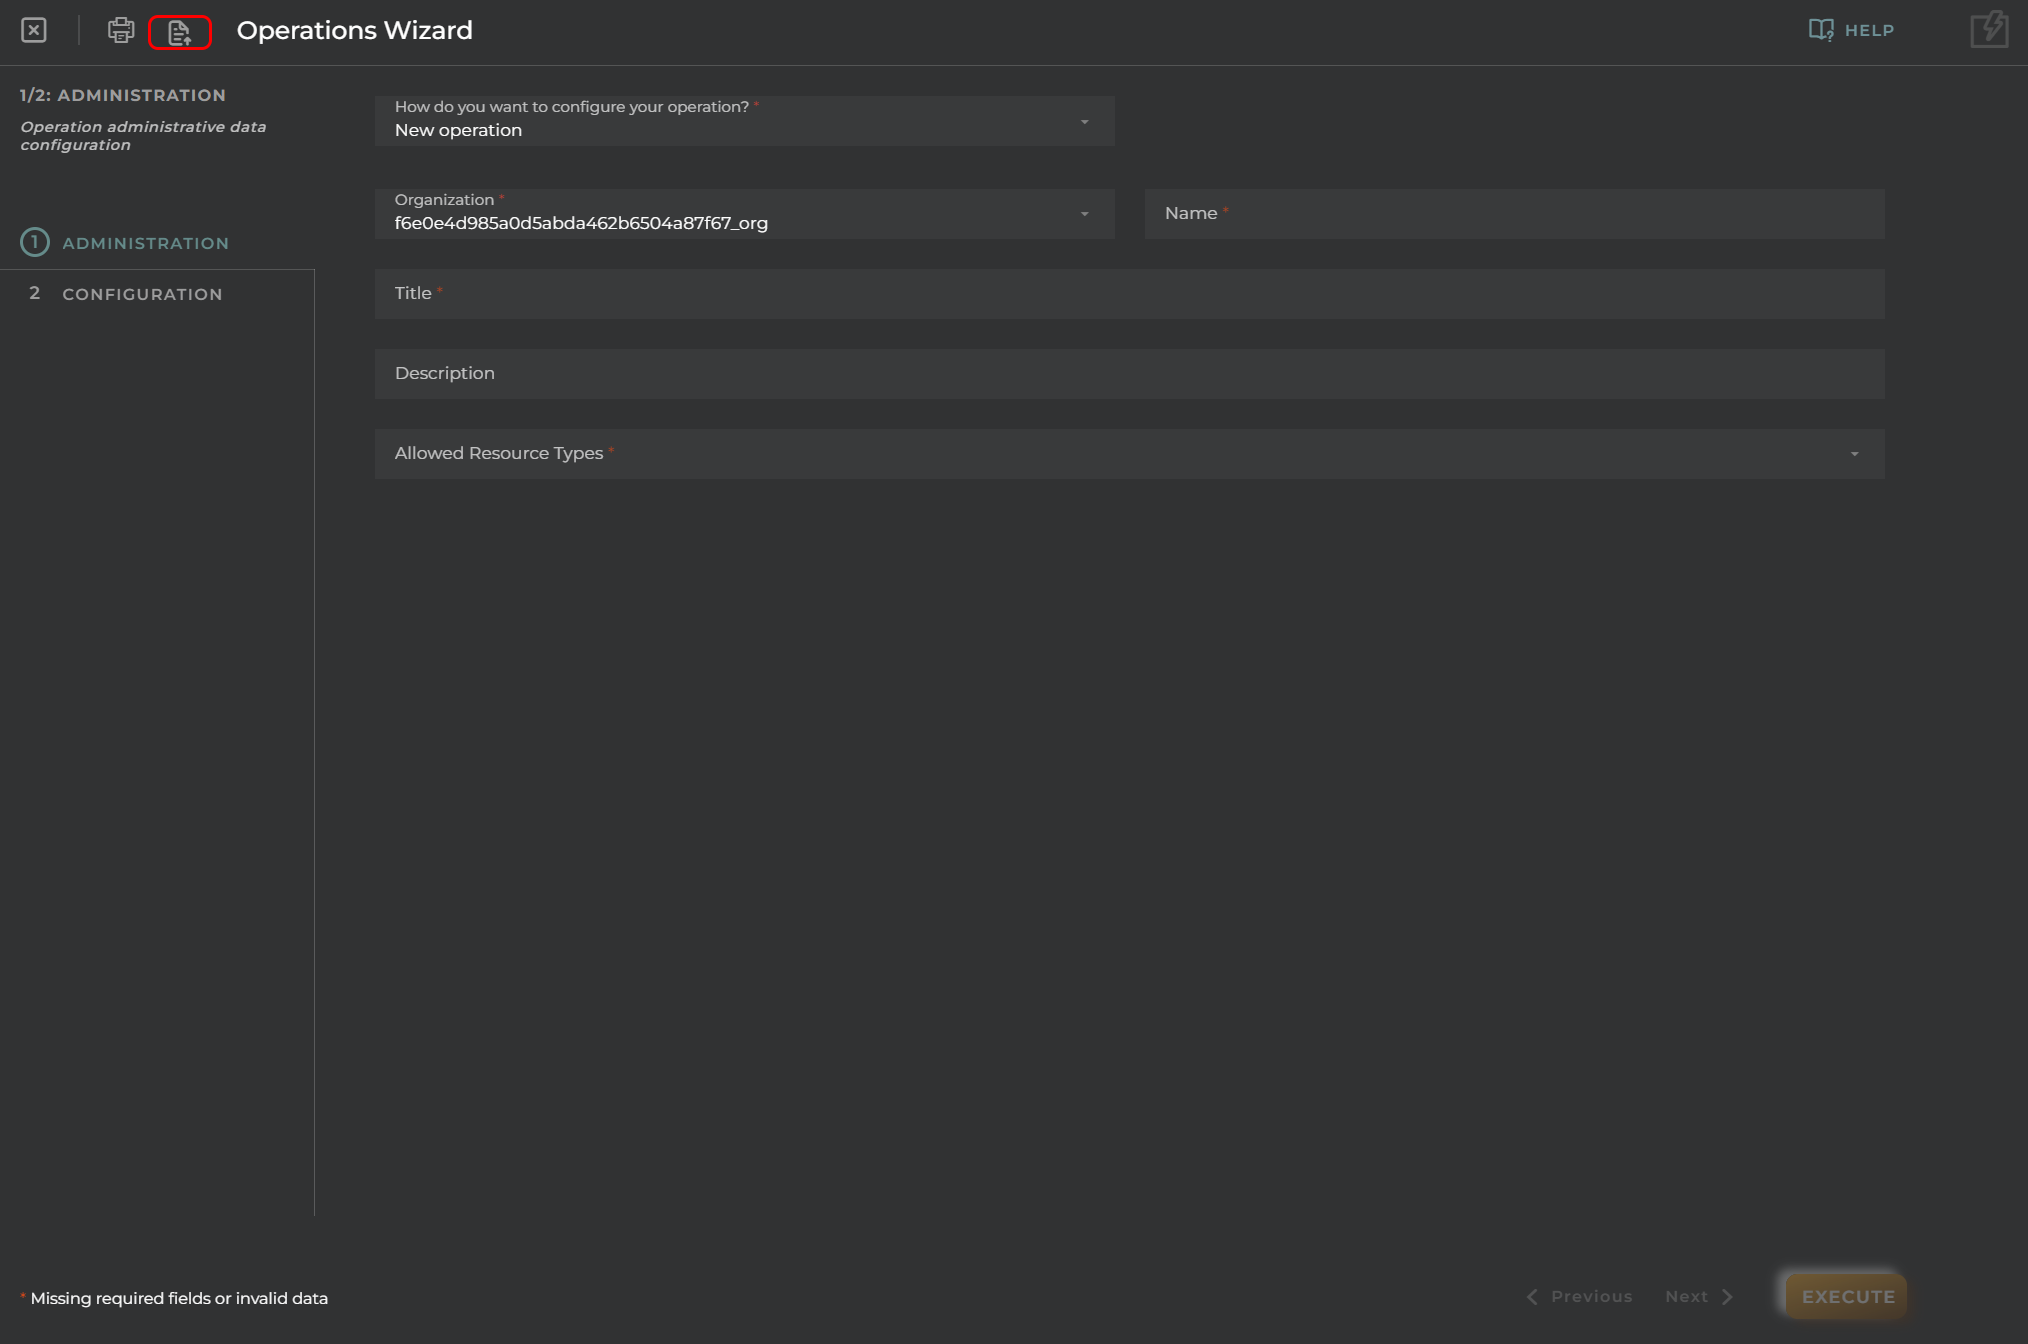
New Operation
Creates a customized operation, and in this case, there is the option to import and export JSON. In a cloned operation, the JSON option will not be available.
Clone Operation
In this case, we will clone an operation to change the state of administration.
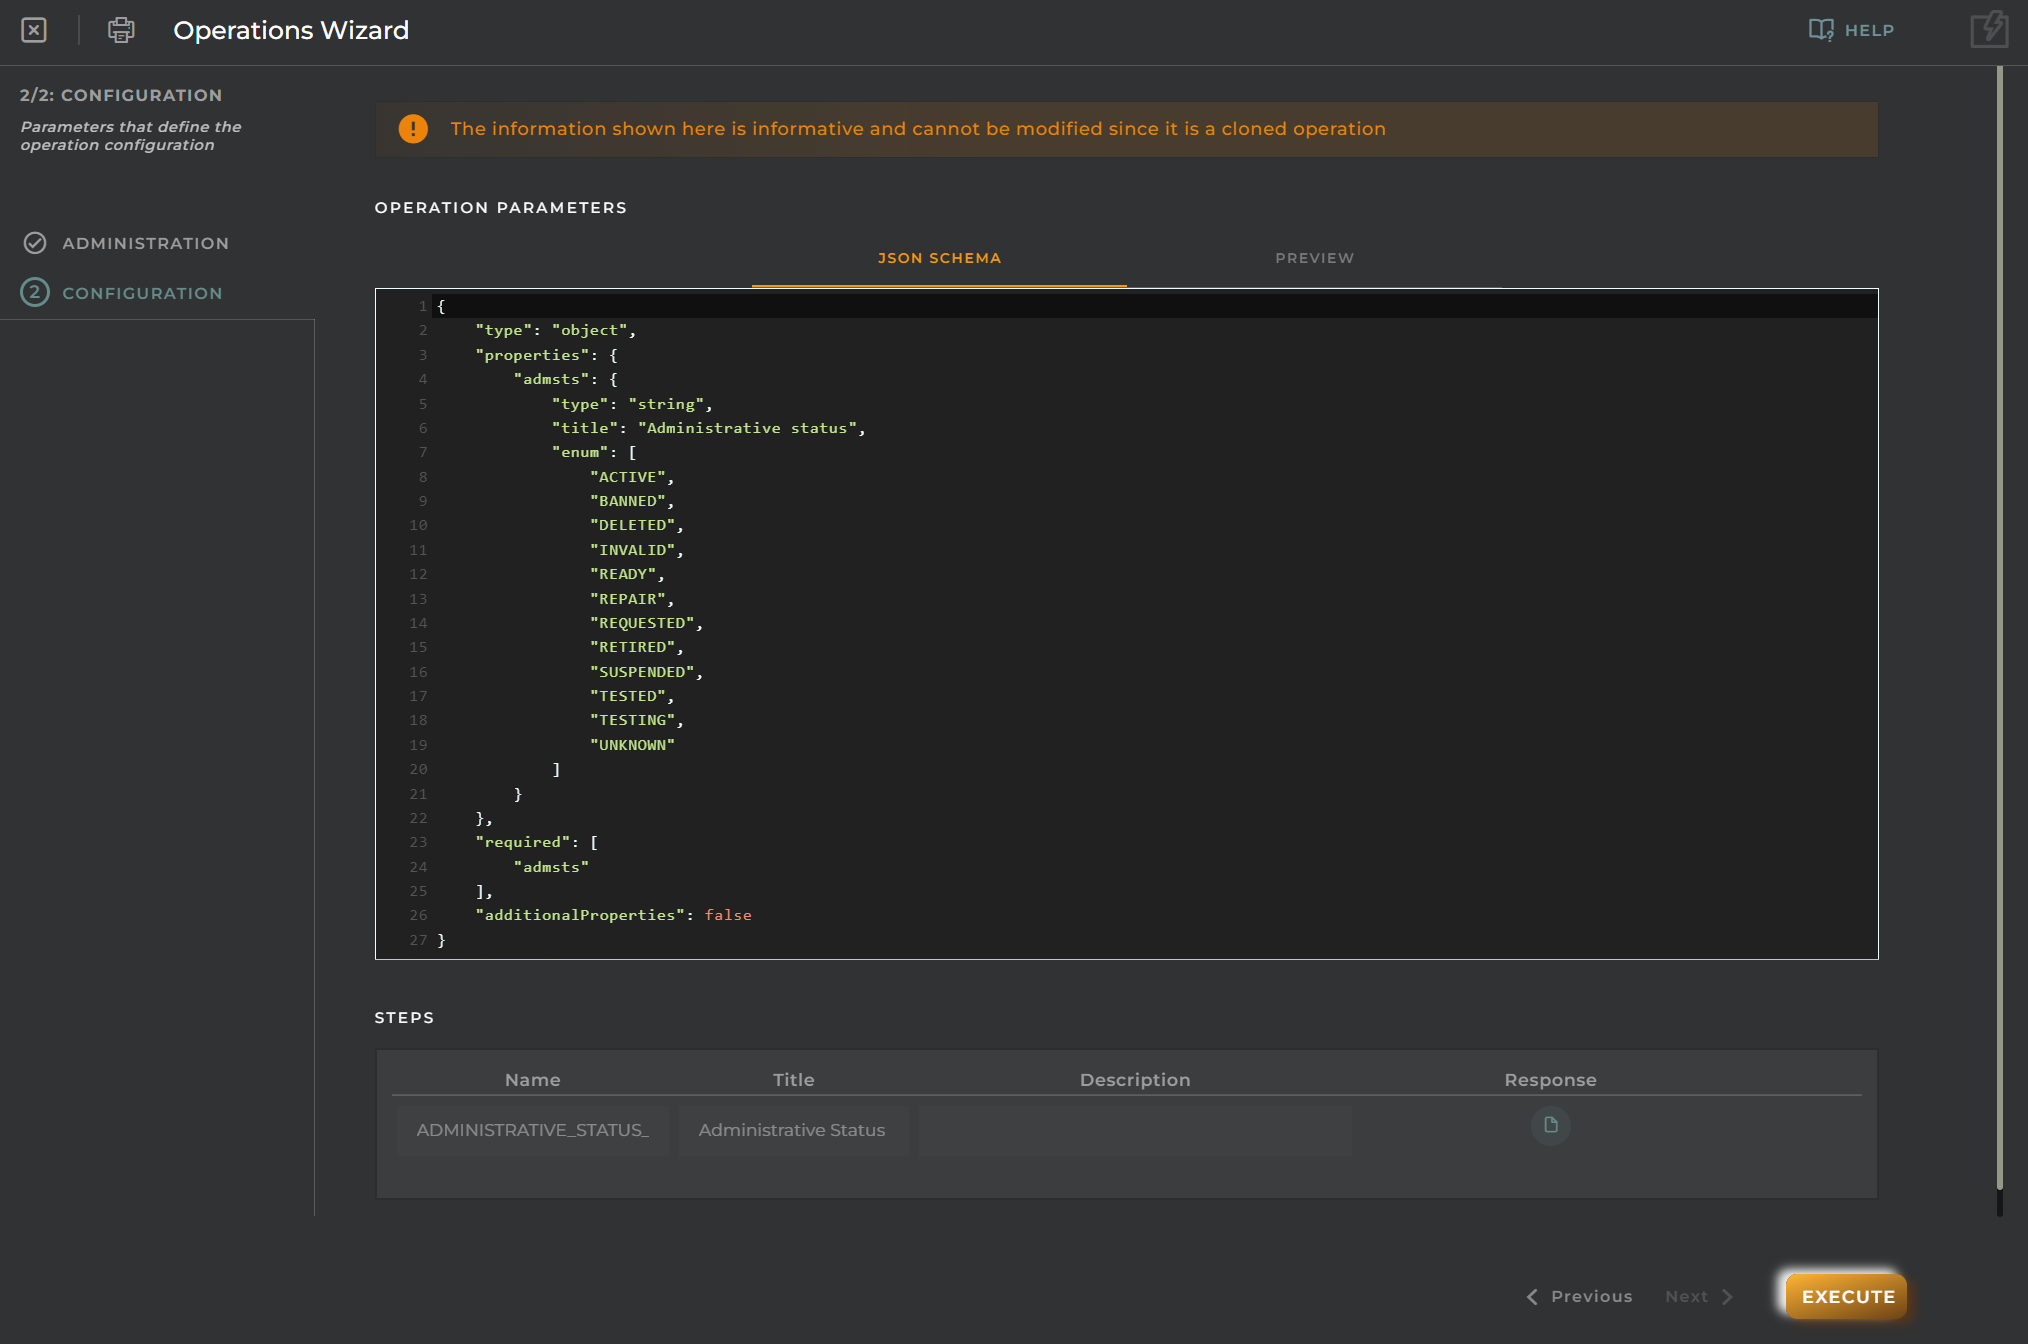
Configuration
Parameters that define the operation’s configuration. By default, for a cloned operation, the JSON Schema field is already filled. You can view the field’s configuration.
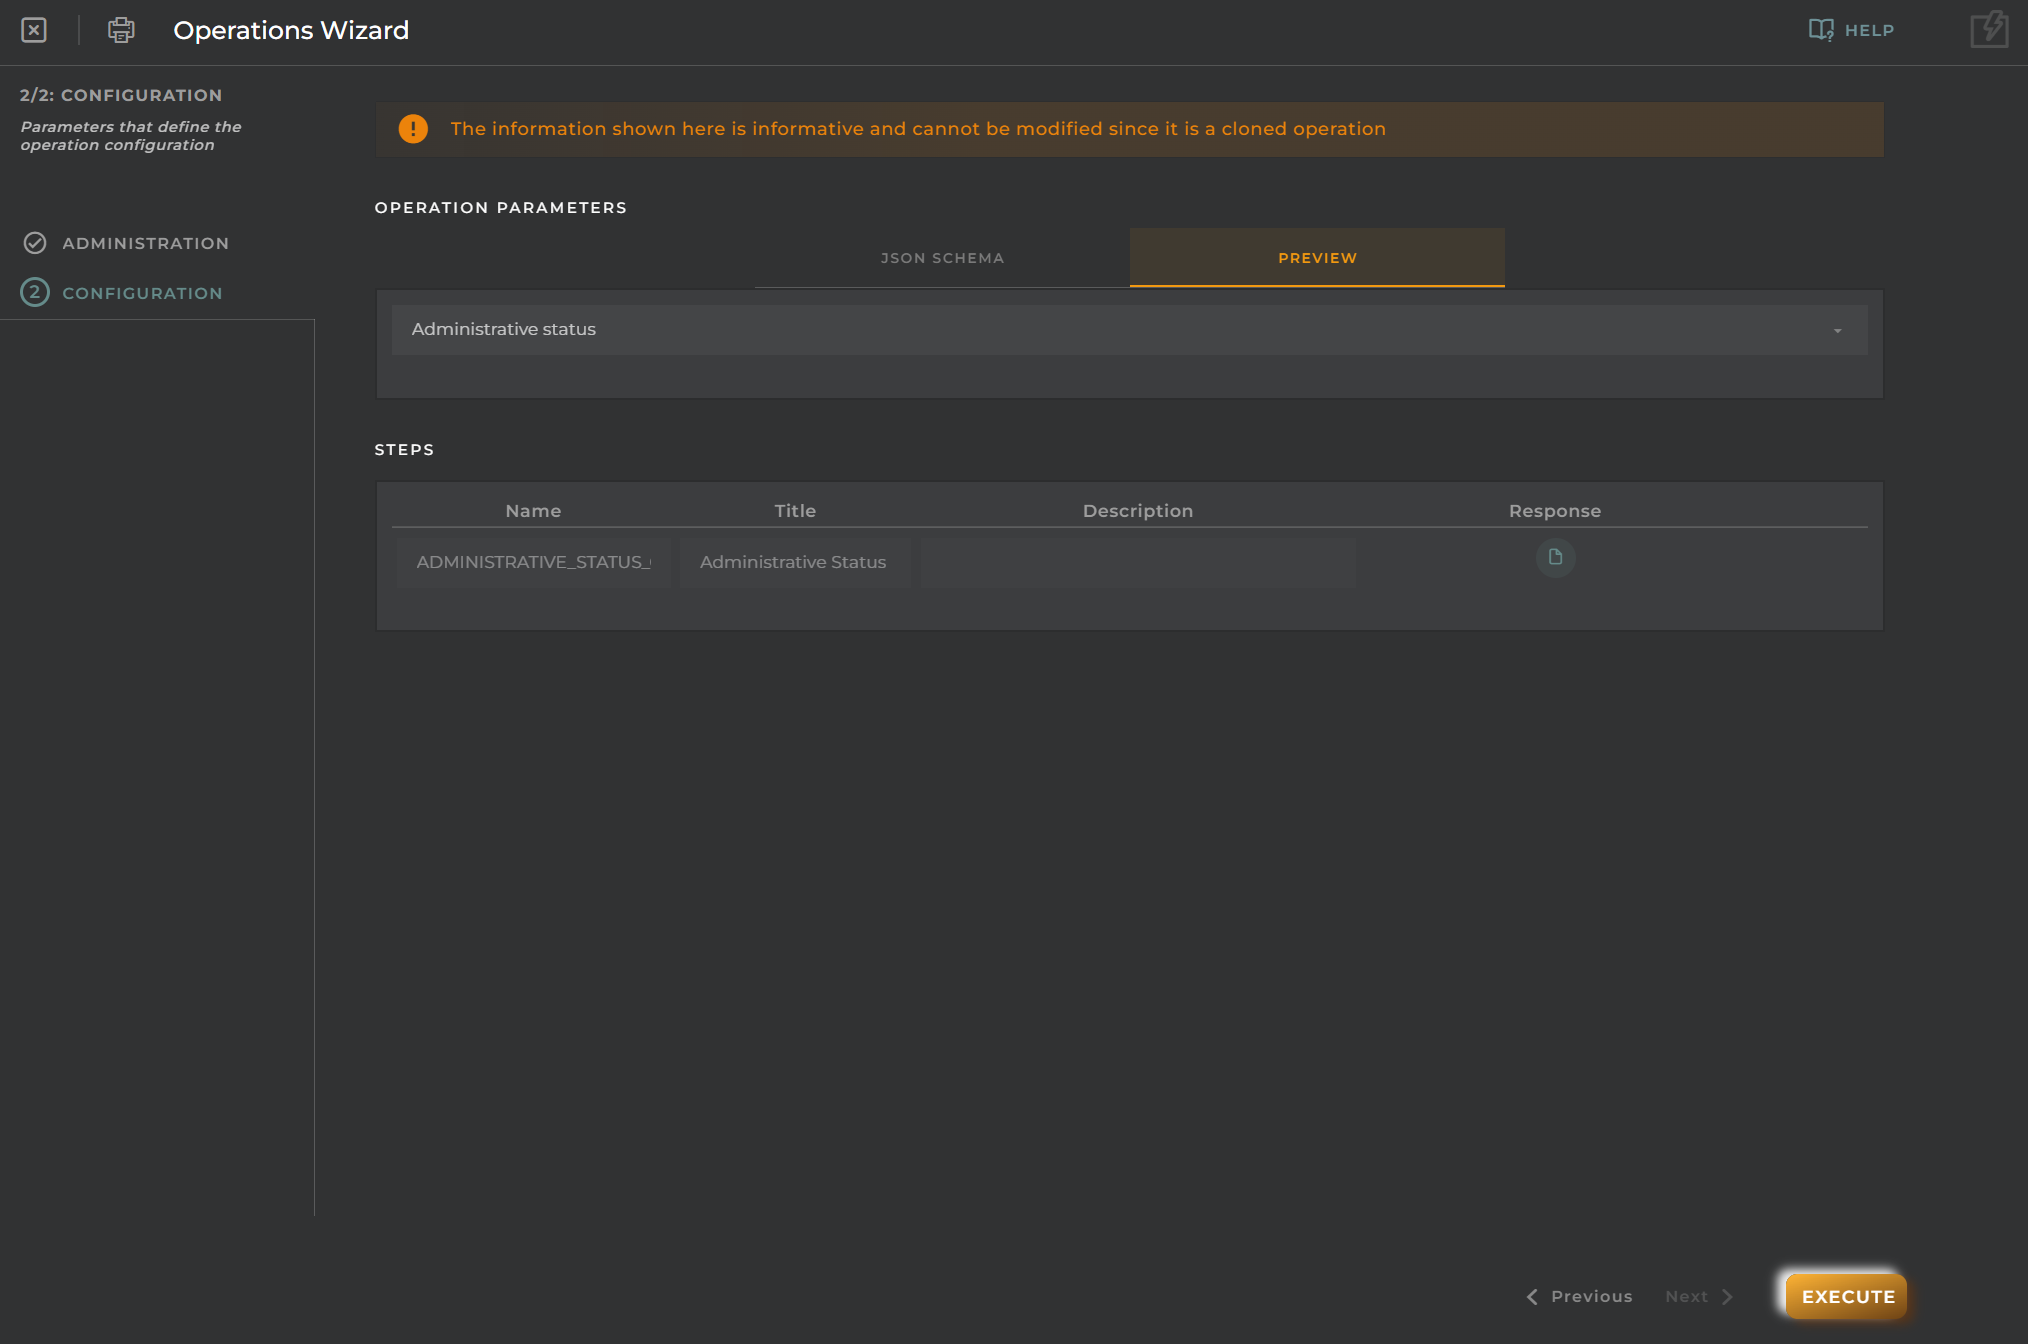
In the Preview section, the result of the JSON Schema configuration will be displayed.
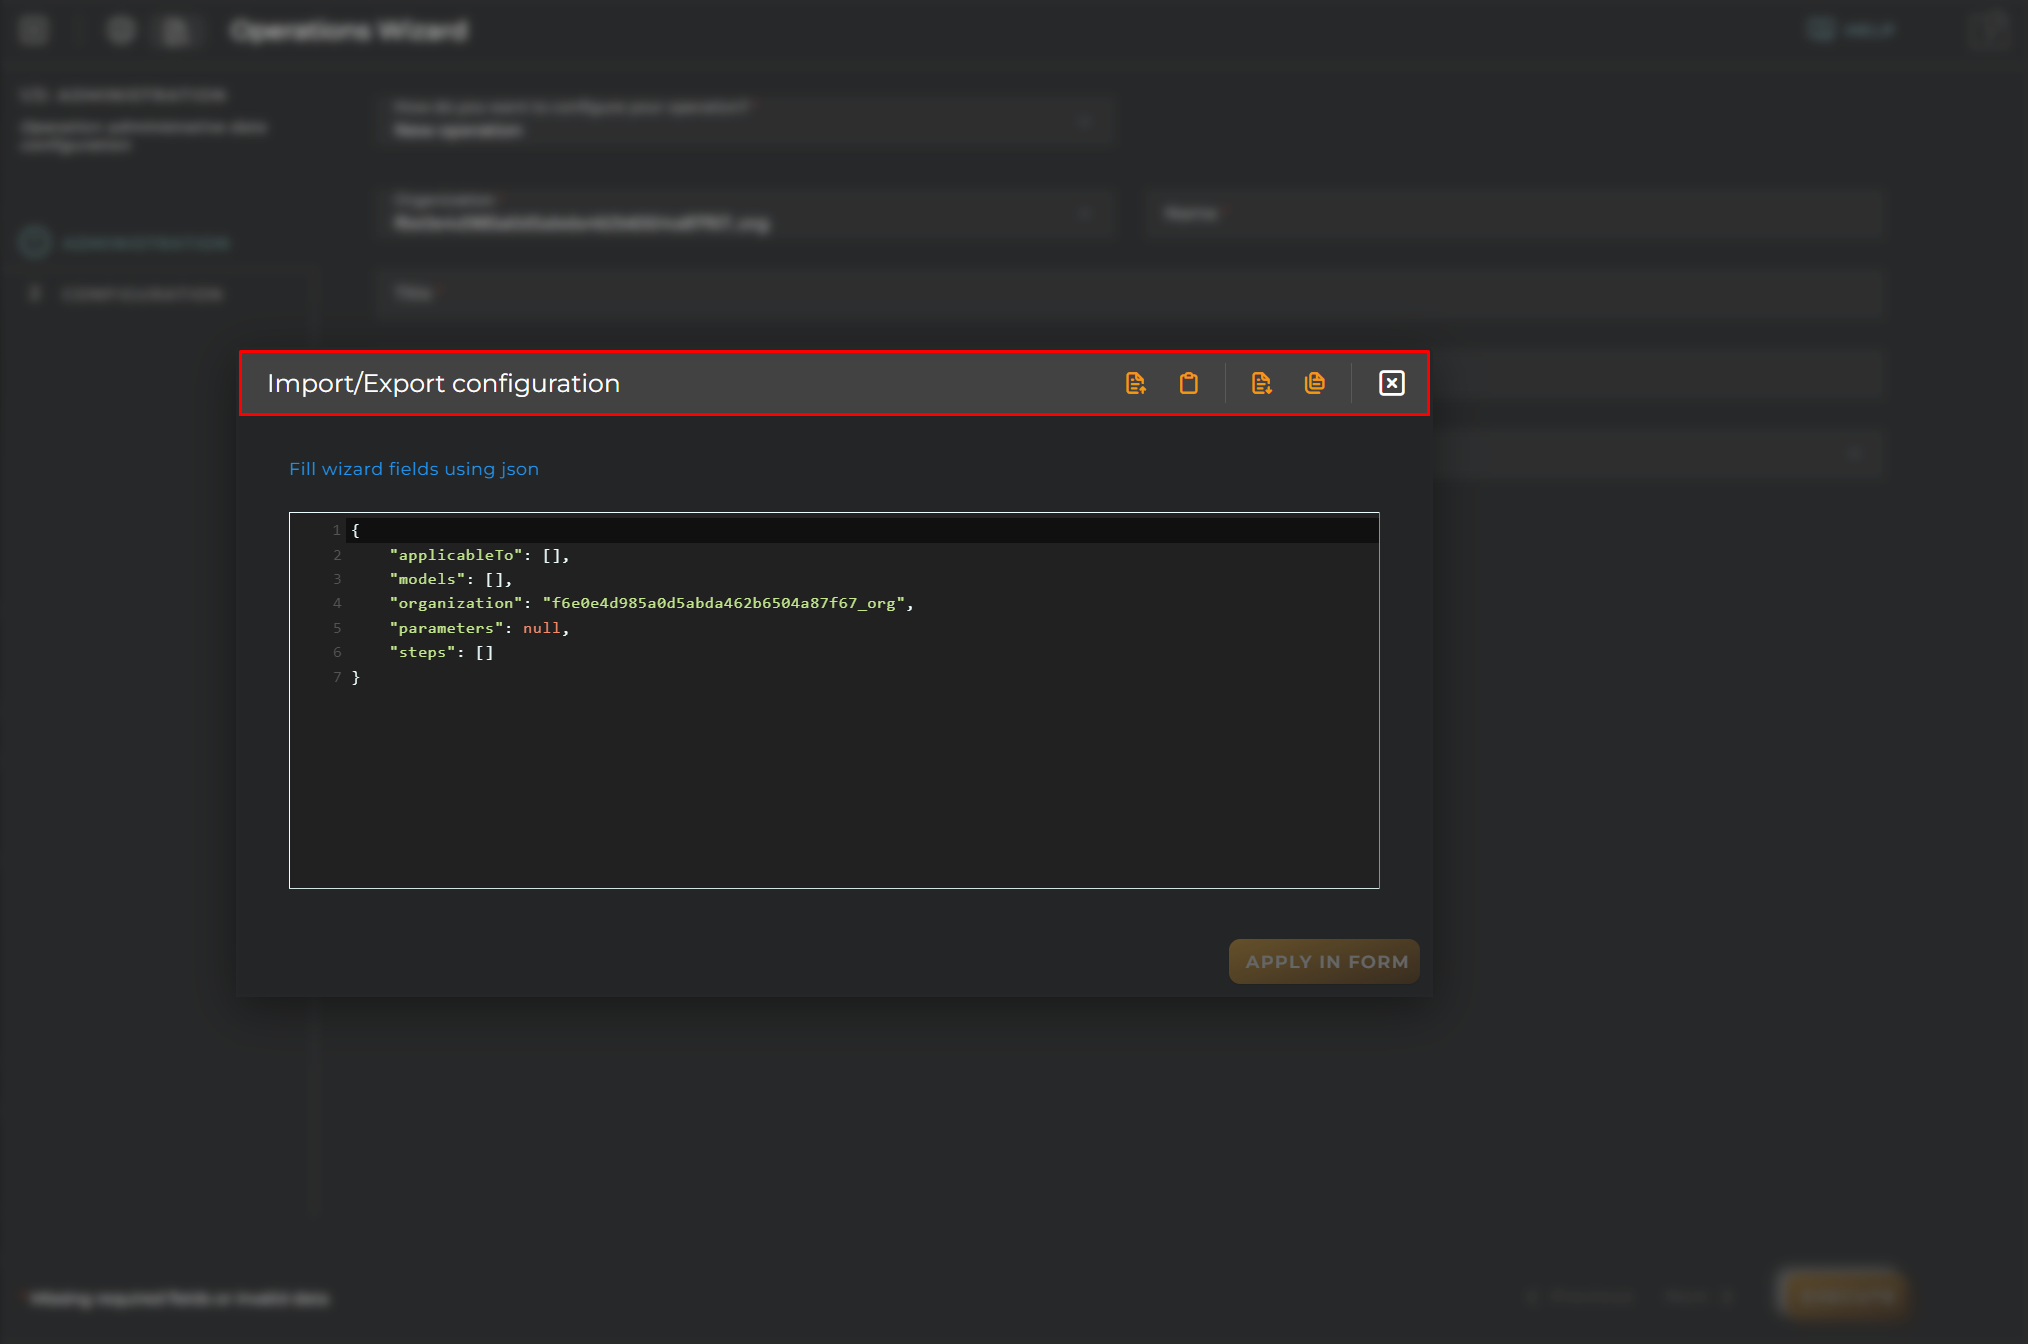
Import/Export Configuration
Allows you to import and export the wizard’s configuration via JSON. Clone operations do not allow the use of json import and export.
When accessing the import and export functionality, it displays a window with various actions. Additionally, it presents the configuration of the wizard in JSON format.
The available actions are as follows:
Upload Json: Uploads a JSON file and replaces the previous JSON configuration.
Paste from clipboard: Pastes JSON data from the clipboard and replaces the previous JSON configuration.
Download Json: Downloads the JSON configuration as a file with the wizard’s name.
Copy to clipboard: Copies the JSON configuration to the clipboard.
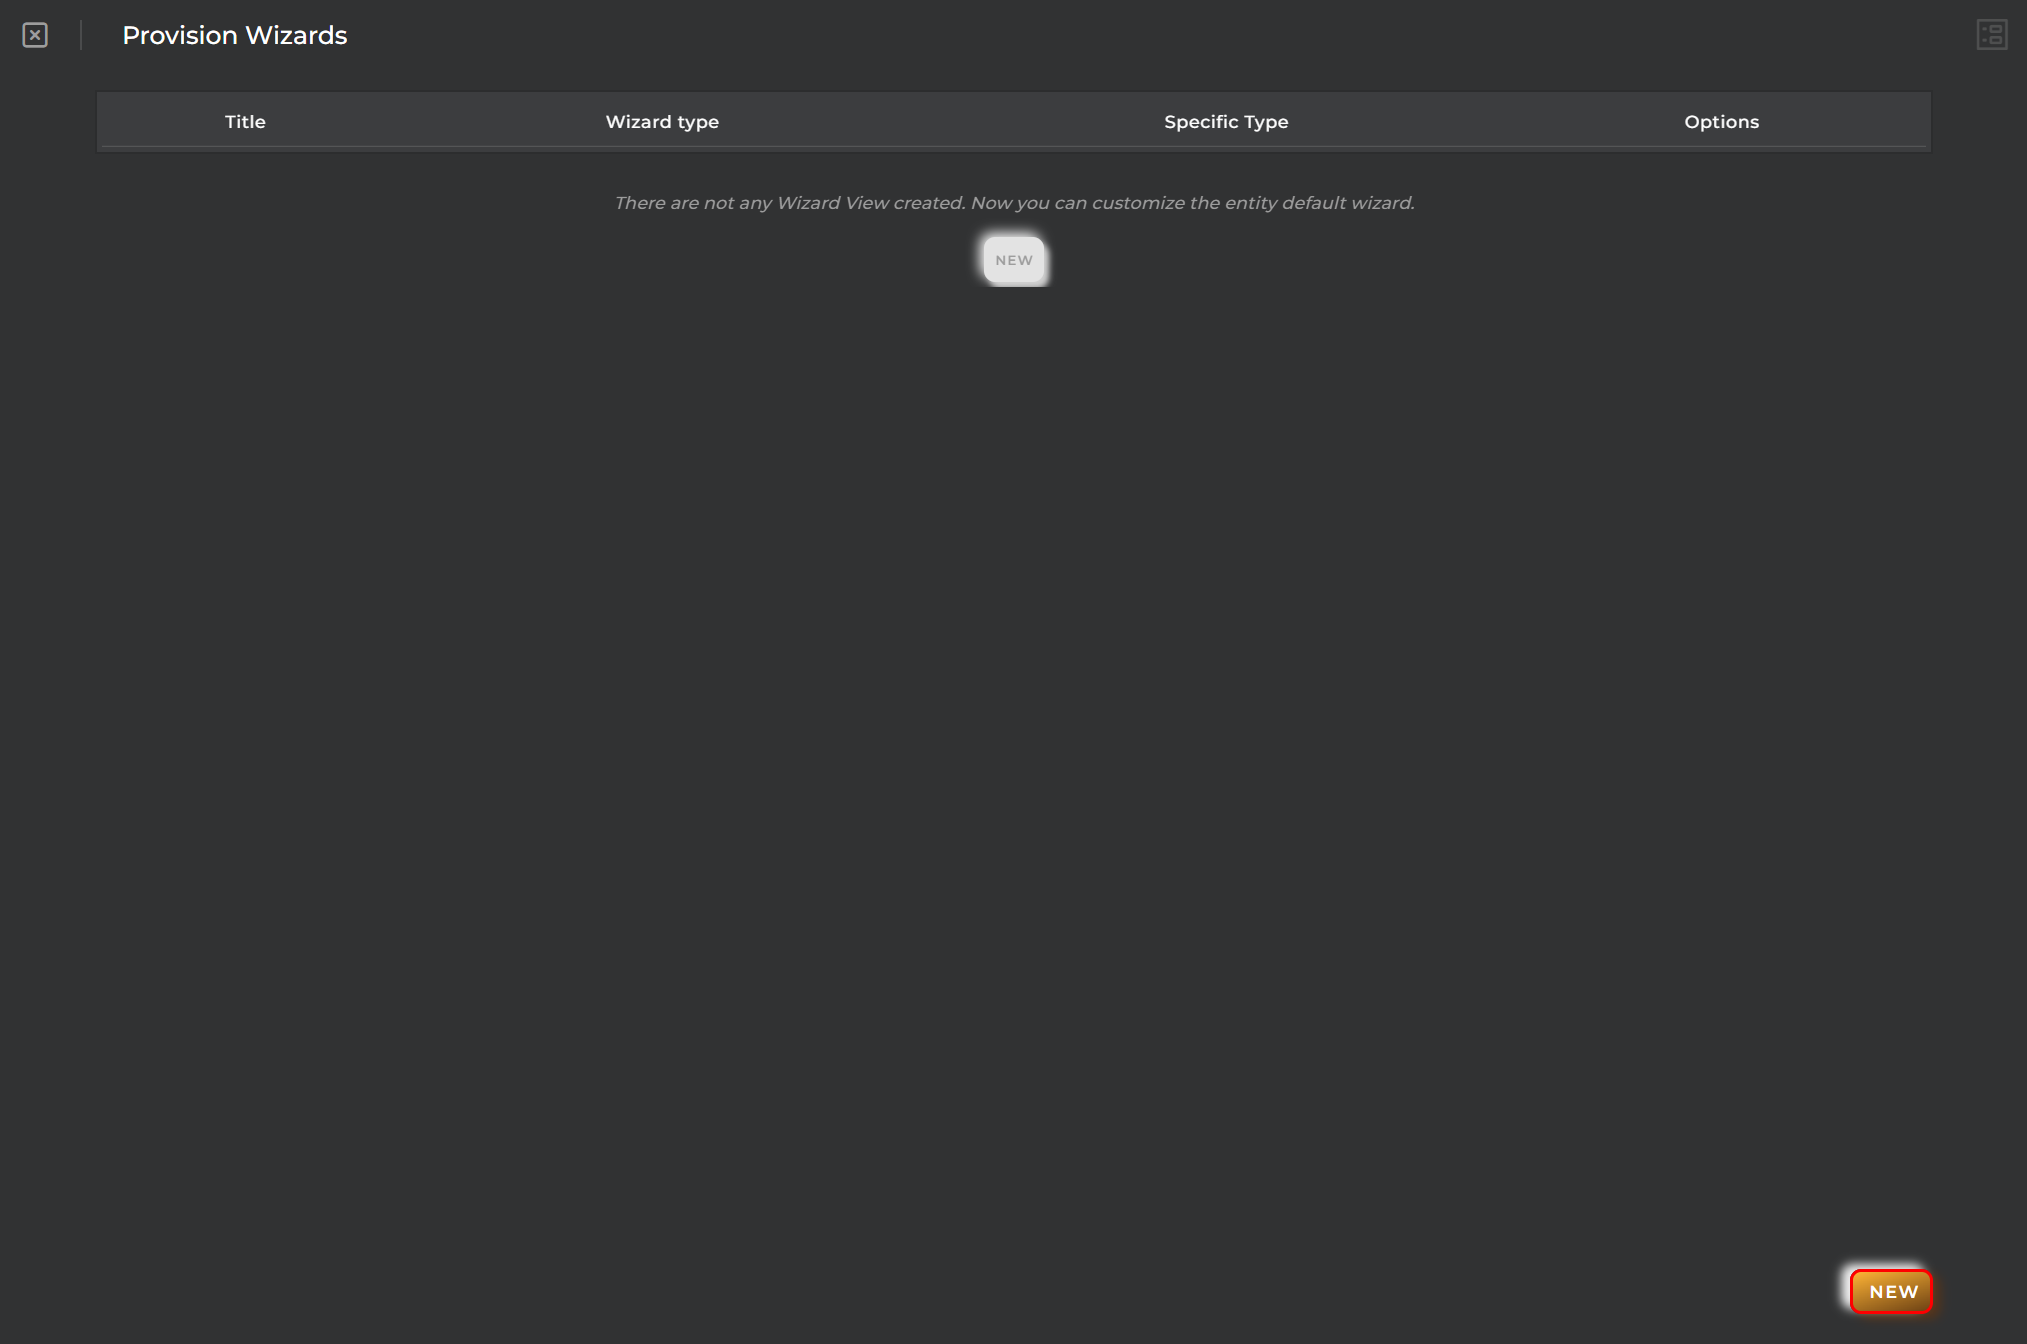
Provision Wizards
This wizard allows us to create provision wizards.
Steps
Provision Wizard
Allows you to view and edit a created wizard view. From this wizard, you can create a new one, which will open the Wizard: New window.
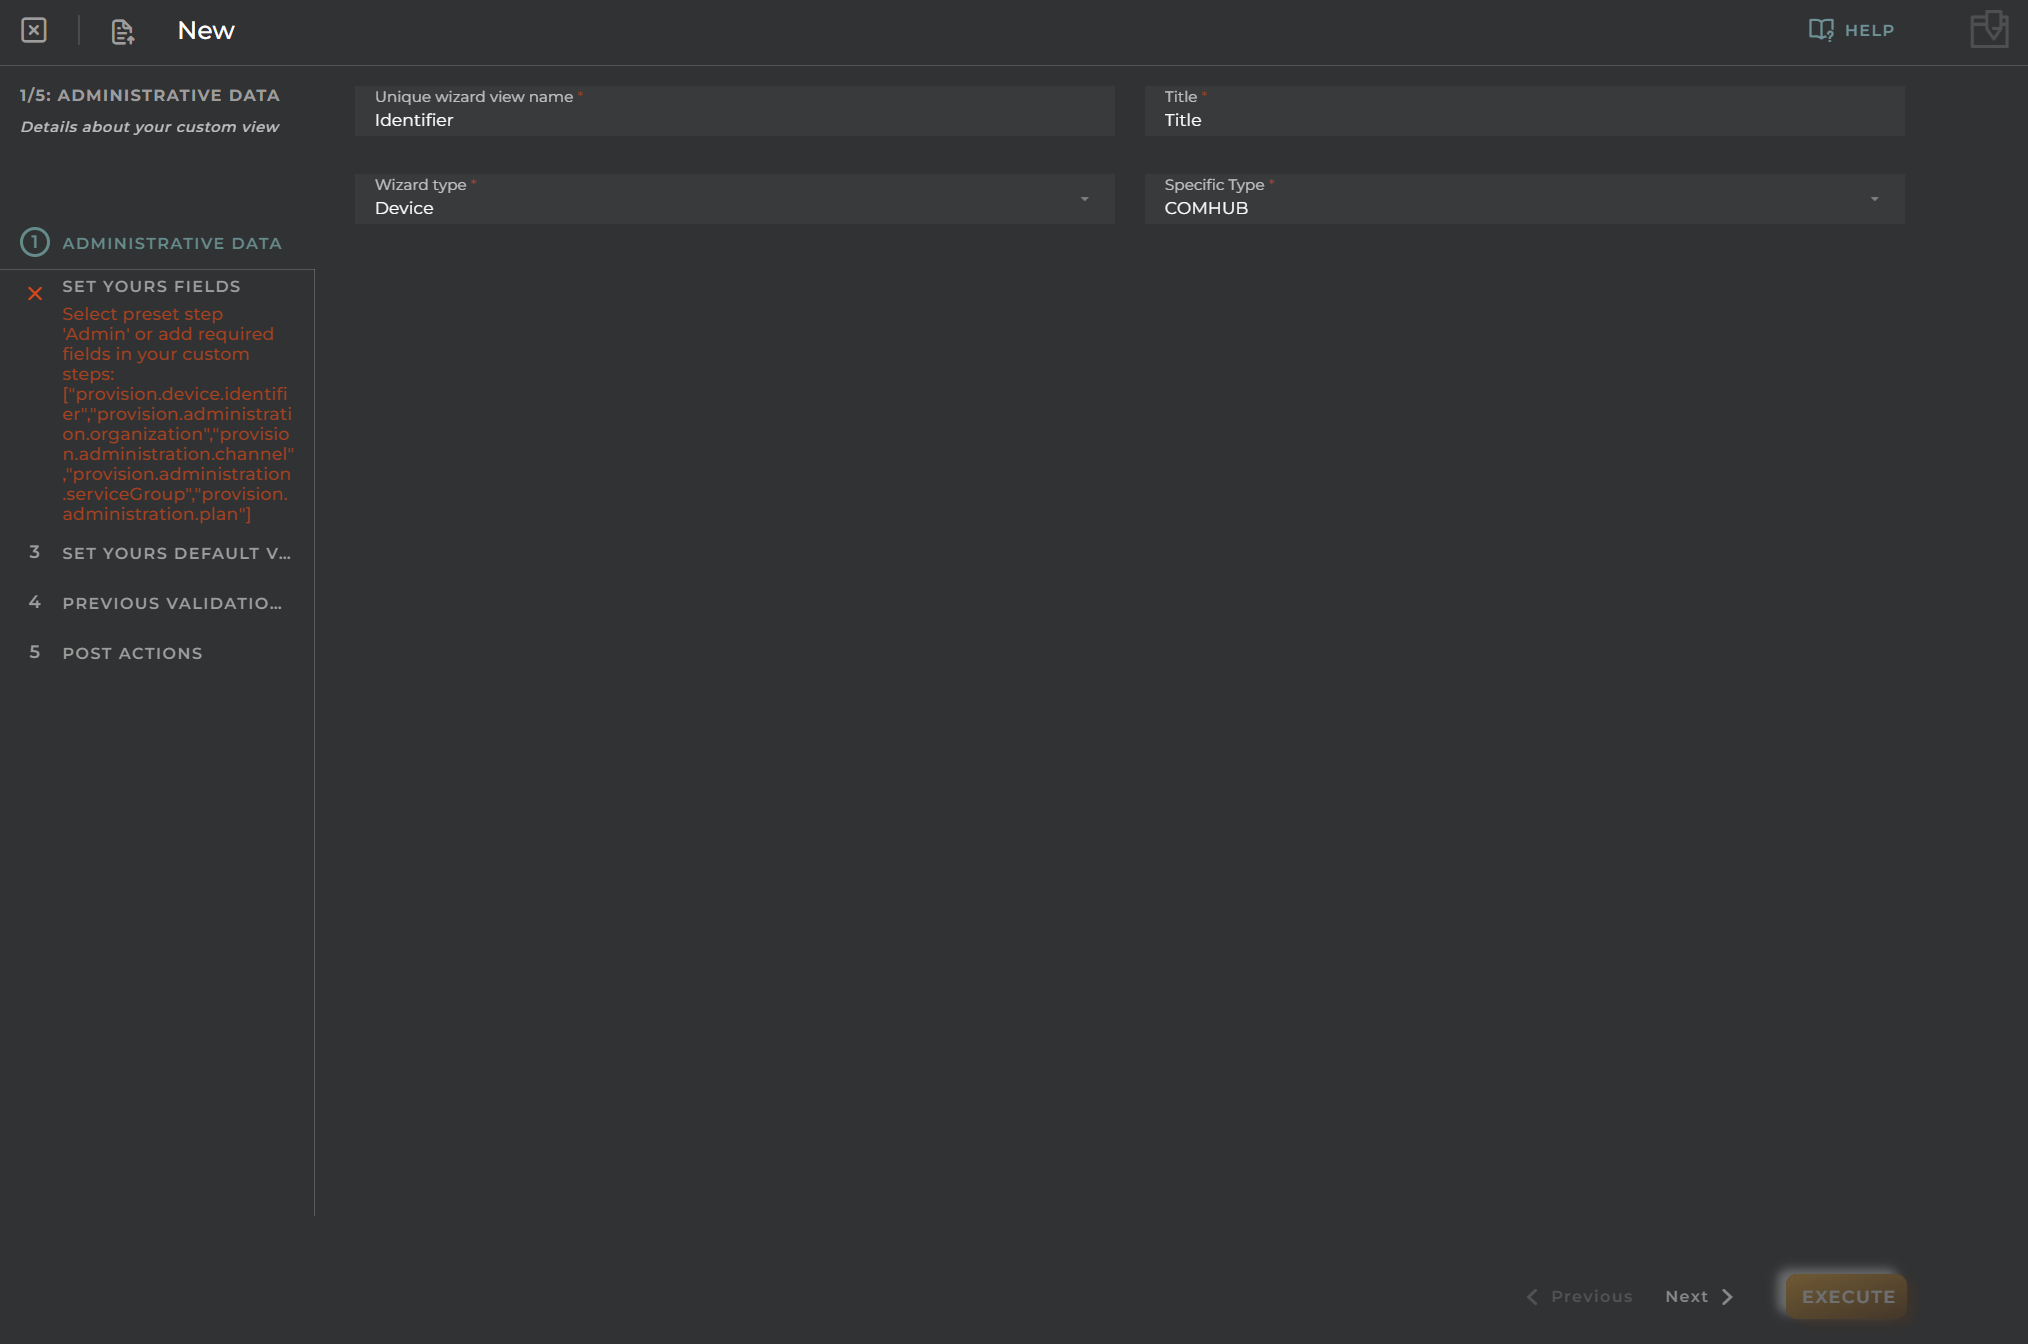
Administrative Data
Essential data for the registration and identification of a provision wizard in the platform.
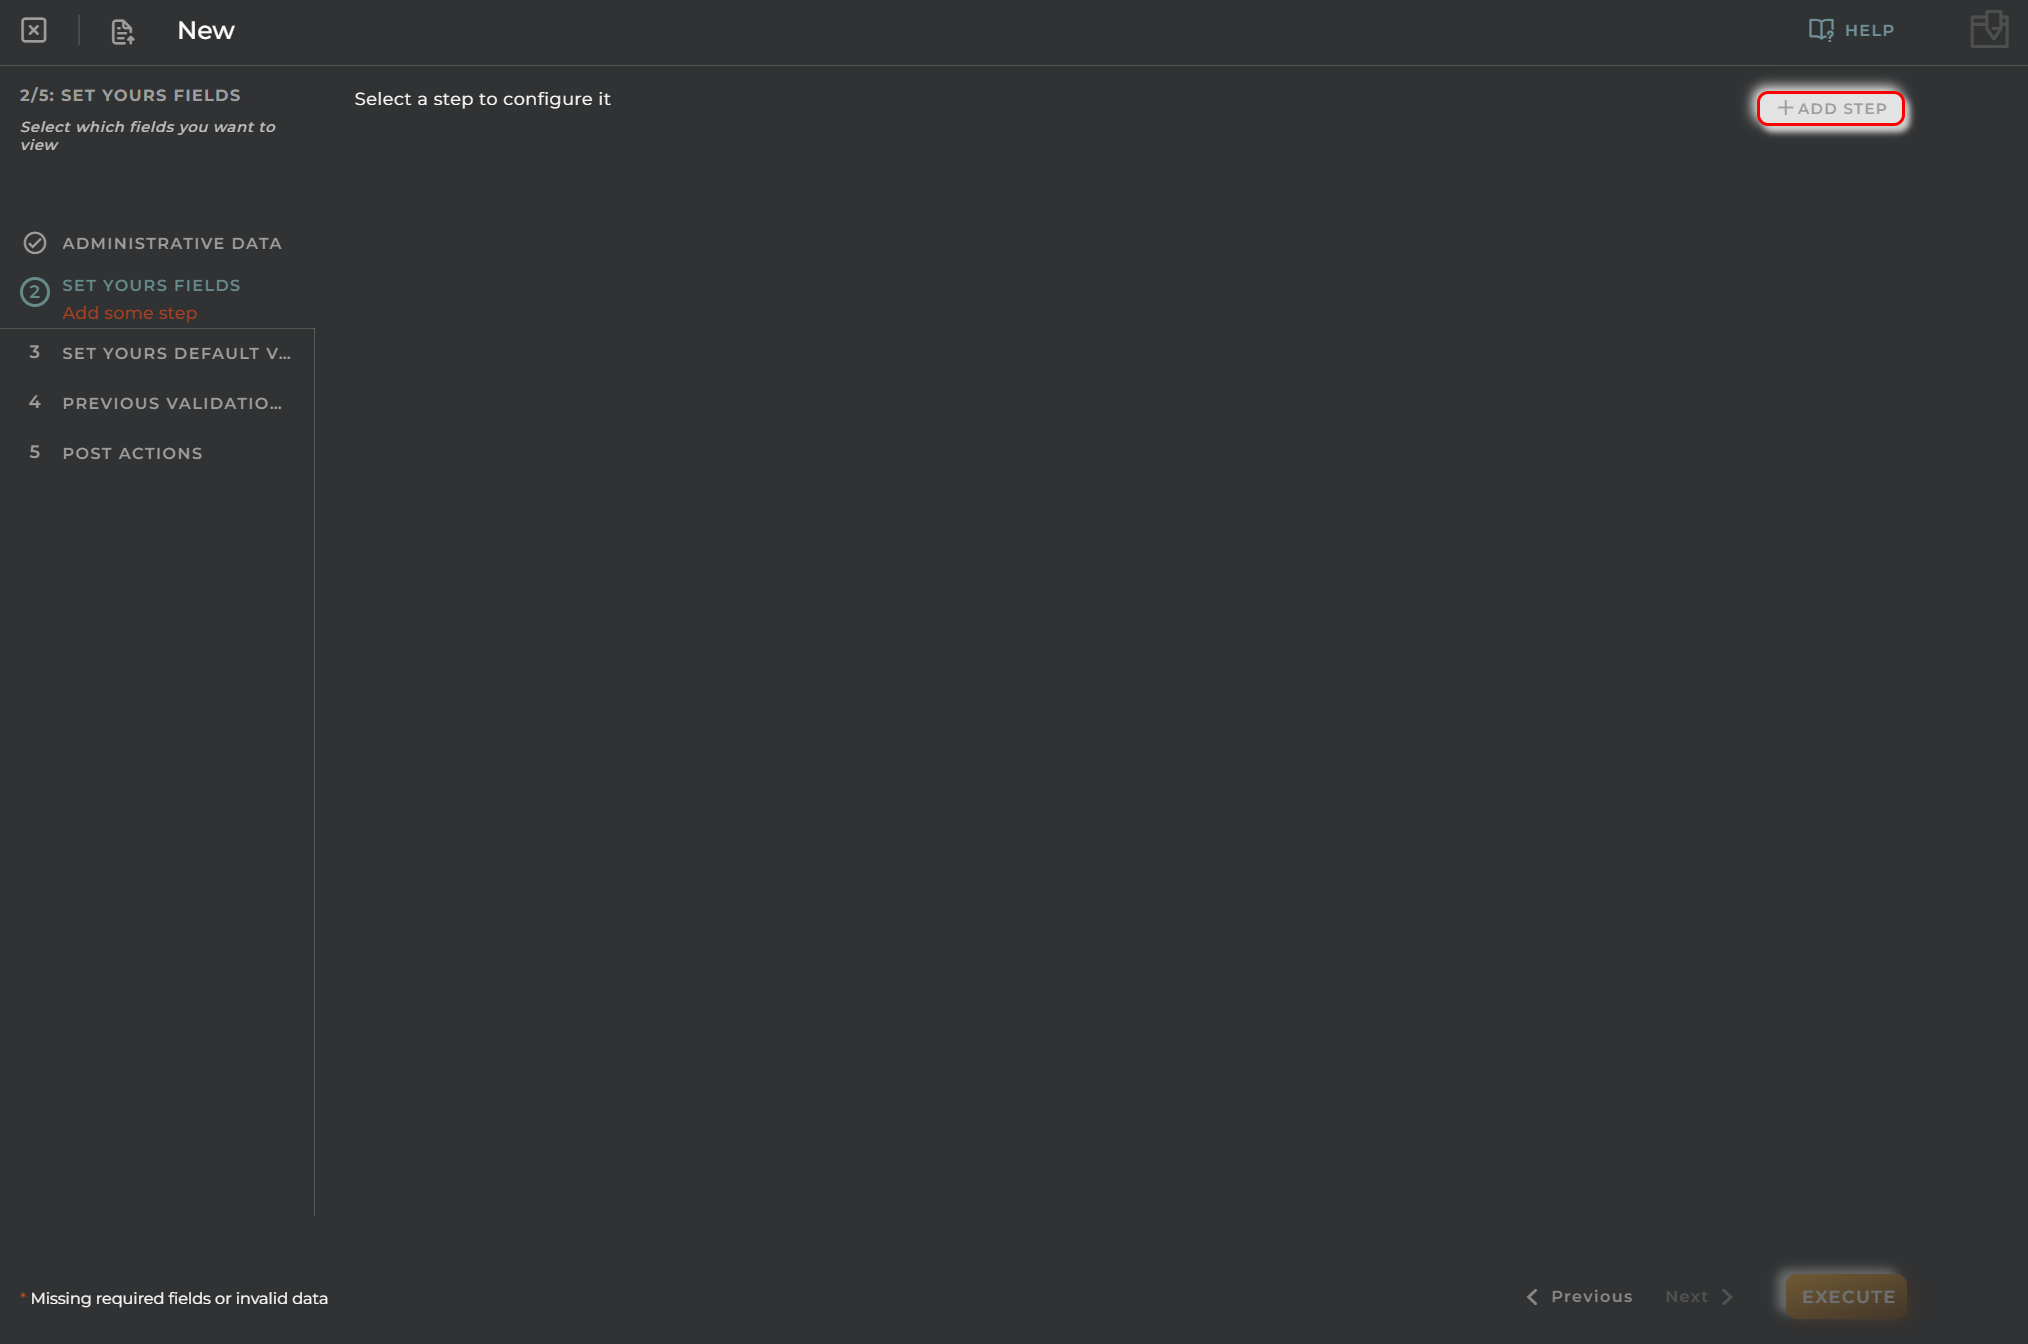
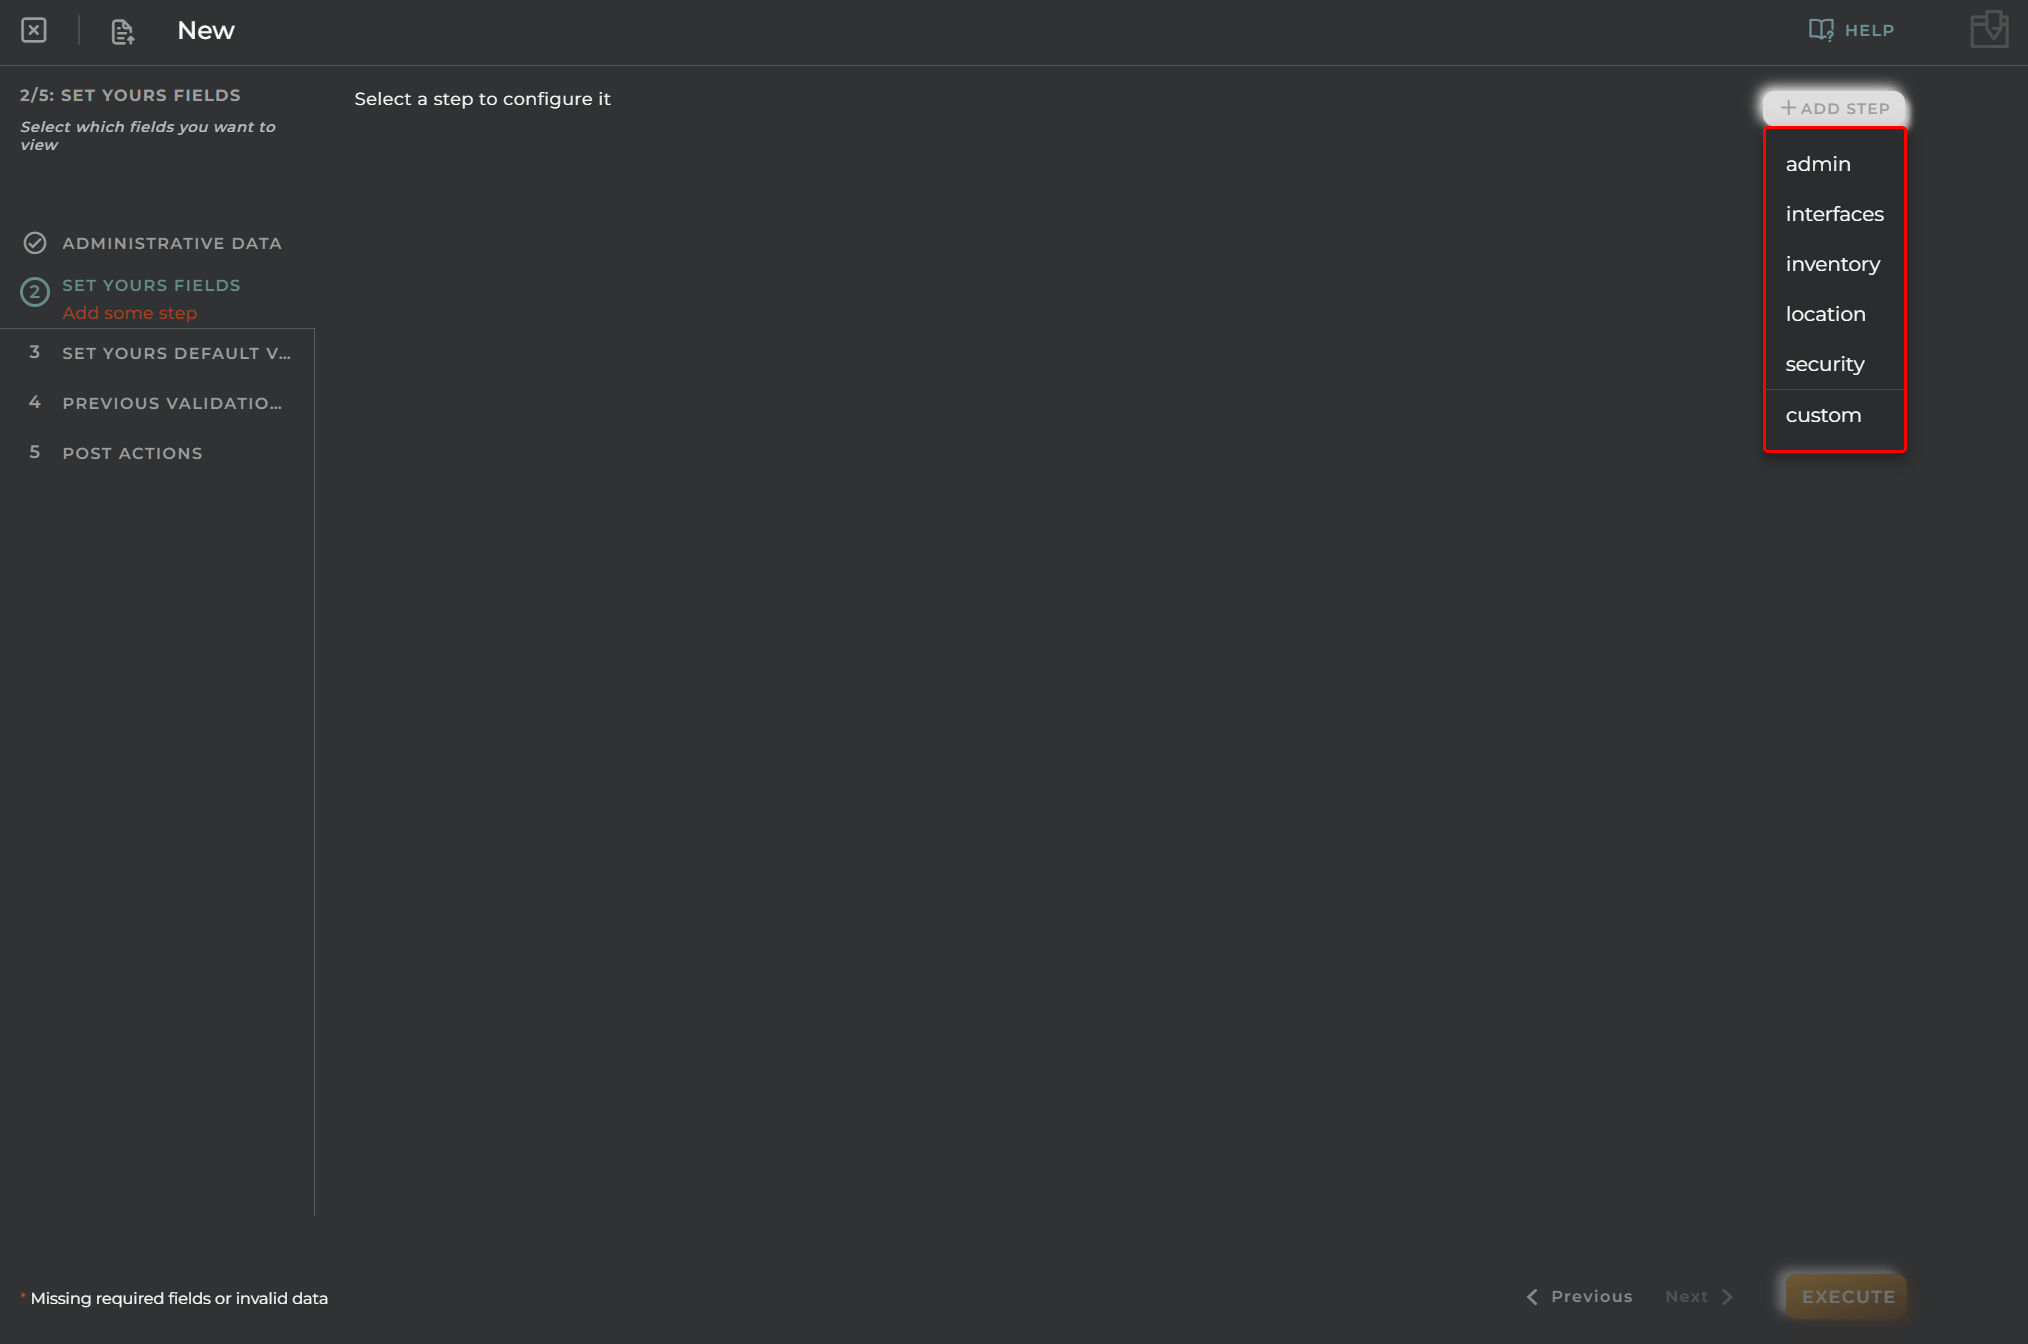
Set Your Fields
Add the customized steps that the wizard will have.
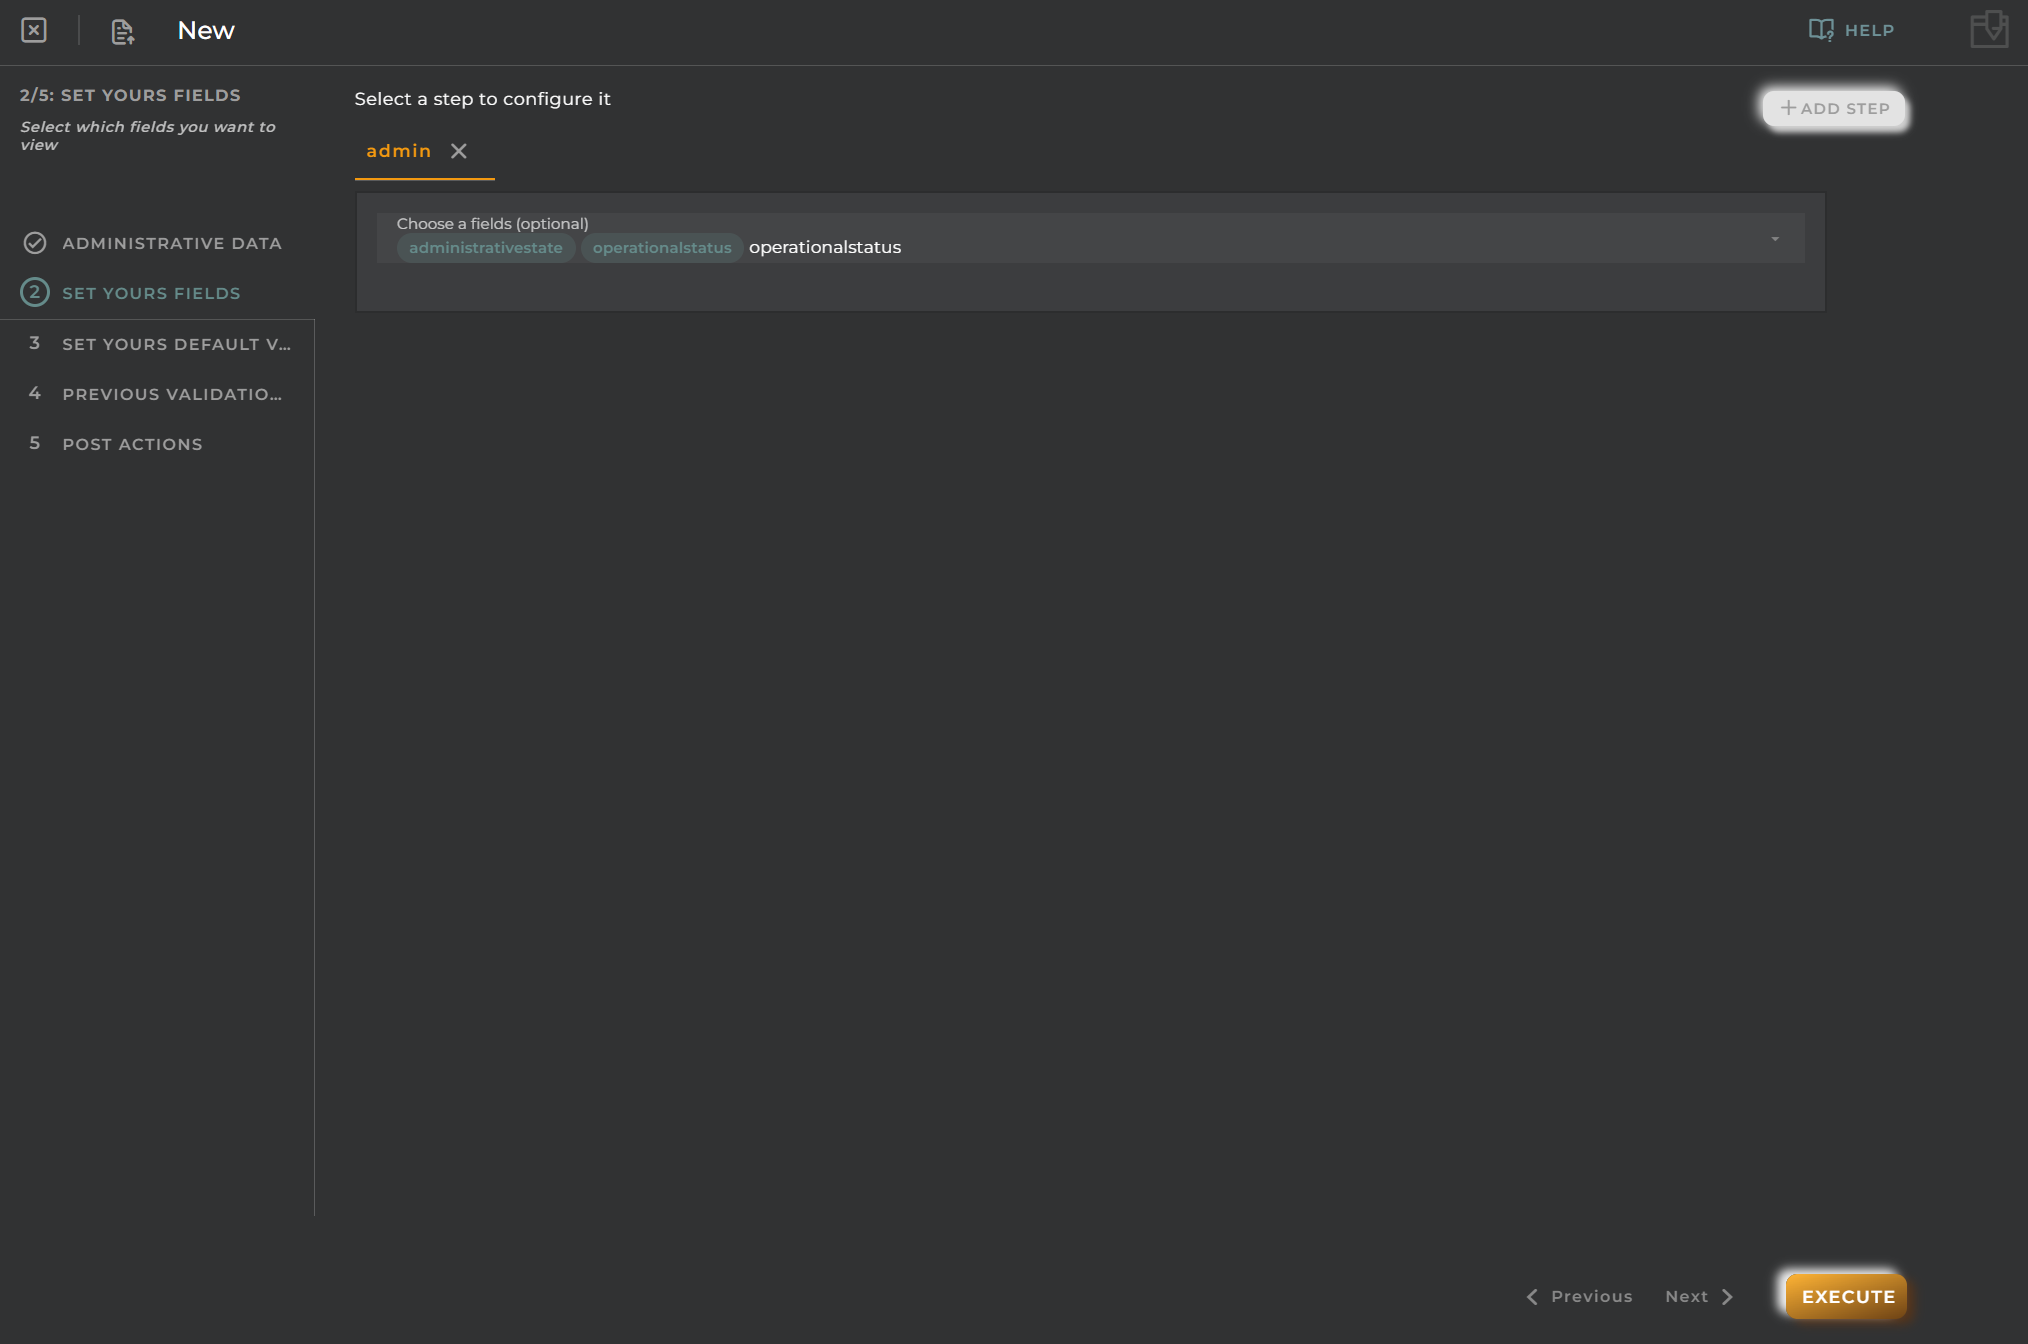
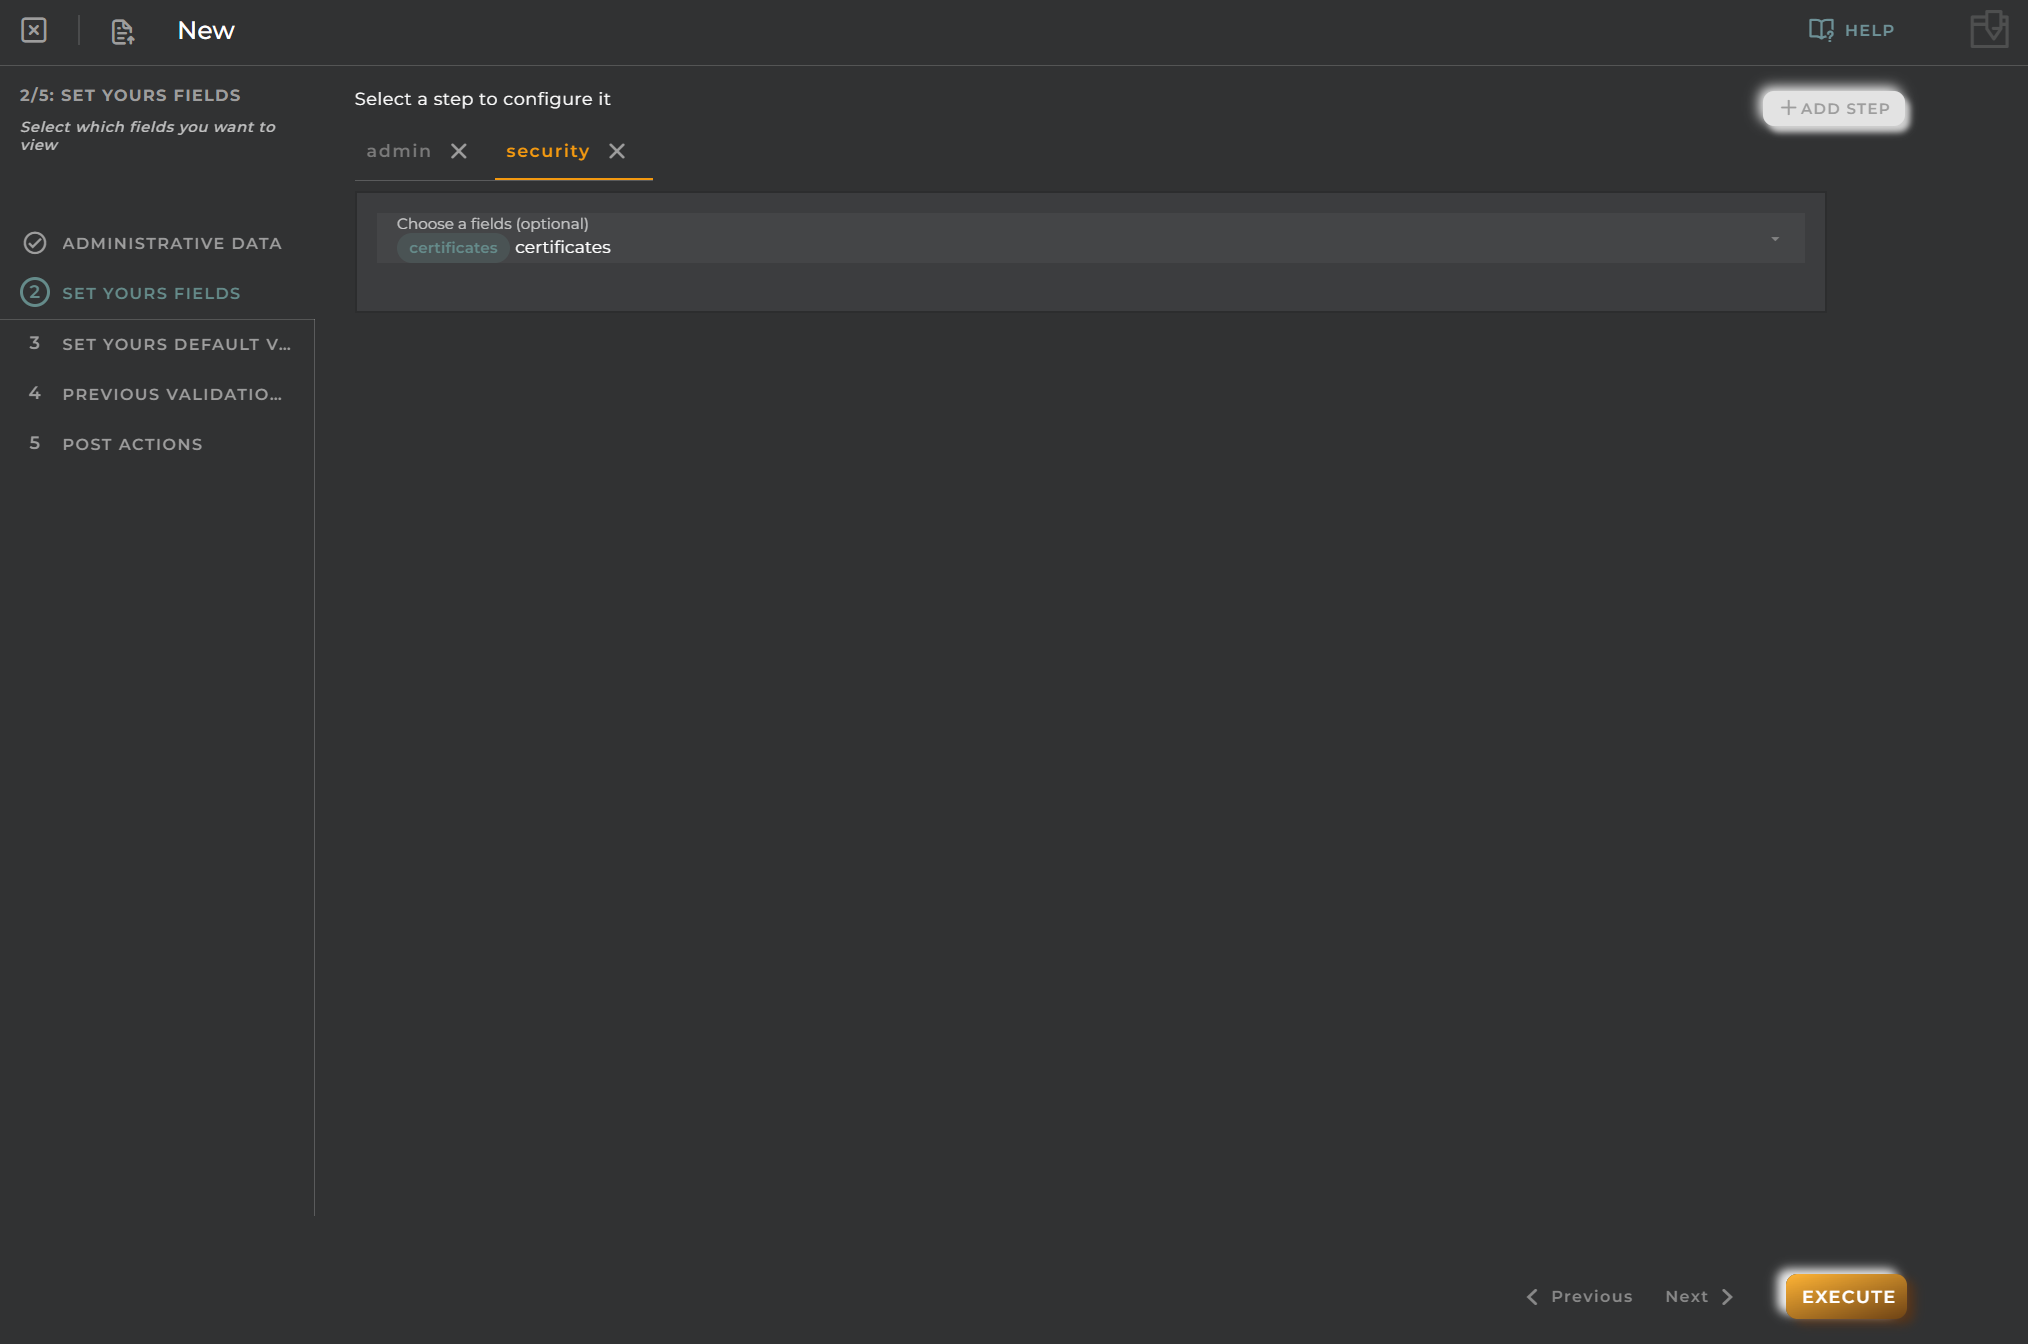
In this case, select the steps admin and security.
For example, for the Admin step, select administrative state and operational status.
And for the Security step, select certificates.
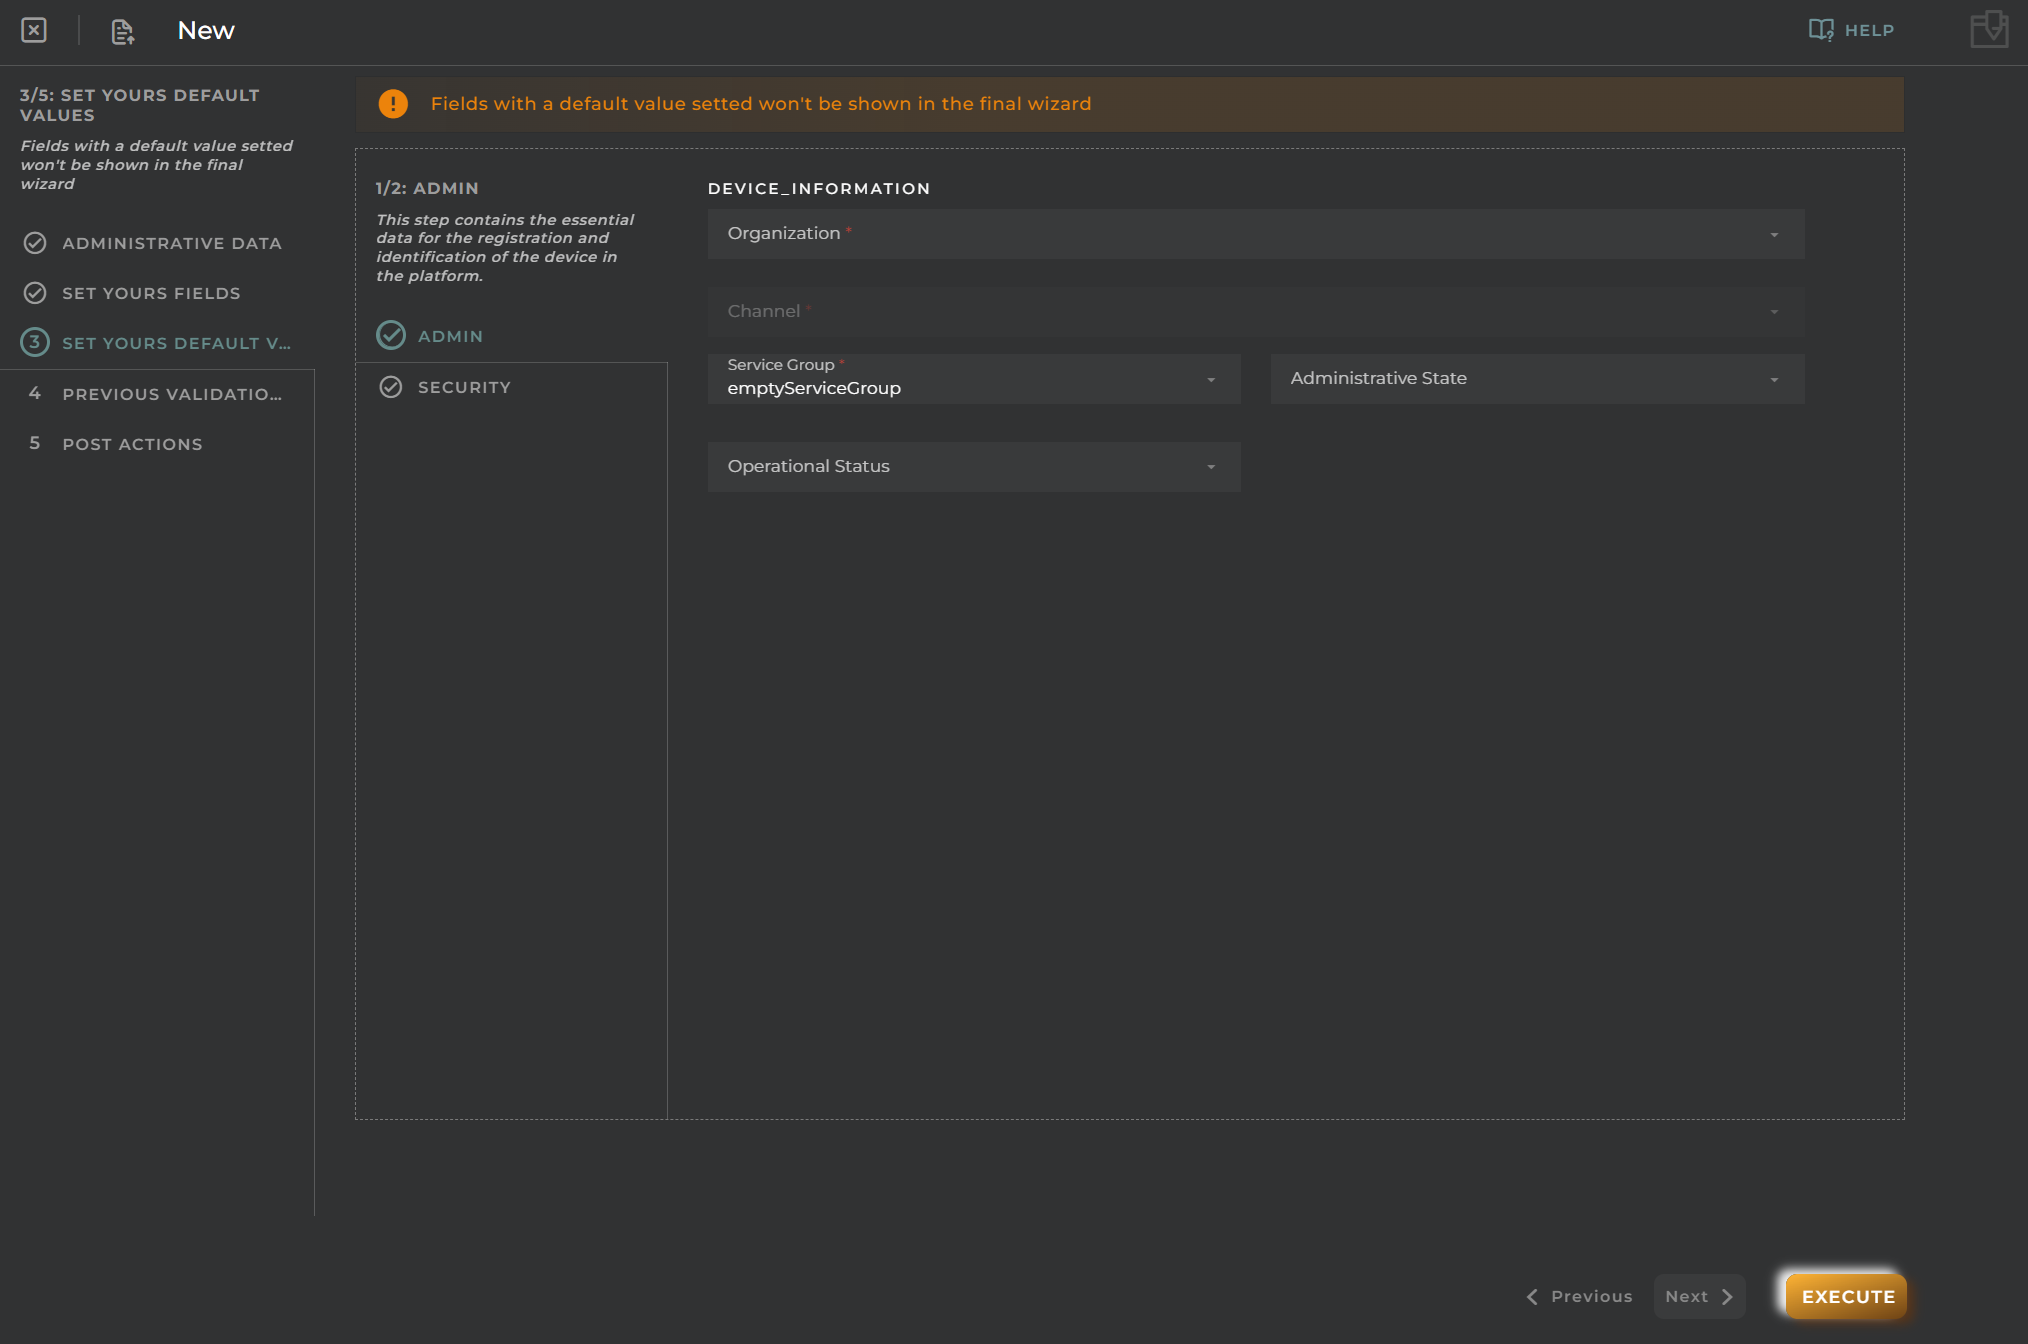
Set Your Default Values
See how the wizard would look graphically with the new steps added, and select default values if needed.
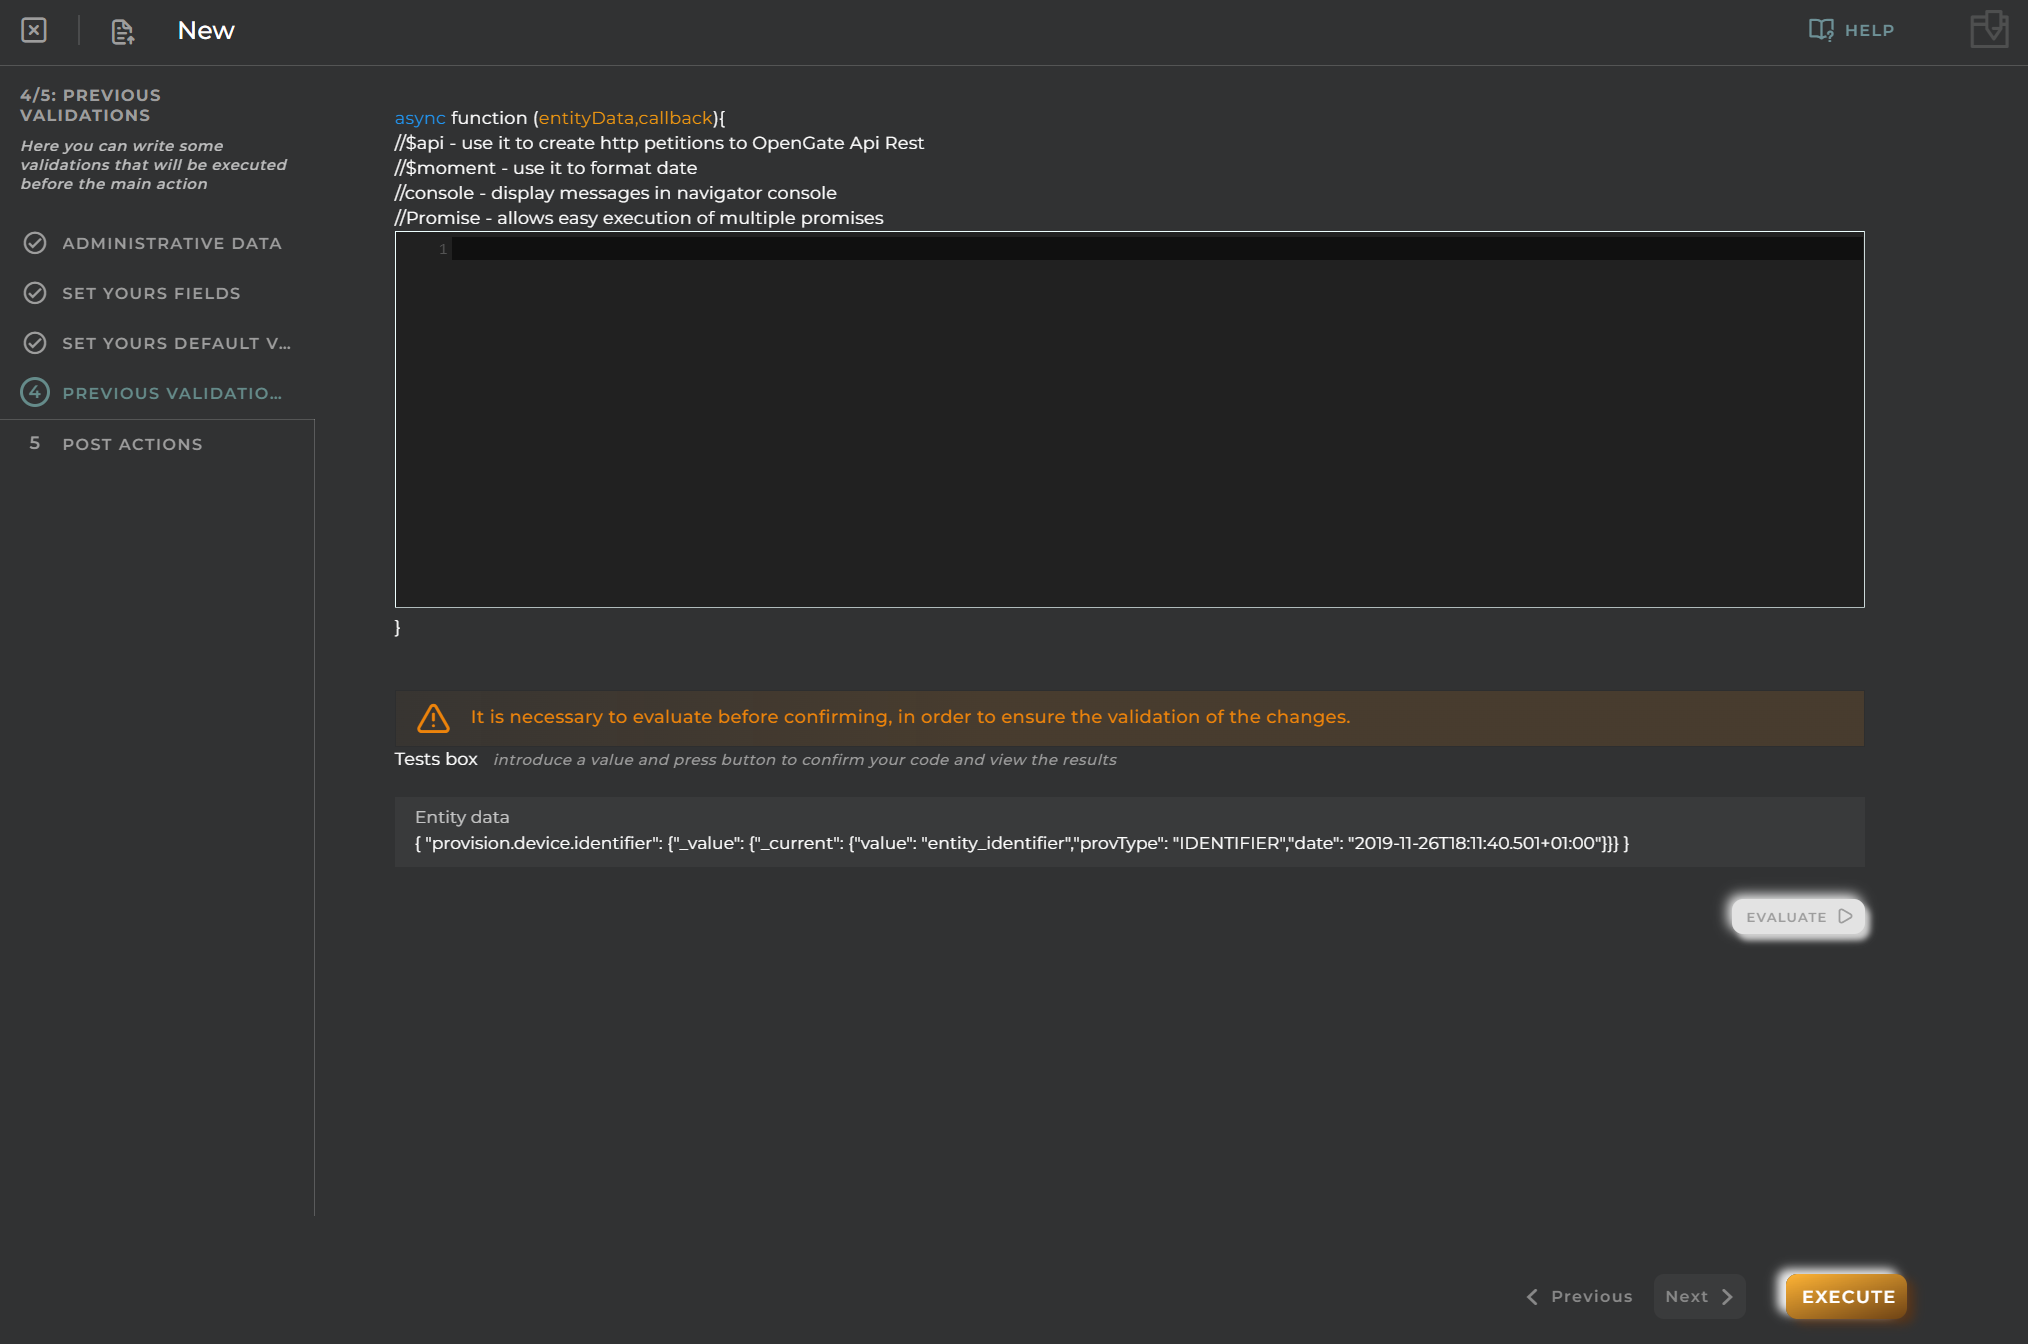
Previous Validations
Create validations that will be executed before the main action.
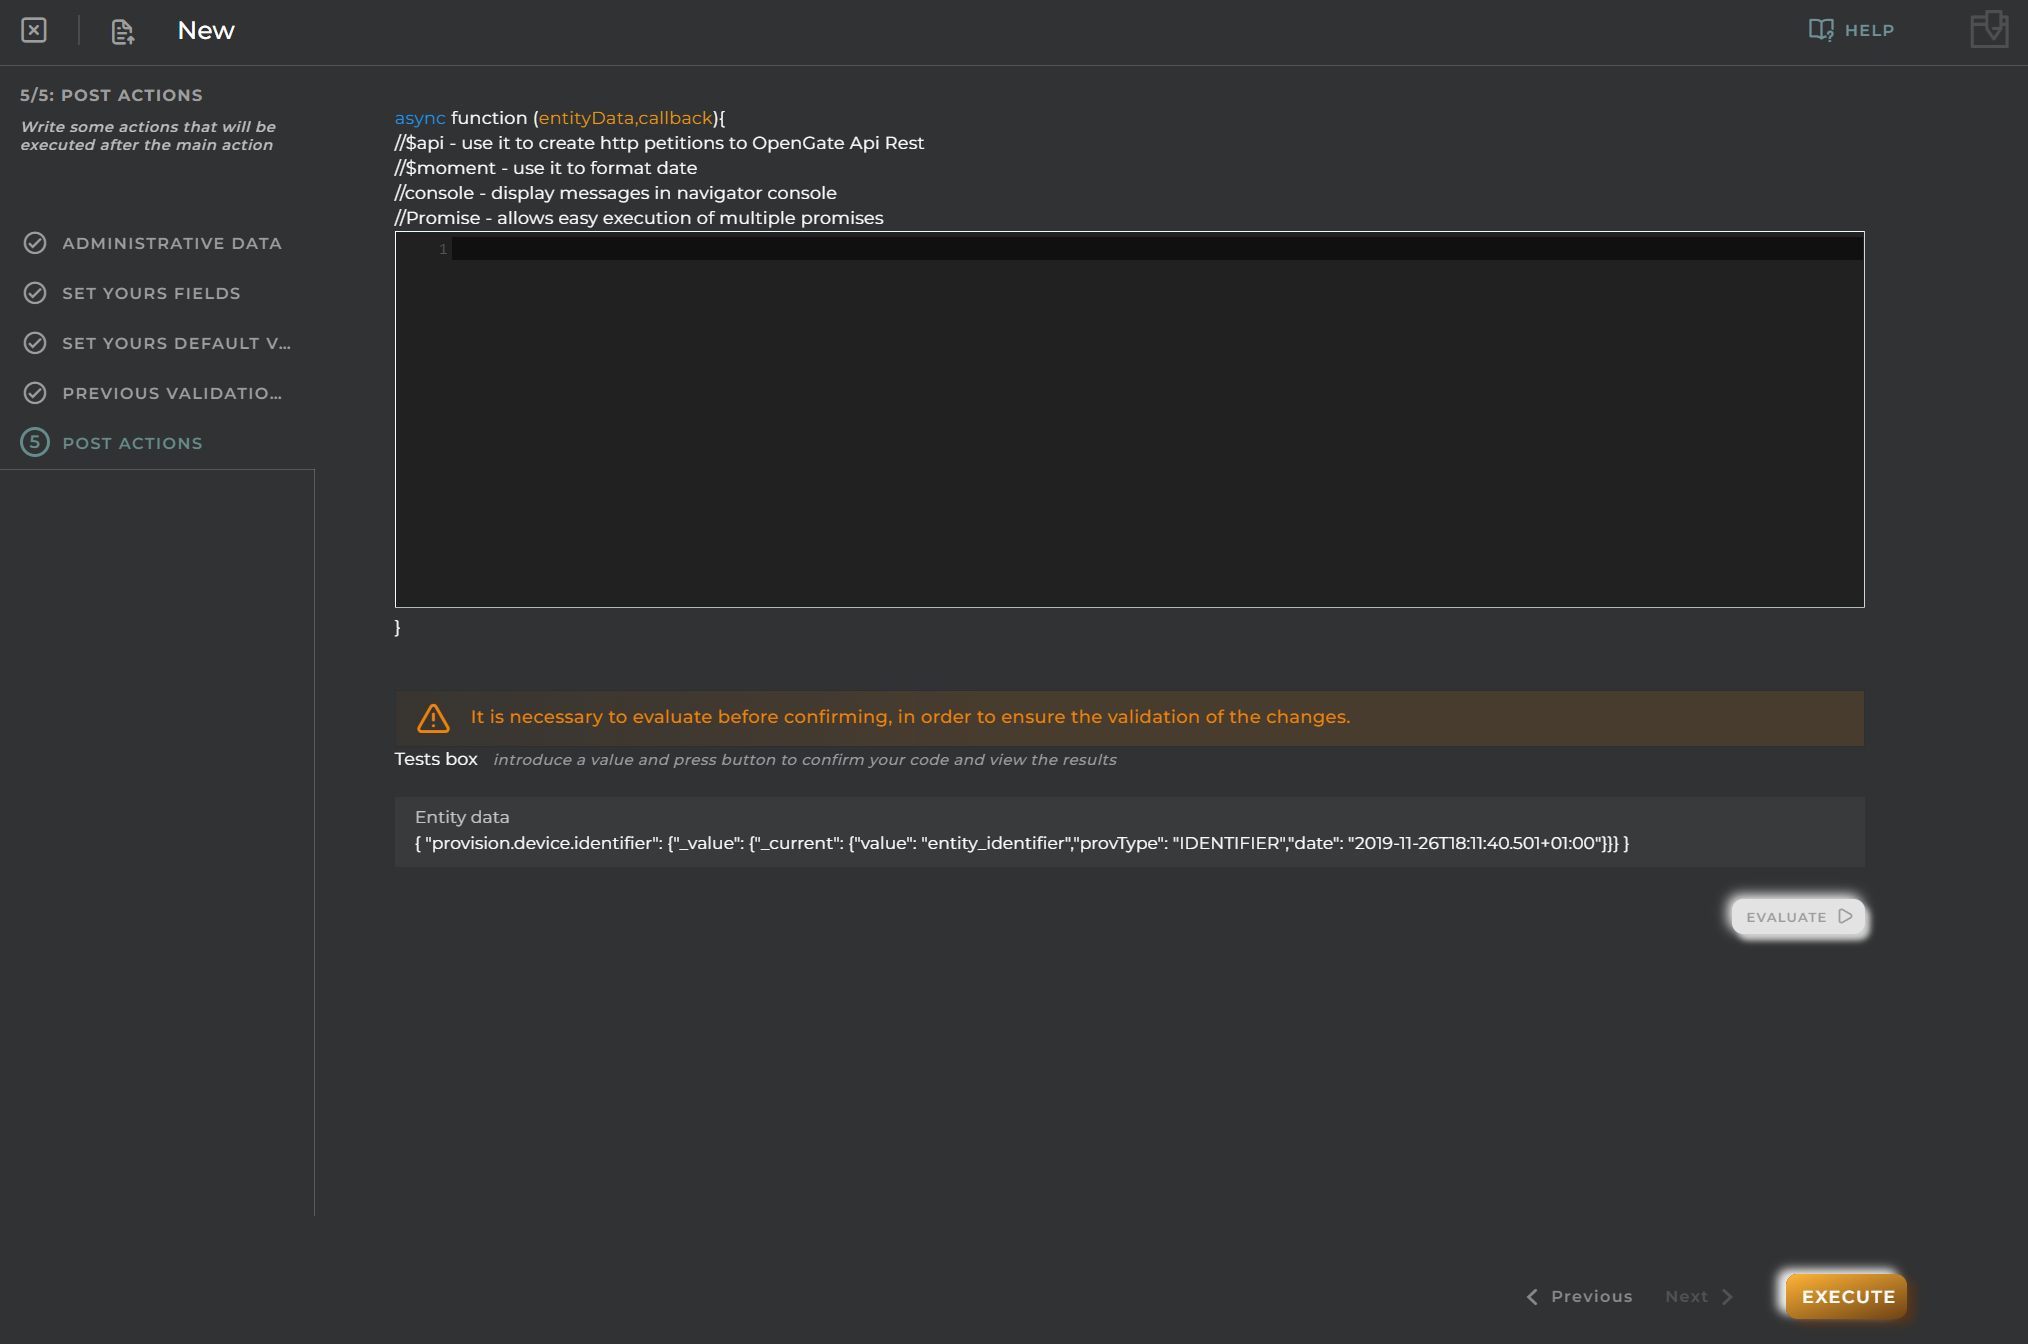
Post Actions
Create validations that will be executed after the main action.
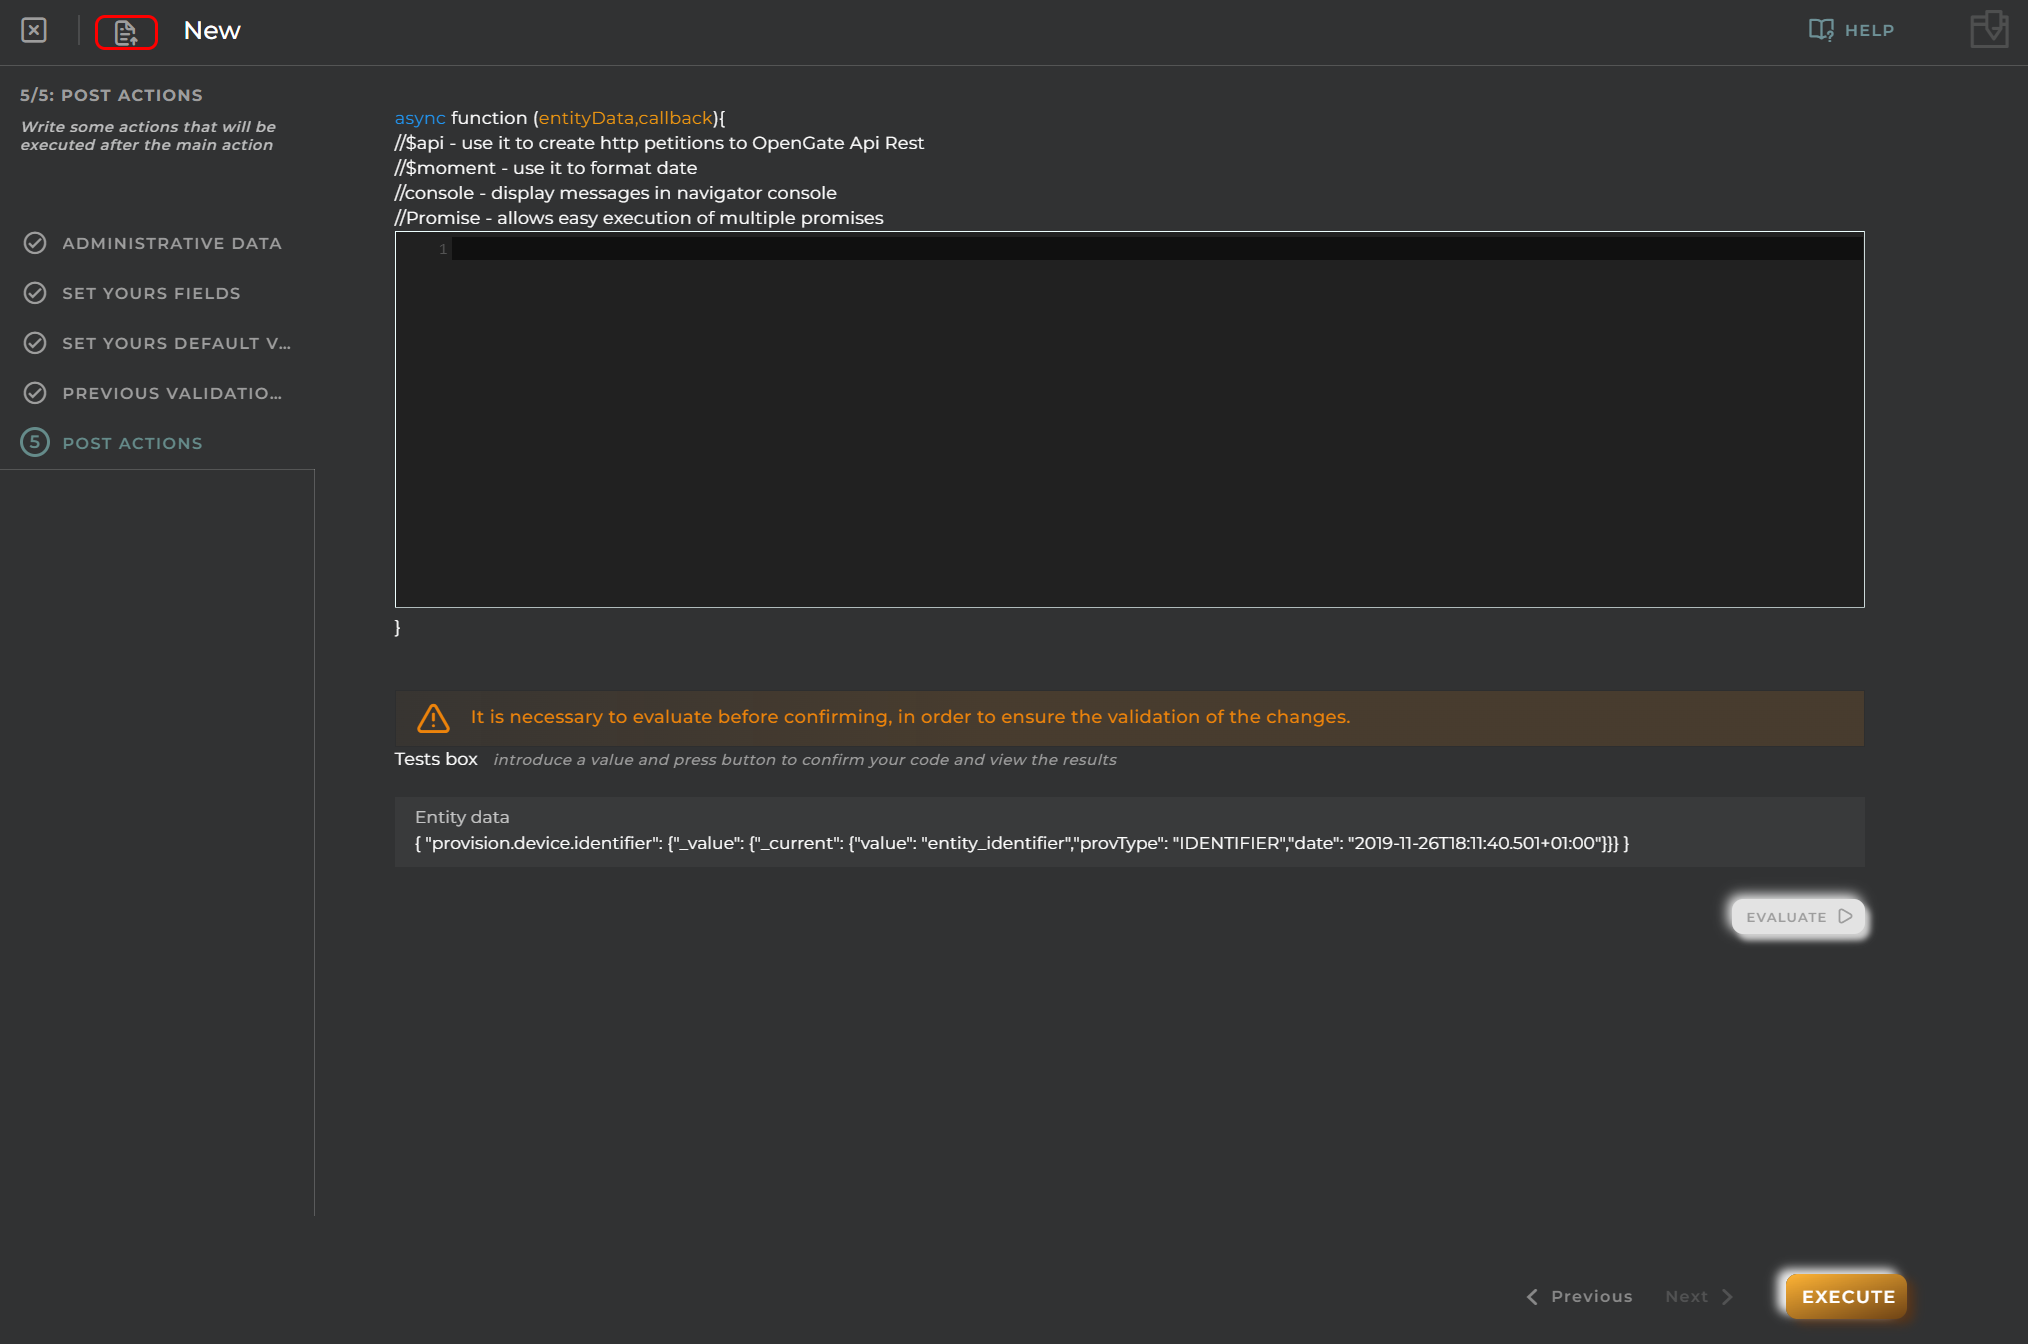
Import/Export Configuration
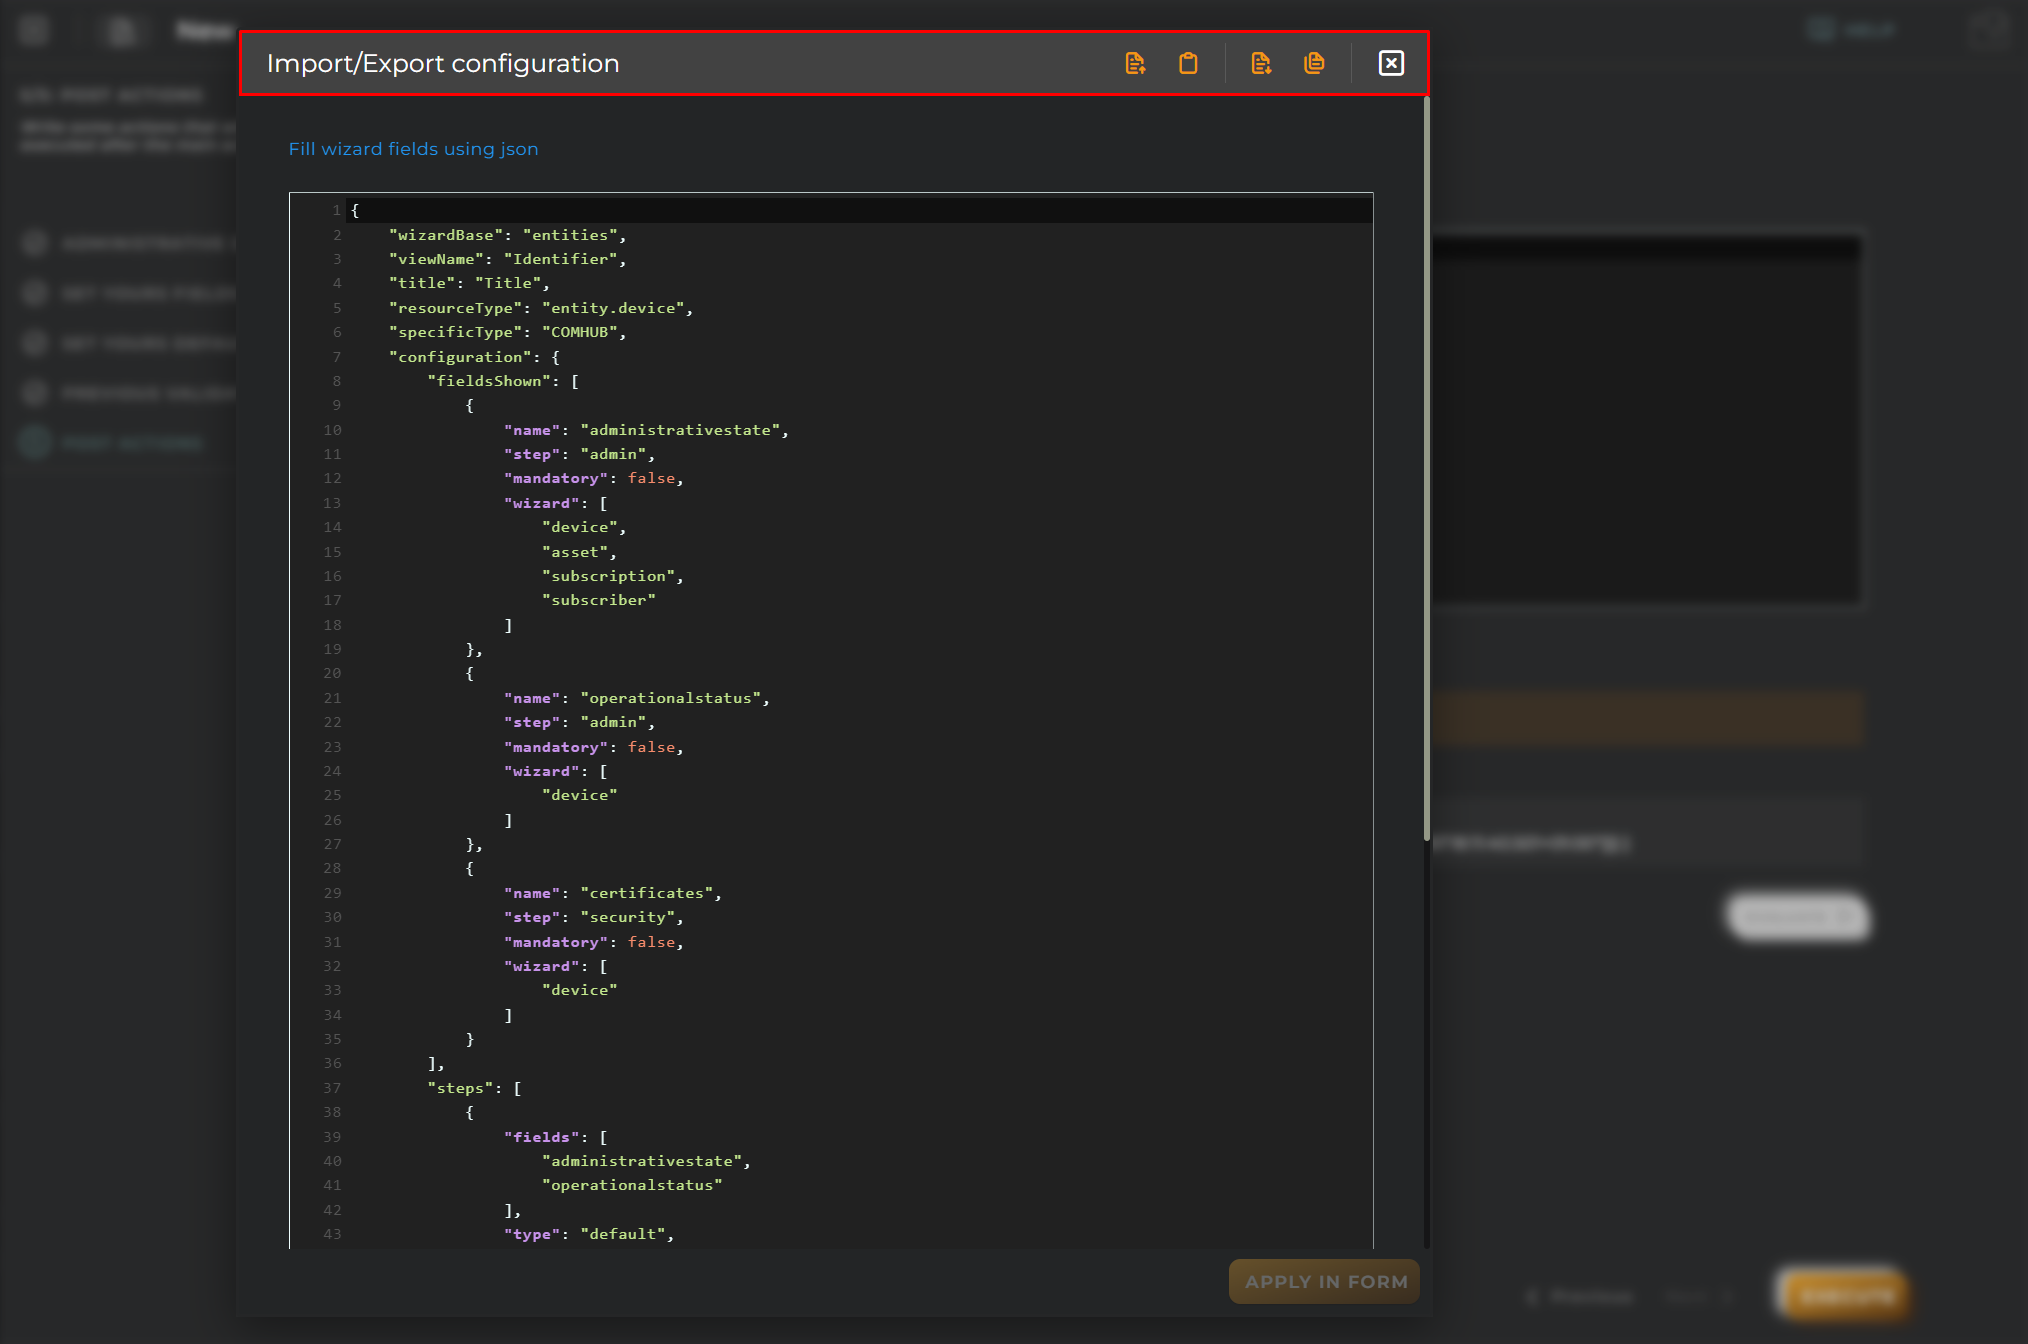
Allows you to import and export the wizard’s configuration via JSON.
When accessing the import and export functionality, it displays a window with various actions. Additionally, it presents the configuration of the wizard in JSON format.
The available actions are as follows:
Upload Json: Uploads a JSON file and replaces the previous JSON configuration.
Paste from clipboard: Pastes JSON data from the clipboard and replaces the previous JSON configuration.
Download Json: Downloads the JSON configuration as a file with the wizard’s name.
Copy to clipboard: Copies the JSON configuration to the clipboard.
Rules
This wizard allows us to create rules.
Steps
Administration
Essential data for registration and identification for creating a rule in the platform.
Rules consist of Easy rules and Advanced rules, which are created differently in the second step.
We can configure a rule with the following options:
New rules: Create a new rule from scratch.
From catalog: Create a rule from the catalog.
Clone existing rule: Create a rule from a previously created one.
Easy rule
Build a rule using basic concepts for evaluation.
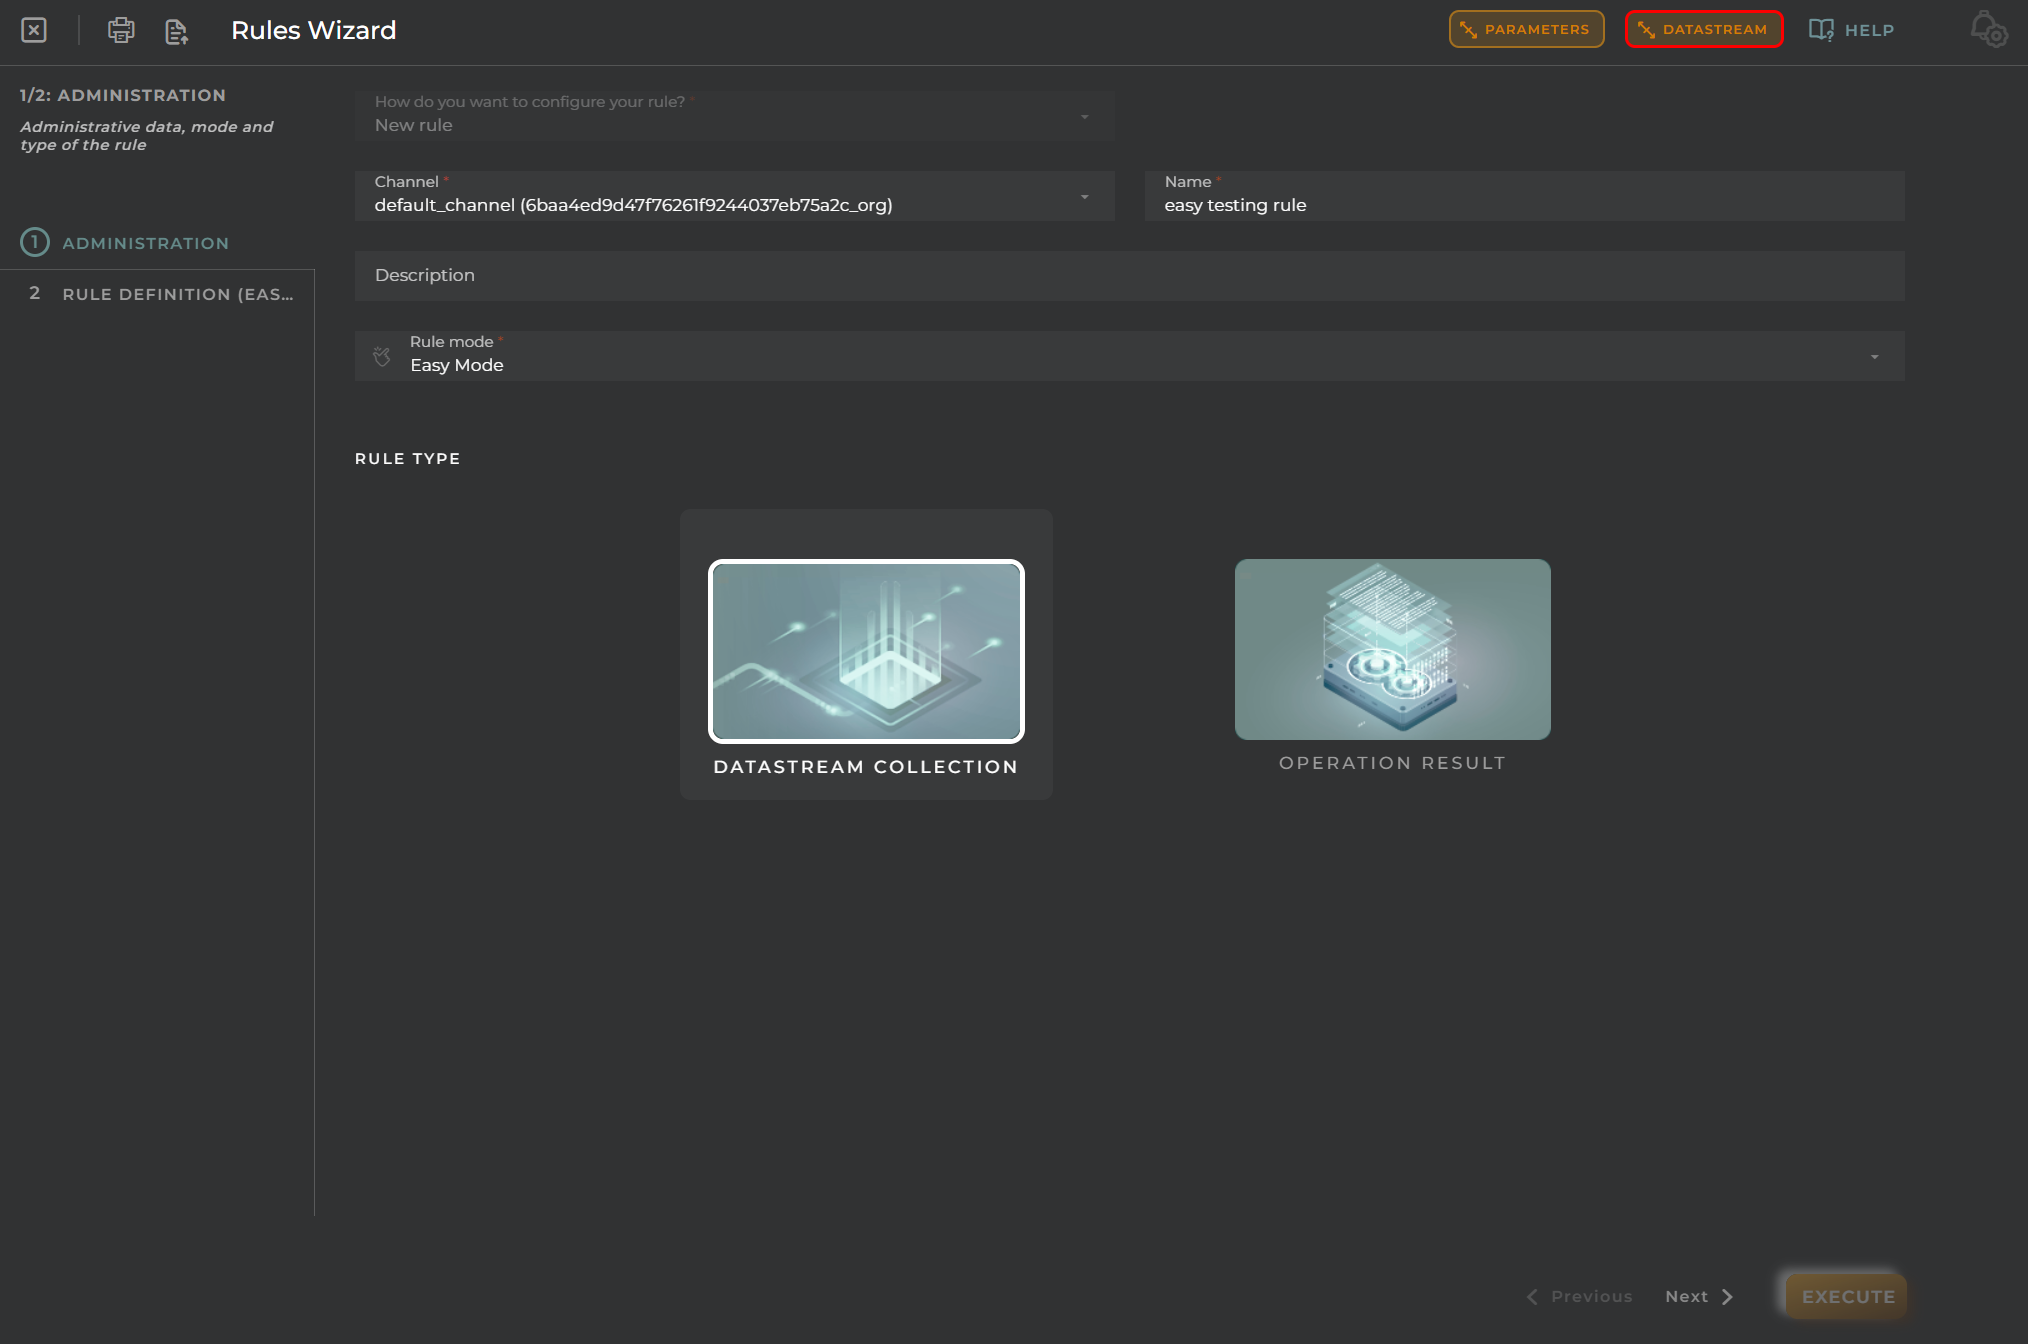
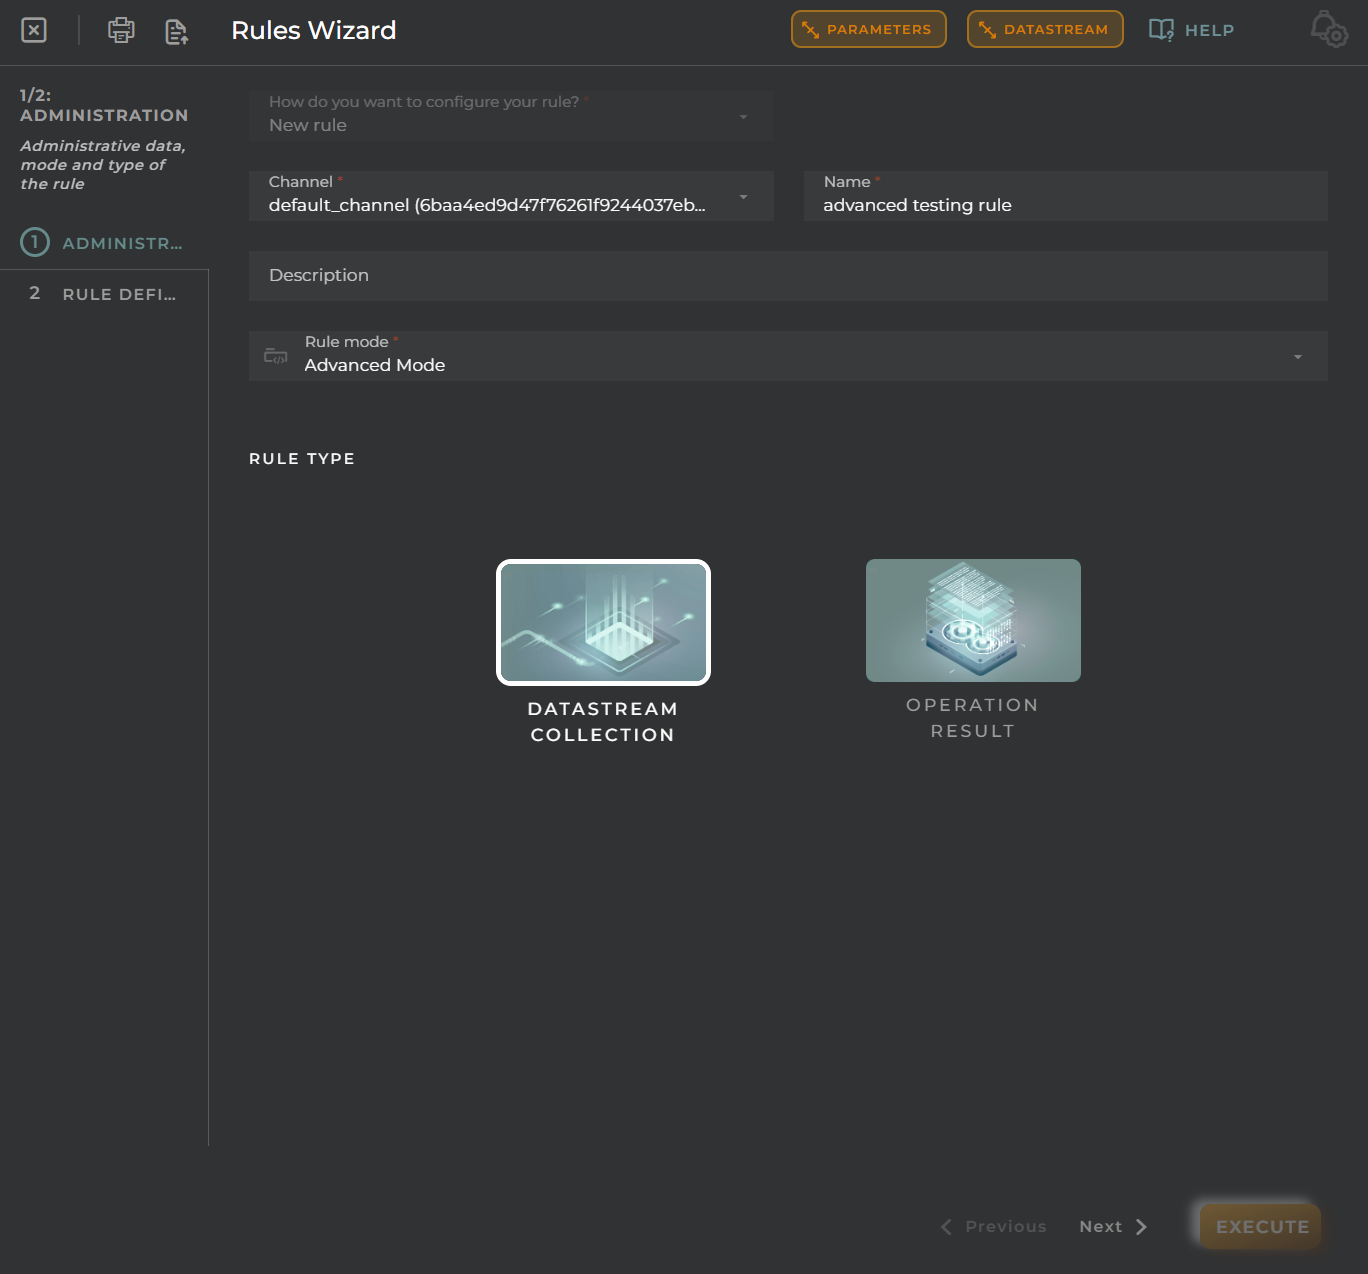
You must select the rule type depending on whether you want a data stream collection, the operation result, or an event. When selecting Data Stream collection, the Data Stream button above will be enabled.
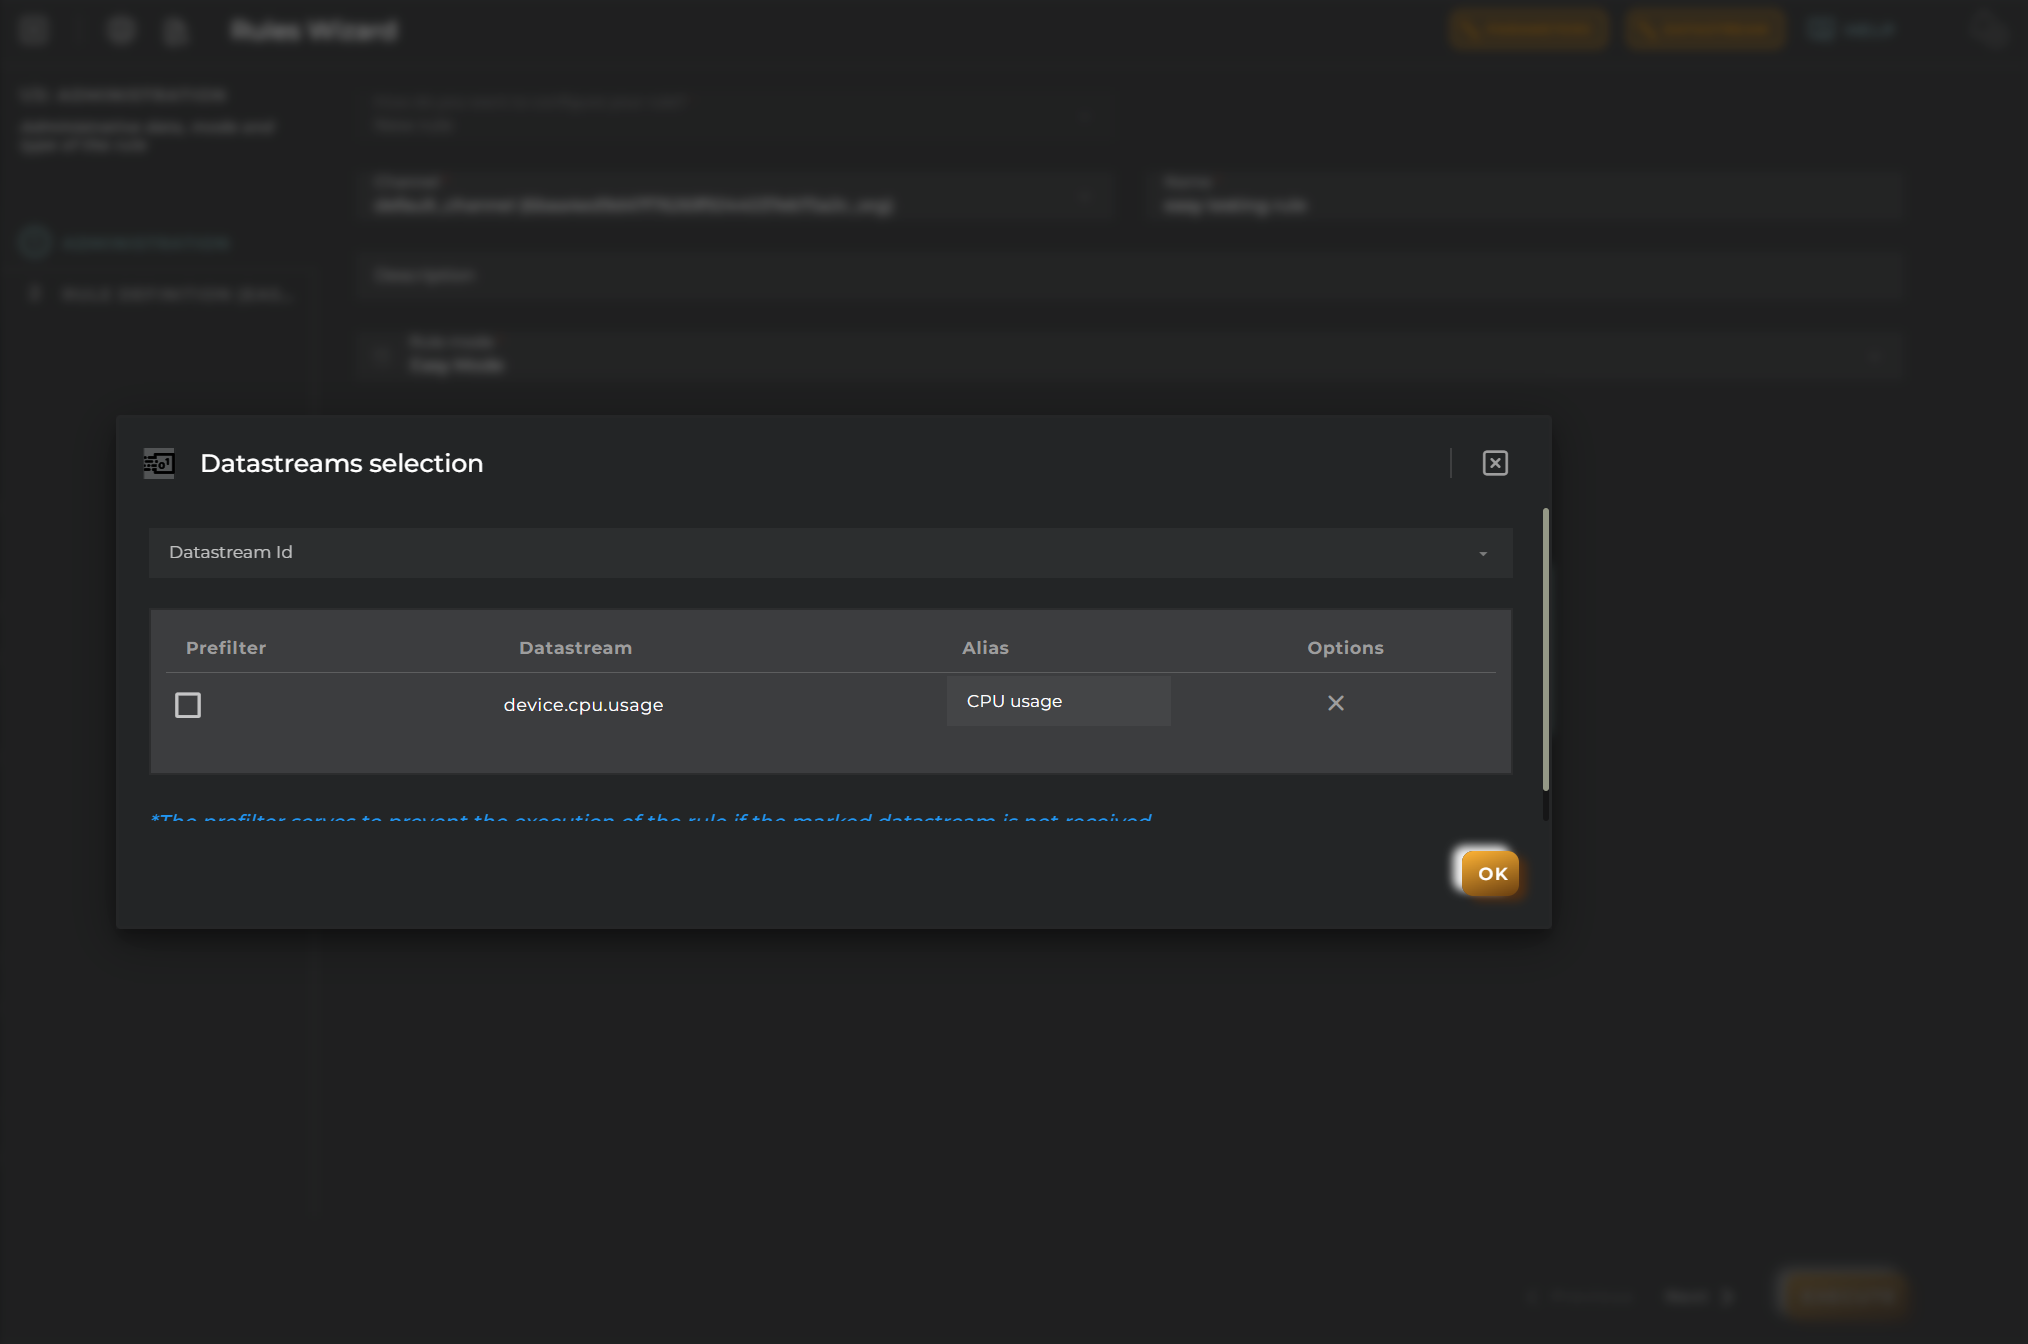
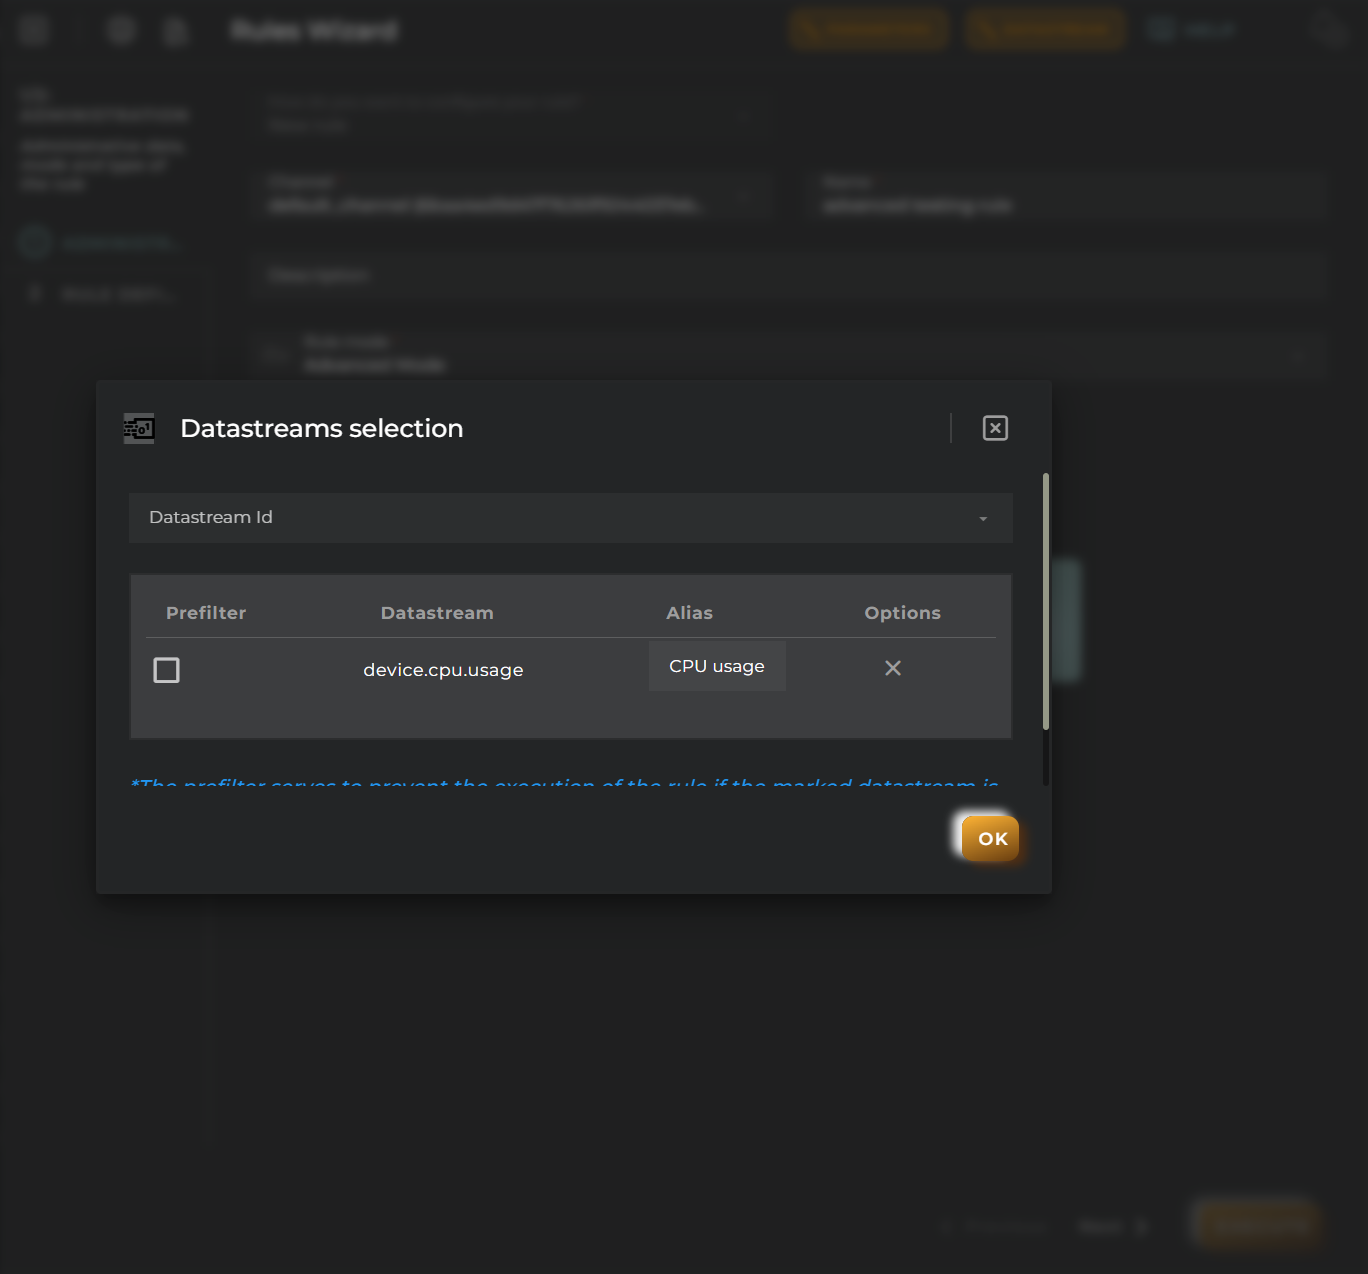
Clicking the Data Stream button will open a menu where you can search for and add the data stream, along with adding an alias.
However, if you select Operation result or Event as the rule type, the Data Stream button will not be visible.
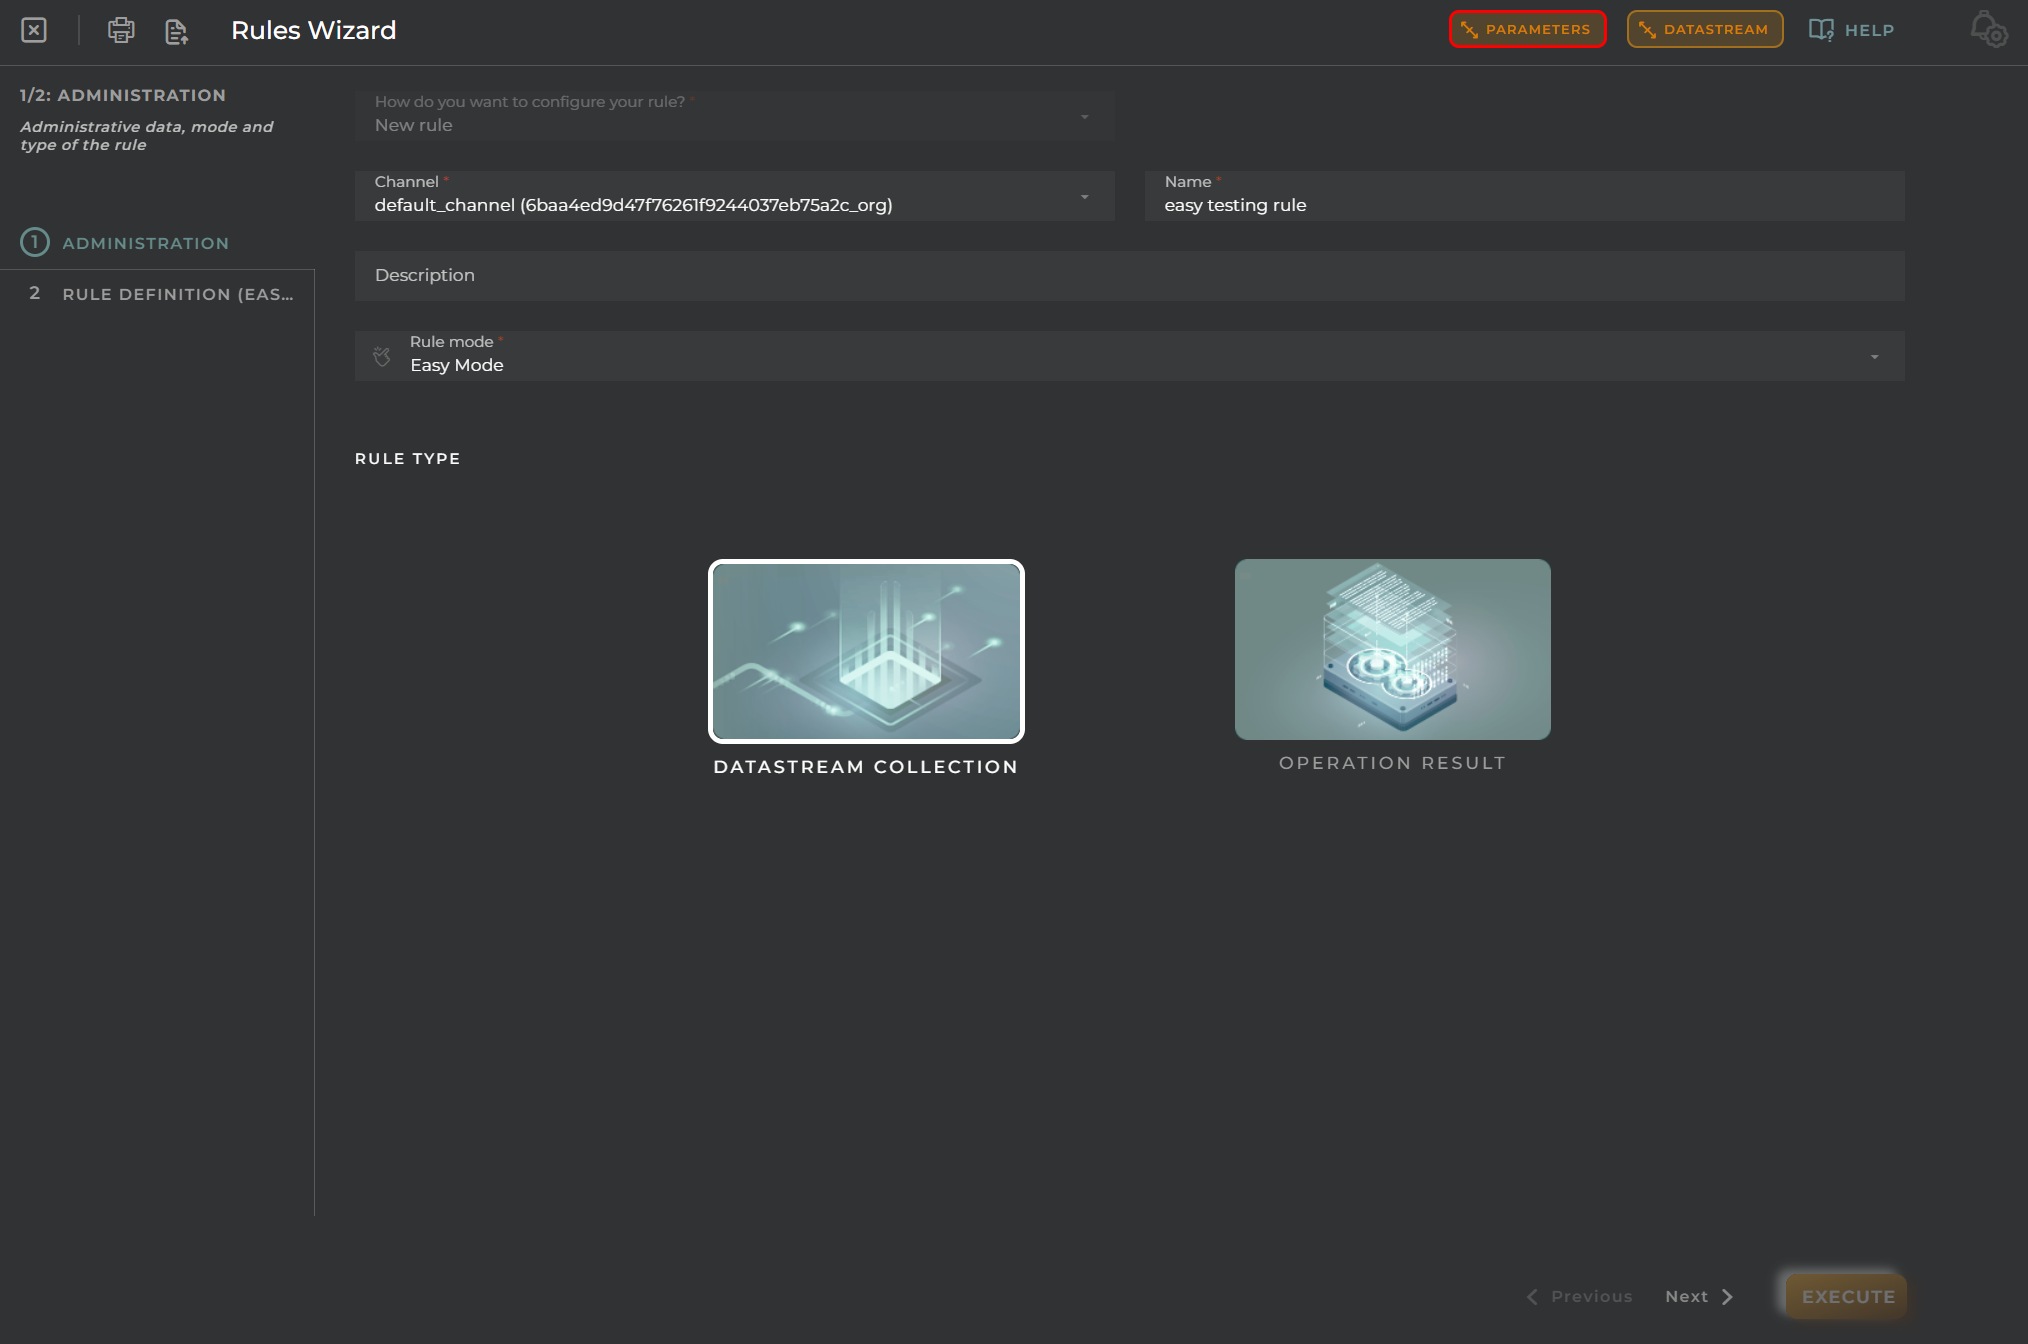
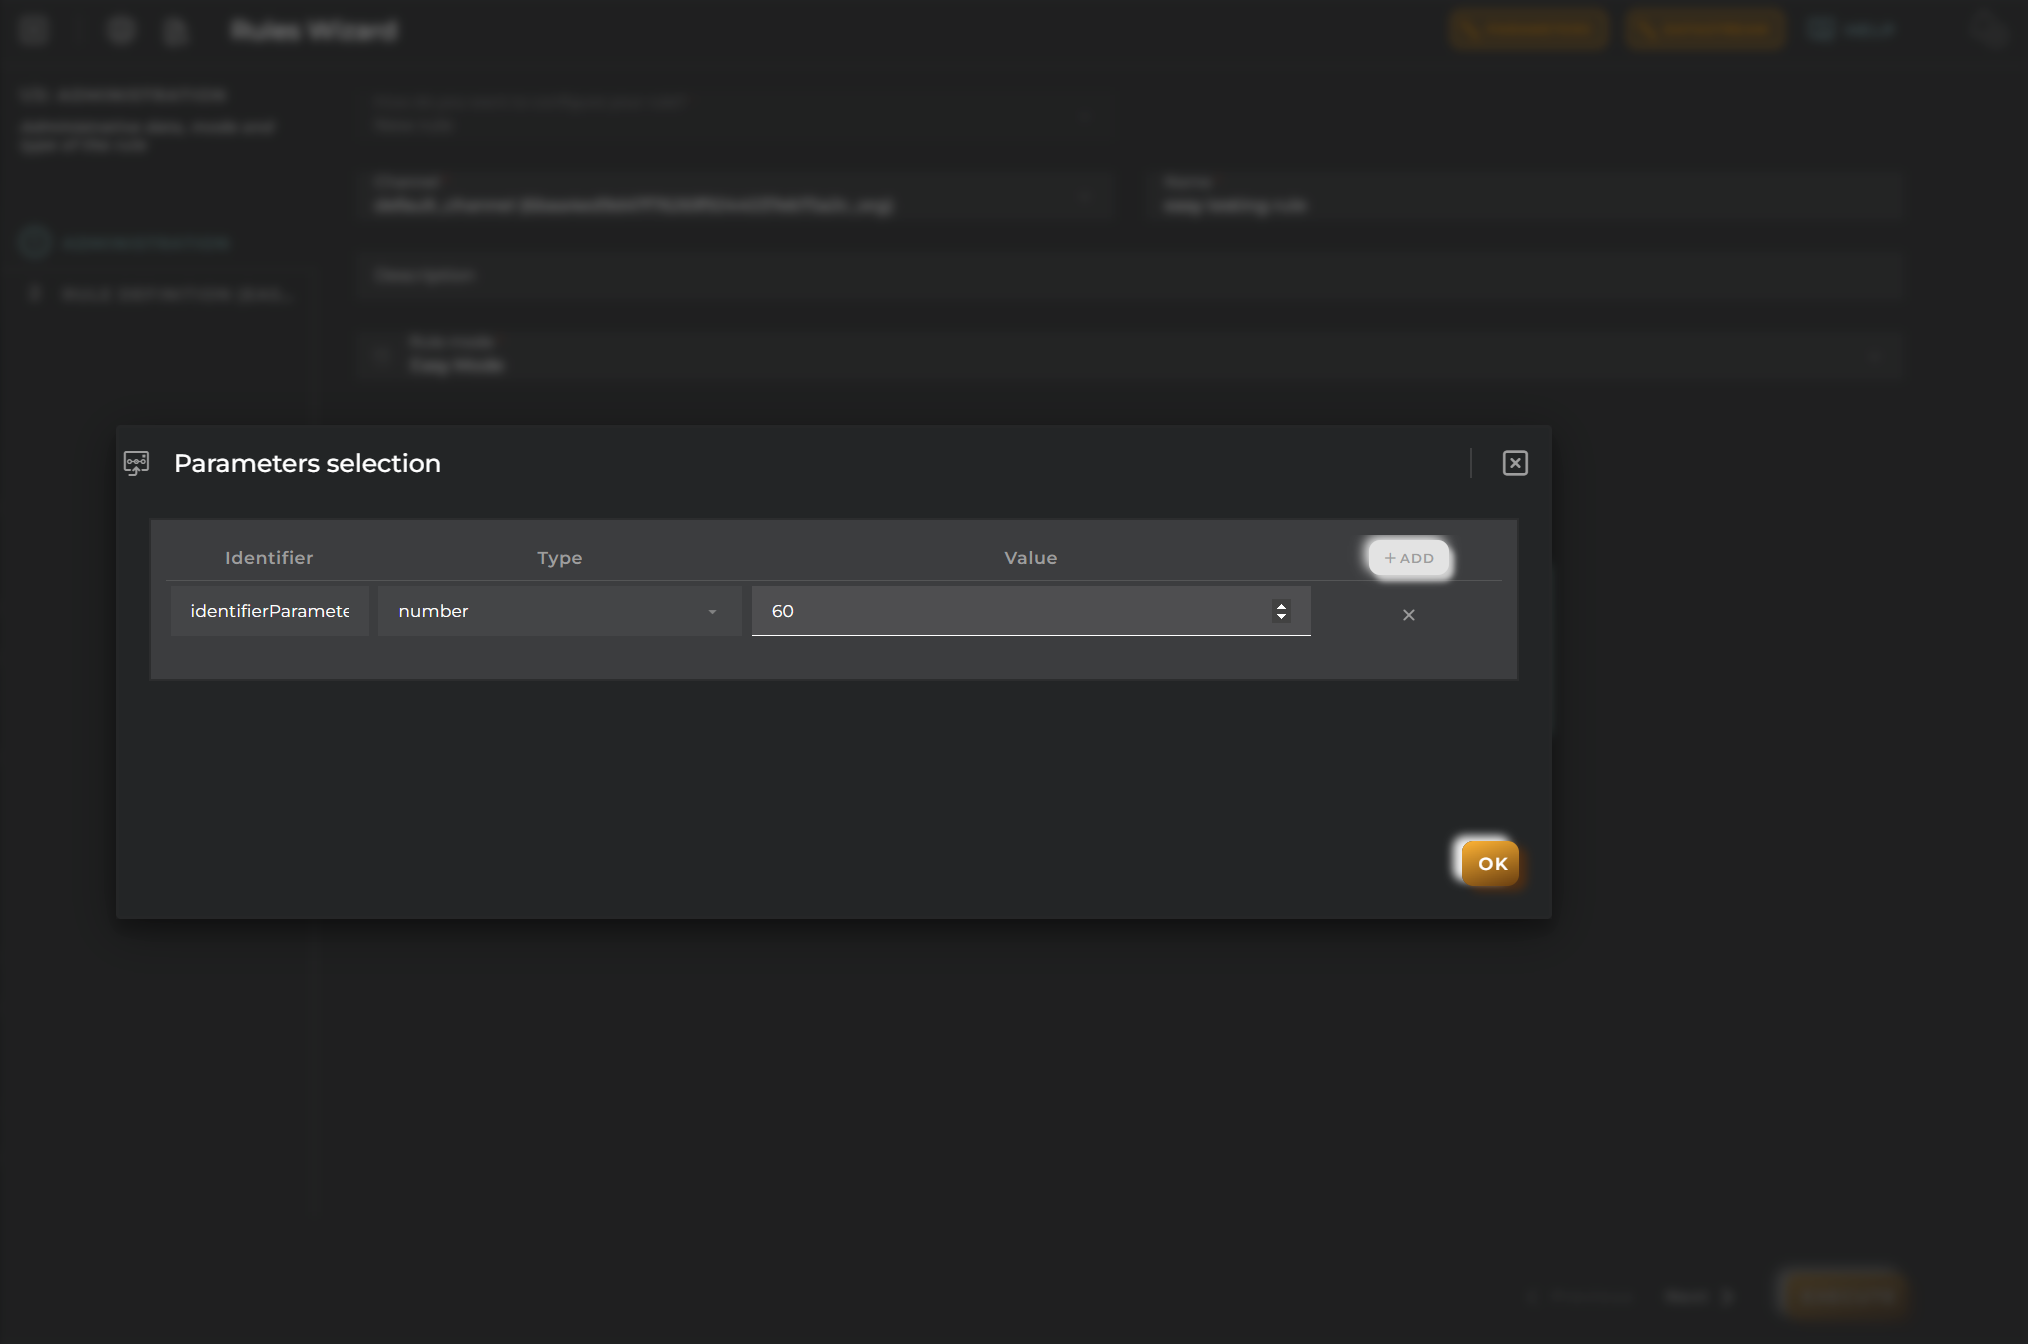
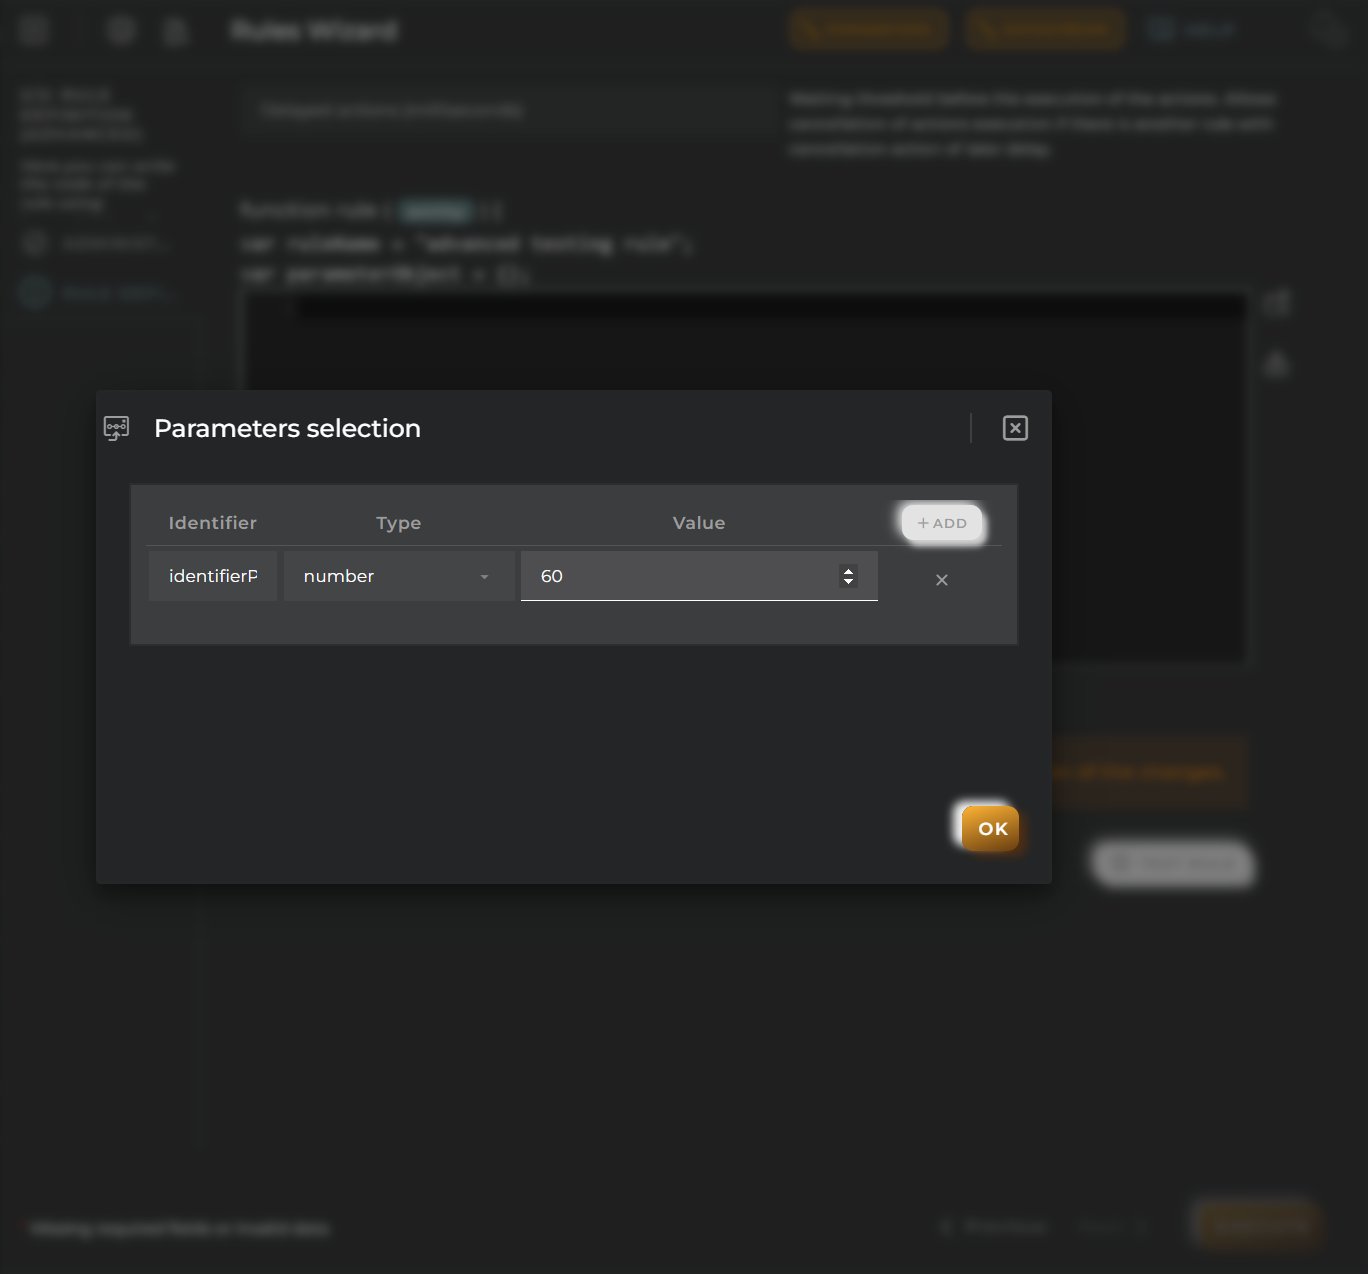
For all three rule types, you need to select a parameter, which consists of an identifier, type, and value.
Within the parameter menu, you will enter an identifier, type (string, integer, number, or boolean), and value.
Rule Definition (Easy)
Build a rule using basic concepts for evaluation.
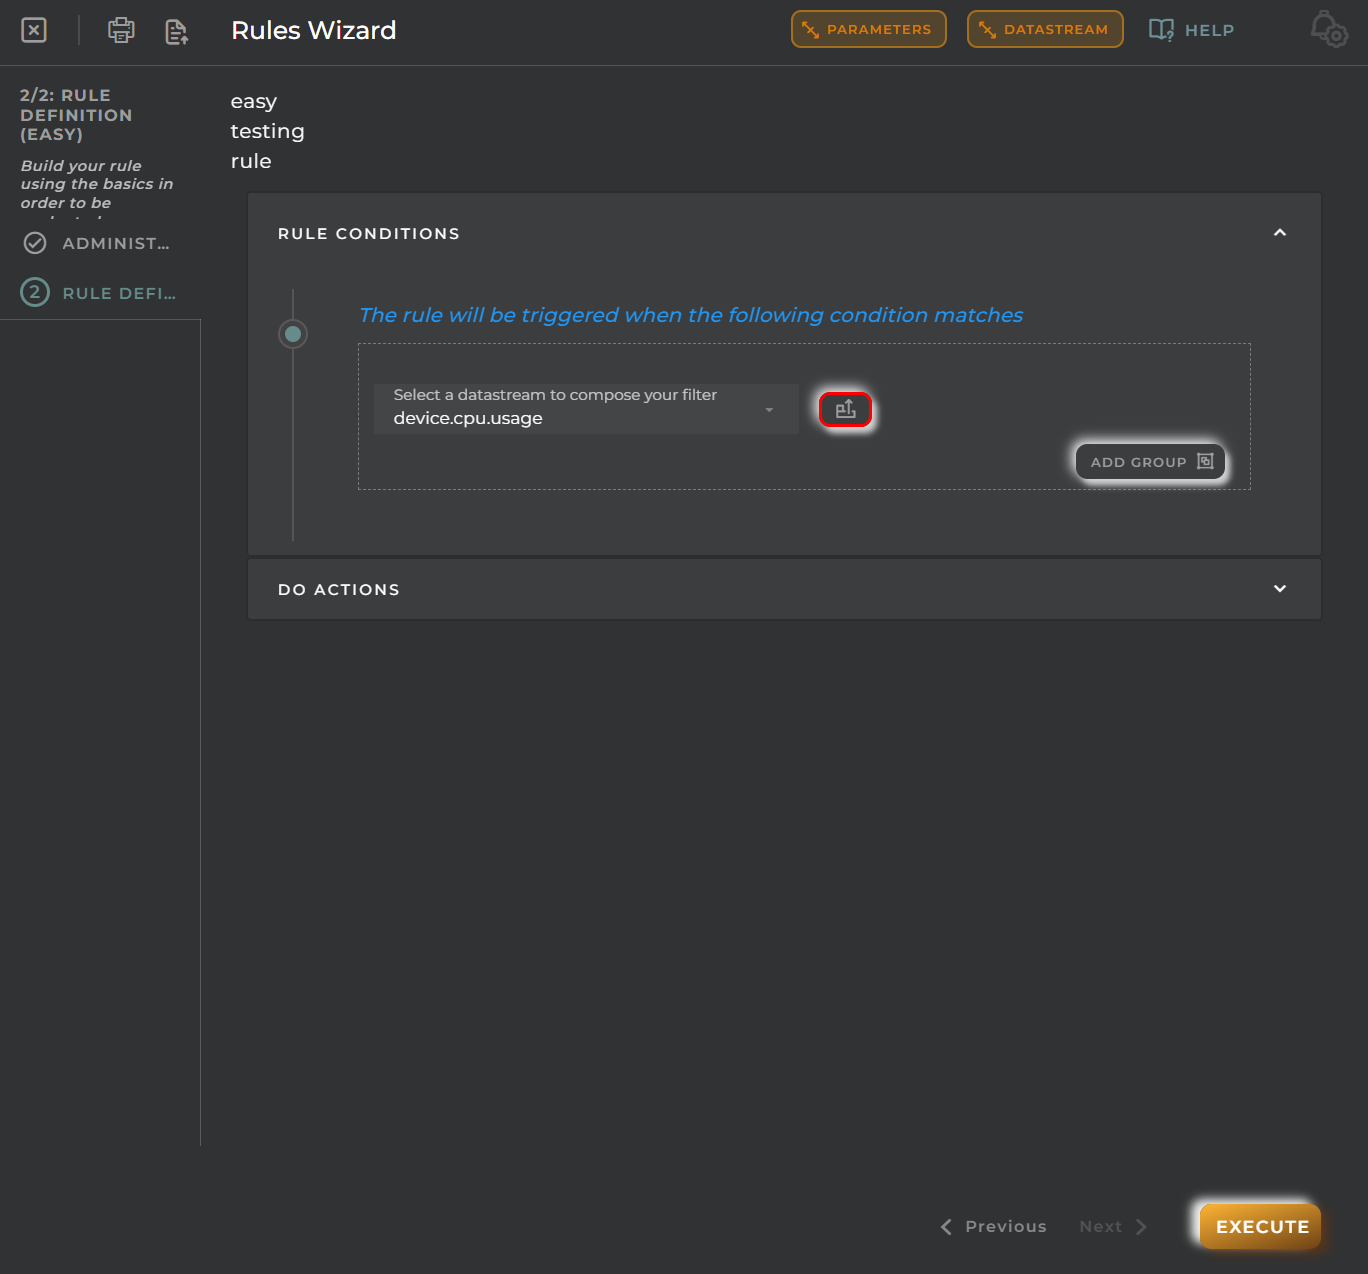
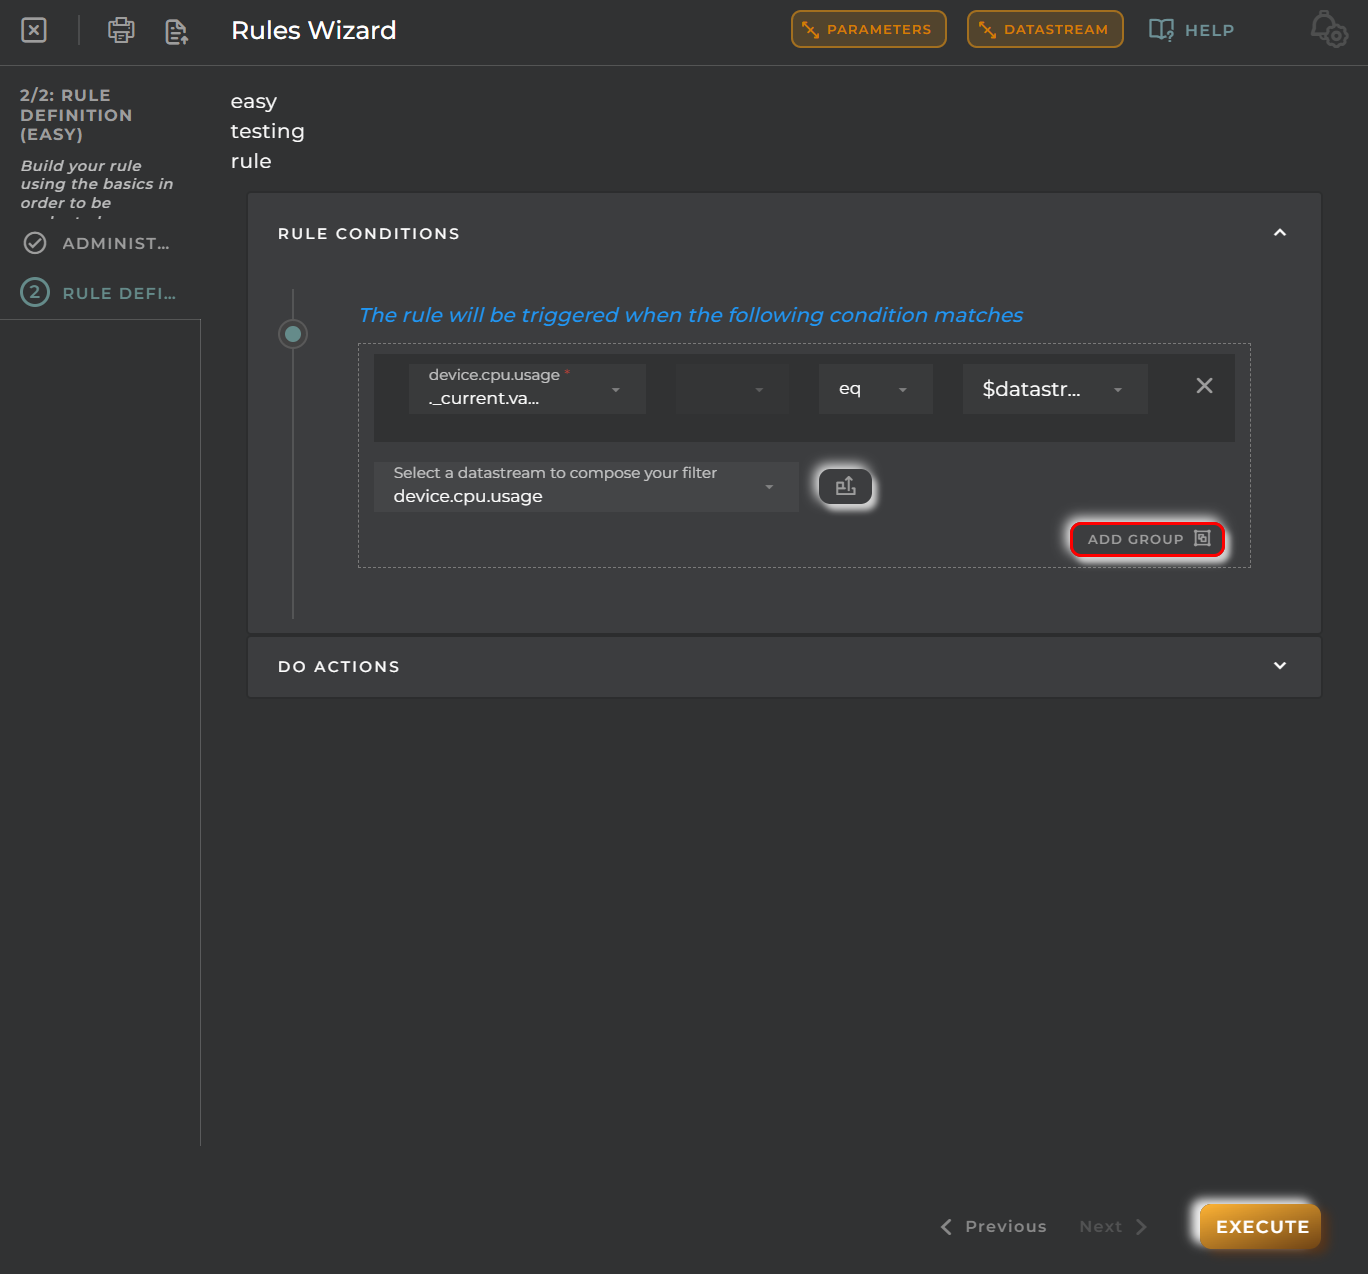
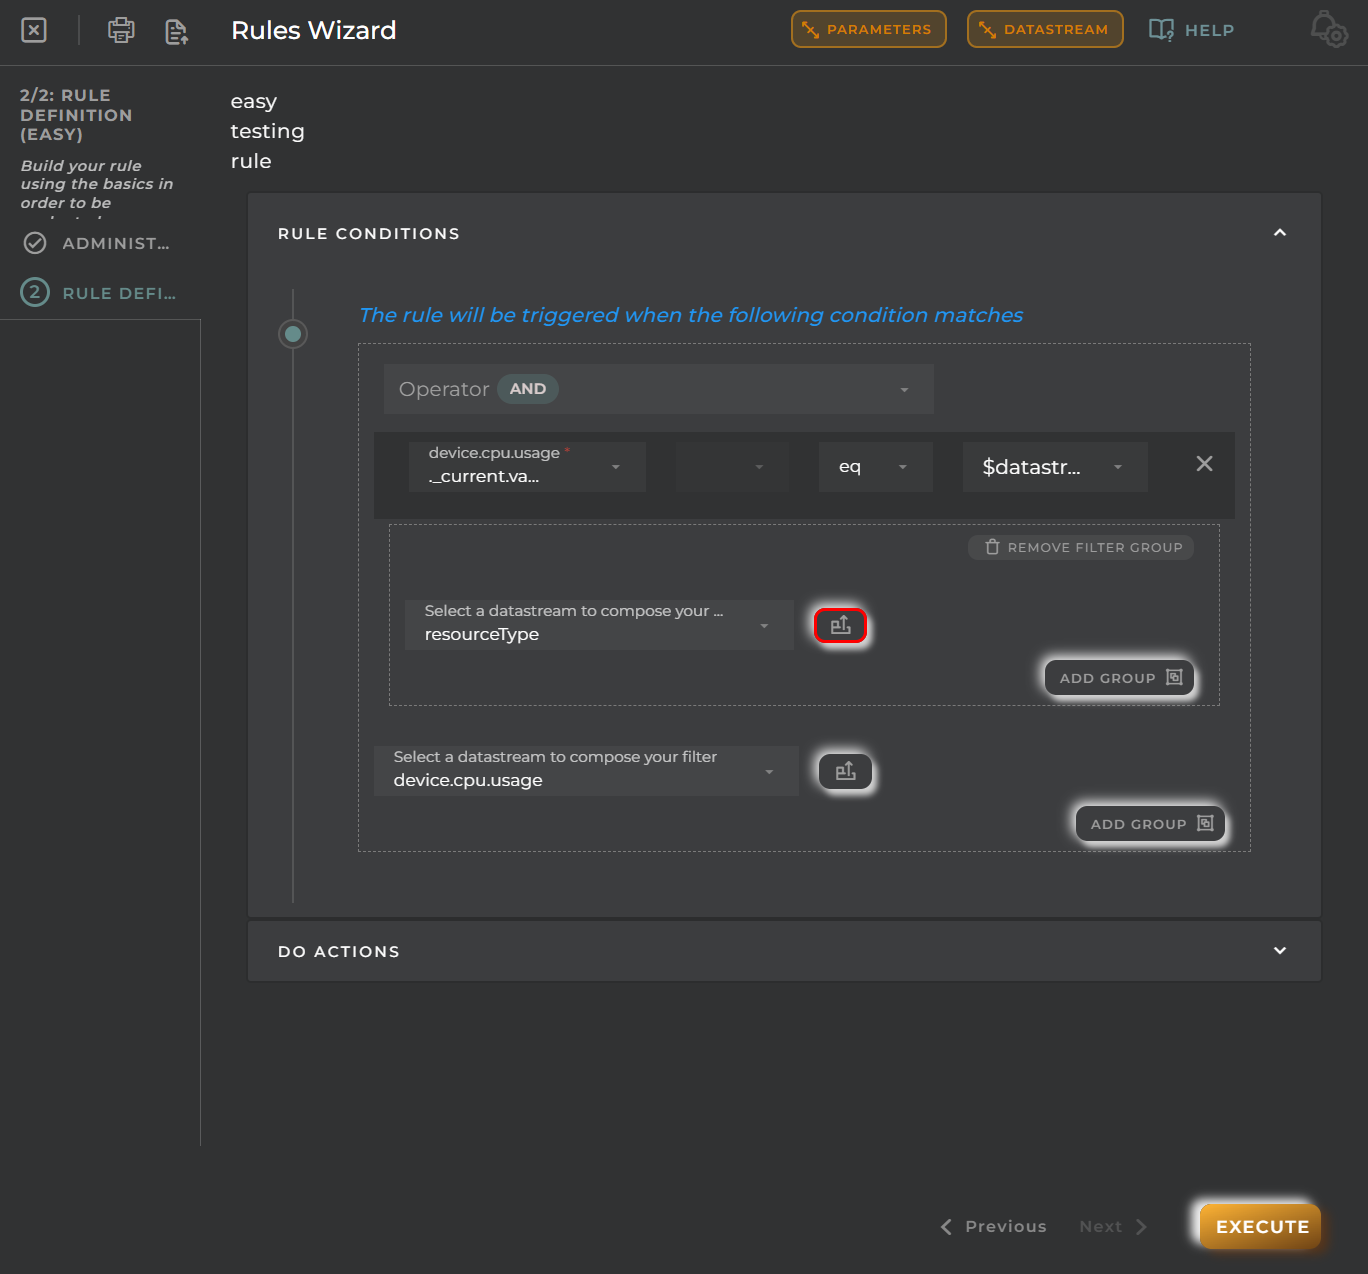
Rule Conditions
This will trigger the rule when the rule meets the filter conditions.
Select a data stream to compose the filter.
You can also add a group to add another condition to the filter.
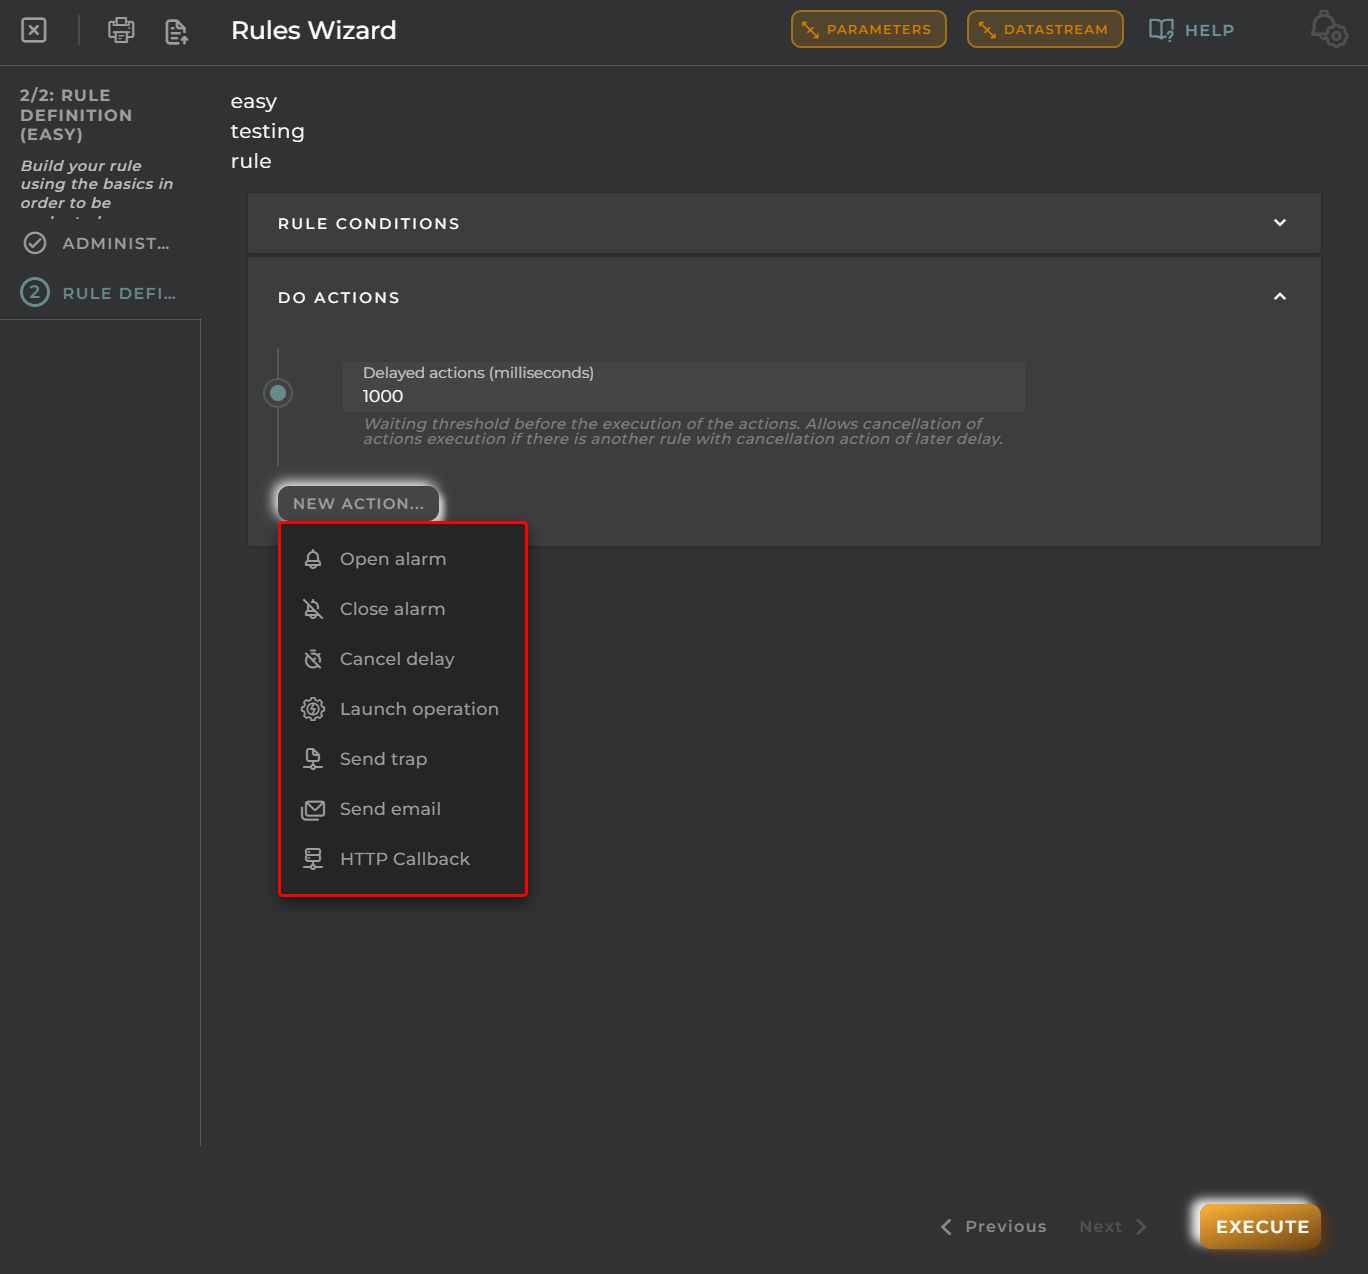
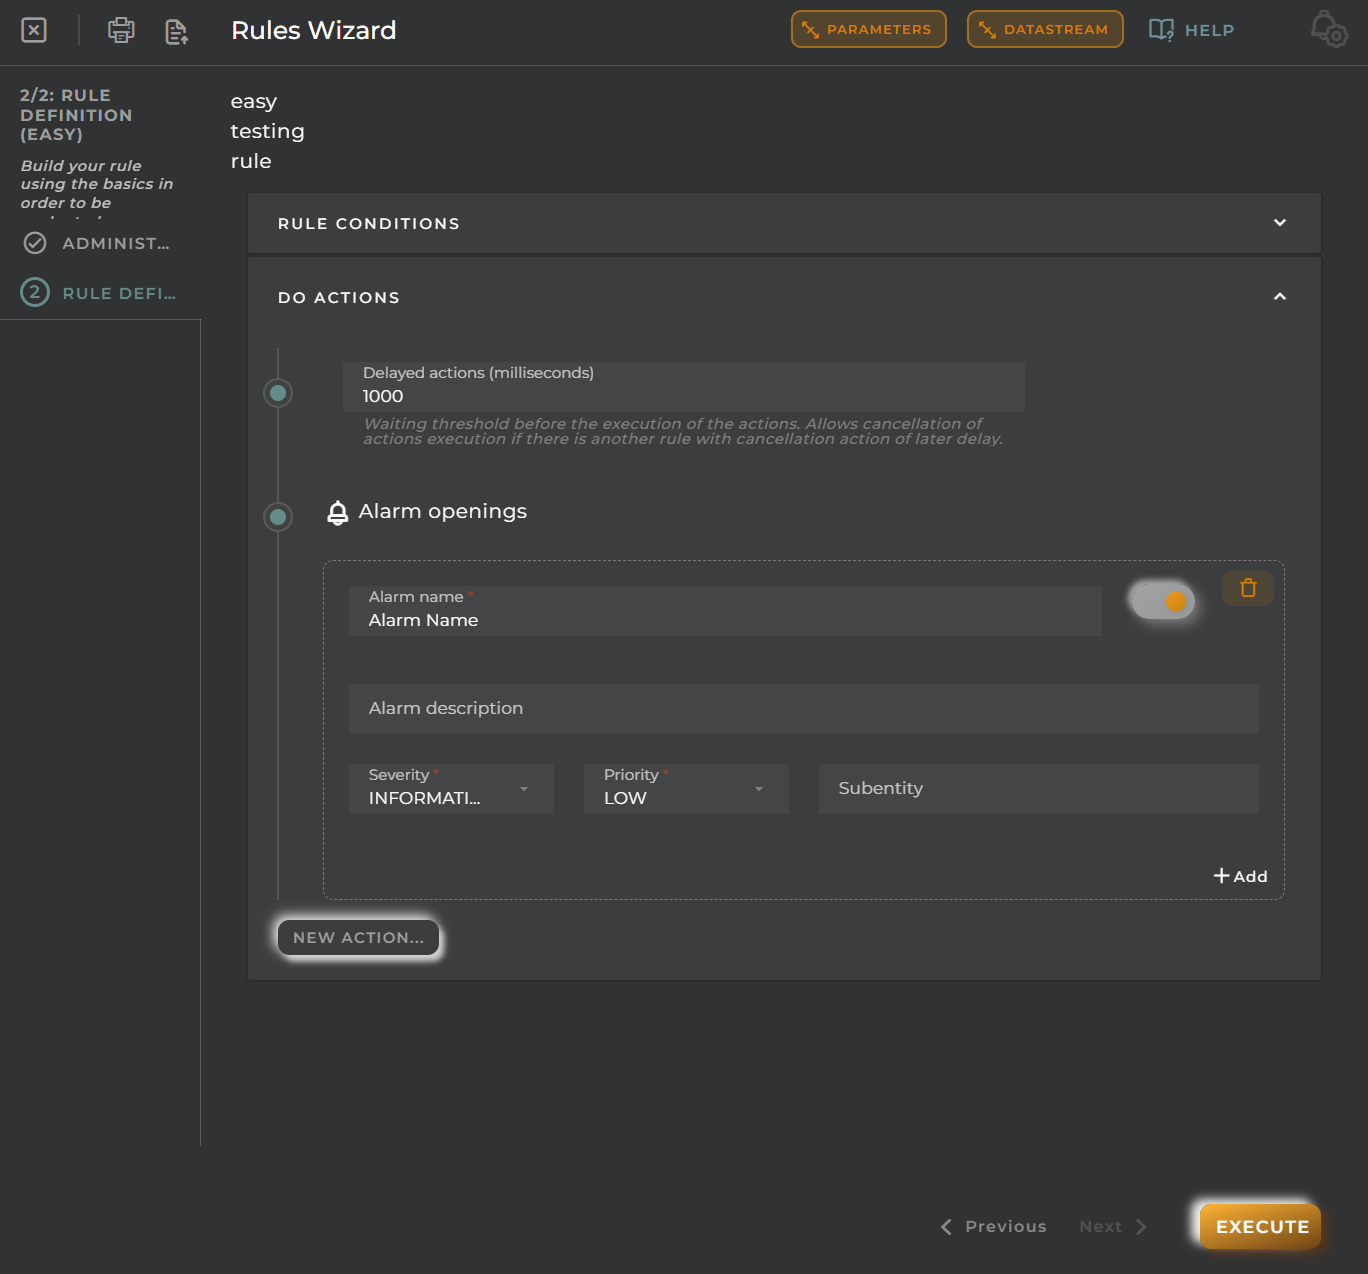
Perform the following actions
Actions will be executed when the configured conditions are met.
There are different options within the New Action menu:
You can delay the action by a specified number of milliseconds, creating a wait threshold before executing the actions. In this case, creating a new alarm has been selected.
Advanced rule
Build a rule using basic concepts for evaluation.
Just like easy rules, the same options exist. You need to select the rule type depending on whether you want a data stream collection, the operation result, or an event. When selecting Data Stream collection, the Data Stream button above will be enabled.
Rule Definition (Advanced)
Allows you to write the JavaScript code of the rule for evaluation. It also allows you to delay the execution of actions with a wait threshold.
Time Series
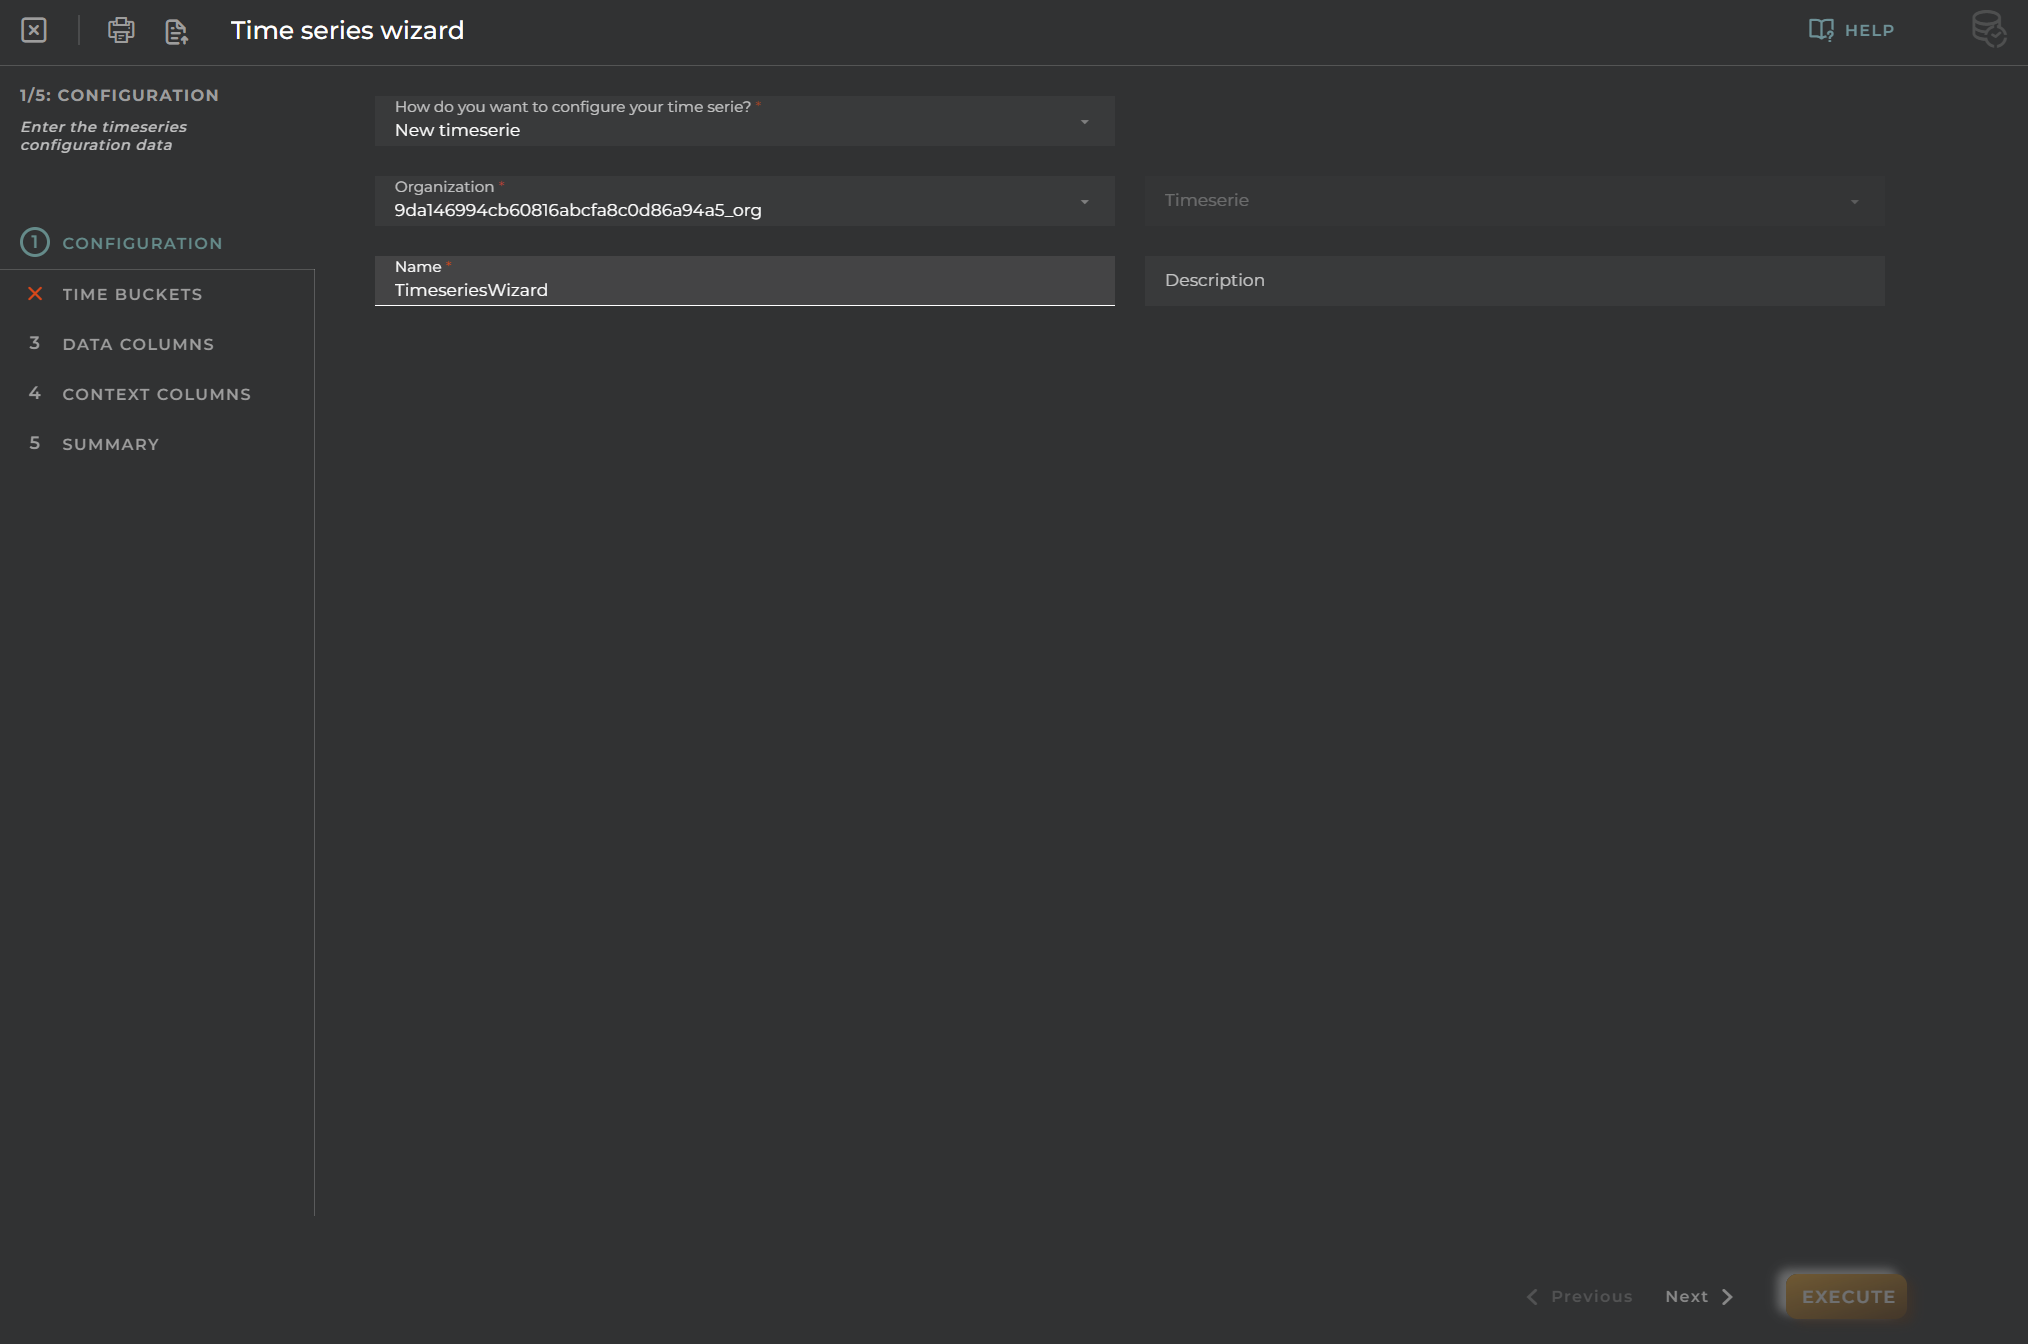
Allows you to create time series for collecting data from a device. It stores rows with columns and maintains aggregated values by column, grouped by configurable time periods.
Steps
Configuration
Essential data for registration and identification of a time series in the platform.
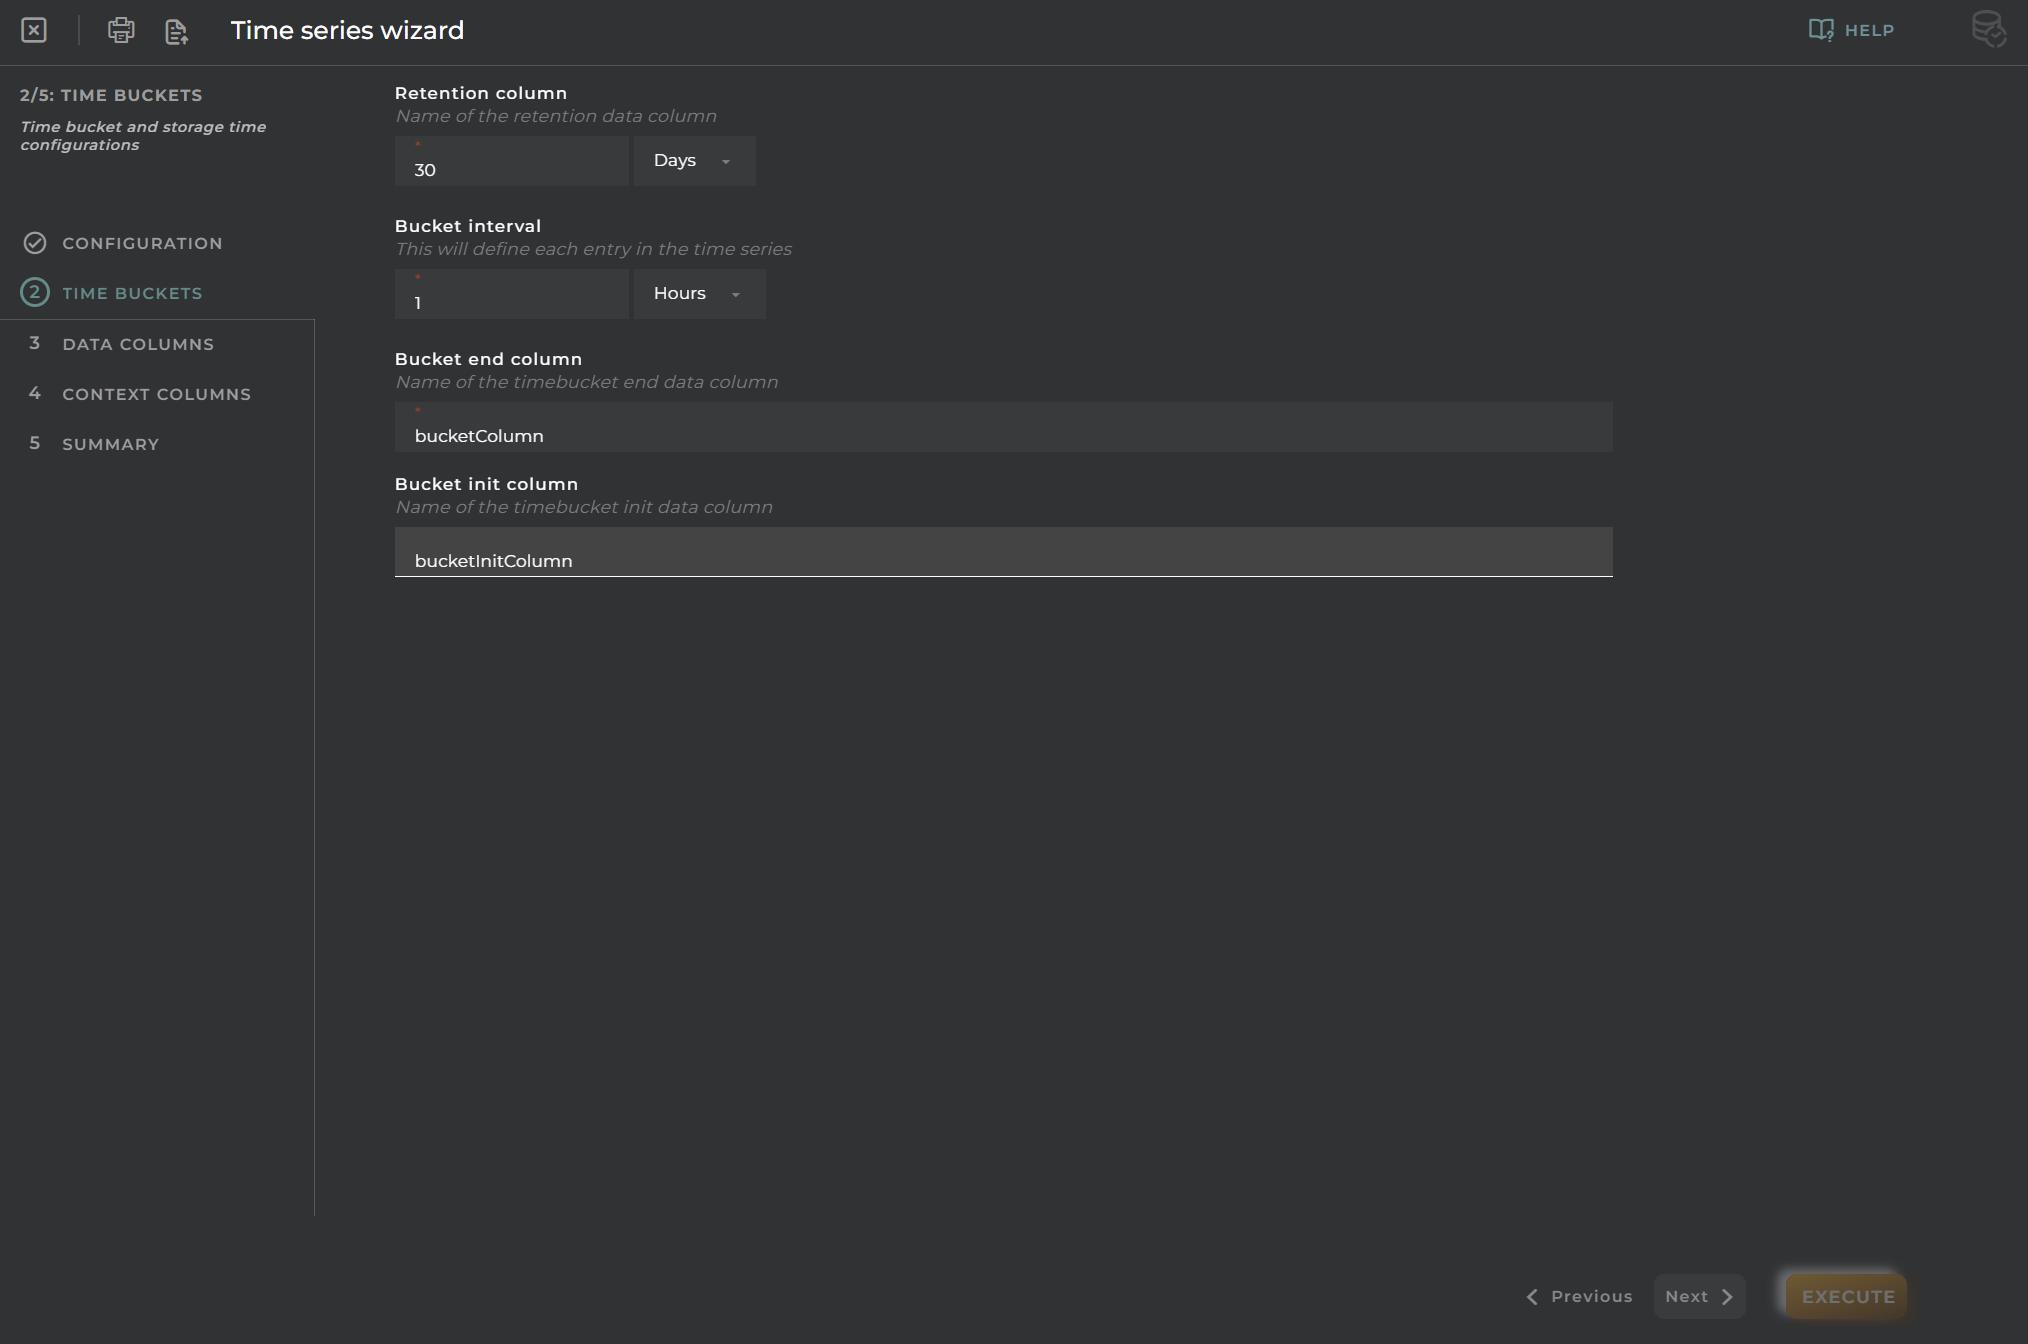
Time Bucket
In time series, the data is grouped by time buckets (time intervals), and all received data columns in each bucket are updated using the selected aggregated function. To understand which bucket each row represents, you will have an additional column to view the end/init date of the selected bucket.
Retention: Column to view the end date of the selected bucket.
Time Bucket: Time interval taken as a reference for data grouping.
Bucket Column: Column to view the end date of the selected bucket (disabled if the time bucket is 0).
Bucket Init Column: Column to view the init date of the selected bucket (disabled if the time bucket is 0).
Origin: Date from which the time series starts.
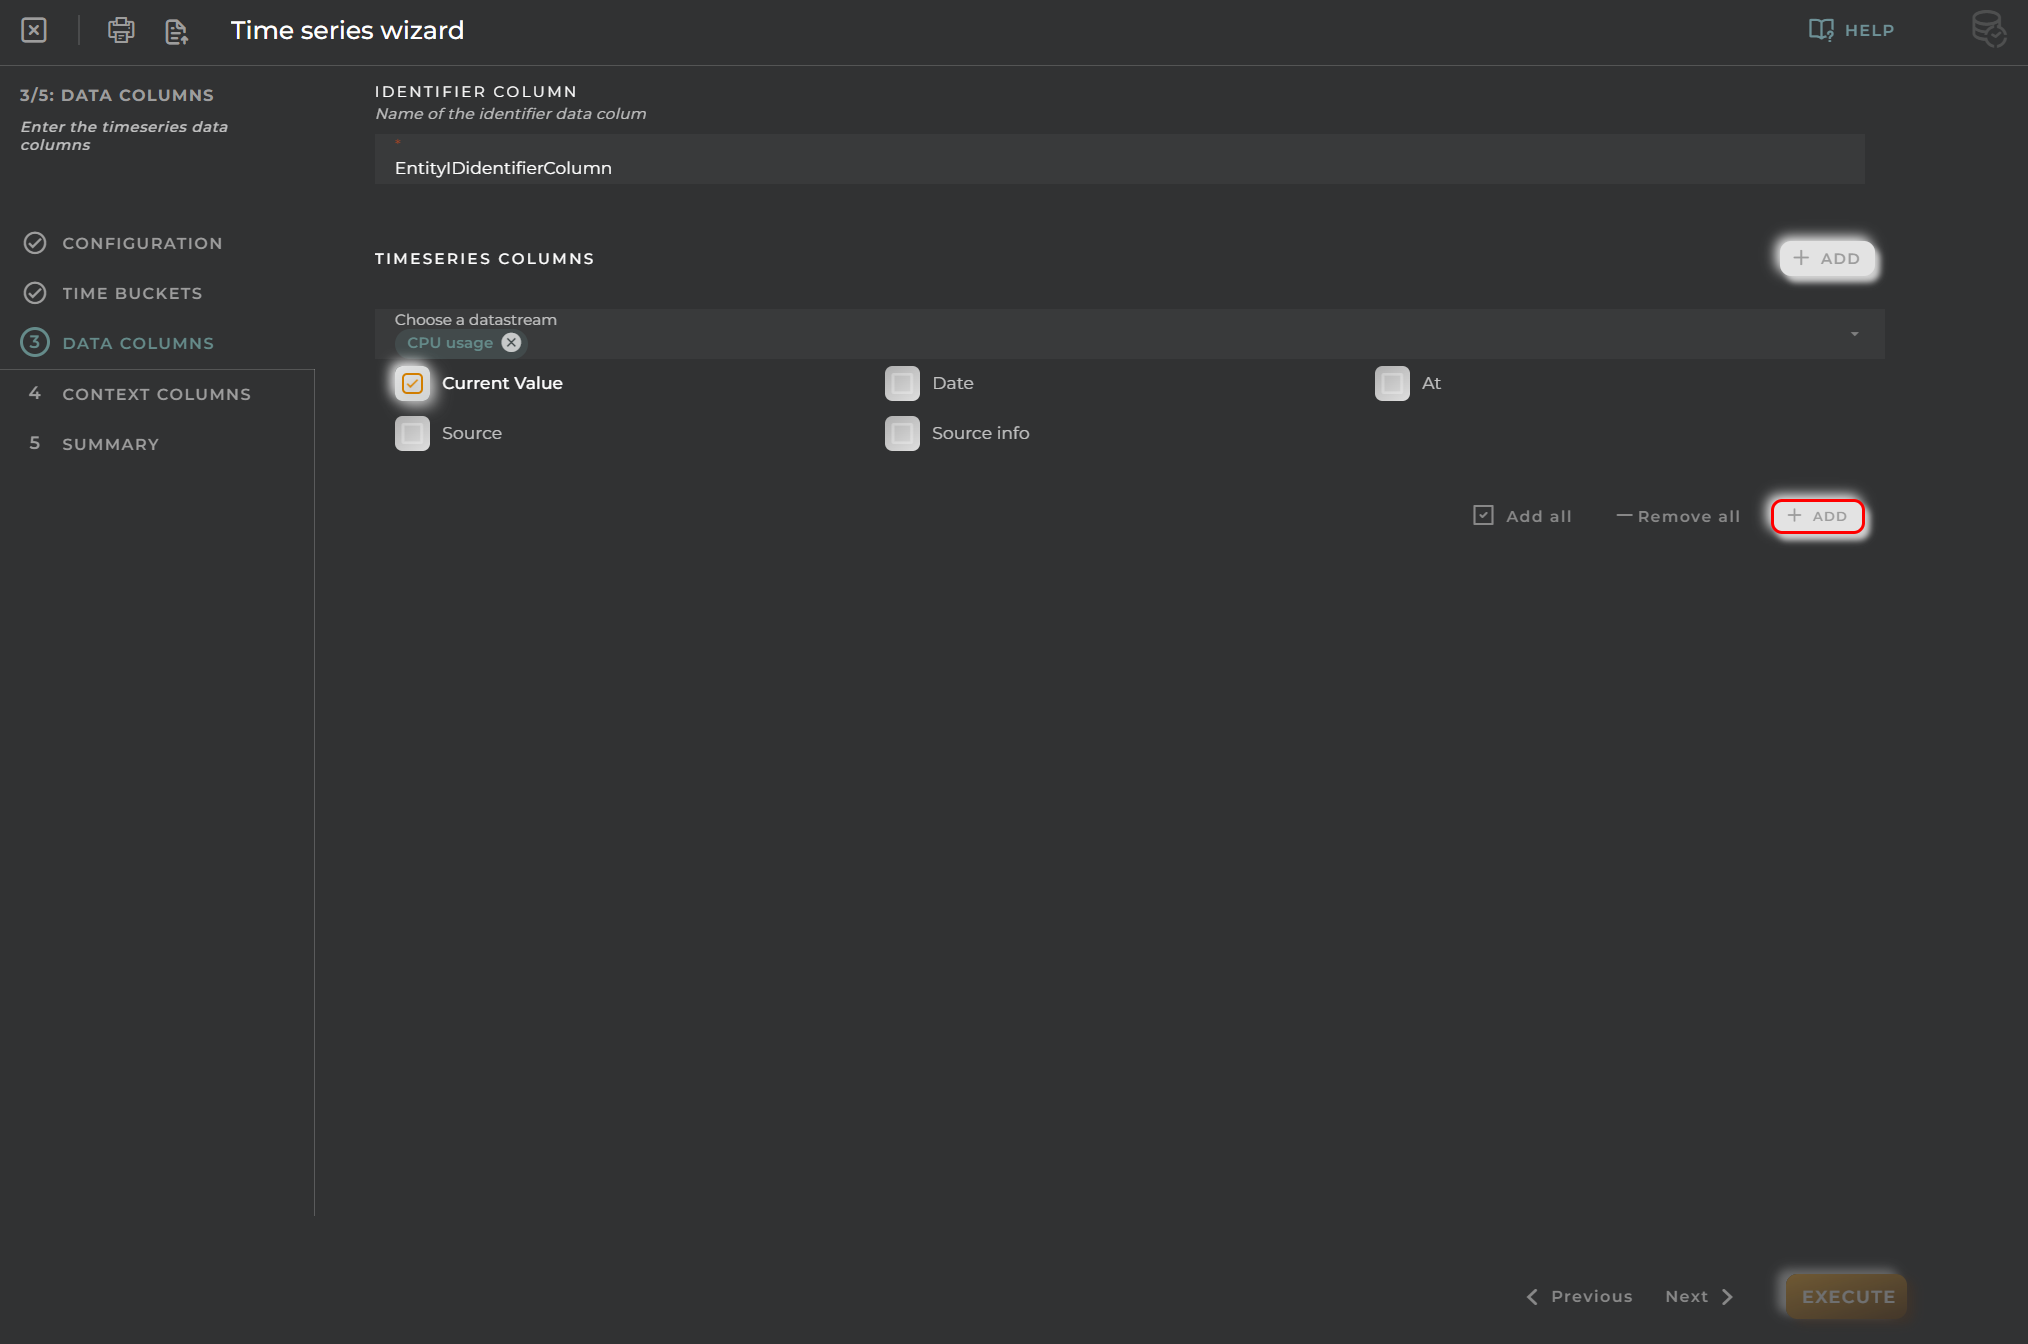
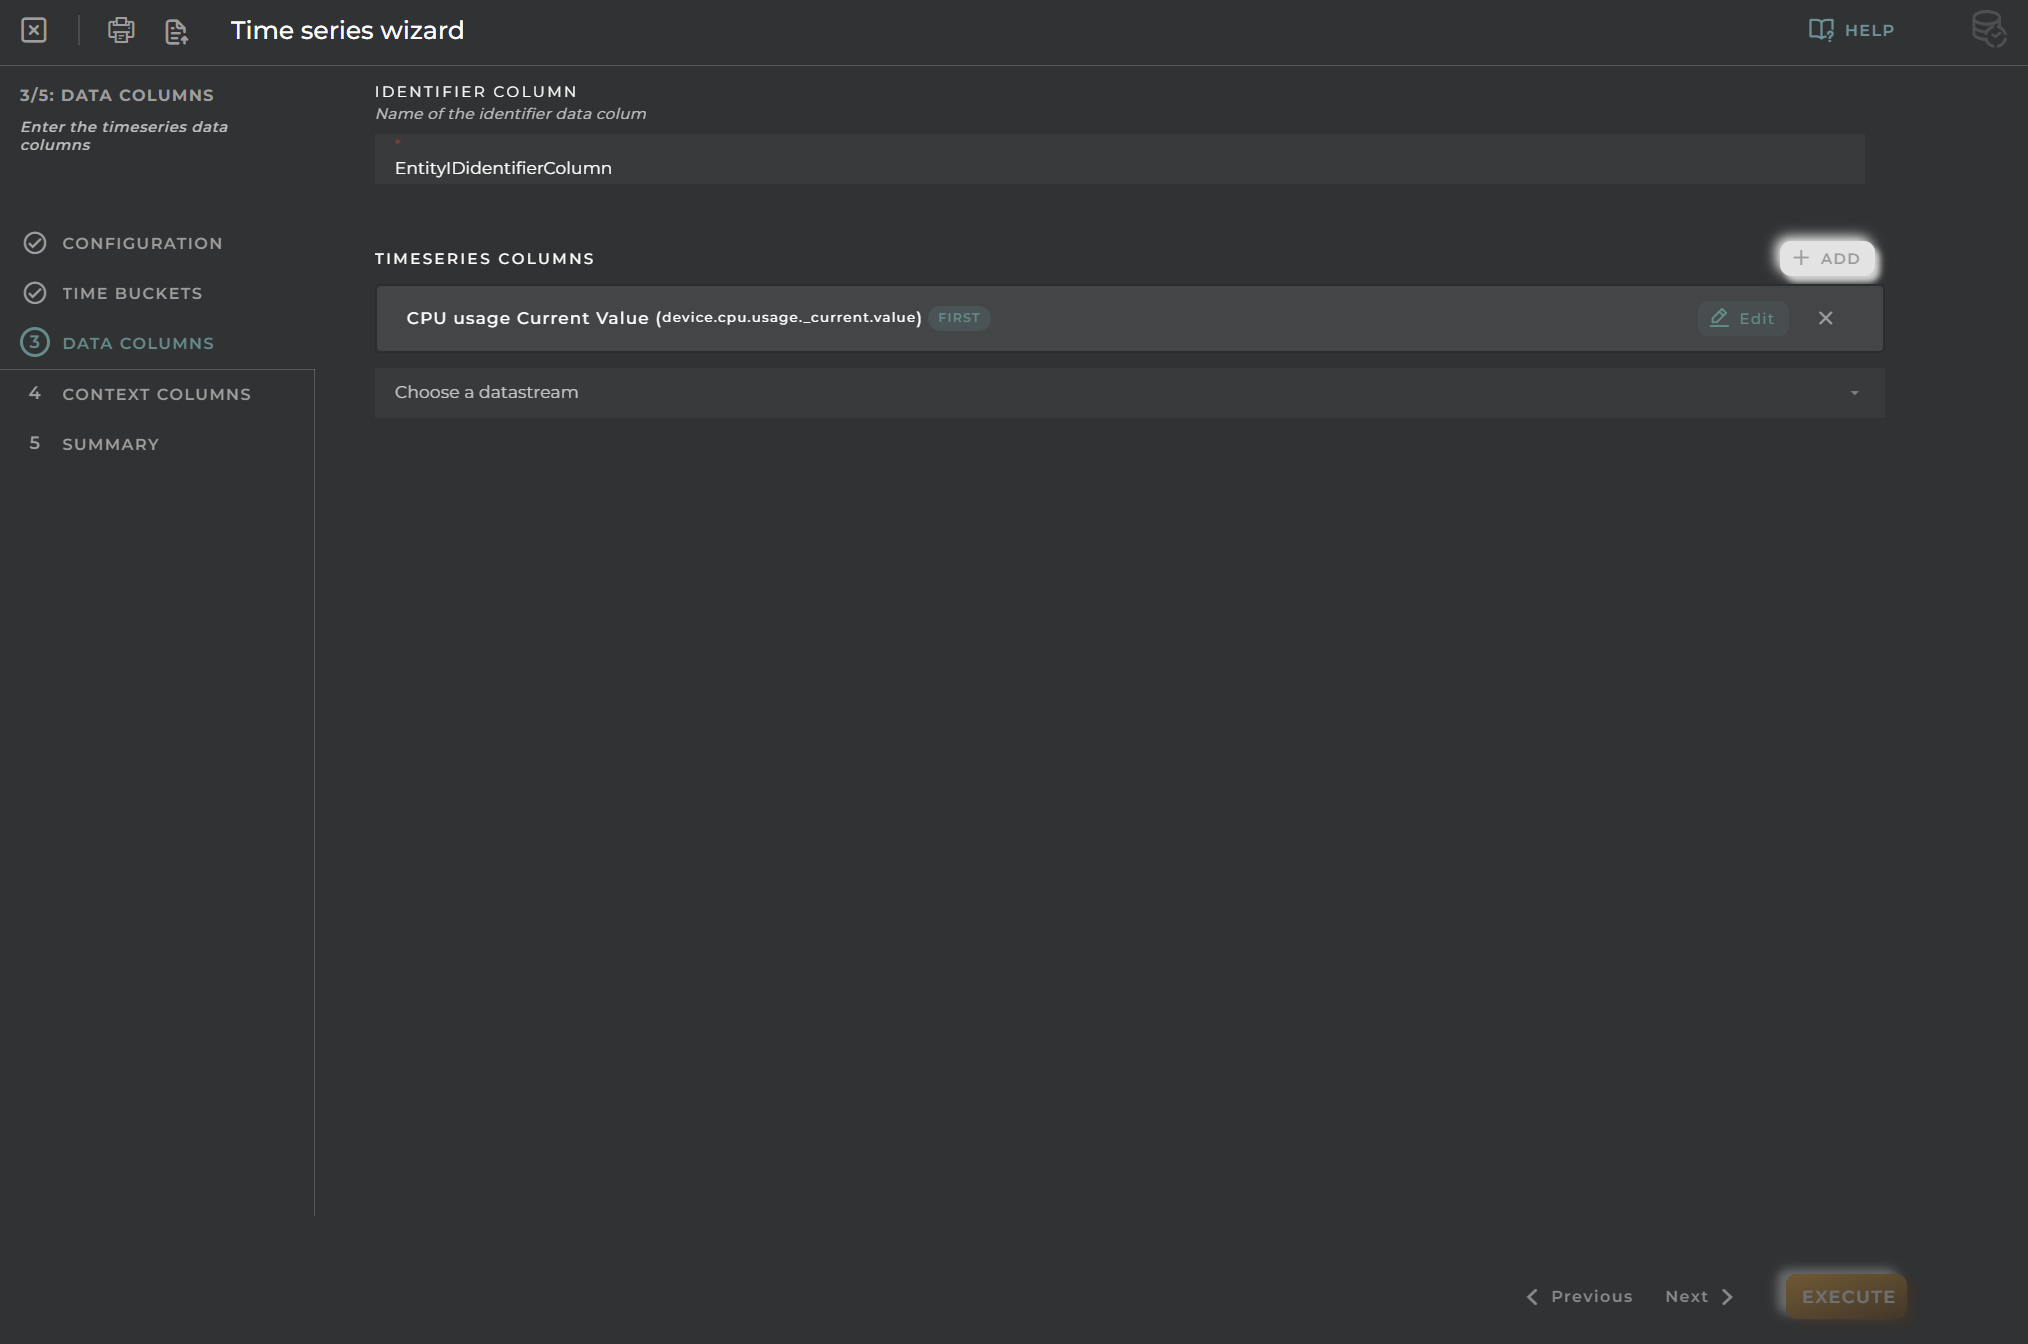
Data Columns
You need to select one or more data streams for the configuration of columns.
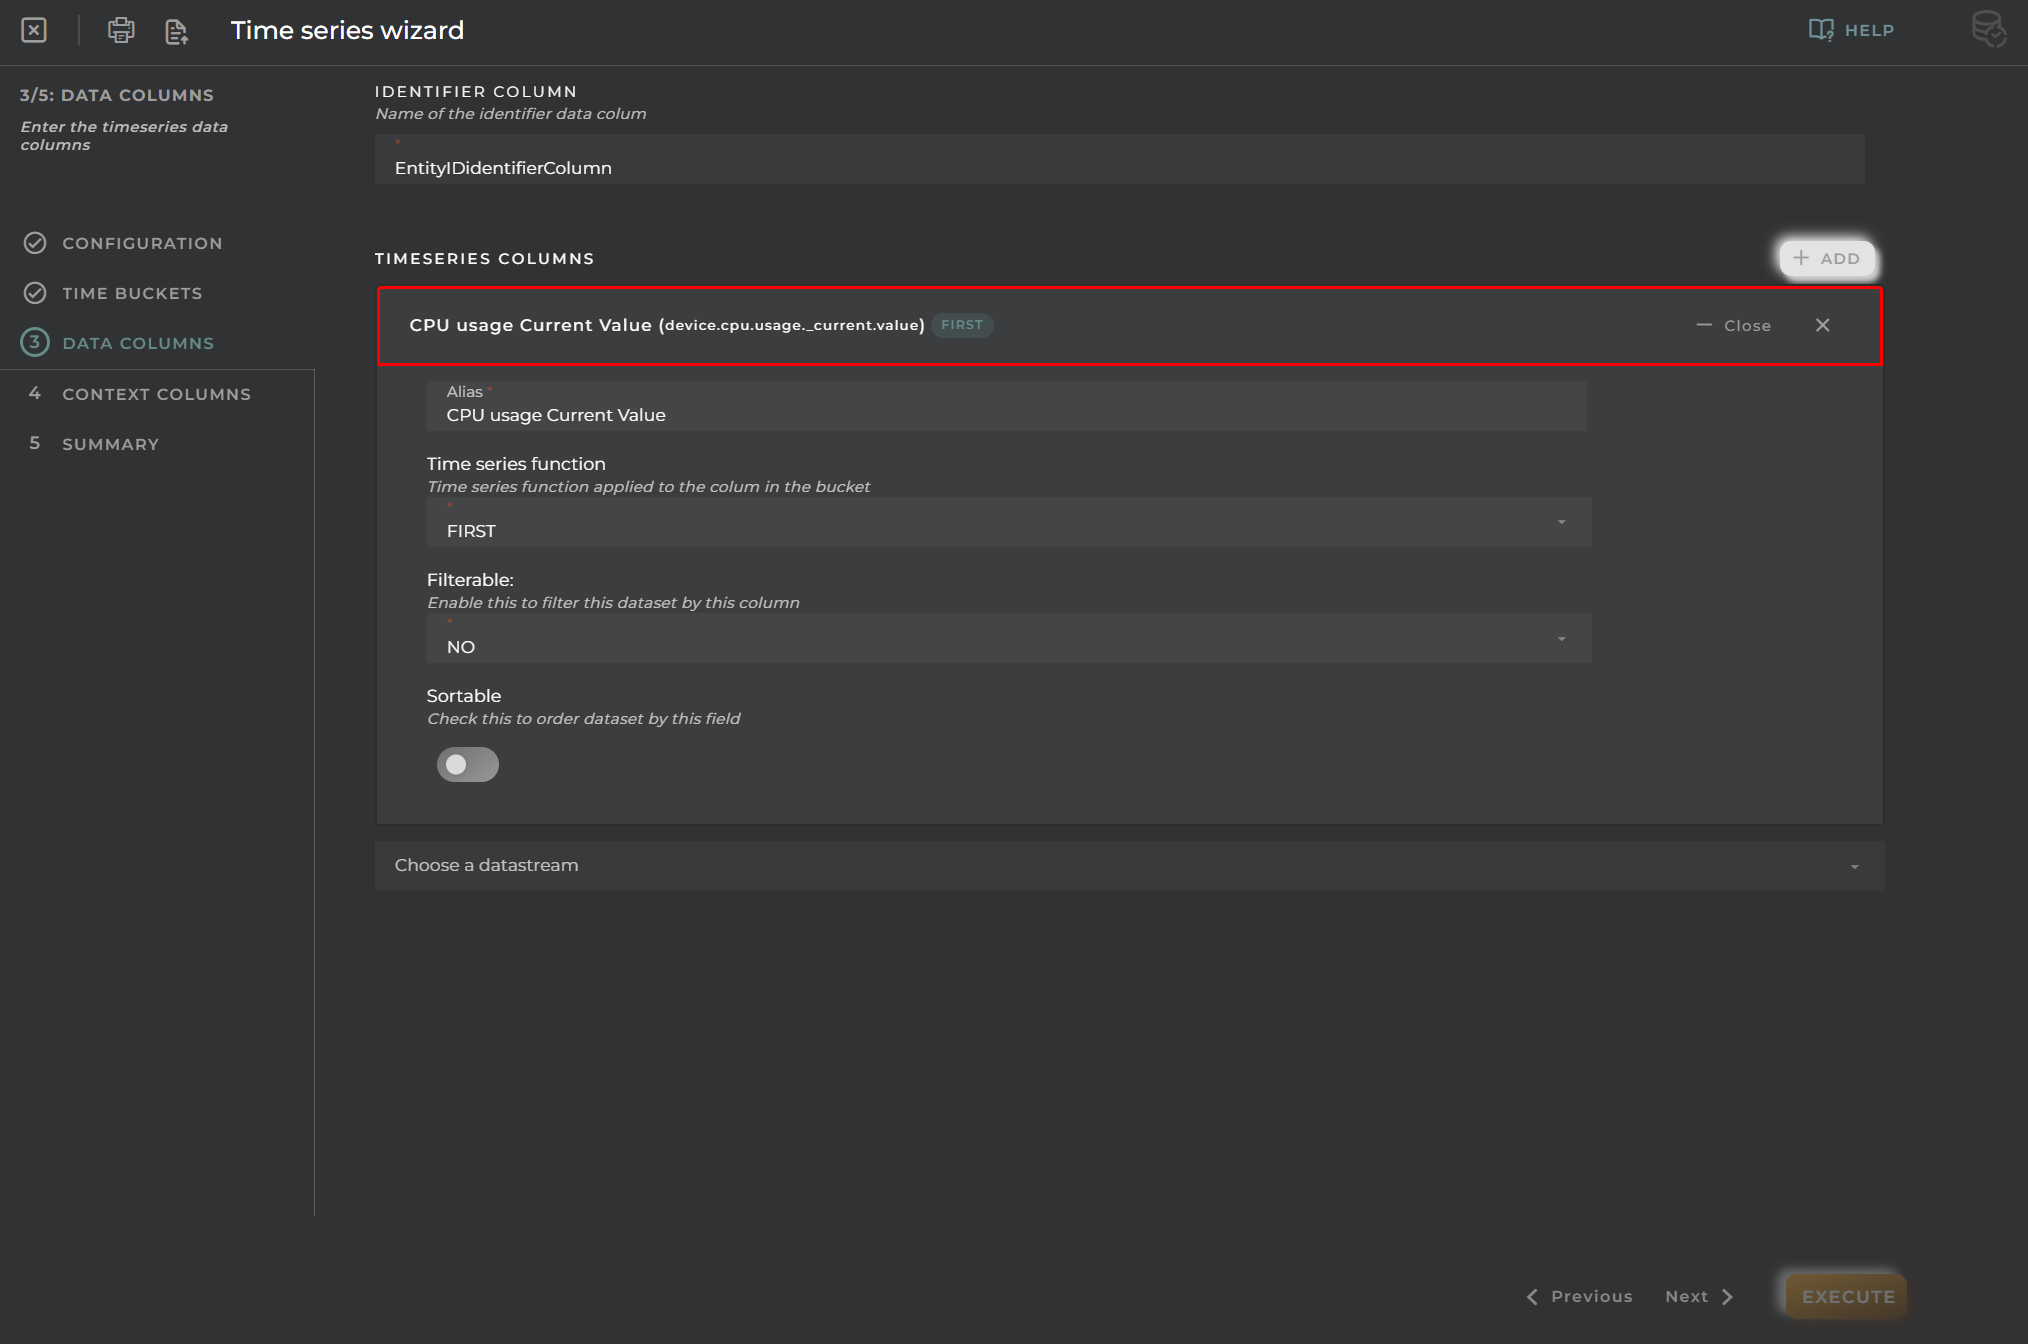
Identifier Column: Name for the column representing provision.administration.identifier._current.value path with filter=YES.
Columns: These can be expanded or collapsed depending on the desired view.
Alias: Alias for the selected column.
Aggregation Field: Aggregation function applied to the current column.
Apply Filter: The dataset filter:
Always: Will always have to be filtered.
Yes: It can be filtered or not.
No: It will not be possible to filter.
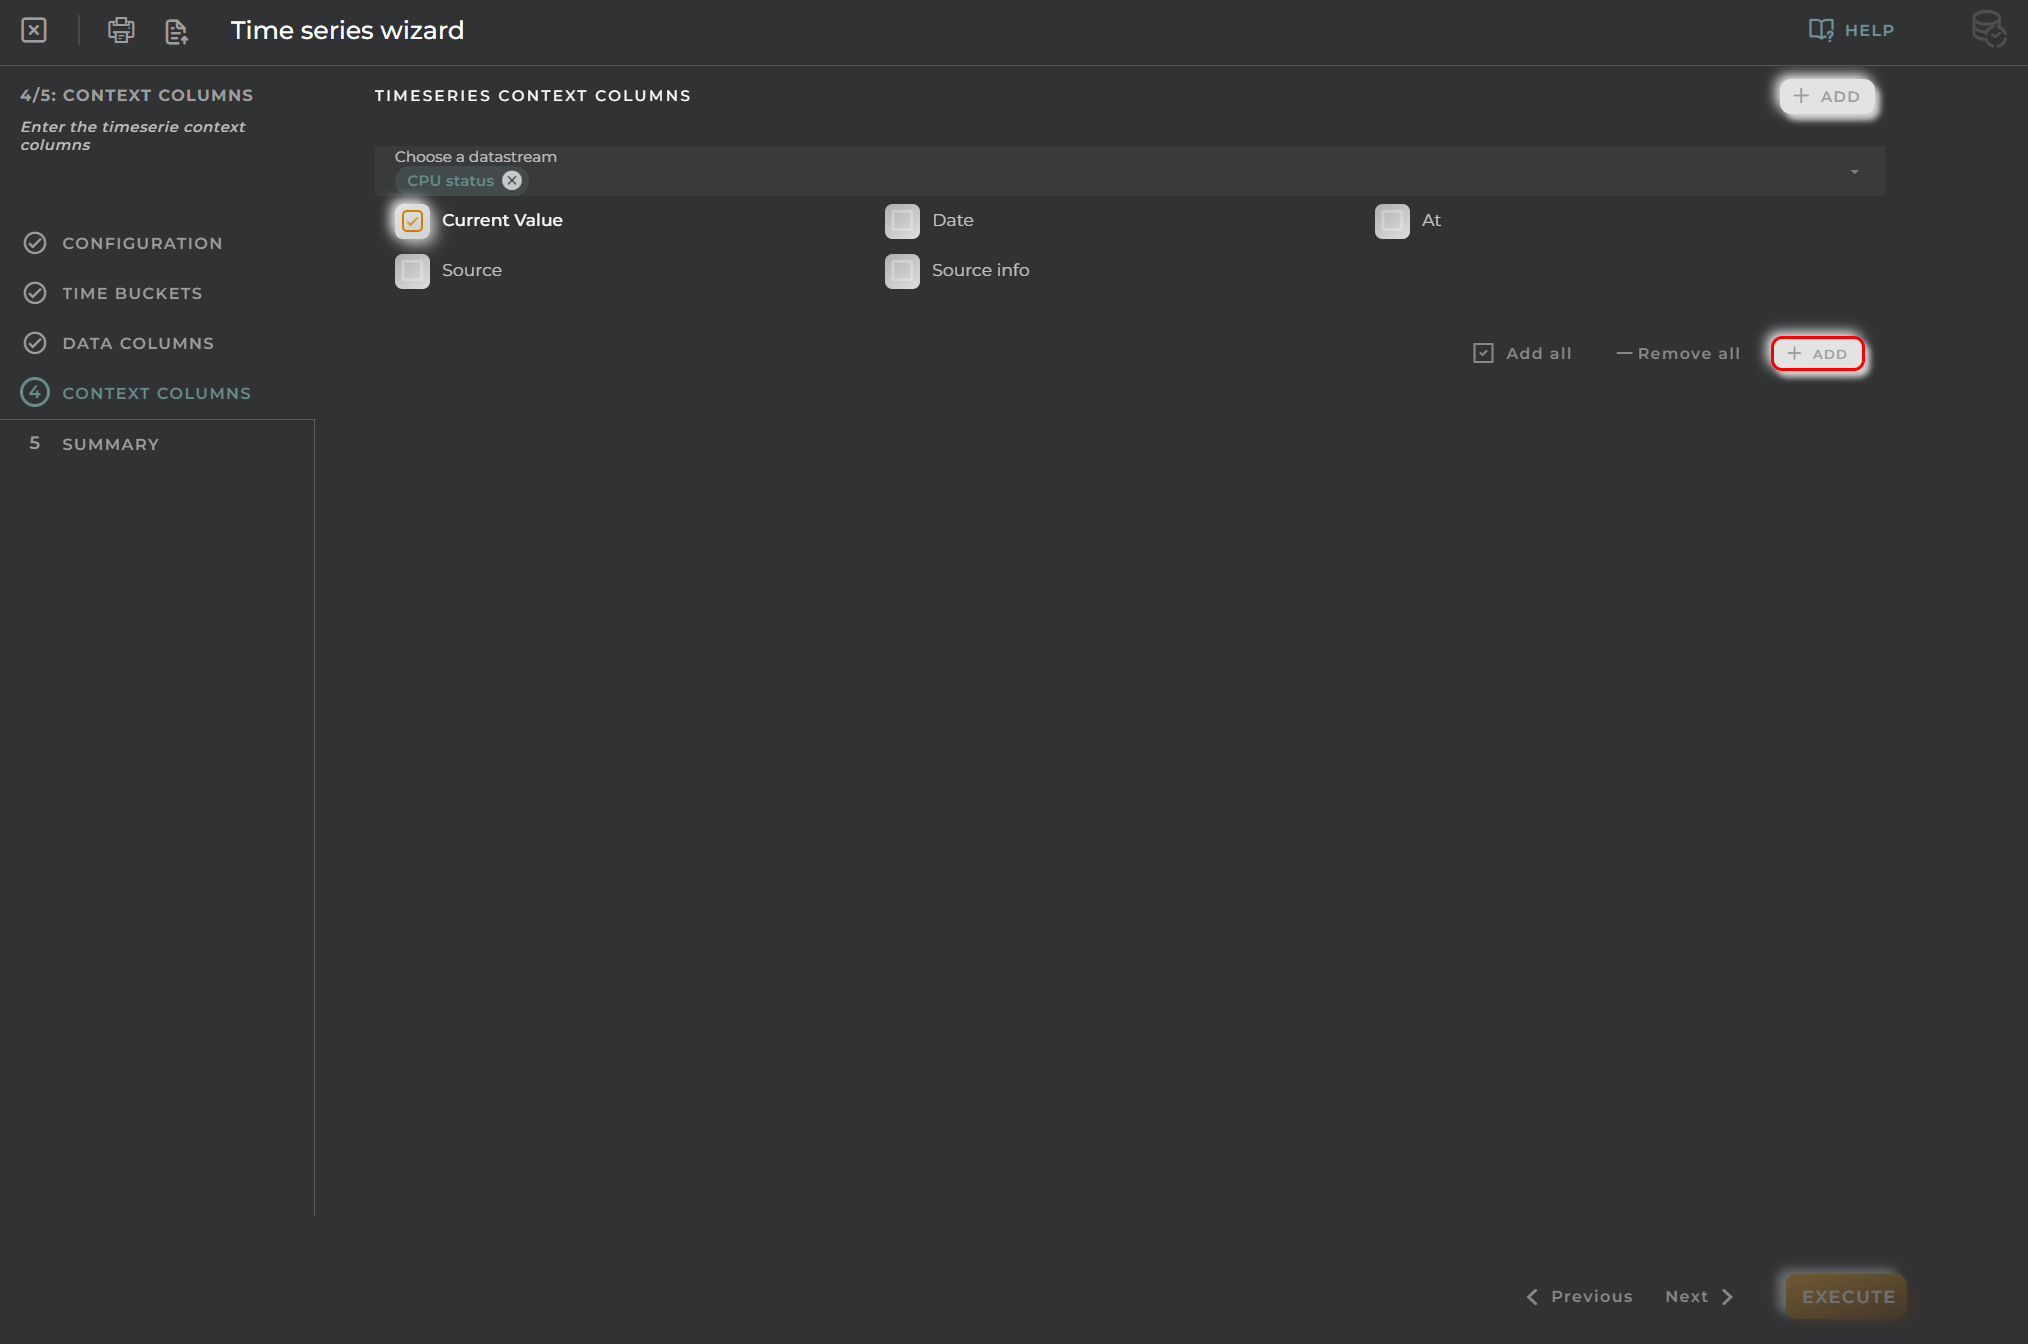
Context Columns
You can add some columns as context information, and these columns will be added to the time series to be used in searching resources.
Columns:
Input Name: Name of the dataset.
Apply Filter: The dataset filter:
Always: Will always have to be filtered.
Yes: It can be filtered or not.
No: It will not be possible to filter.
Path: If a data stream value field is selected and its type is not a basic type, then the data path must be selected until you reach a field with a basic type.
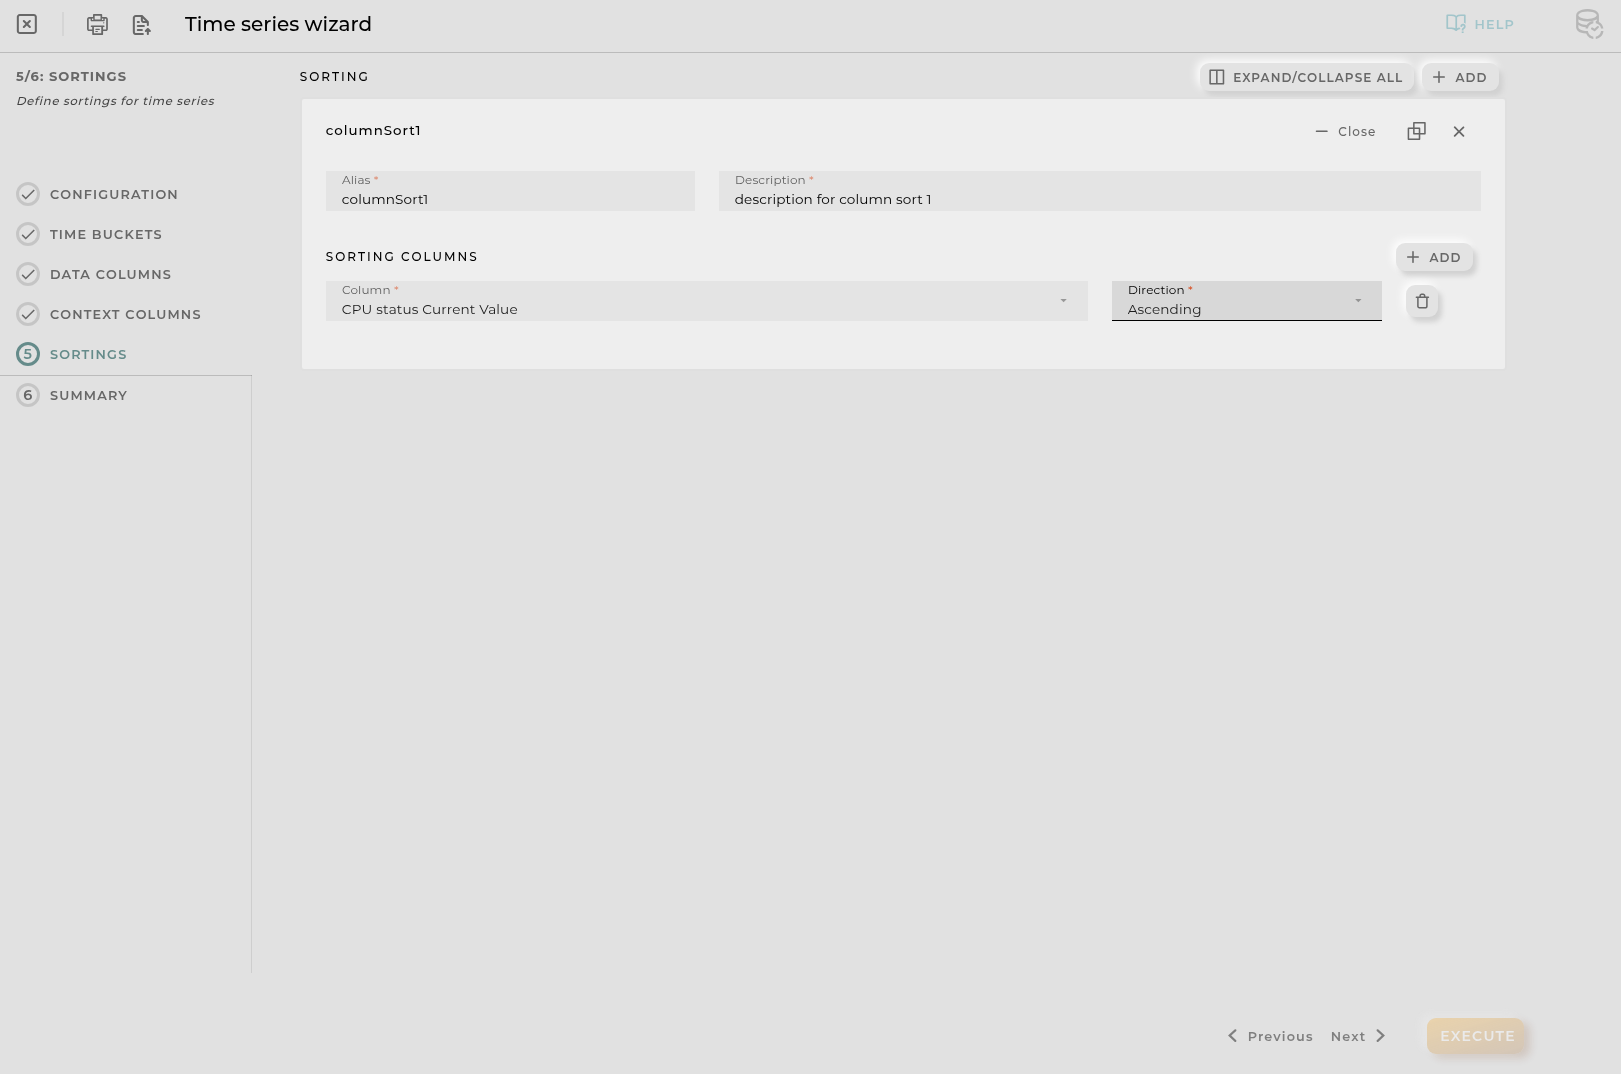
Sorting Columns
In this step you can define the columns that will be used to sort the time series. You can have multiple sorting configurations, each one with multiple columns.
Alias: Identifier for the sorting configuration.
Description: Description of the sorting configuration.
Columns: List of columns to be used for sorting.
Column: Column from the time series to be used for sorting.
Order: Order to be used for sorting.
Ascending: Ascending order.
Descending: Descending order.
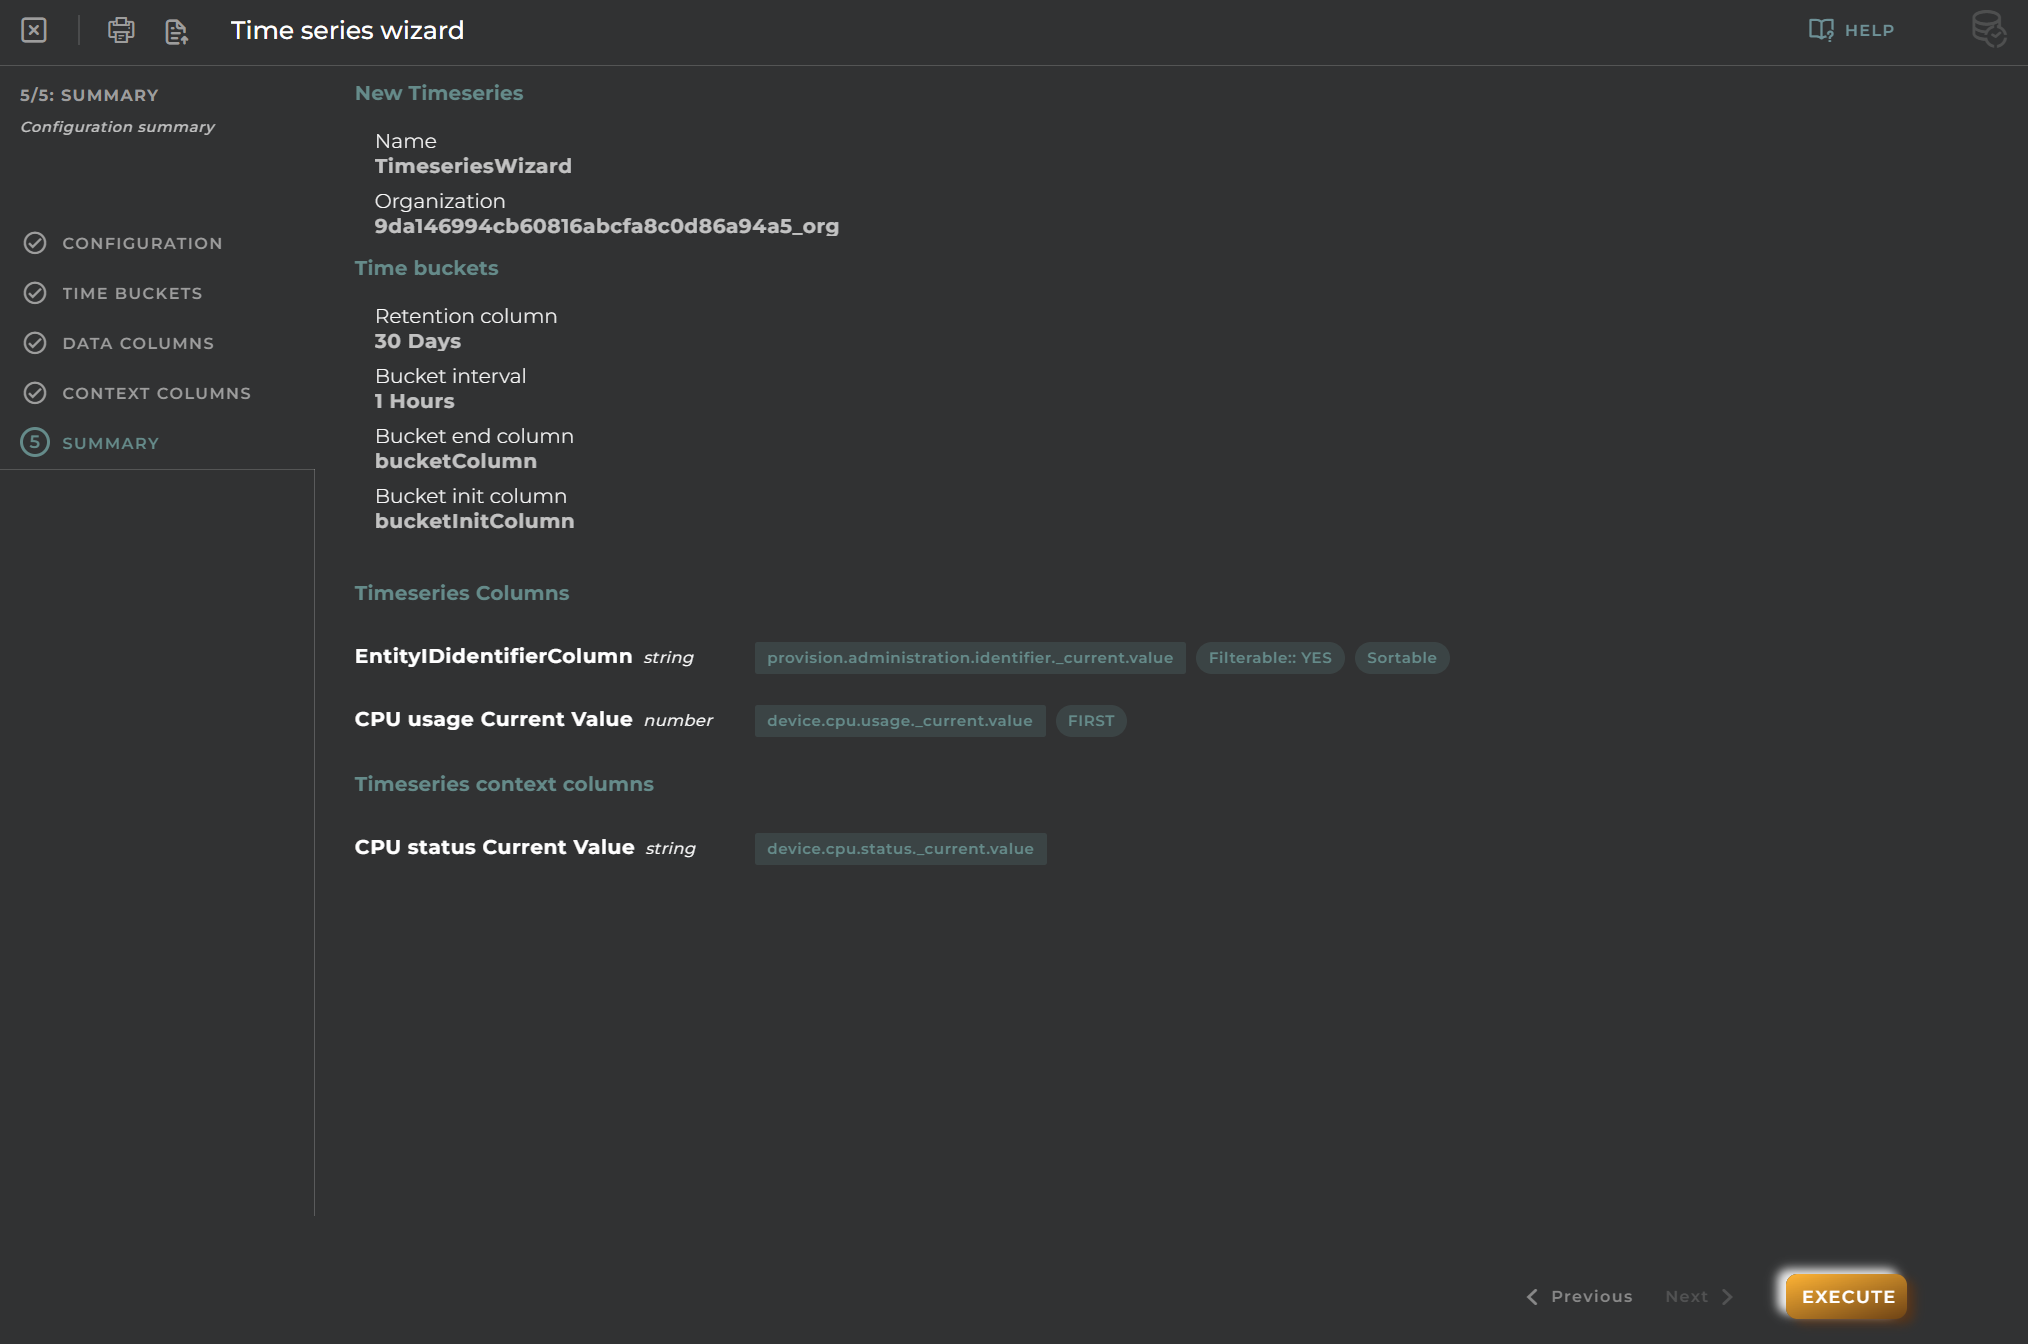
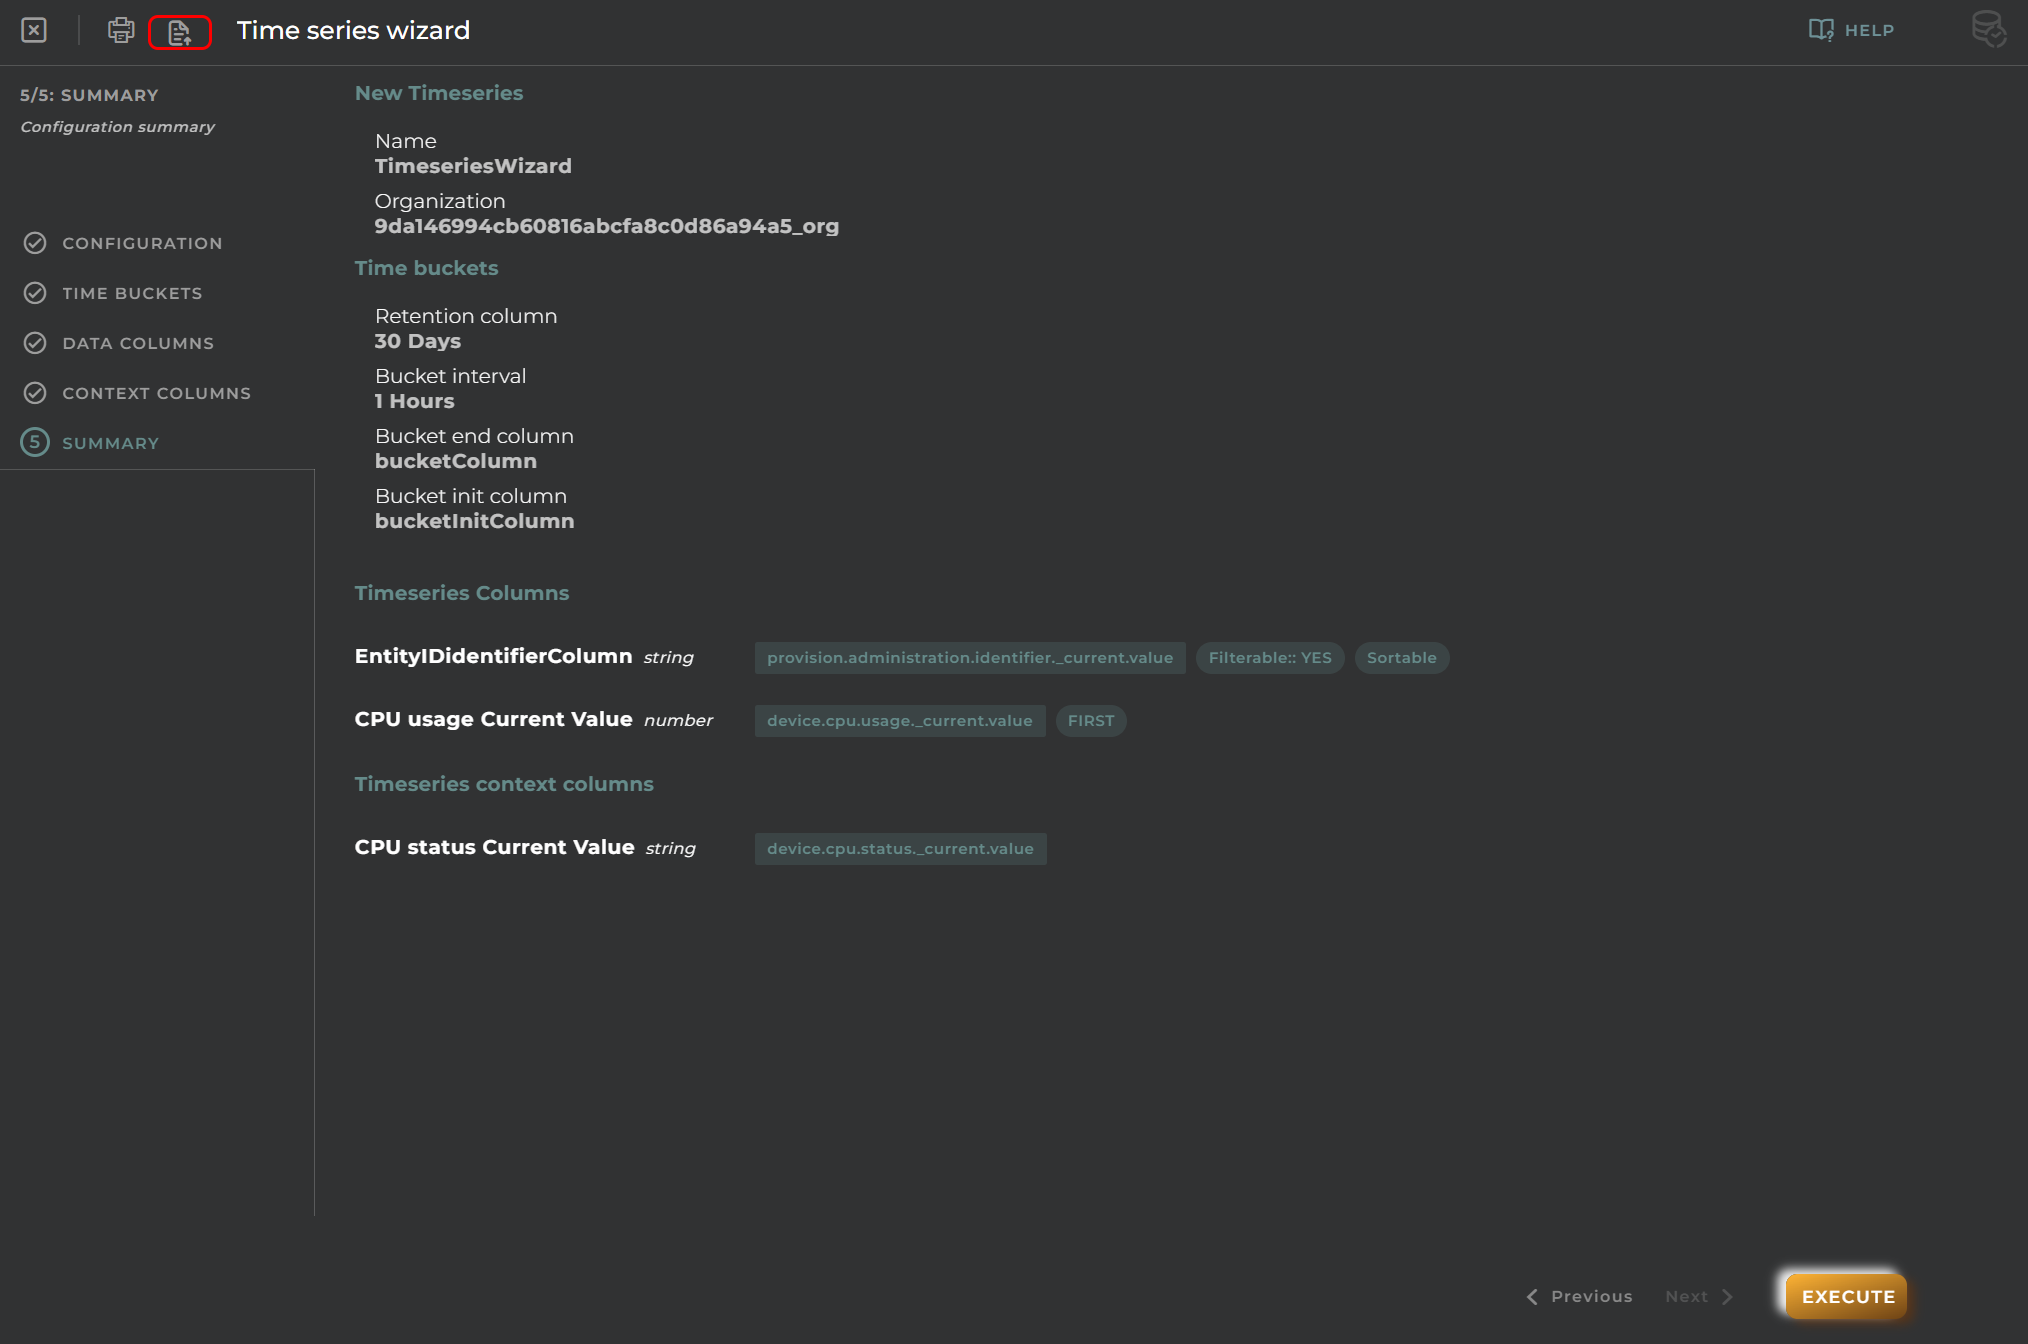
Summary
This step contains the summary of the time series to be created:
New Time series Data: Configuration data.
Bucket Info: Bucket configuration data.
Columns: Configured columns.
Context: Configured context columns.
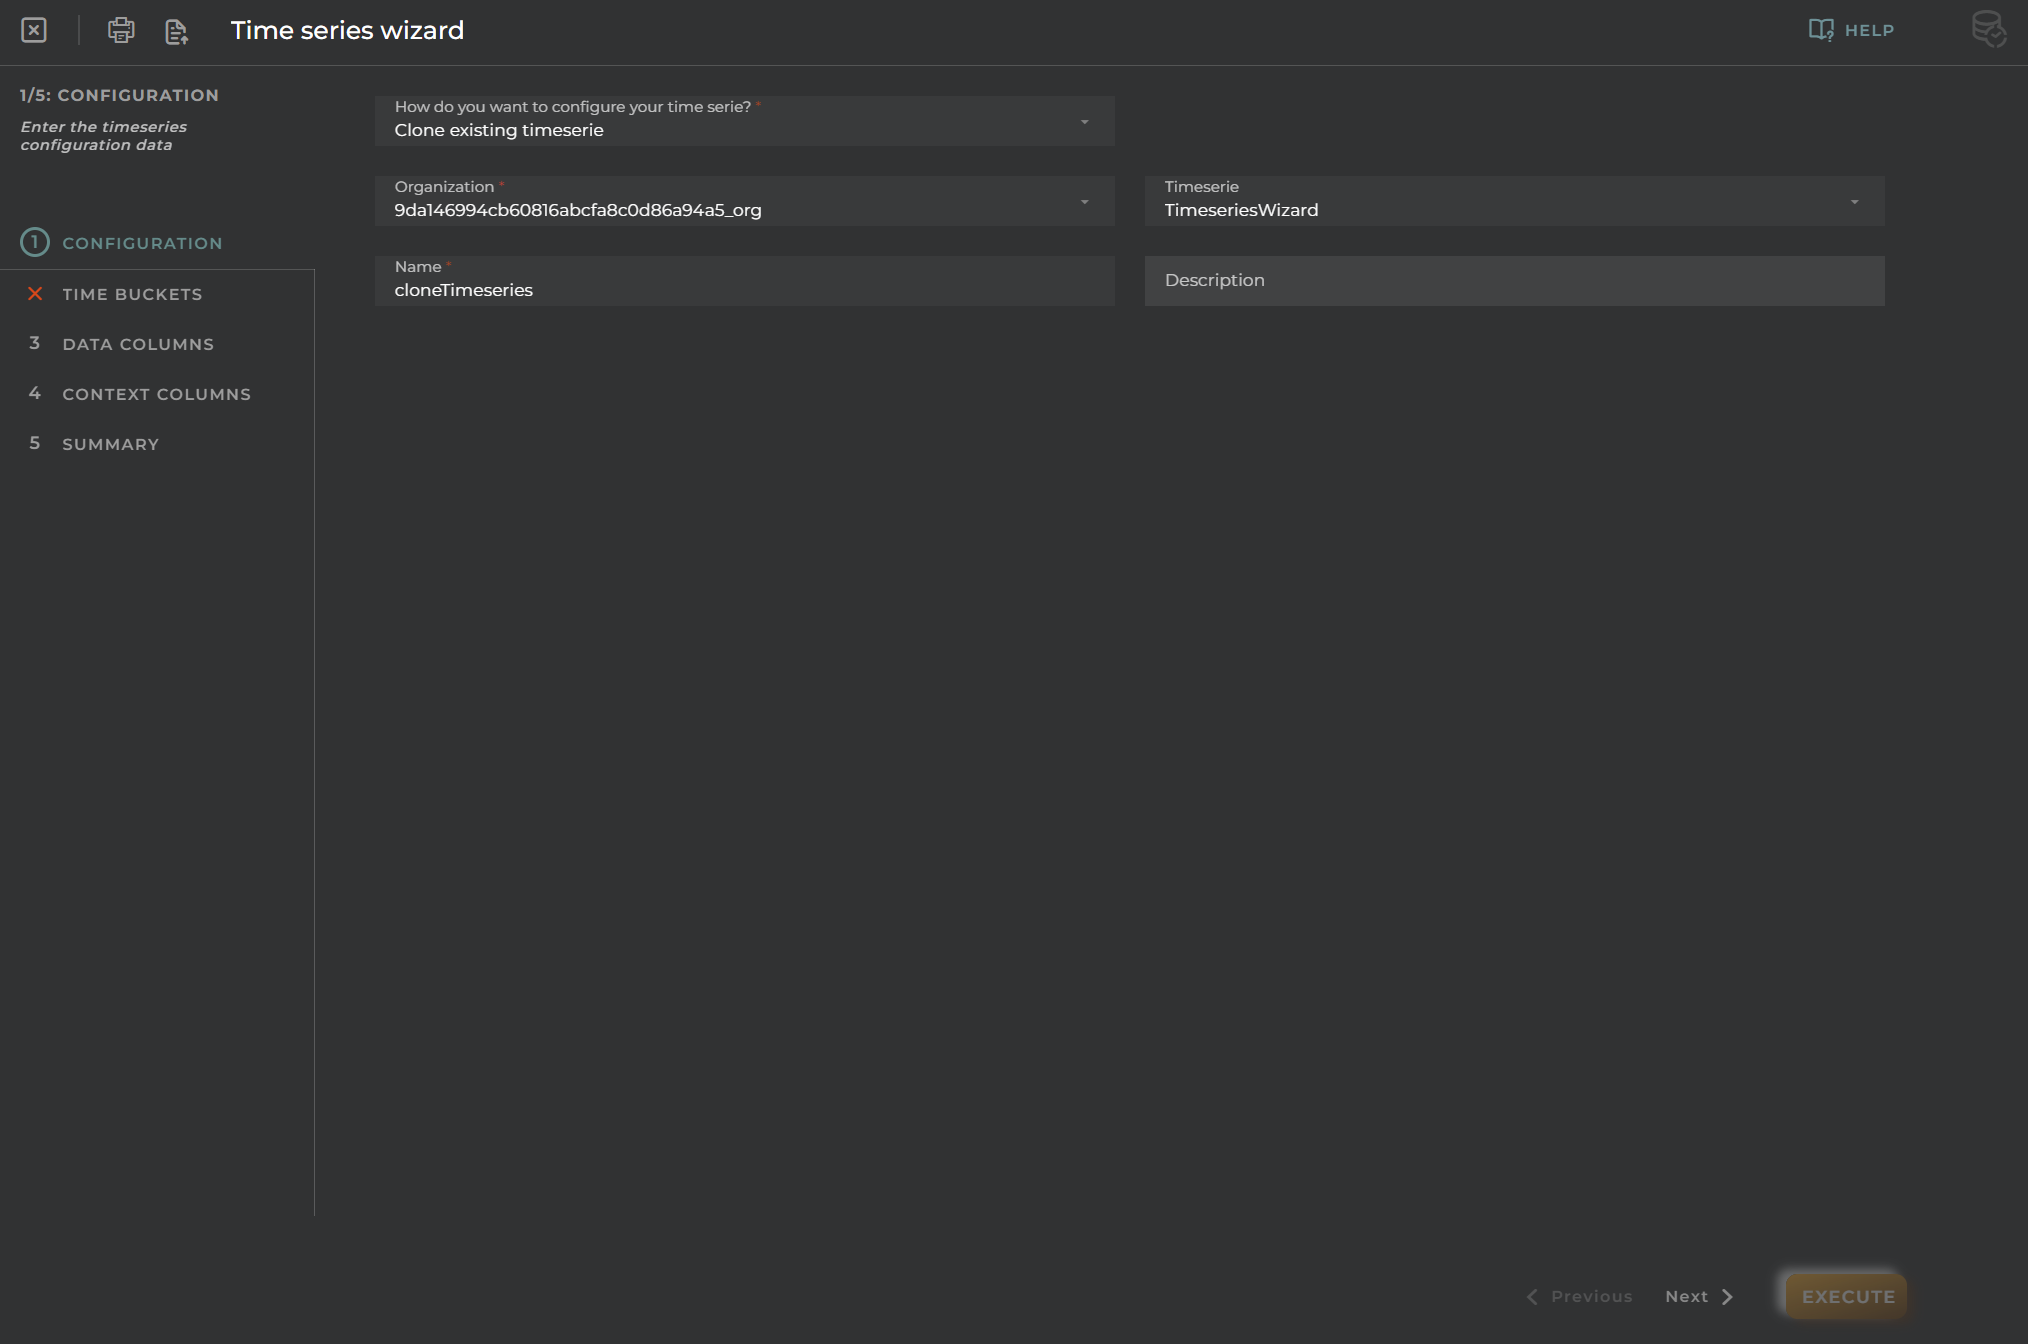
Clone
In addition to creating a new dataset, you can clone a dataset from an existing one that has default data.
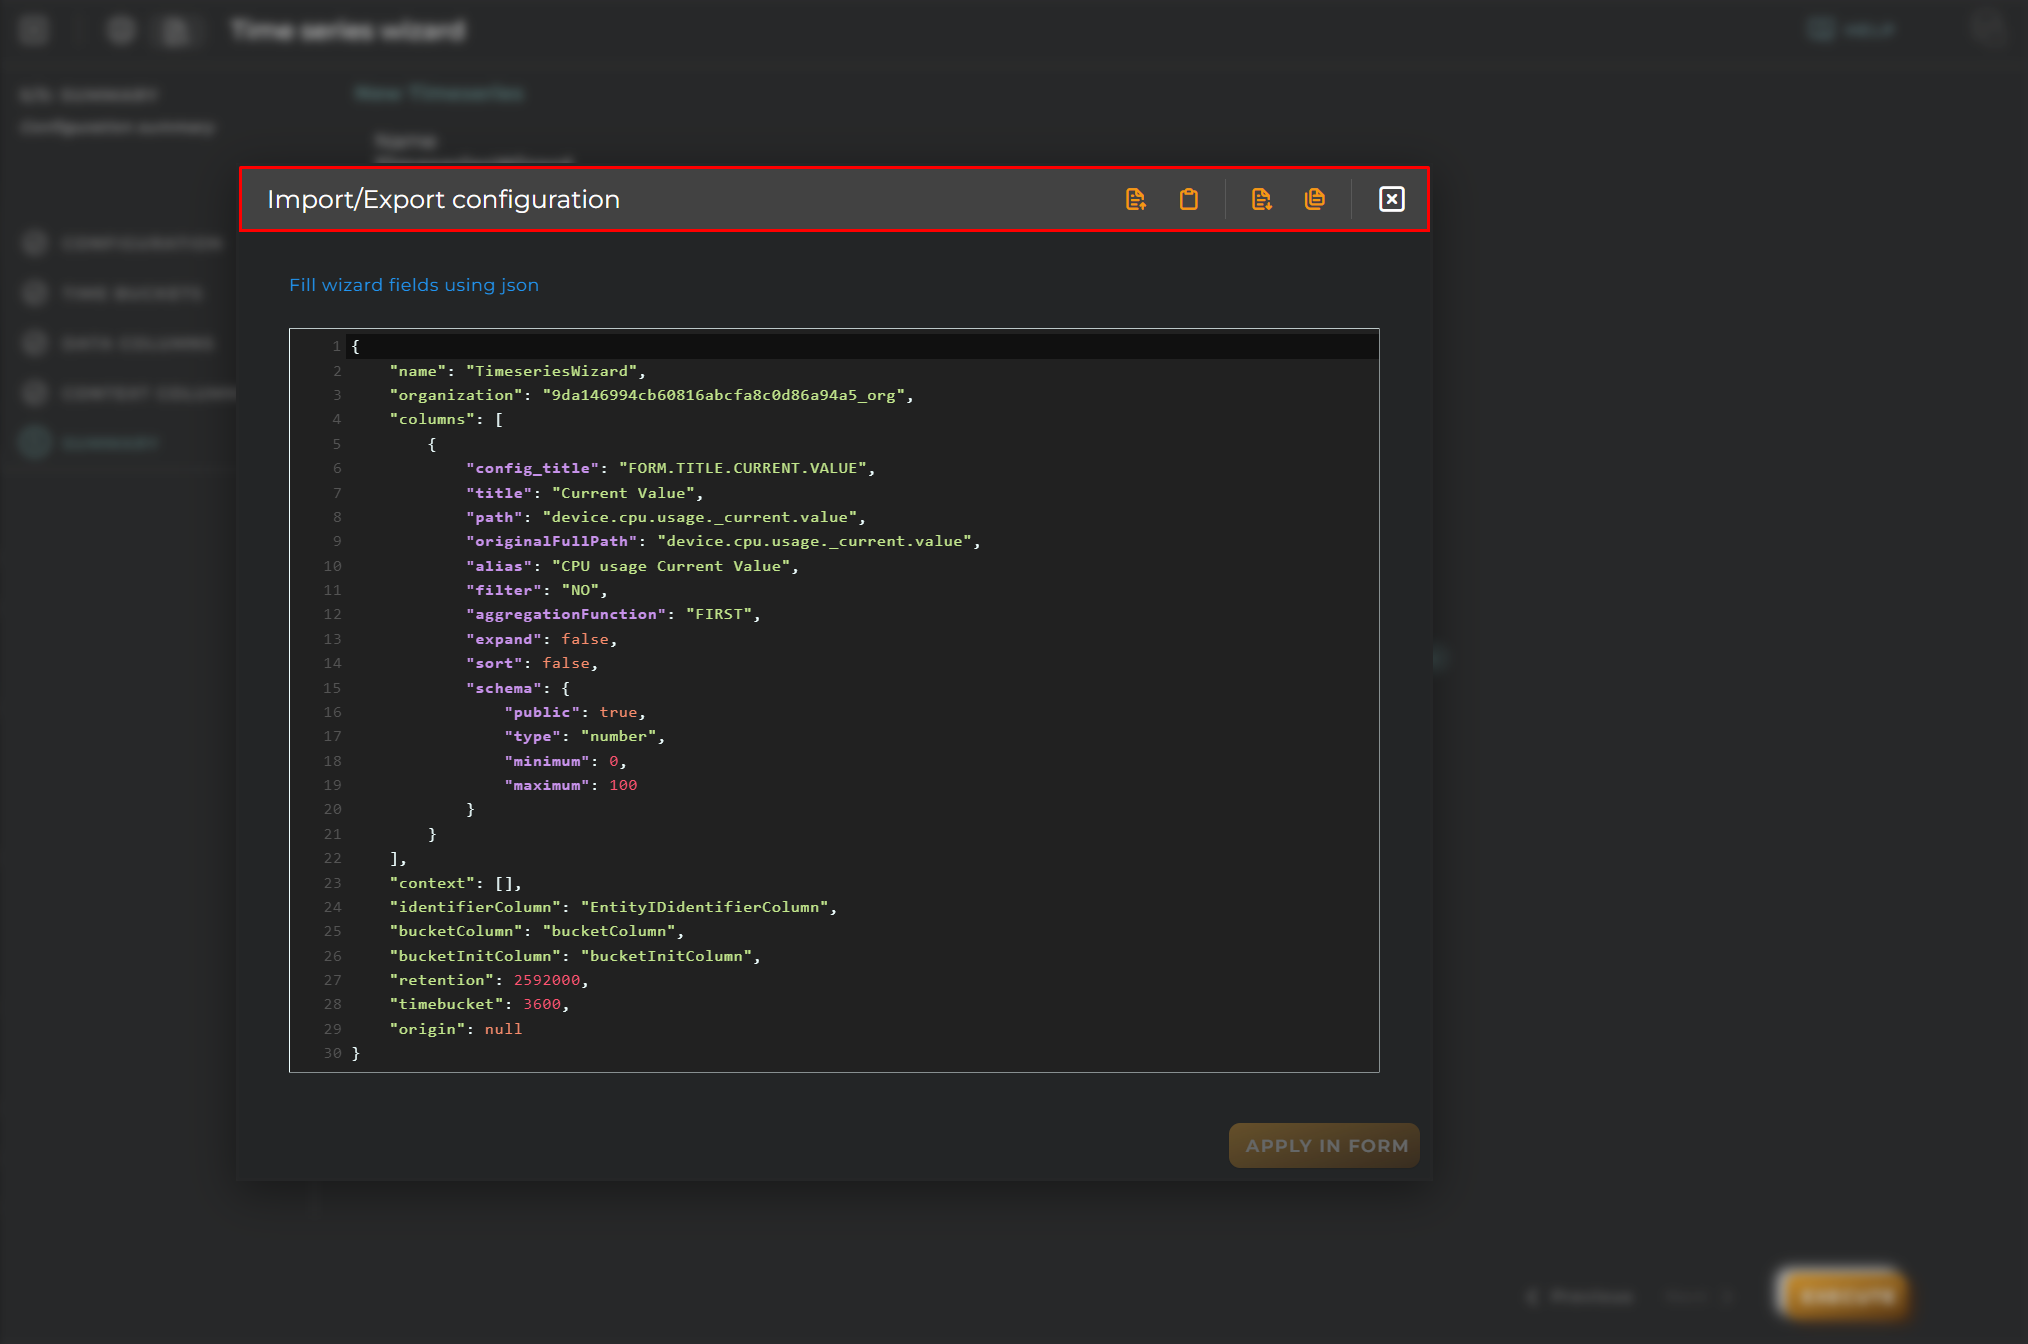
Import/Export Configuration
Allows you to import and export the wizard’s configuration using JSON.
When accessing import and export, it shows a window with different actions. It also displays the wizard’s configuration in JSON format.
The available actions are as follows:
Upload JSON: Uploads a JSON file and replaces the previous JSON.
Paste from clipboard: Pastes JSON from the clipboard and replaces the previous JSON.
Download JSON: Downloads the JSON in a file with the name of the wizard.
Copy to clipboard: Copies the JSON to the clipboard.
Time series functions wizard
Allows for the creation of time series functions.
Steps
Administration
Data for the registration and identification of the time series function on the platform.
Here you can select the organization, name, description and value types allowed by the function.
Definition
This is the code of the time series function.
Here you can modify the code and test it simulating the input data using the receivedValues, extra and currentValue simulated params.
Summary
Finally you can review changes (except the code) in order to proceed.
Once you finish you may be able to select the function in a time series column.
Upload new data transformer
Allows you to upload files for the execution of a transformer.
Steps
Administration data
In this step, you must enter the administrative information for the transformer.
The form contains the following fields:
Organization - organizational location (required)
Files
Here, you can upload the necessary Python files for the execution of the transformation.
The first file will be the main execution file.
Additional files can be Python library files necessary for the correct execution.
Upload new predictive model
Allows you to upload files for the execution of a model.
Steps
Administration data
In this step, you must enter the administrative information for the predictive model.
The form contains the following fields:
Organization - organizational location (required)
Files
Here, you can upload the necessary Python files for the execution of the transformation.
It’s necessary to use files with extensions PMML or ONNX.
User
Allows the creation of users on the platform.
Steps
User Data
Essential information for the registration and identification of a user on the platform.
All fields are mandatory.
Email: The email address must be valid.
Password: The “Password” and “Password Repeat” fields must match.
Profile: User profile to be assigned to the user.
Organization: Administrative organization associated with the user.
Workgroup: Workgroup indicating the management scope assigned to this user. This means the list of entities that the user can manage through the web and API interfaces.
Import/Export Configuration
Allows you to import and export the wizard’s configuration via JSON.
When accessing the import and export functionality, it displays a window with various actions. Additionally, it presents the configuration of the wizard in JSON format.
The available actions are as follows:
Upload Json: Uploads a JSON file and replaces the previous JSON configuration.
Paste from clipboard: Pastes JSON data from the clipboard and replaces the previous JSON configuration.
Download Json: Downloads the JSON configuration as a file with the wizard’s name.
Copy to clipboard: Copies the JSON configuration to the clipboard.