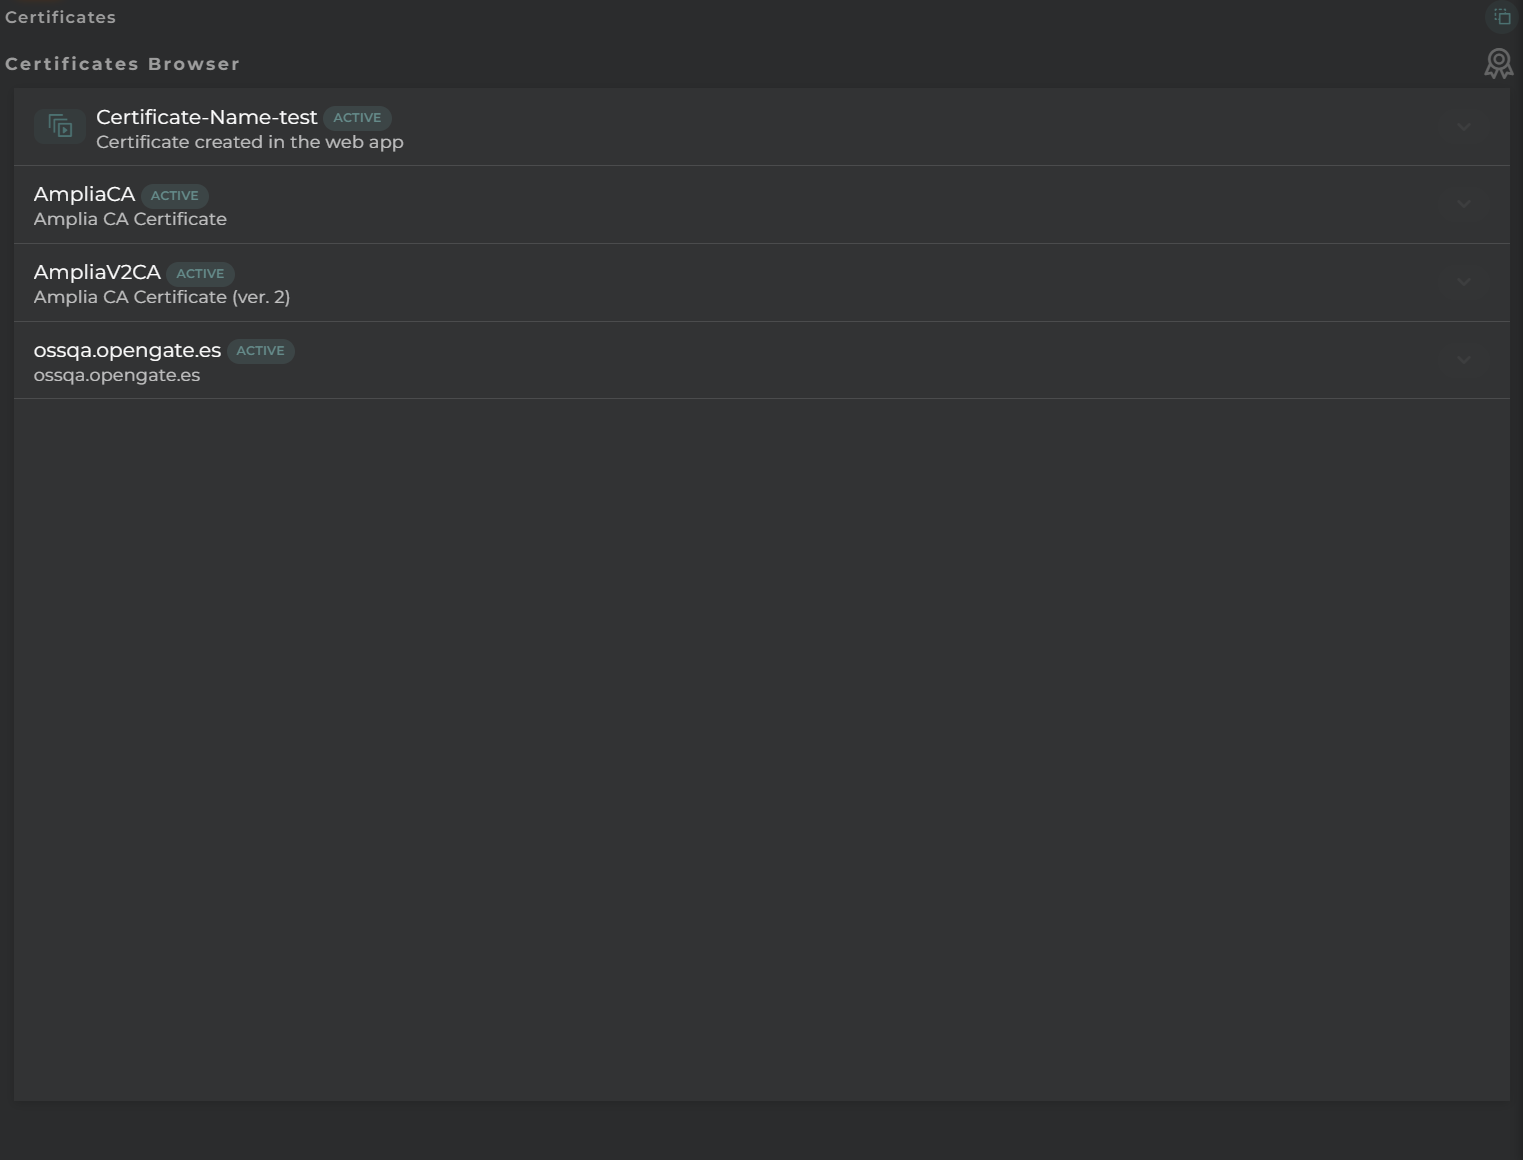
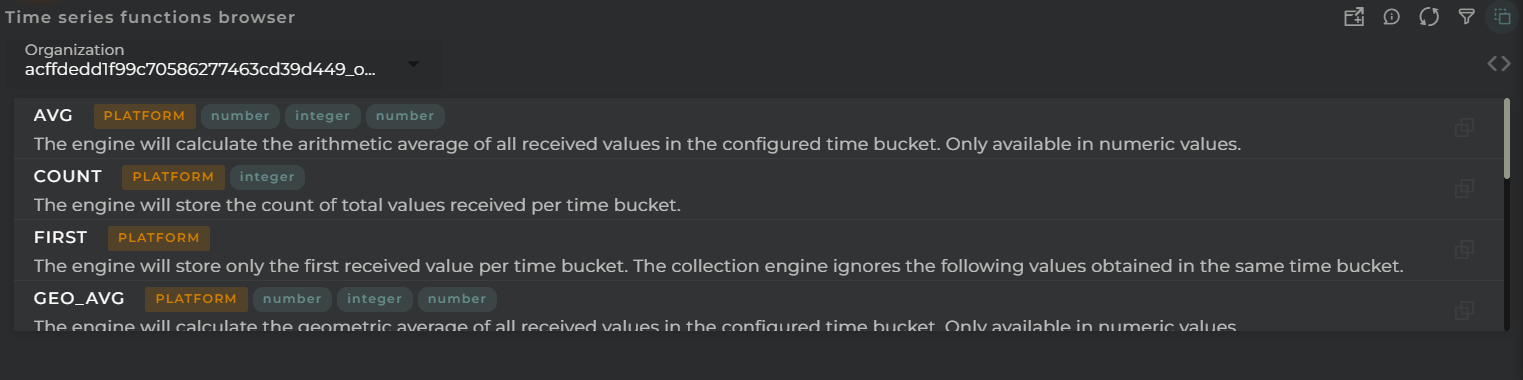
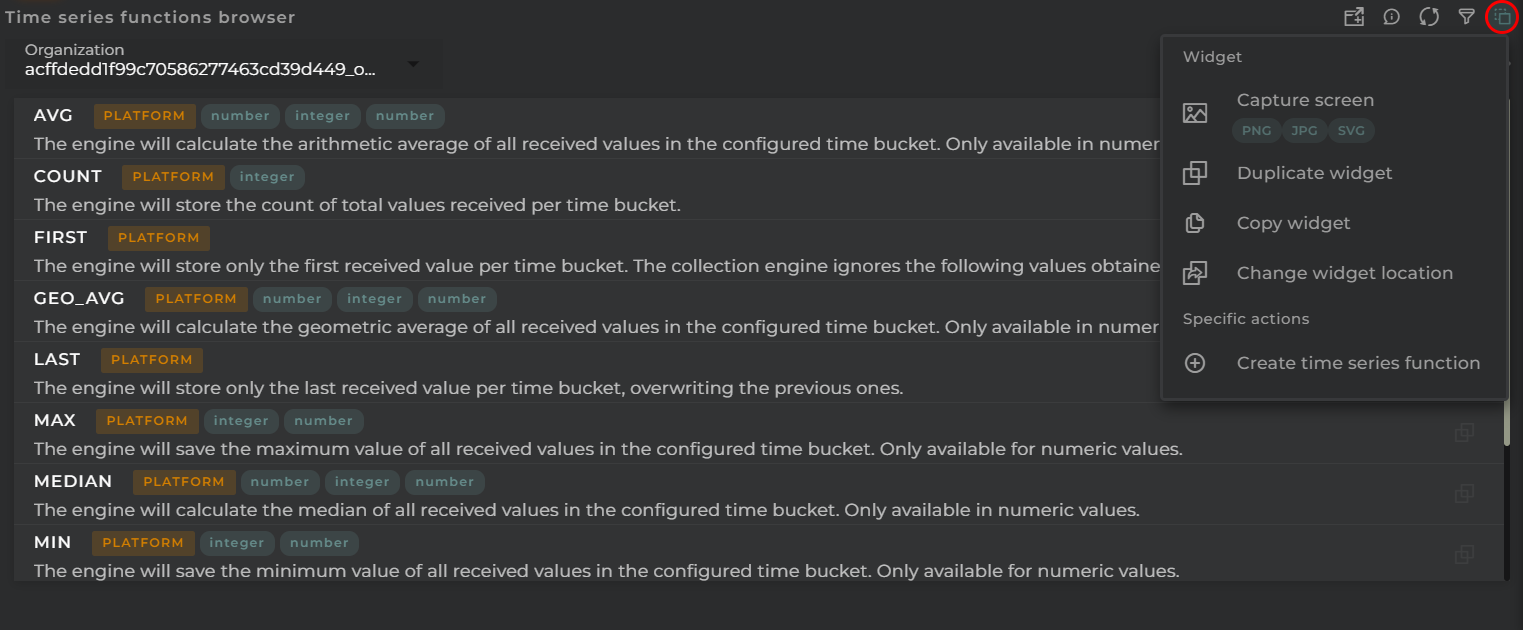
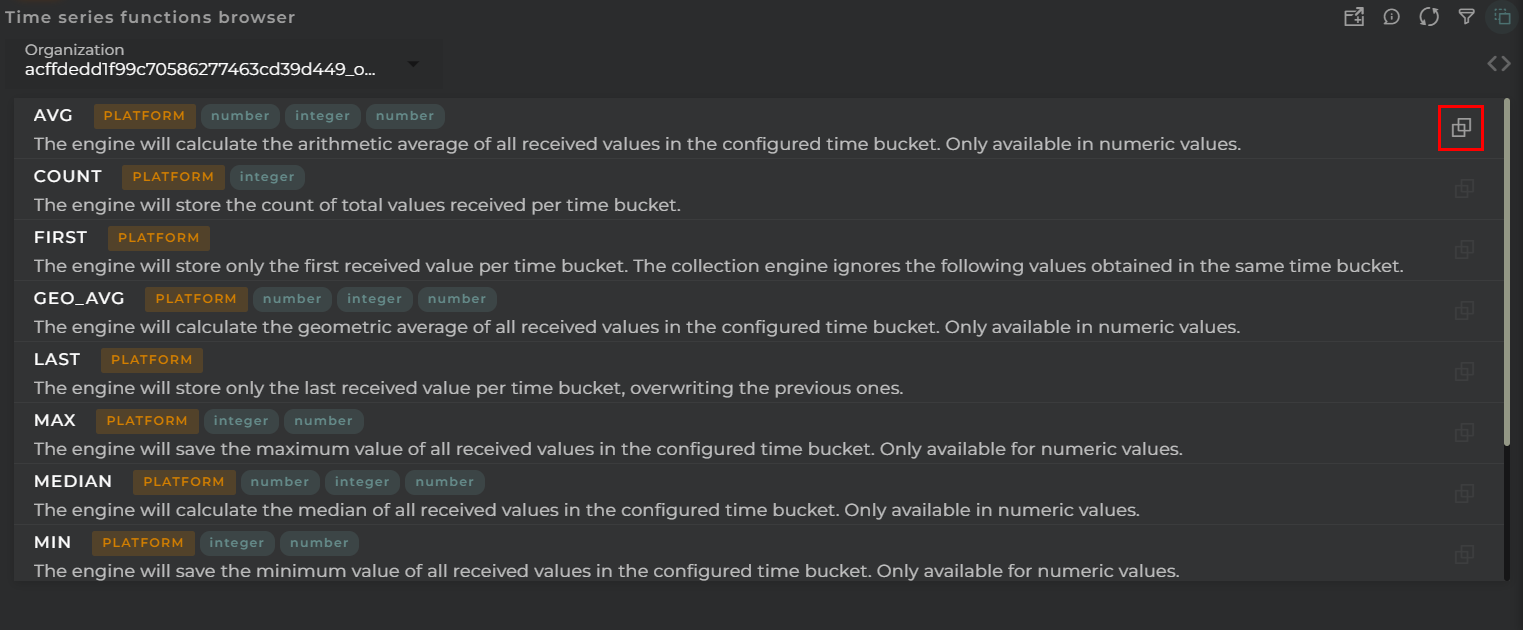
The certificate browser allows you to view/manage the different certificates available to my organization.
How it works
From the browser, you can view the certificates provided by Opengate as well as those managed directly by my organization.
Widget Menu
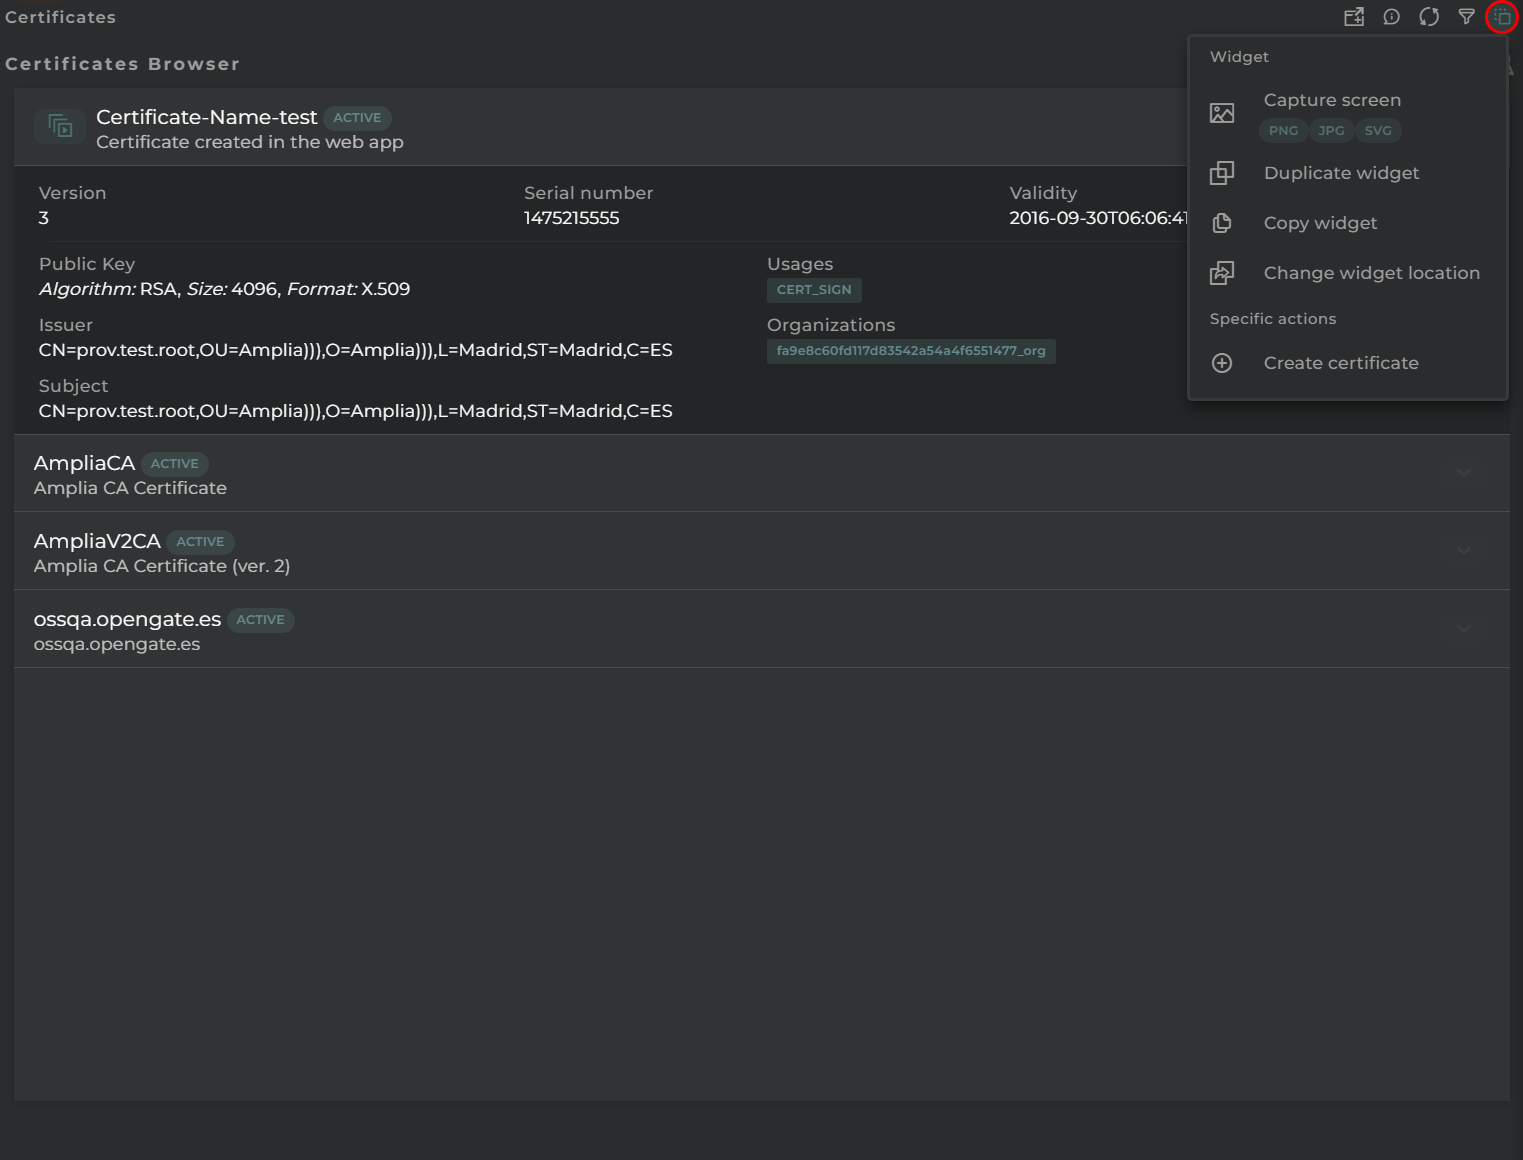
From the action menu of the widget, you can perform the following:
New certificate: launches the certificate configuration wizard as long as you have the necessary permissions.
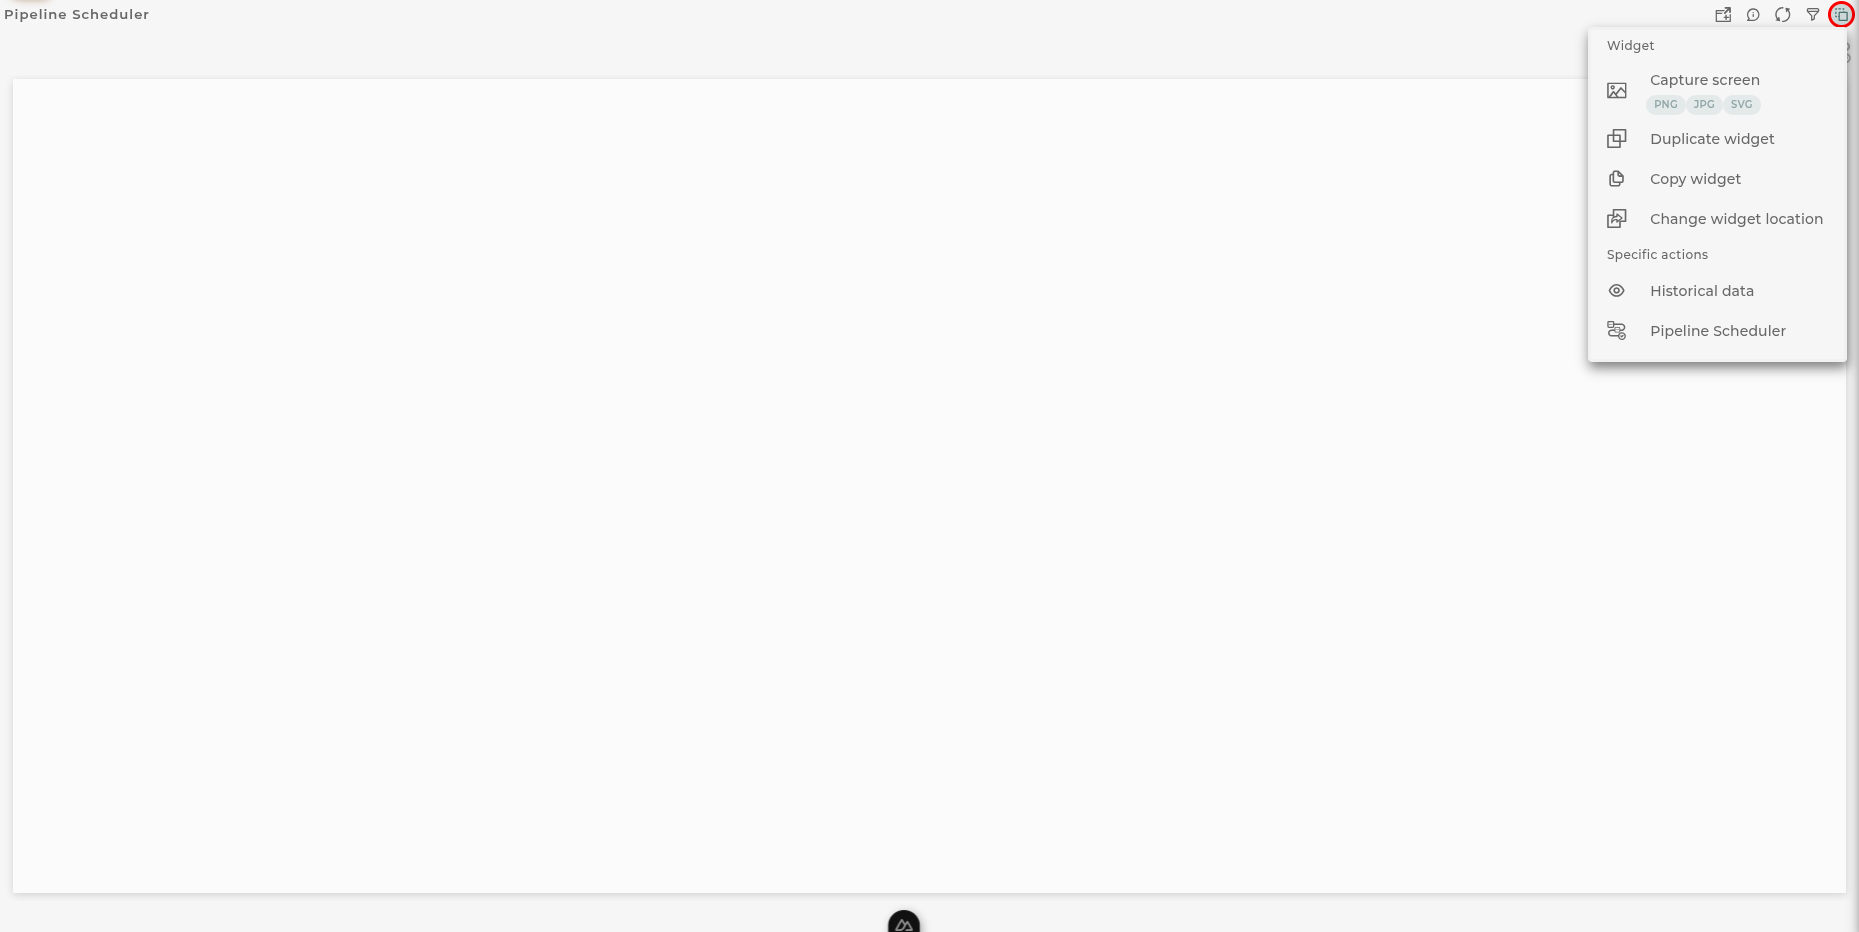
Capture screen: Takes a screenshot of the widget.
Duplicate widget: Creates a duplicate of the widget on the dashboard.
Copy widget: Copies the widget to another dashboard.
Change widget location: Moves the widget to another dashboard.
Certificate Details
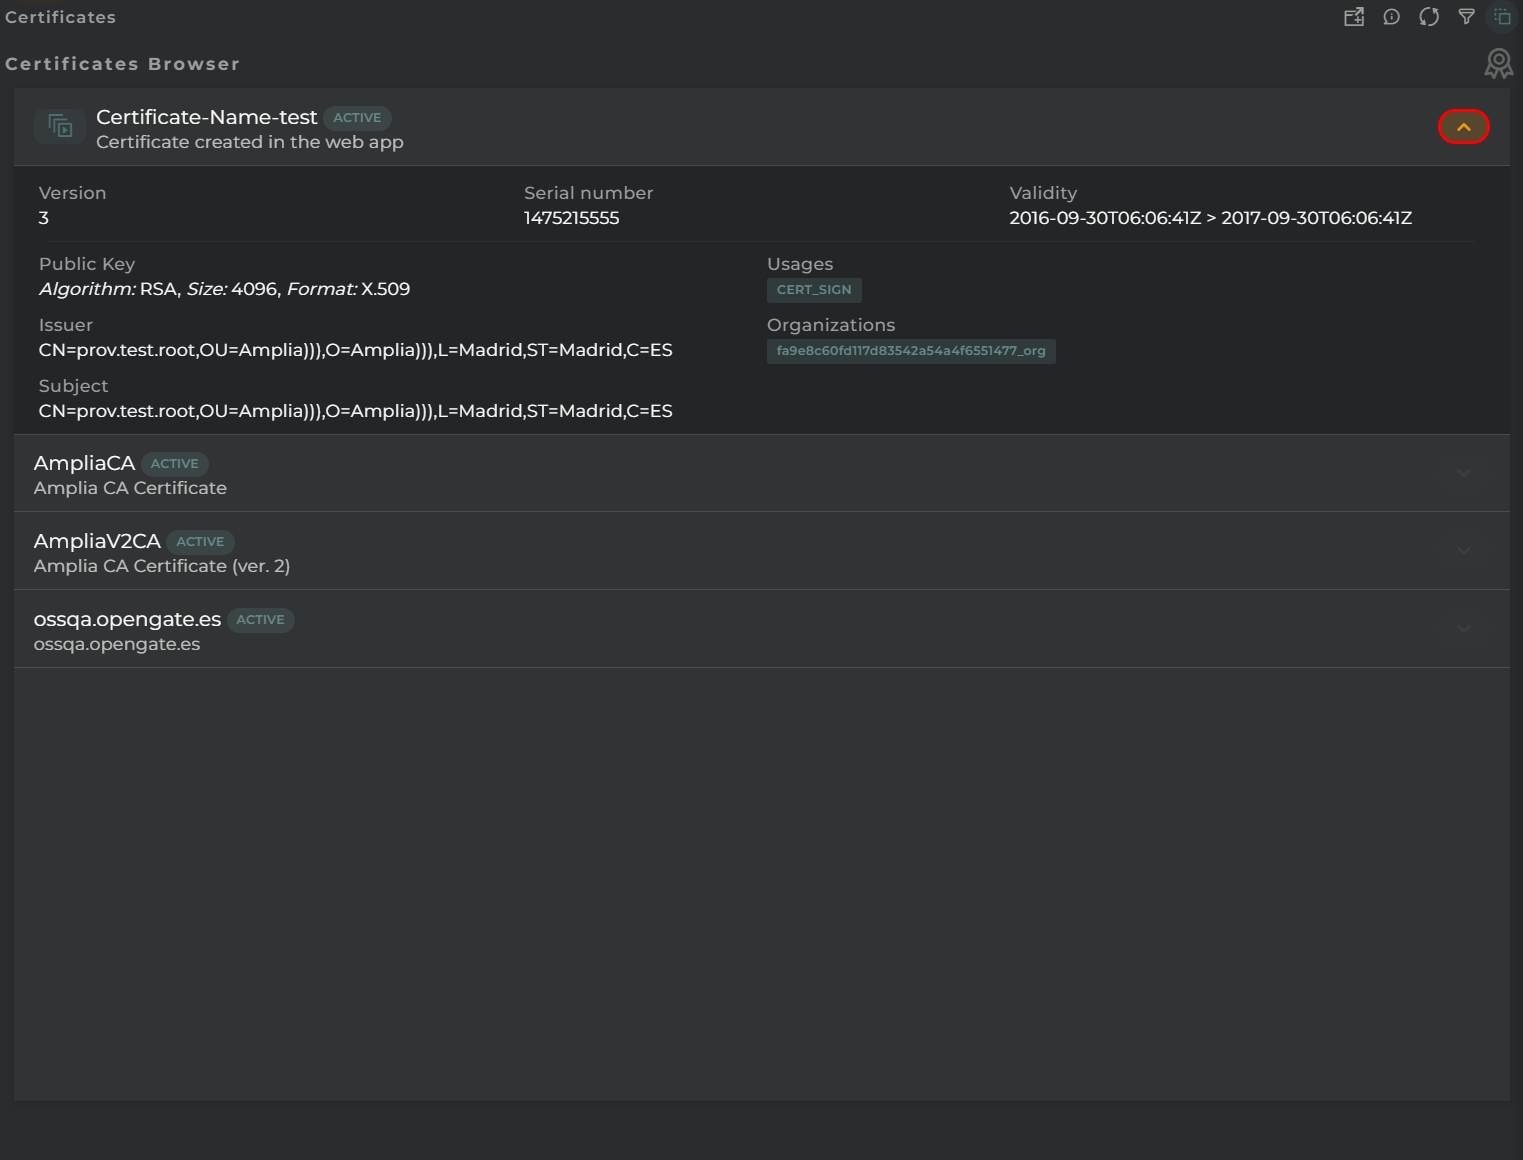
To view the details of a certificate, clicking on the arrow located to the right of each will enable the details panel.
Actions per Certificate
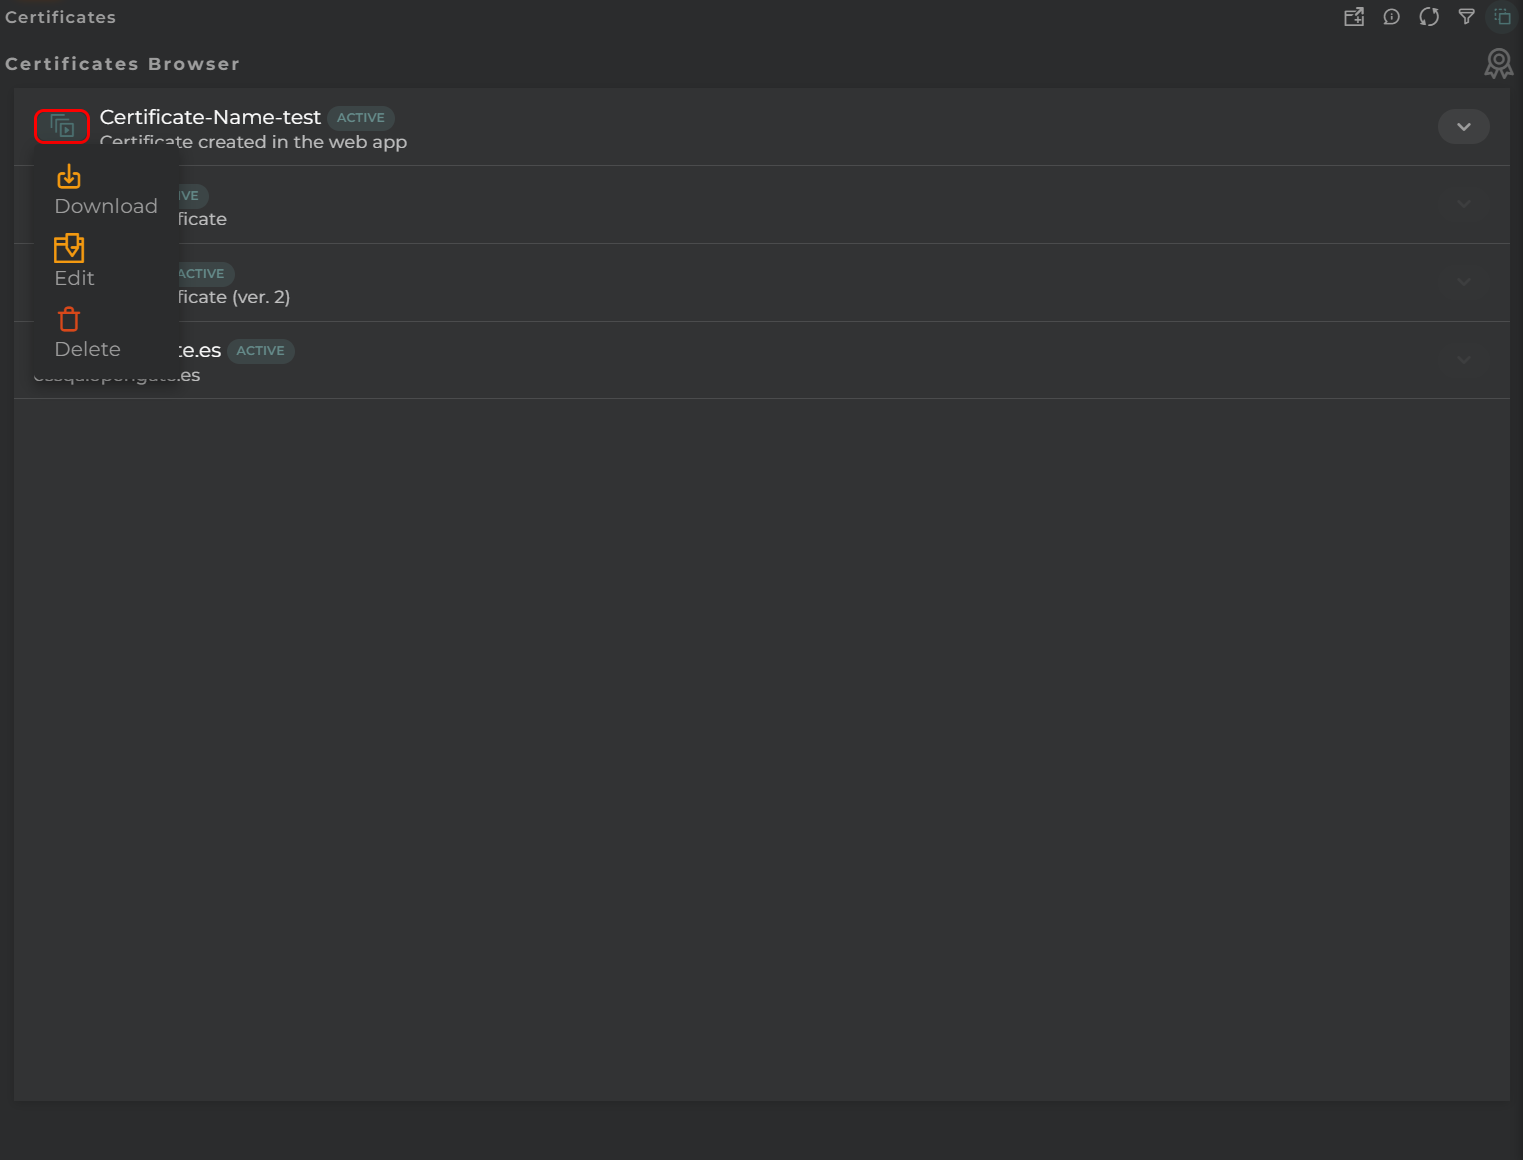
The following are the possible actions to perform for each of the organization’s own certificates.
Download allows you to download the selected certificate
Edit enables the editing of a certificate, including uploading an updated version of it
Delete deletes the selected certificate
Configuration
General
Boxed: widget will be displayed with background in dahsboard.
About: widget description in Markdown format.
Title: widget title. It can be configured to remain fixed in the widget or only be displayed when it receives focus.
Toolbar: configures the behavior of the widget bar on the dashboard, allowing you to hide it, hide it when not in use, or leave it always visible.
Refresh Frequency: allows configuring the data refresh frequency displayed in the list.
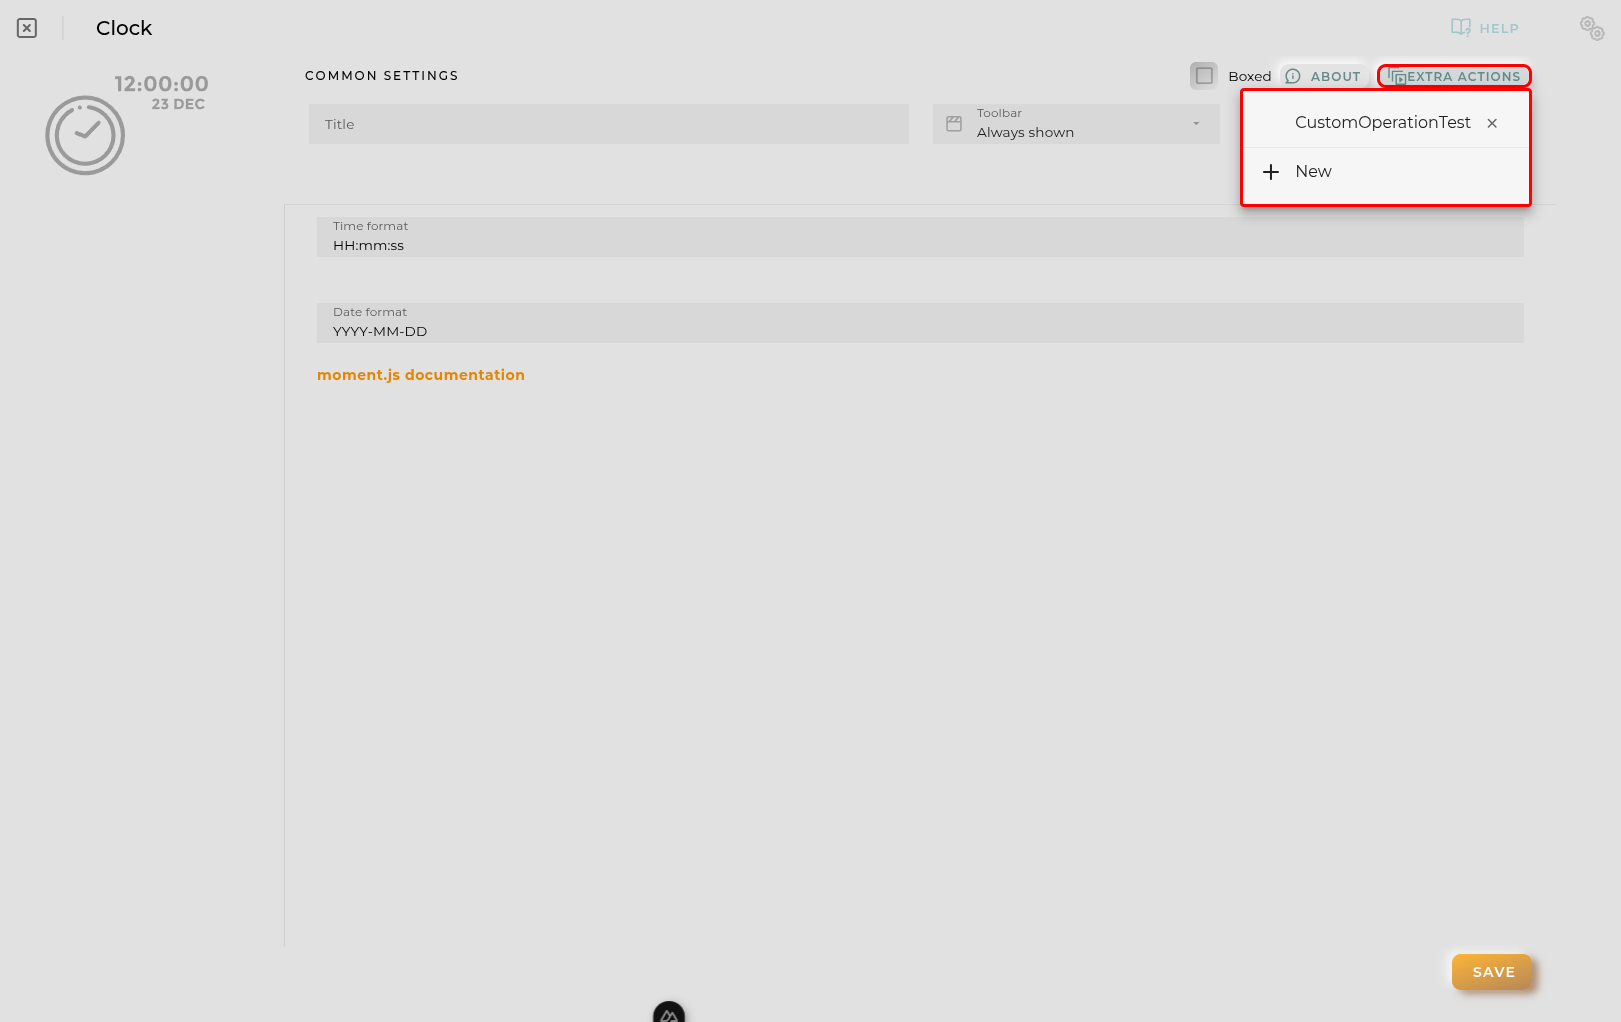
Extra actions: allows user to add new specific actions to the widget with your own code.
You can add a new one by pressing the New button.
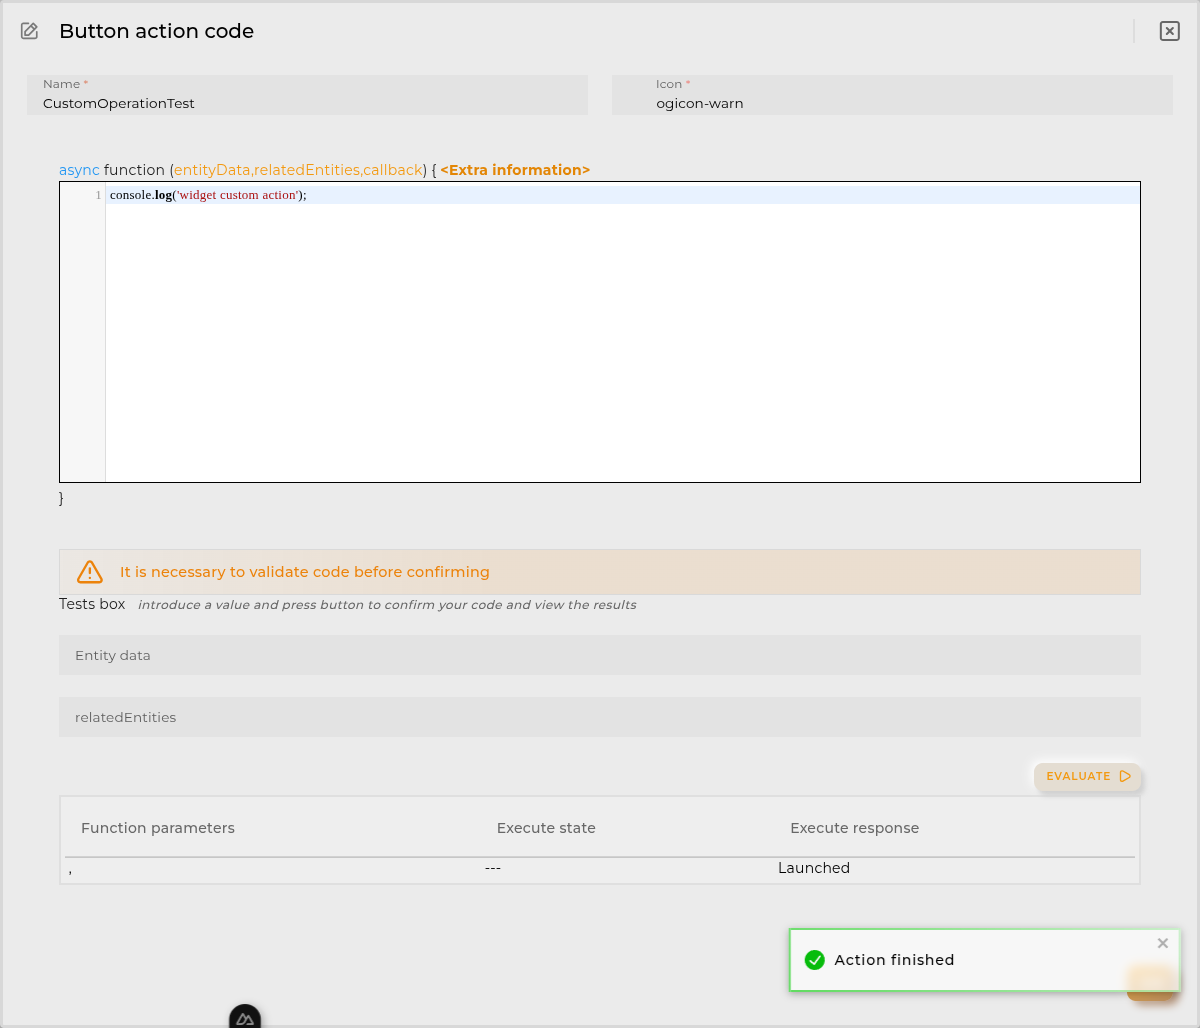
Once you added a custom action it can be modified later by pressing the name in the list.
In order to remove the custom action click the delete icon button on the right.
In extra actions you can write your own code were you can open other dashboards, entities dashboards or execute wizards.
You can find all available functions and methods in Extra Information
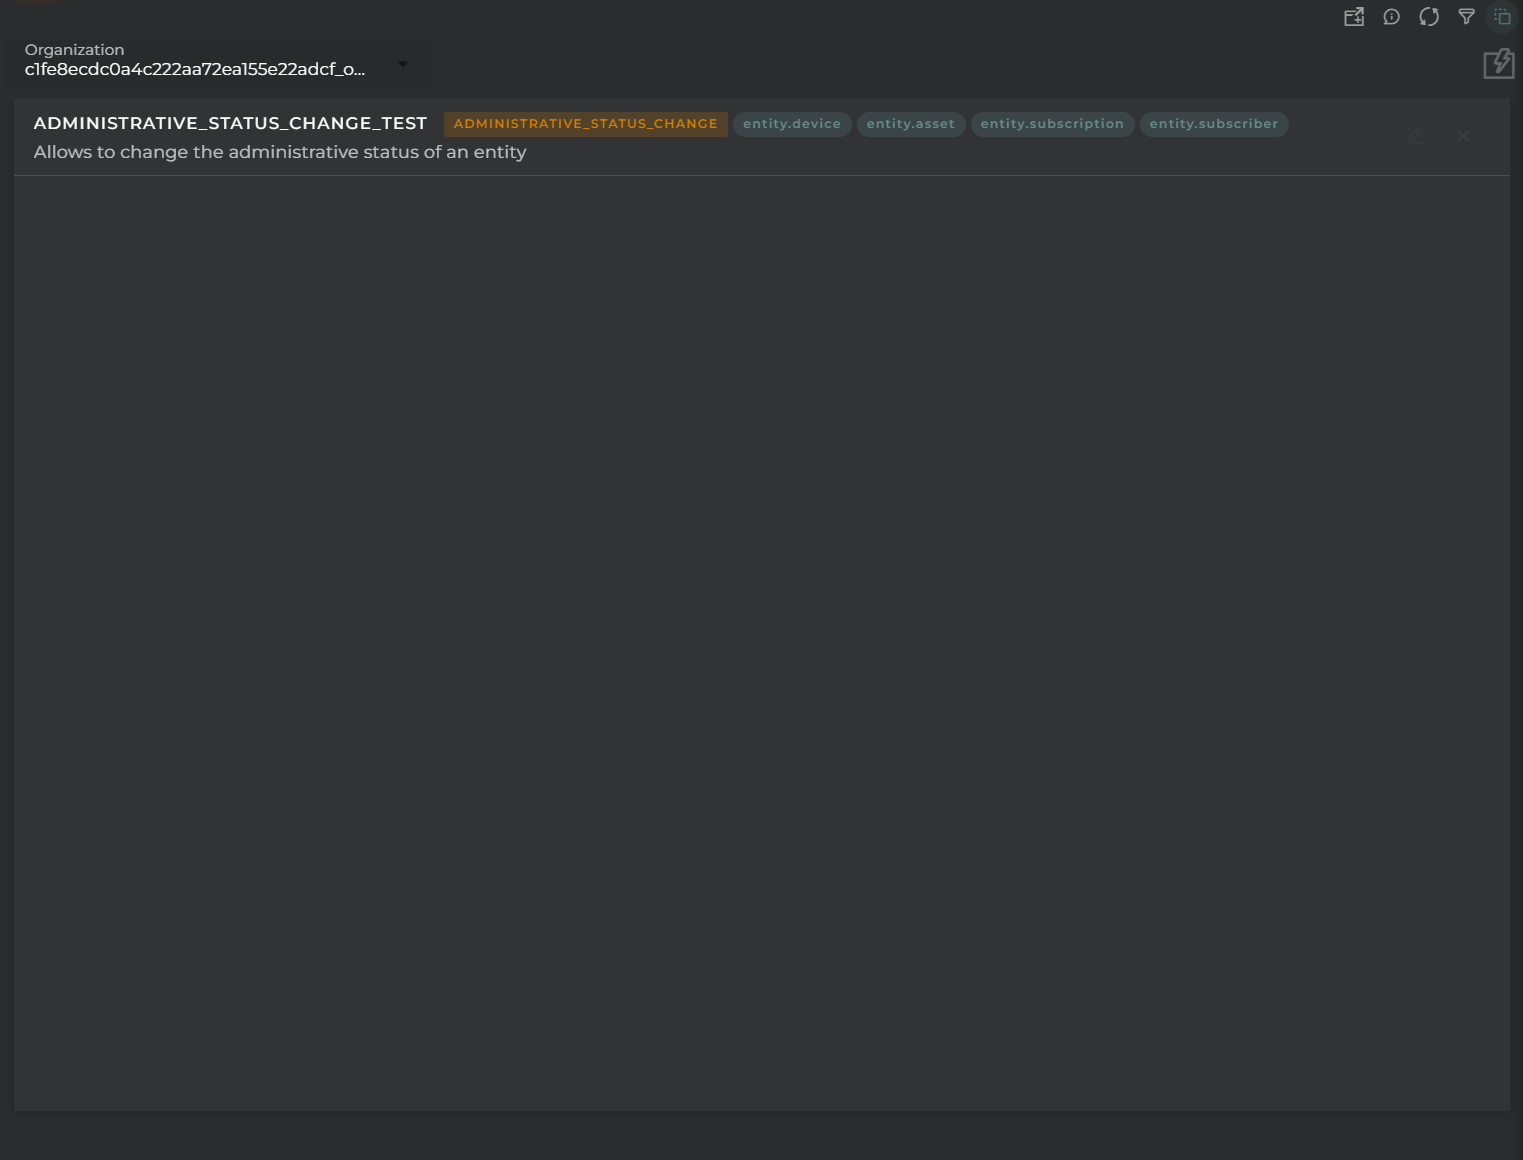
Configured Operations Navigator
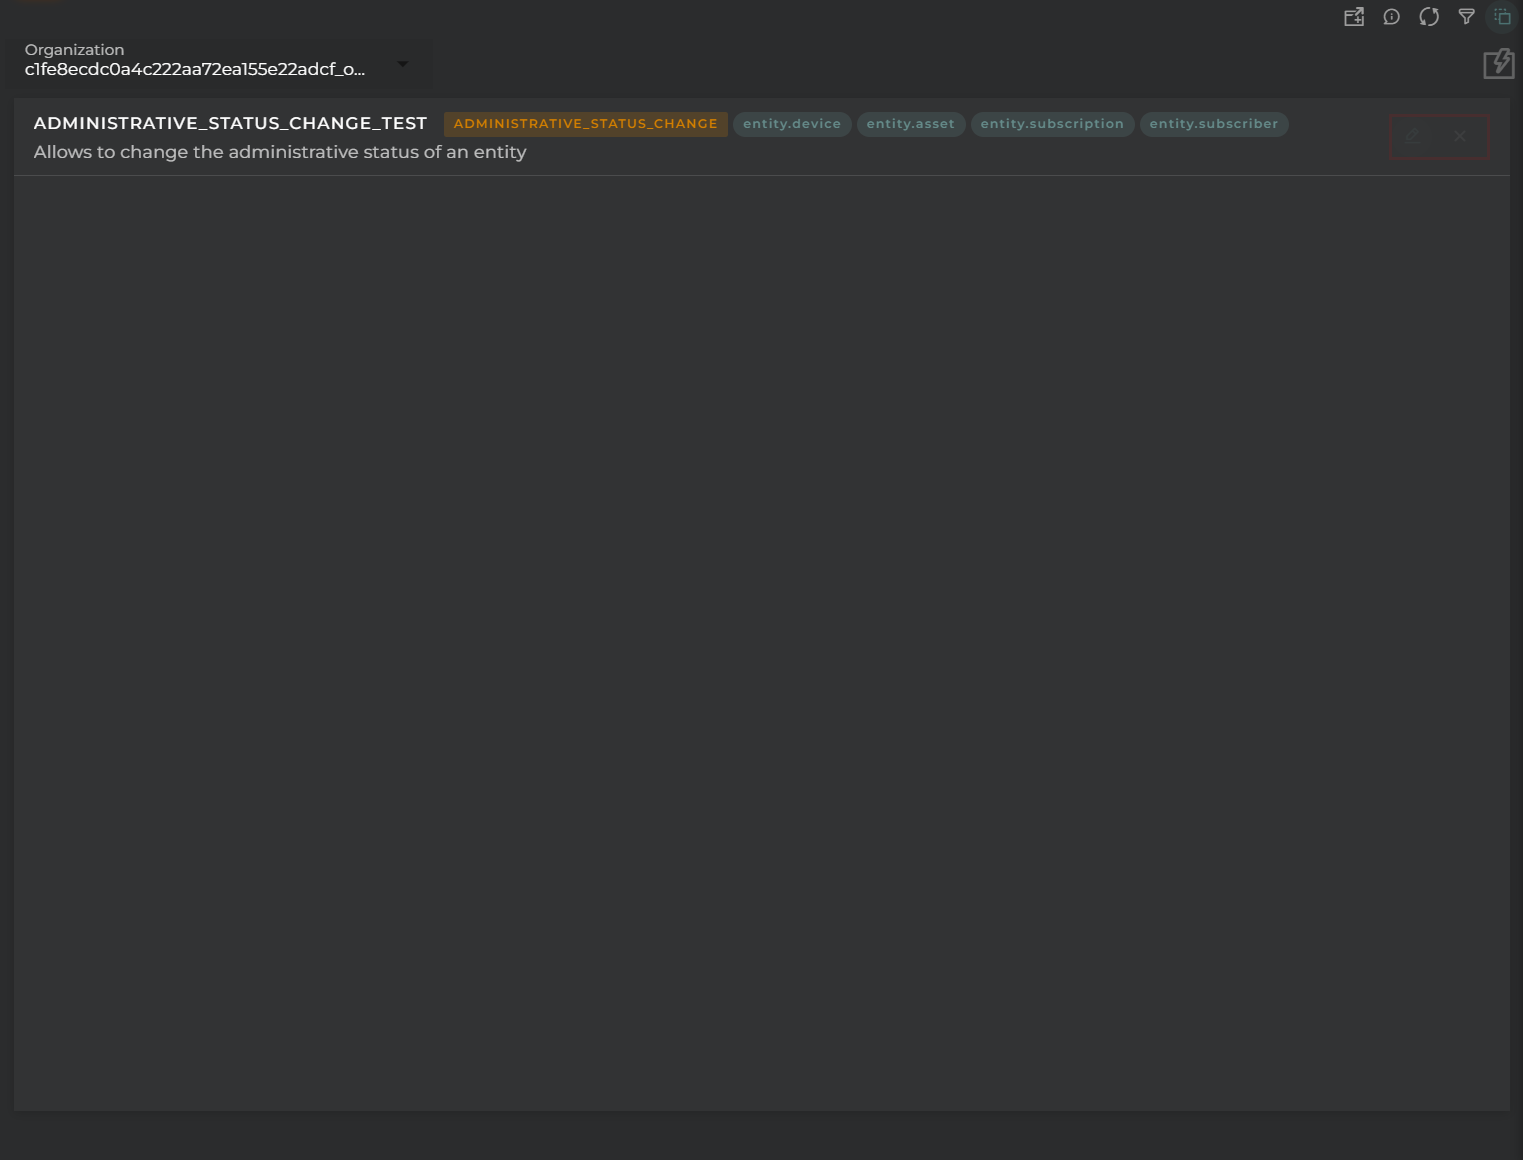
The Operation Types browser allows you to view and manage the operations that have been configured for your organization.
How it Works
Each of the configured operations will be displayed in the browser along with some details about them, such as the type of operation and the types of entities to which they apply and the available launchers if any.
Widget Menu
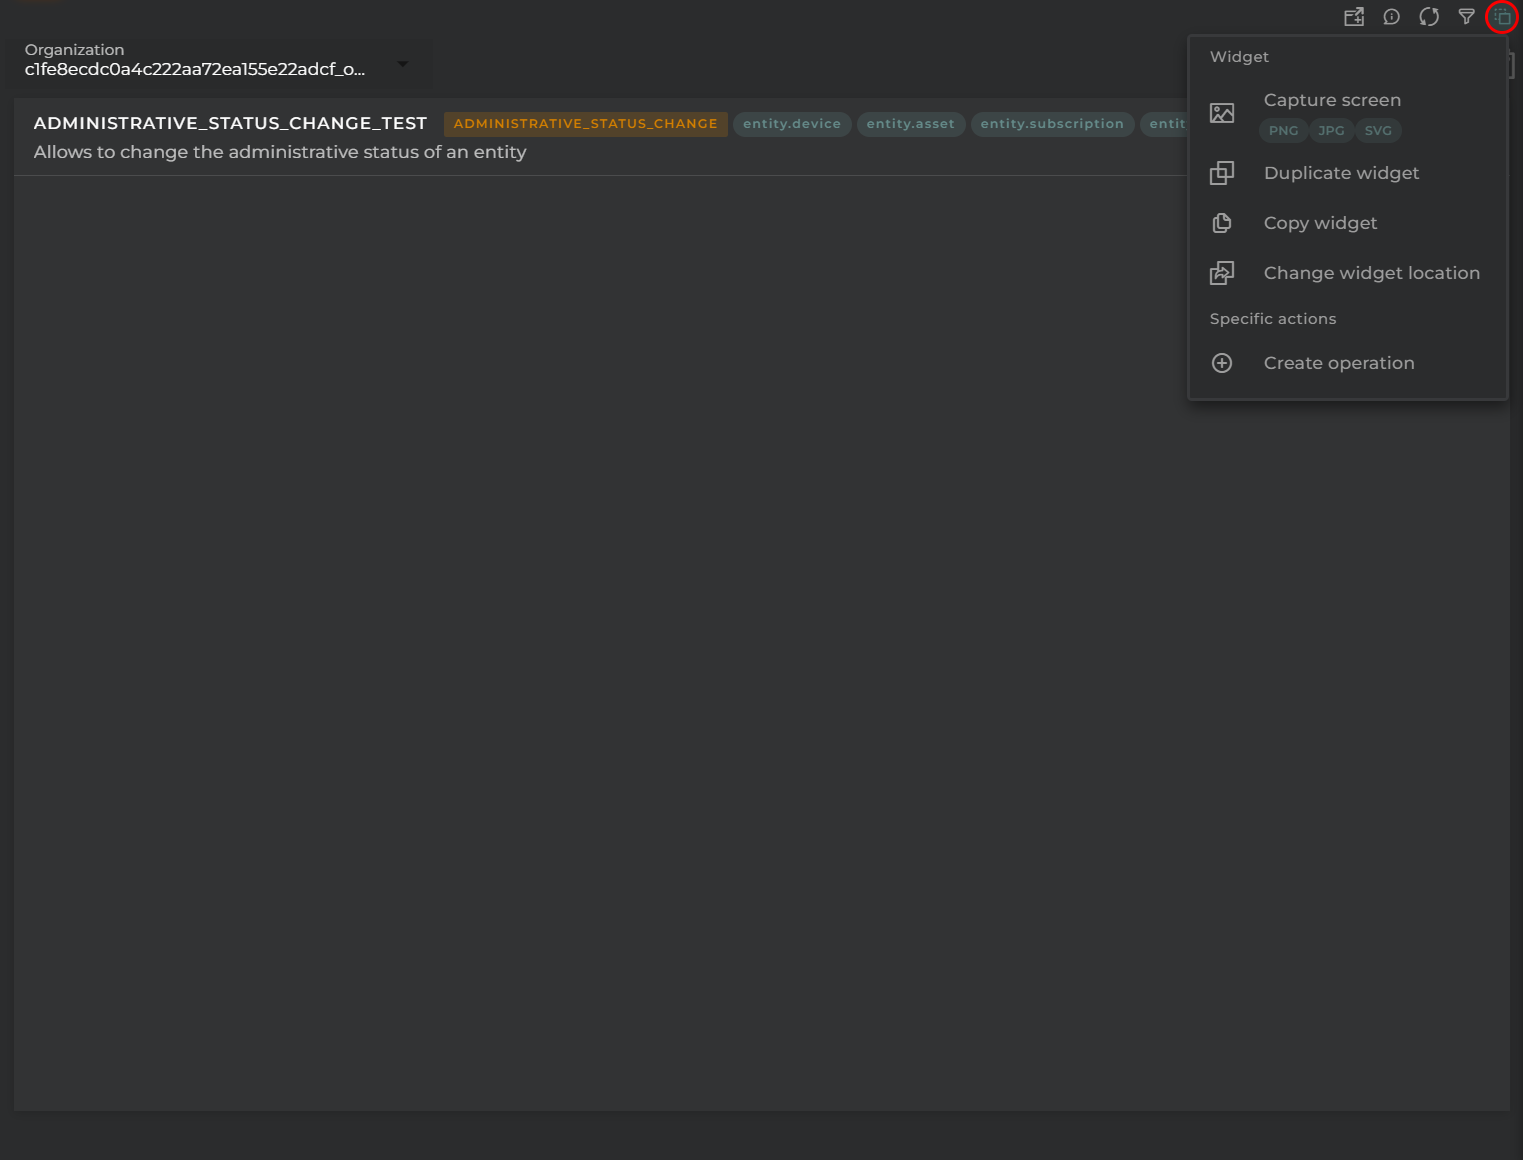
From the action menu of the widget, it will be possible to do the following:
Operations wizard: allows you to run the creation wizard for a new type of operation (provided you have the necessary permissions).
Execute operation: launches the operation execution wizard.
Capture screen: Takes a screenshot of the widget.
Duplicate widget: Creates a duplicate of the widget on the dashboard.
Copy widget: Copies the widget to another dashboard.
Change widget location: Moves the widget to another dashboard.
Actions by Operation Type
The following are the possible actions that can be performed for each of the configured operations:
Edit: Opens the operation configurator to change various parameters.
Remove: Deletes the selected operation.
Operations launchers
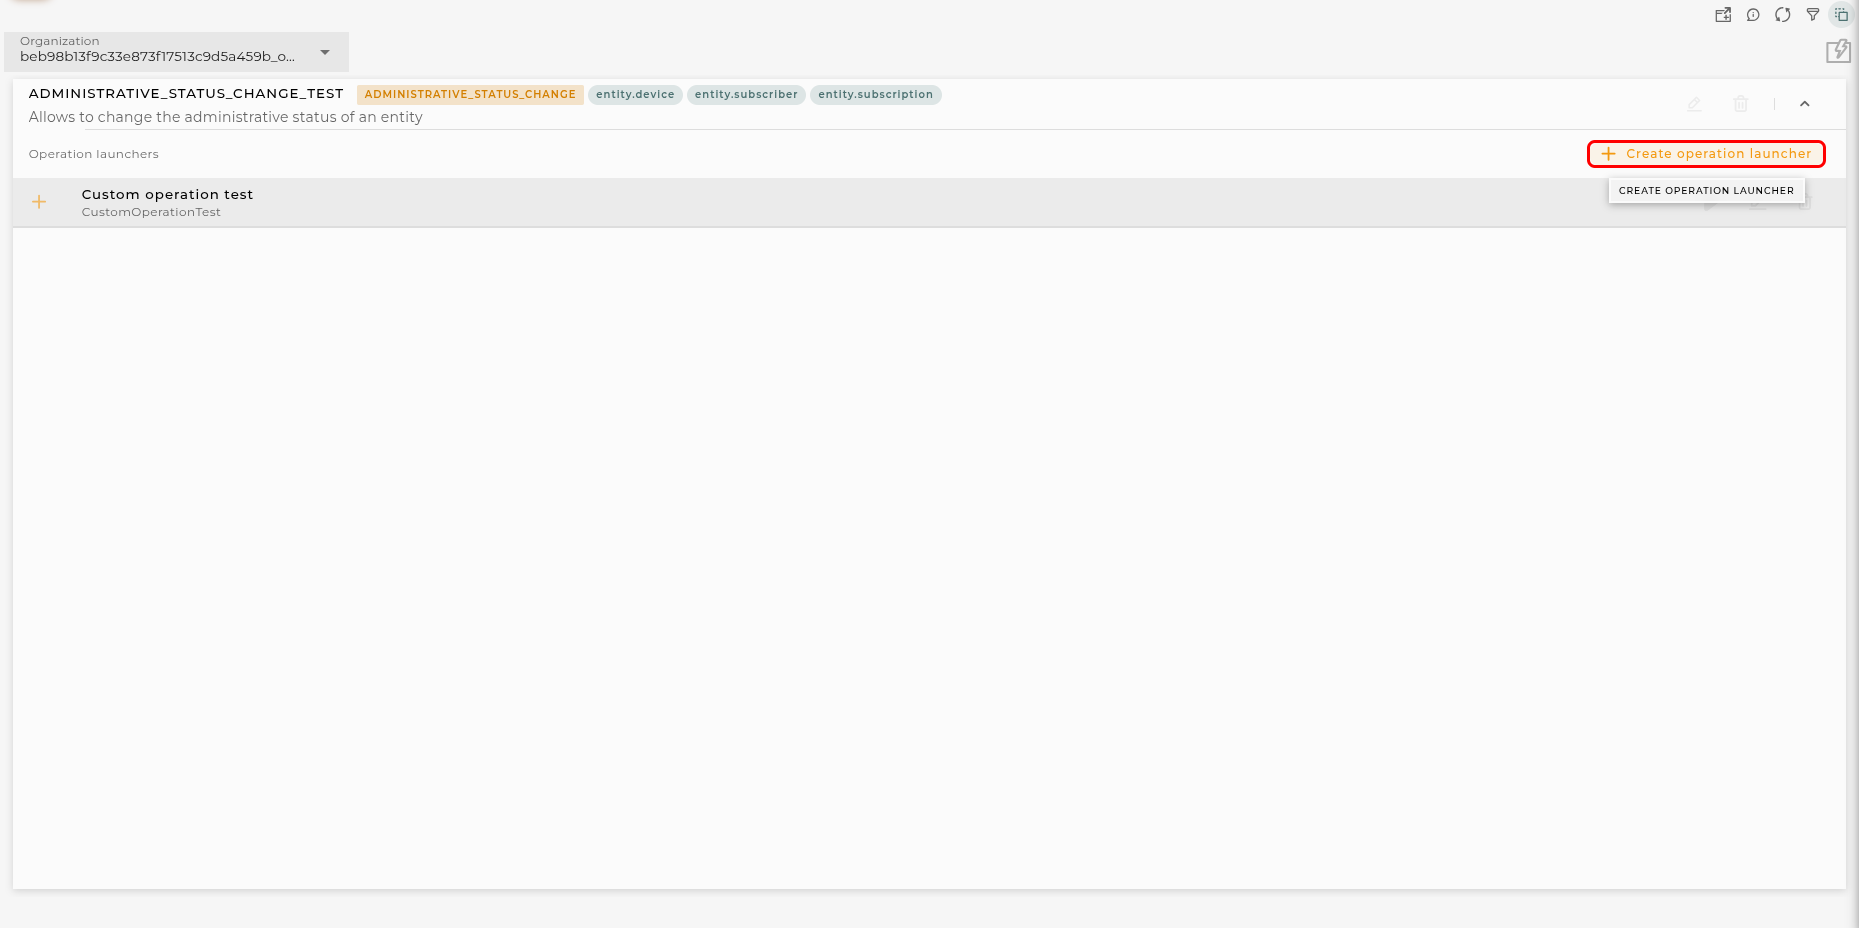
For each of the operation type, it will be possible to create launchers that will allow you to run them with different parameters. By creating one, default operation will not be displayed in wizard.
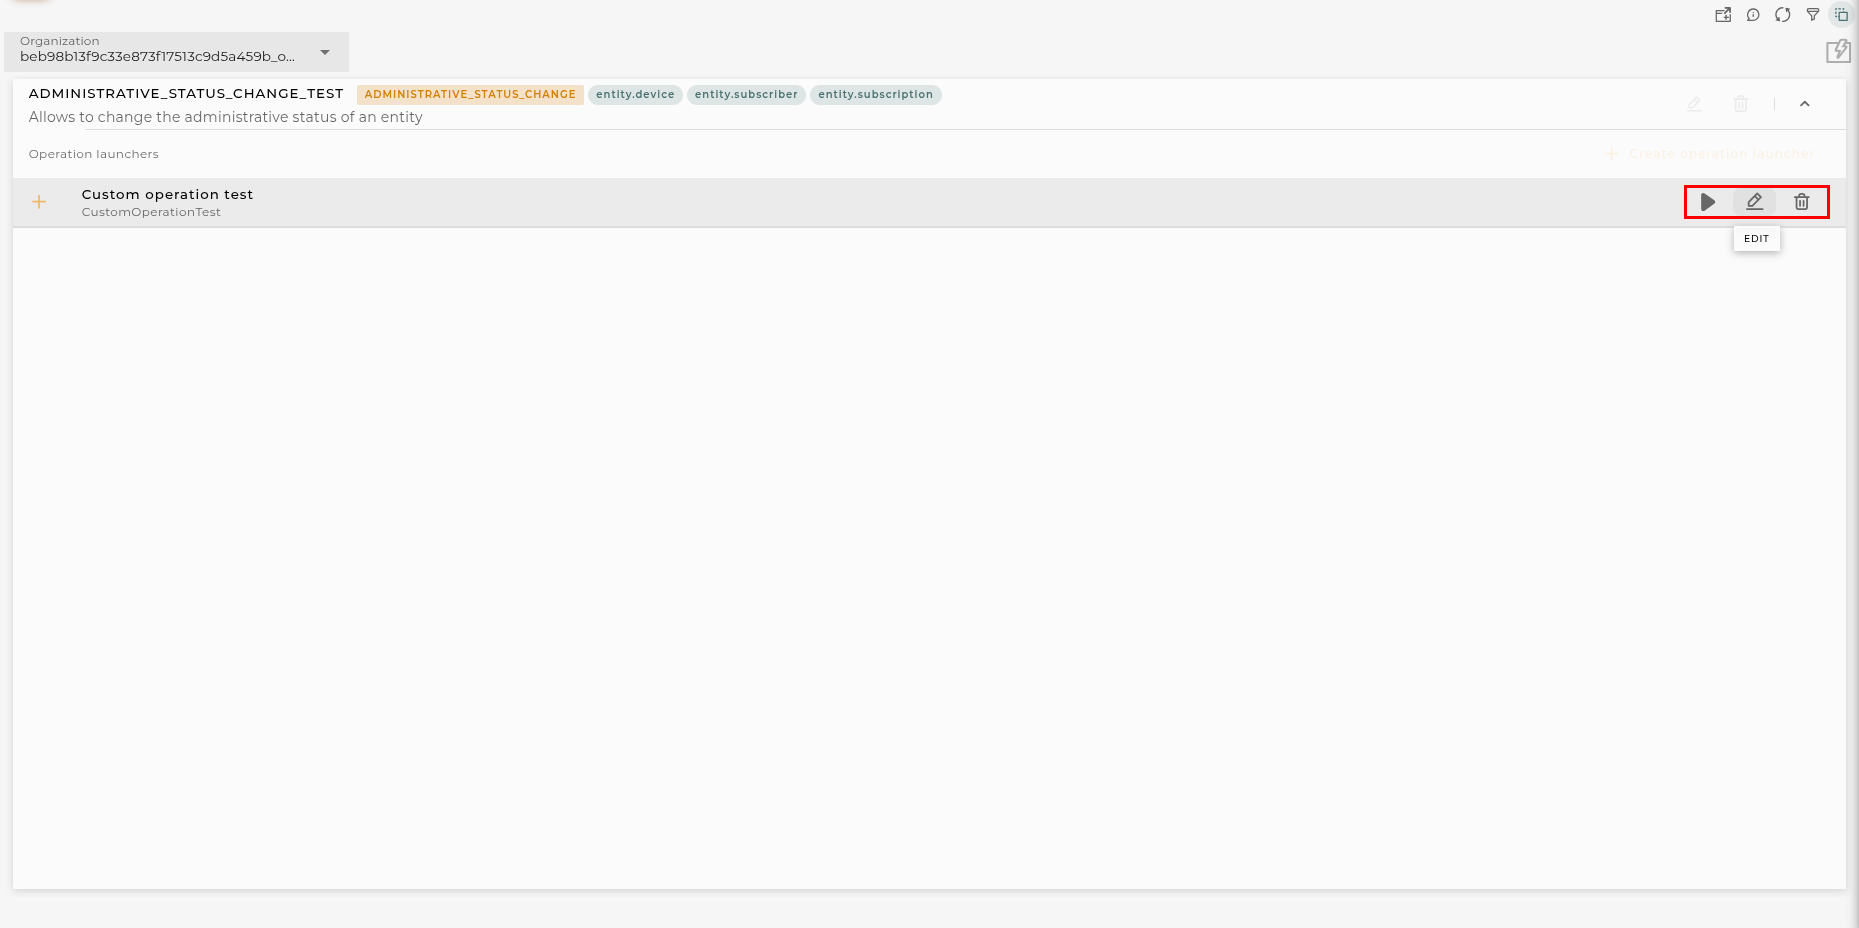
Each launcher can be executed, edited or deleted.
Configuration
General
Boxed: widget will be displayed with background in dahsboard.
About: widget description in Markdown format.
Title: widget title. It can be configured to remain fixed in the widget or only be displayed when it receives focus.
Toolbar: configures the behavior of the widget bar on the dashboard, allowing you to hide it, hide it when not in use, or leave it always visible.
Refresh Frequency: allows configuring the data refresh frequency displayed in the list.
Extra actions: allows user to add new specific actions to the widget with your own code.
You can add a new one by pressing the New button.
Once you added a custom action it can be modified later by pressing the name in the list.
In order to remove the custom action click the delete icon button on the right.
In extra actions you can write your own code were you can open other dashboards, entities dashboards or execute wizards.
You can find all available functions and methods in Extra Information
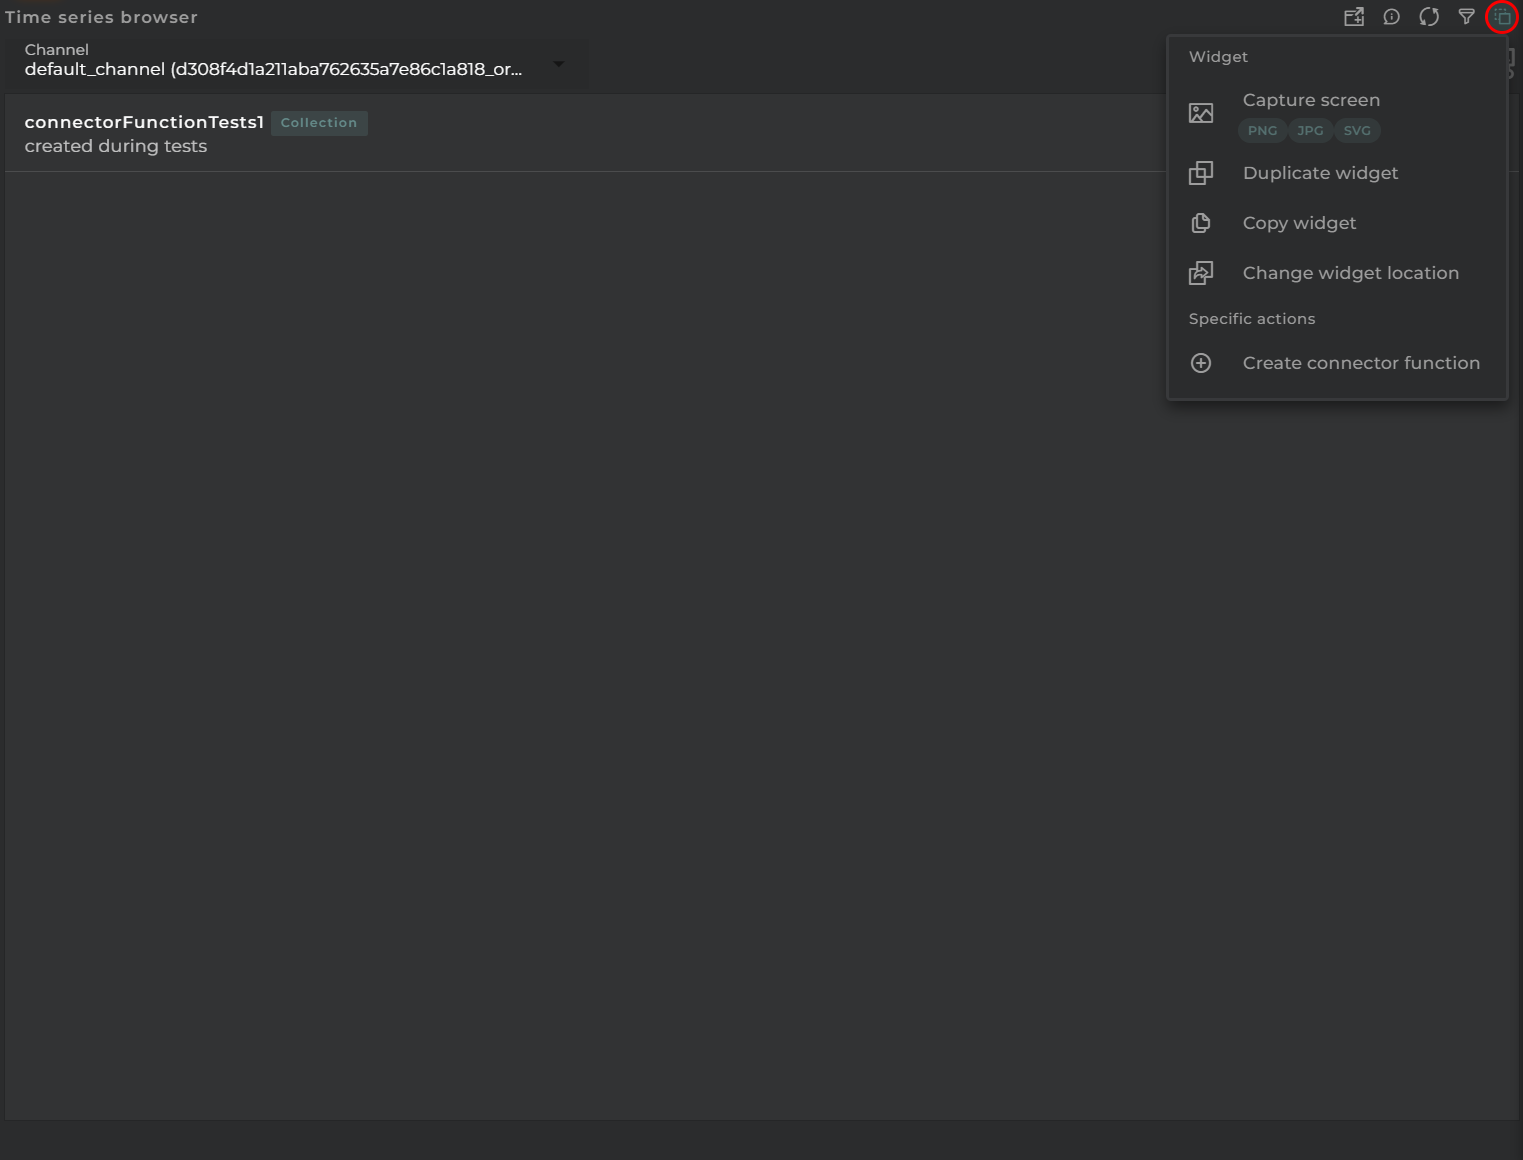
Connector functions browser
In this widget, you will find the connector functions configured for your organization.
How it works
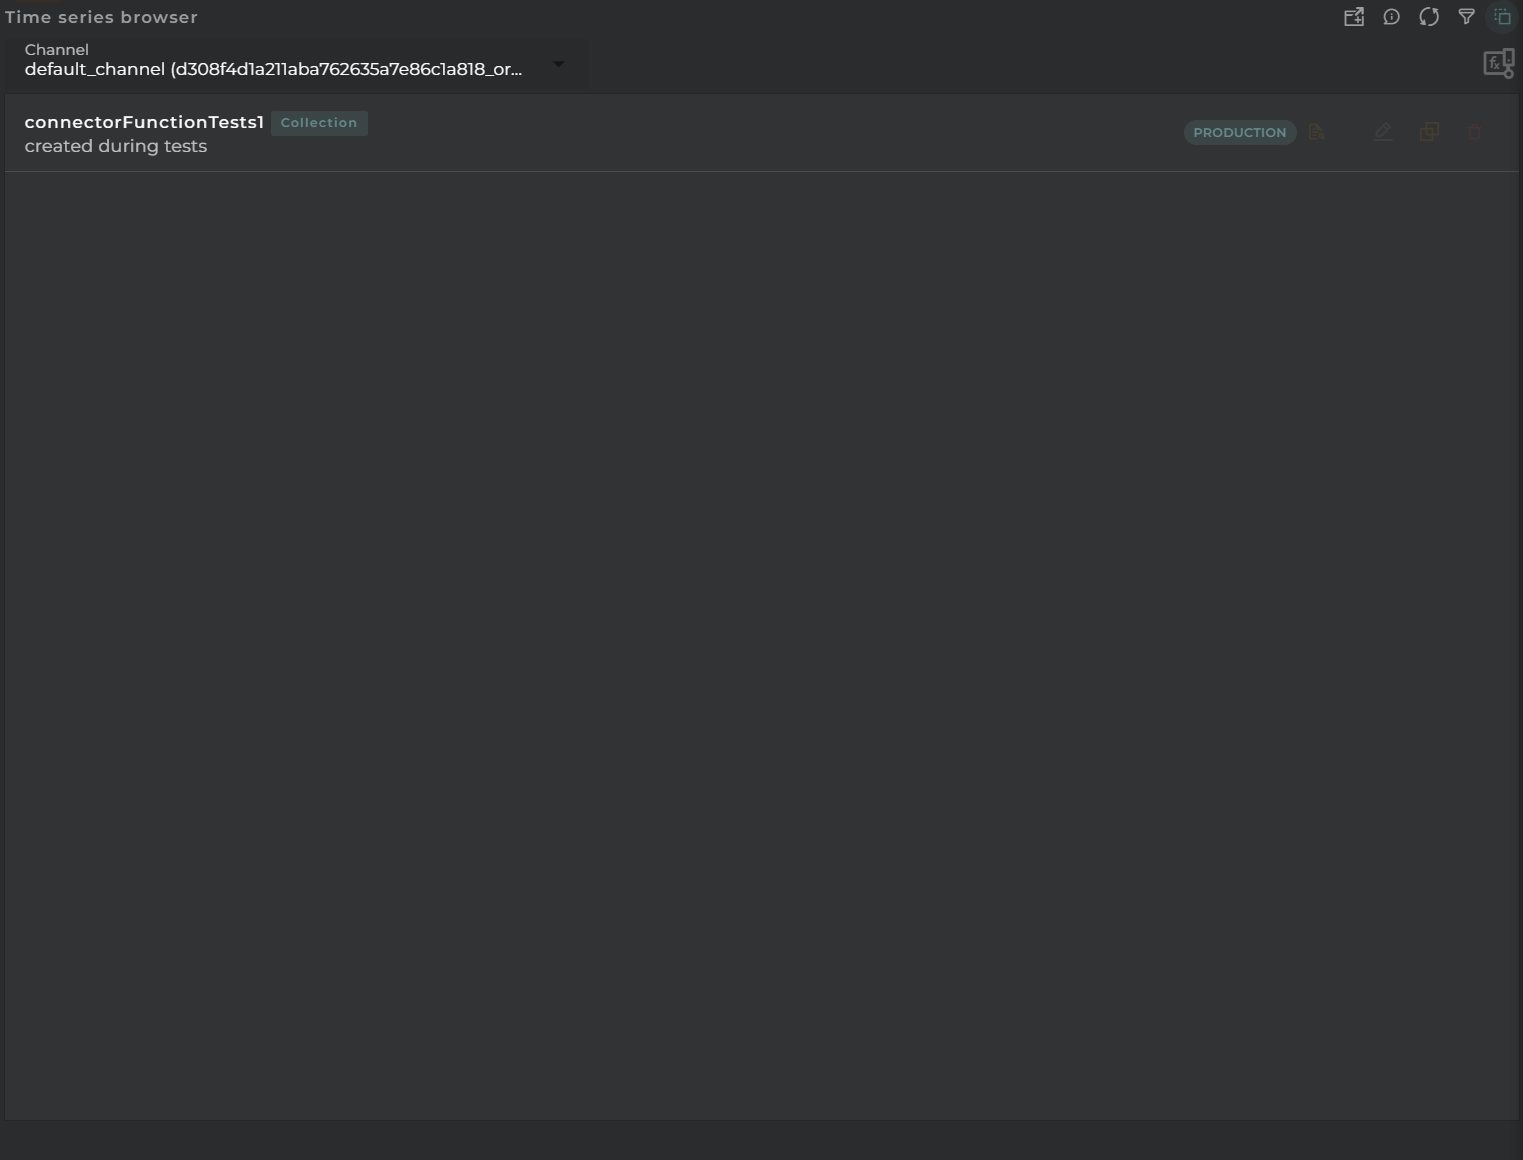
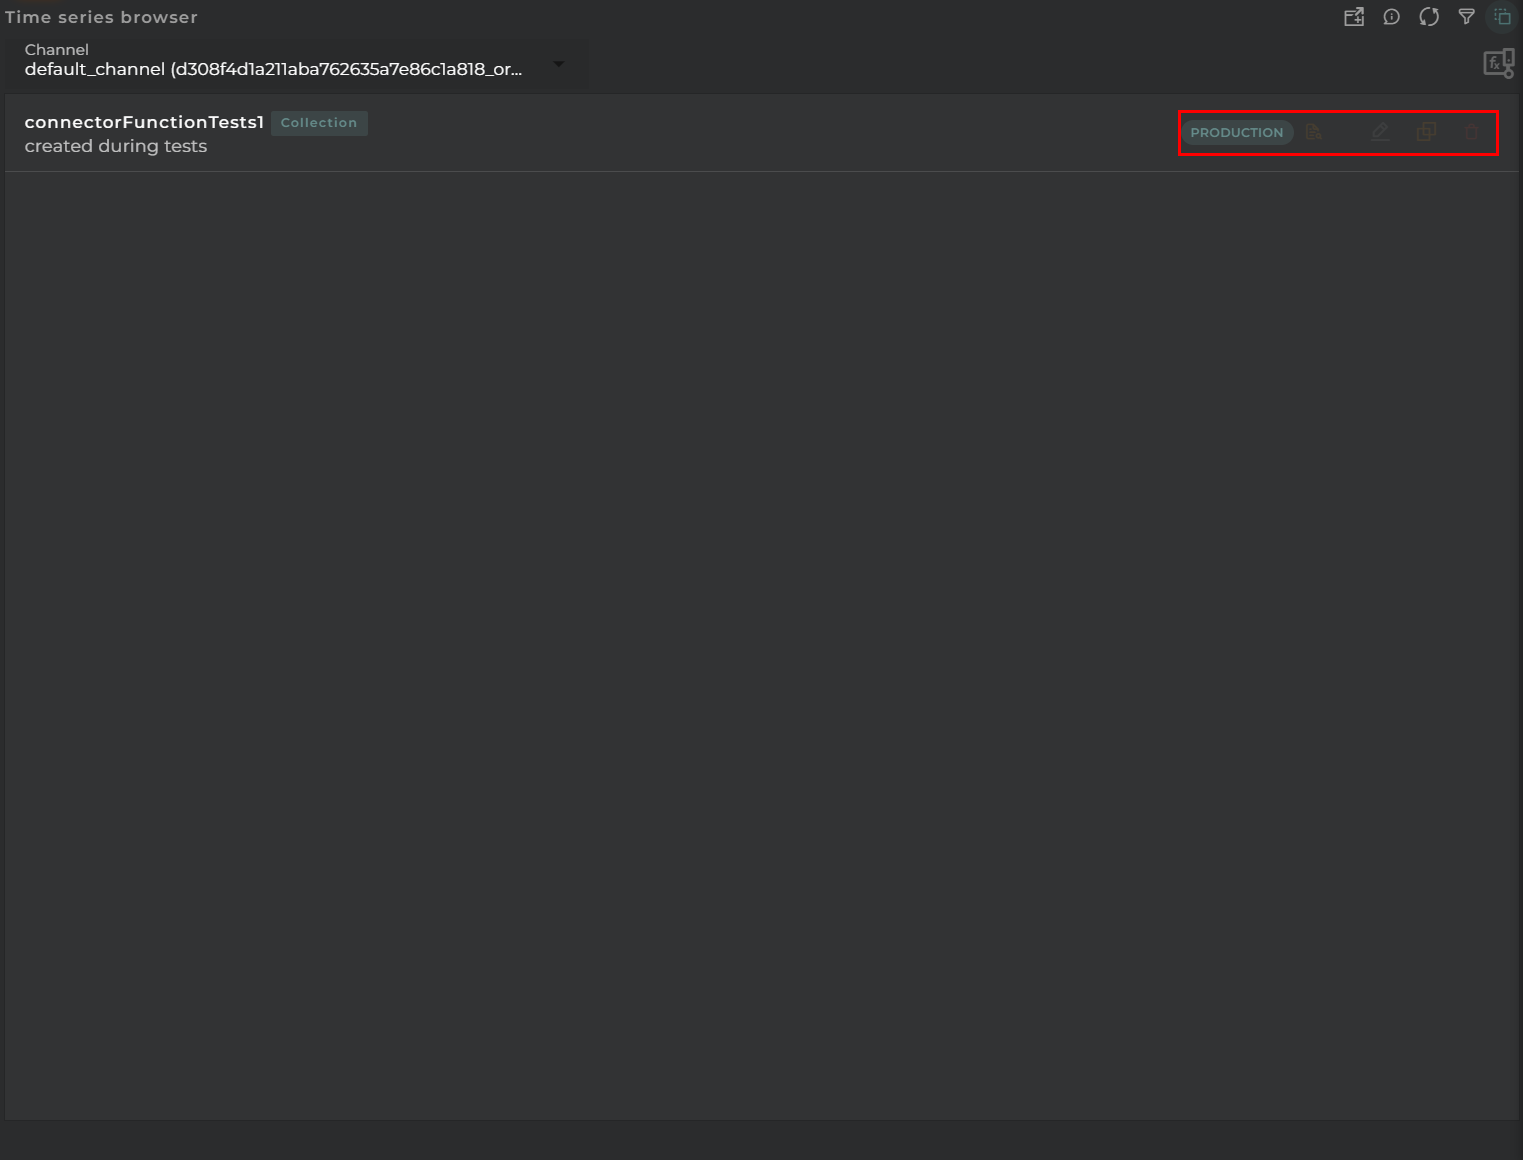
In the browser, you will find a list of connector functions along with the actions available for each one, depending on the permissions you have.
Next to the name, you can find the type of connector function as well as its operational status.
By pressing expand button you can see criteria selectors for each item.
Widget Menu
From the action menu of the widget, it will be possible to do the following:
New connector function: allows you to run the creation wizard for connector functions (provided you have the necessary permissions).
Capture screen: Takes a screenshot of the widget.
Duplicate widget: Creates a duplicate of the widget on the dashboard.
Copy widget: Copies the widget to another dashboard.
Change widget location: Moves the widget to another dashboard.
Channel Selector
A user can manage connector functions for those channels that are dependent on the user’s organization. To switch between channels, you can use the selector available at the top of the widget.
Actions on Connector Functions
For each connector function, you can perform the following actions:
Logger: opens a new window showing execution logs for the connector function.
Edit: opens the editing wizard to change the parameters of the element.
Clone: opens the creation wizard with a copy of the element’s data.
Delete: removes the element.
Expand: toggle criteria selectors display.
Configuration
General
Boxed: widget will be displayed with background in dahsboard.
About: widget description in Markdown format.
Title: widget title. It can be configured to remain fixed in the widget or only be displayed when it receives focus.
Toolbar: configures the behavior of the widget bar on the dashboard, allowing you to hide it, hide it when not in use, or leave it always visible.
Refresh Frequency: allows configuring the data refresh frequency displayed in the list.
Extra actions: allows user to add new specific actions to the widget with your own code.
You can add a new one by pressing the New button.
Once you added a custom action it can be modified later by pressing the name in the list.
In order to remove the custom action click the delete icon button on the right.
In extra actions you can write your own code were you can open other dashboards, entities dashboards or execute wizards.
You can find all available functions and methods in Extra Information
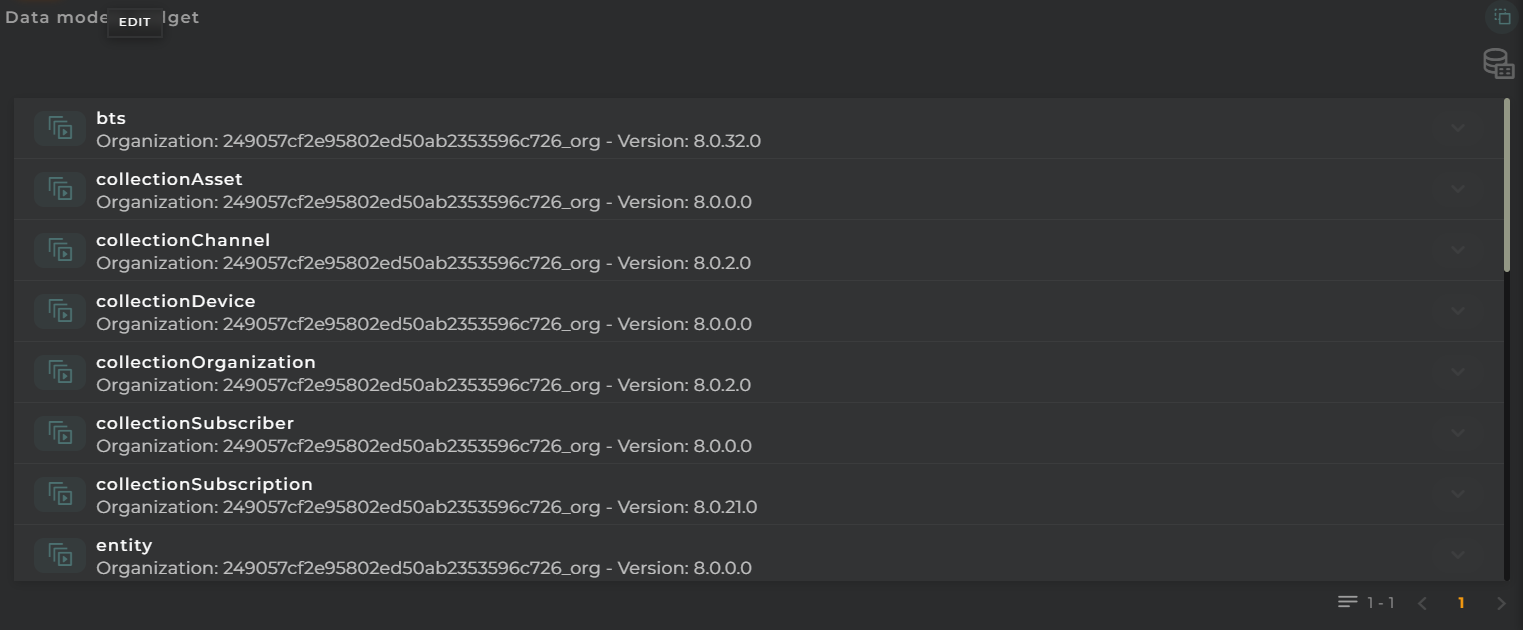
Data models Browser
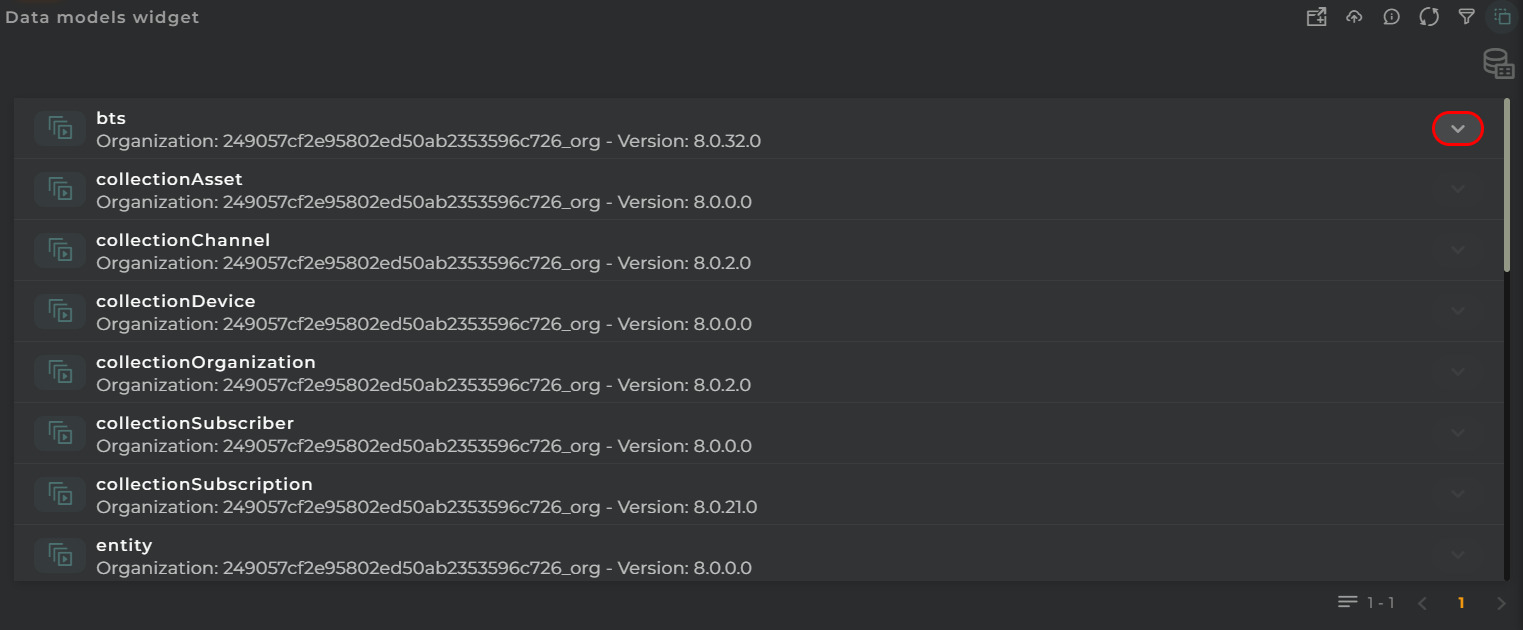
From the data models browser, you can view/modify the data models of your organization, allowing for customization of entity data on the platform.
How it Works
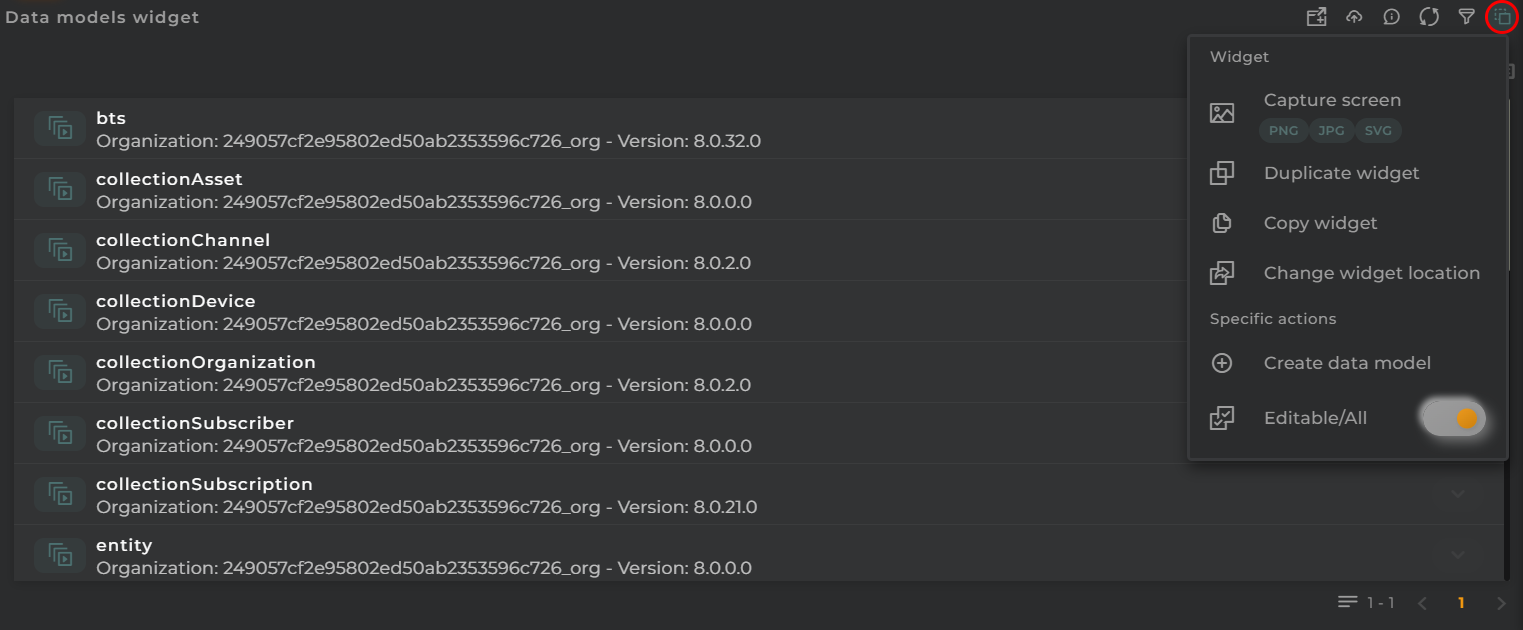
Widget Menu
The following actions can be performed directly from the widget:
New Datamodel: Launches the data models configuration wizard, provided the necessary permissions are available.
Editable/All: Toggles between displaying all data models (both inherited from catalog and own) or only the editable ones (those owned by you, which can be deleted).
Capture screen: Takes a screenshot of the widget.
Duplicate widget: Creates a duplicate of the widget on the dashboard.
Copy widget: Copies the widget to another dashboard.
Change widget location: Moves the widget to another dashboard.
Data Model Details
To view the data streams of a data model, click on the arrow located to the right of each one to enable the navigation panel. The first level will display the categories followed by the data streams assigned to each of them.
Actions per Data Model
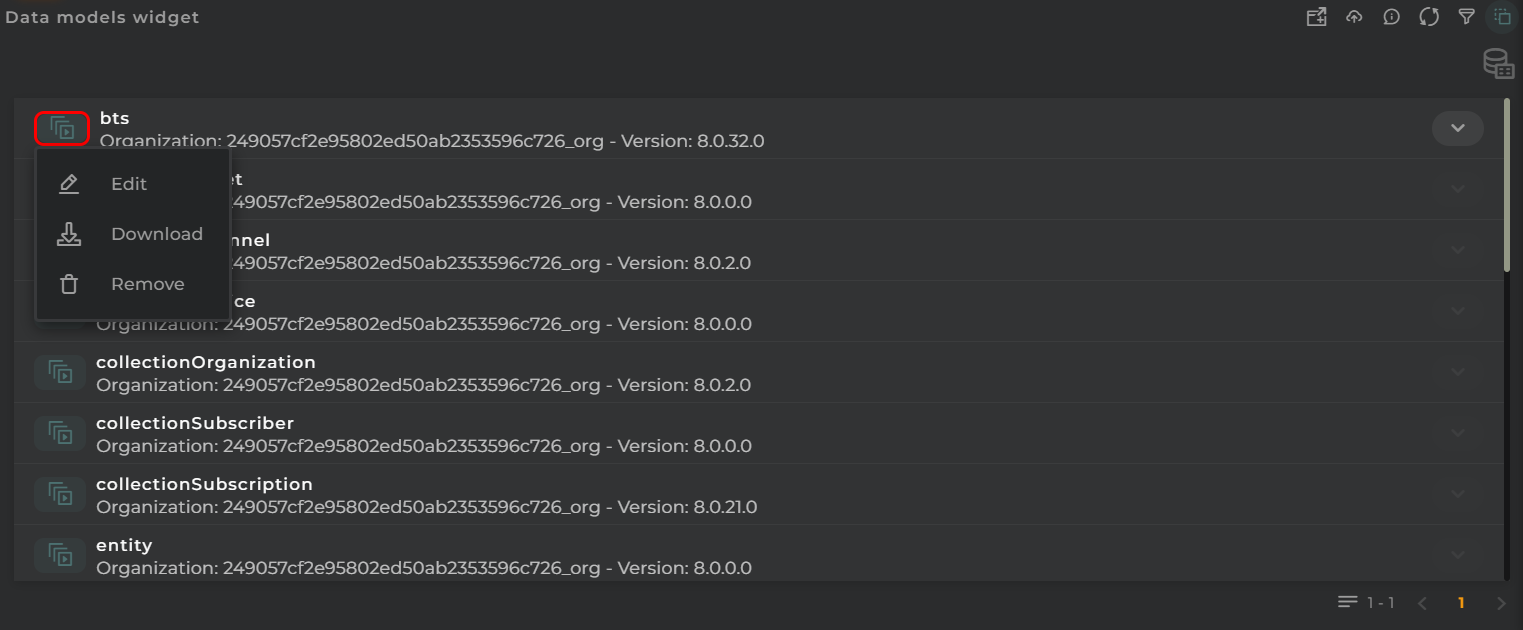
The following are the possible actions that can be performed for each of the organization’s own data models:
Download: Allows downloading of the selected data model.
Edit: Enables editing of a data model.
Remove: Deletes the selected data model (only those that are not inherited).
Configuration
General
Boxed: widget will be displayed with background in dahsboard.
About: widget description in Markdown format.
Title: widget title. It can be configured to remain fixed in the widget or only be displayed when it receives focus.
Toolbar: configures the behavior of the widget bar on the dashboard, allowing you to hide it, hide it when not in use, or leave it always visible.
Refresh Frequency: allows configuring the data refresh frequency displayed in the list.
Extra actions: allows user to add new specific actions to the widget with your own code.
You can add a new one by pressing the New button.
Once you added a custom action it can be modified later by pressing the name in the list.
In order to remove the custom action click the delete icon button on the right.
In extra actions you can write your own code were you can open other dashboards, entities dashboards or execute wizards.
You can find all available functions and methods in Extra Information
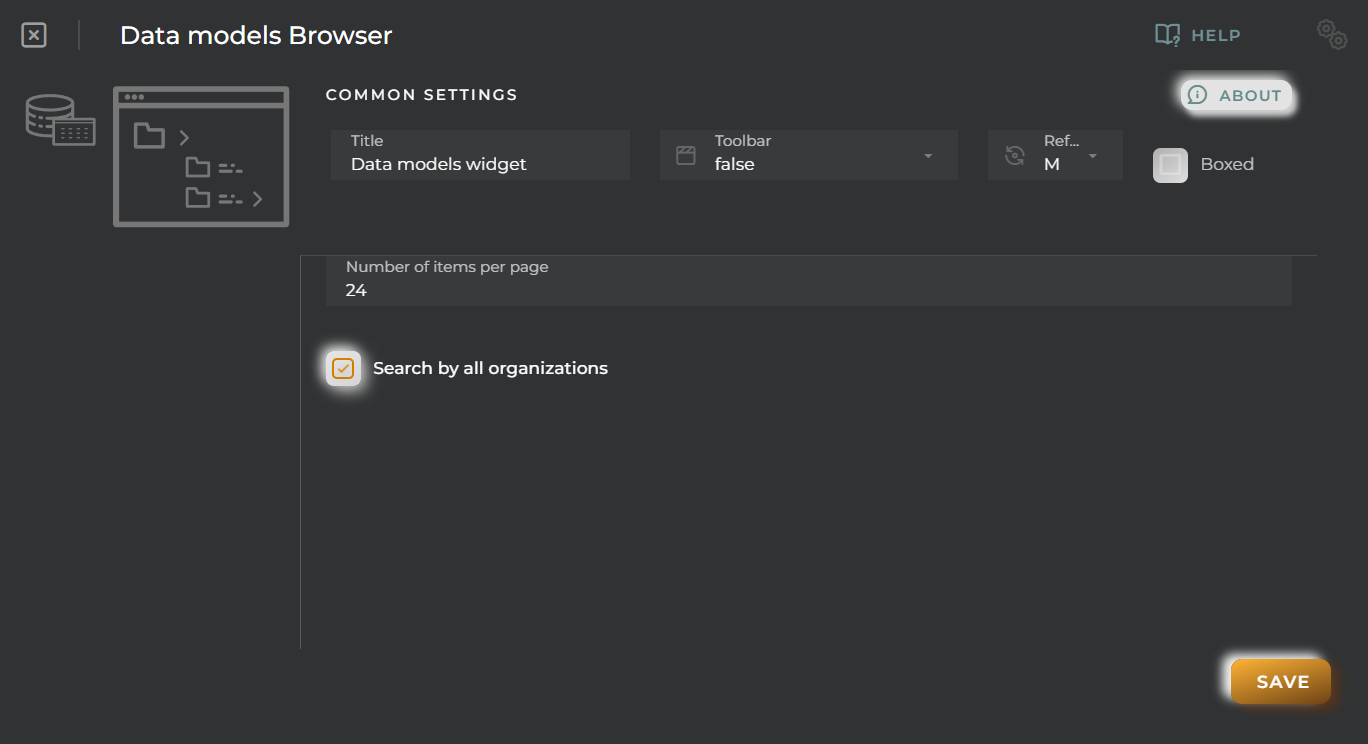
Items Per Page: Indicates the number of data models that will be displayed per page while navigating.
Search by All Organizations: When enabled, the widget will display all data models from all my organizations.
Data sets Browser
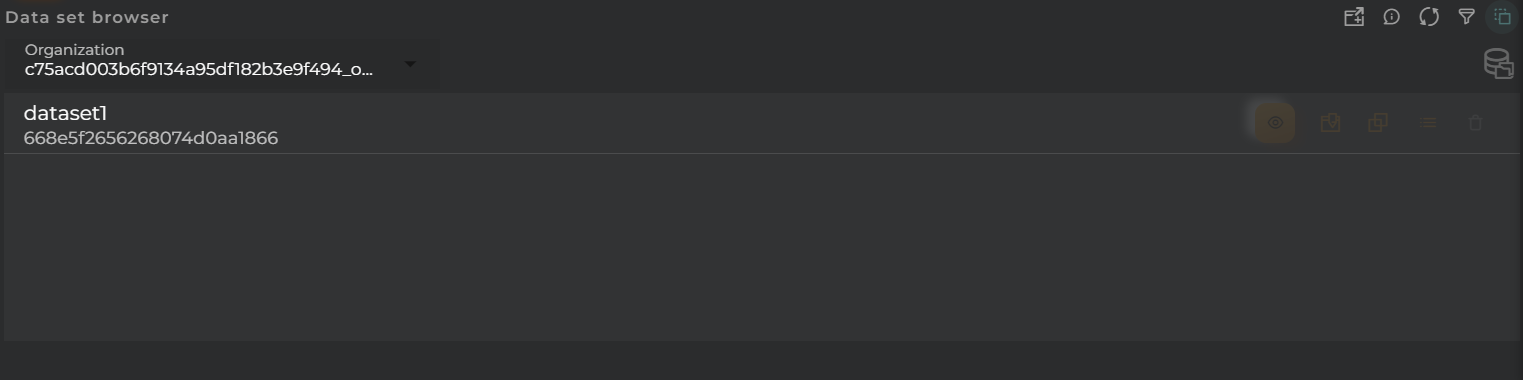
In this widget, you will find the data sets configured for your organization.
How it Works
In the browser, you will find a list of data sets along with the available actions for each, based on the permissions you have.
Widget Menu
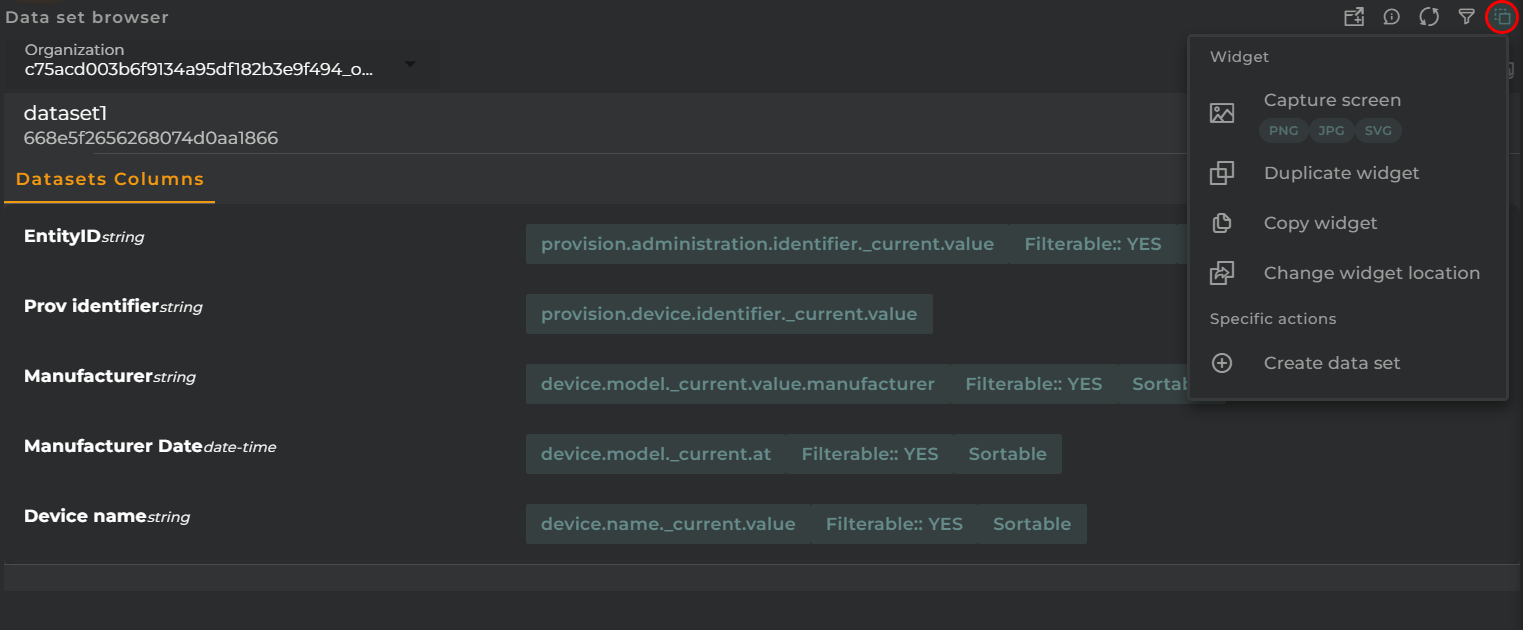
From the action menu of the widget, you can perform the following:
New Data Set: This allows you to run the data set creation wizard (provided you have the necessary permissions).
Capture screen: Takes a screenshot of the widget.
Duplicate widget: Creates a duplicate of the widget on the dashboard.
Copy widget: Copies the widget to another dashboard.
Change widget location: Moves the widget to another dashboard.
Organization Selector
A user can manage the data sets for those organizations that are dependent on the user’s own organization. To switch between organizations, you must select it from the selector available at the top of the widget.
Actions on Data Set
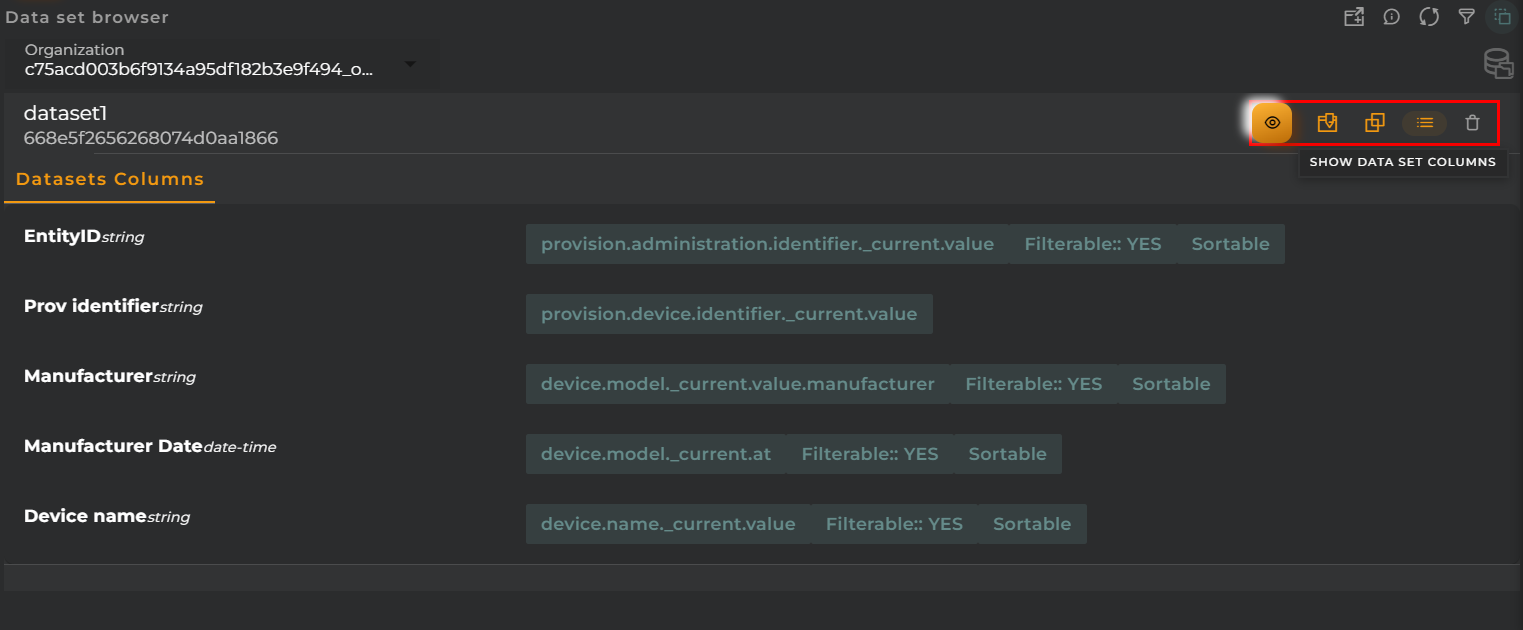
For each data set, you can perform the following actions:
View Data: This will open a list widget where you can view the data of the selected data set.
Edit: Allows you to initiate a data set update wizard with the configuration data of the current one.
Clone: Allows you to initiate a data set creation wizard with the configuration data of the current one.
Columns: Displays, within the widget itself, the columns configured for the data set.
Delete: Removes the selected data set and all its associated data.
Configuration
General
Boxed: widget will be displayed with background in dahsboard.
About: widget description in Markdown format.
Title: widget title. It can be configured to remain fixed in the widget or only be displayed when it receives focus.
Toolbar: configures the behavior of the widget bar on the dashboard, allowing you to hide it, hide it when not in use, or leave it always visible.
Refresh Frequency: allows configuring the data refresh frequency displayed in the list.
Extra actions: allows user to add new specific actions to the widget with your own code.
You can add a new one by pressing the New button.
Once you added a custom action it can be modified later by pressing the name in the list.
In order to remove the custom action click the delete icon button on the right.
In extra actions you can write your own code were you can open other dashboards, entities dashboards or execute wizards.
You can find all available functions and methods in Extra Information
Device Plans Browser
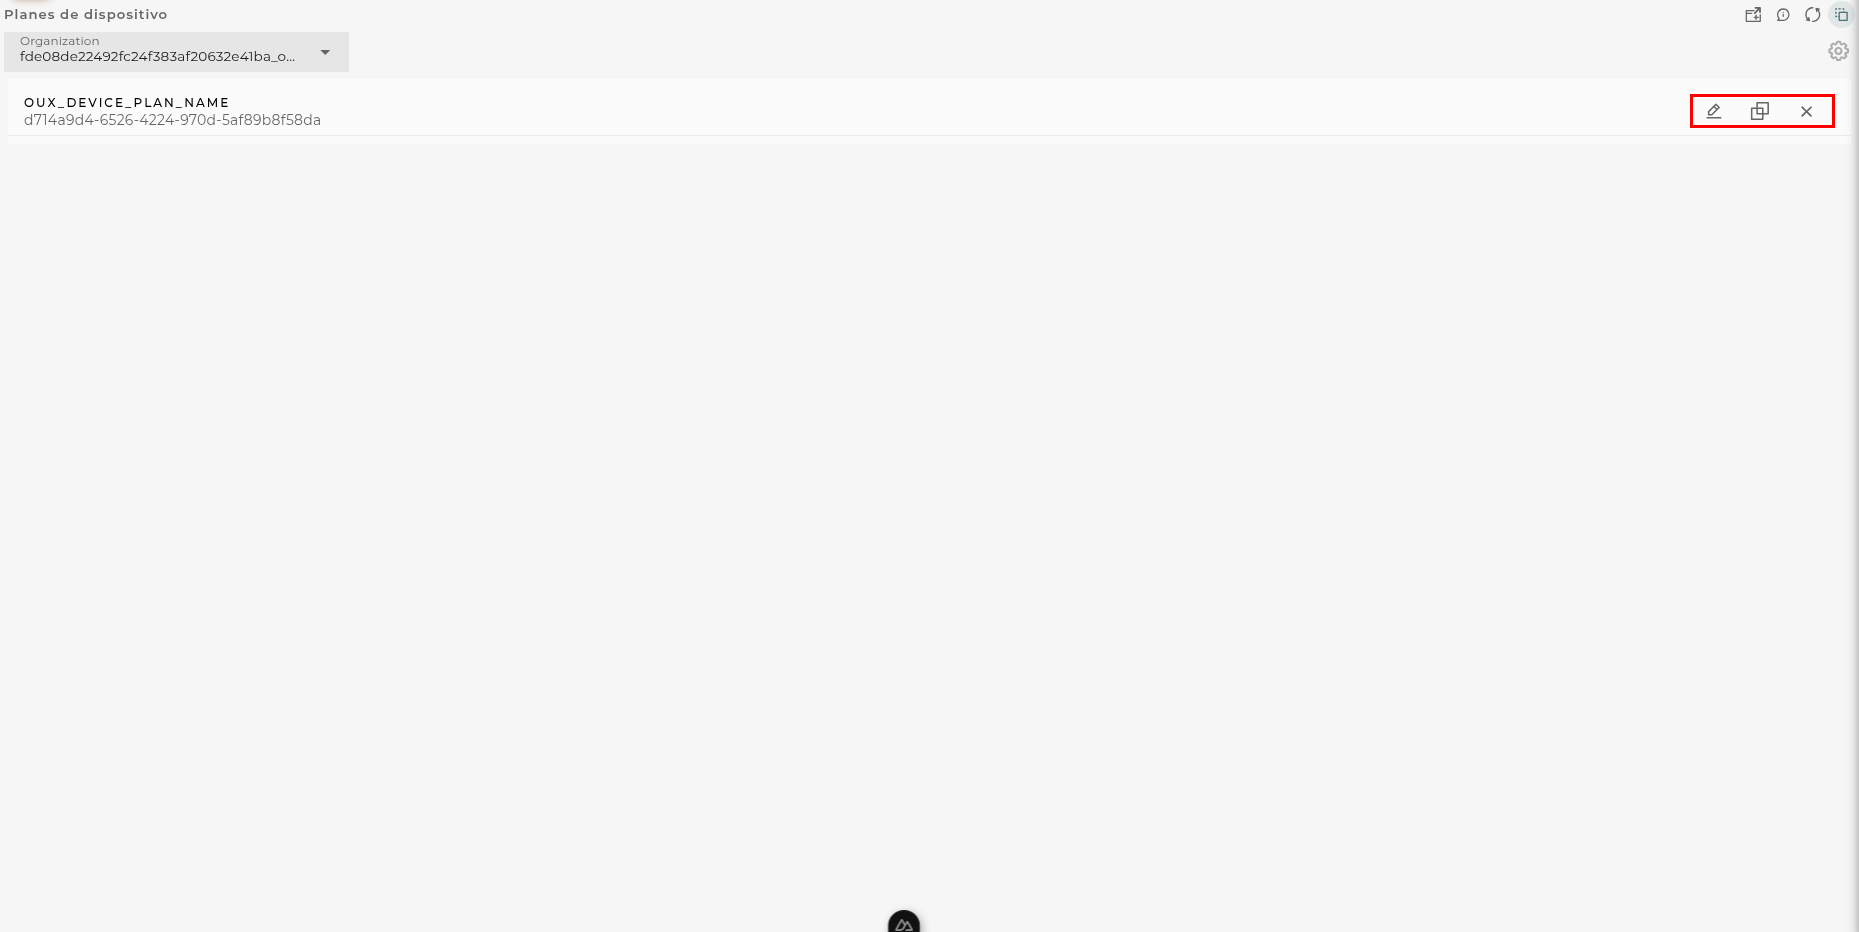
In this widget, you can navigate through different device plans within your organization. Actions can be performed on each of the identifying elements within each organization.
How it Works
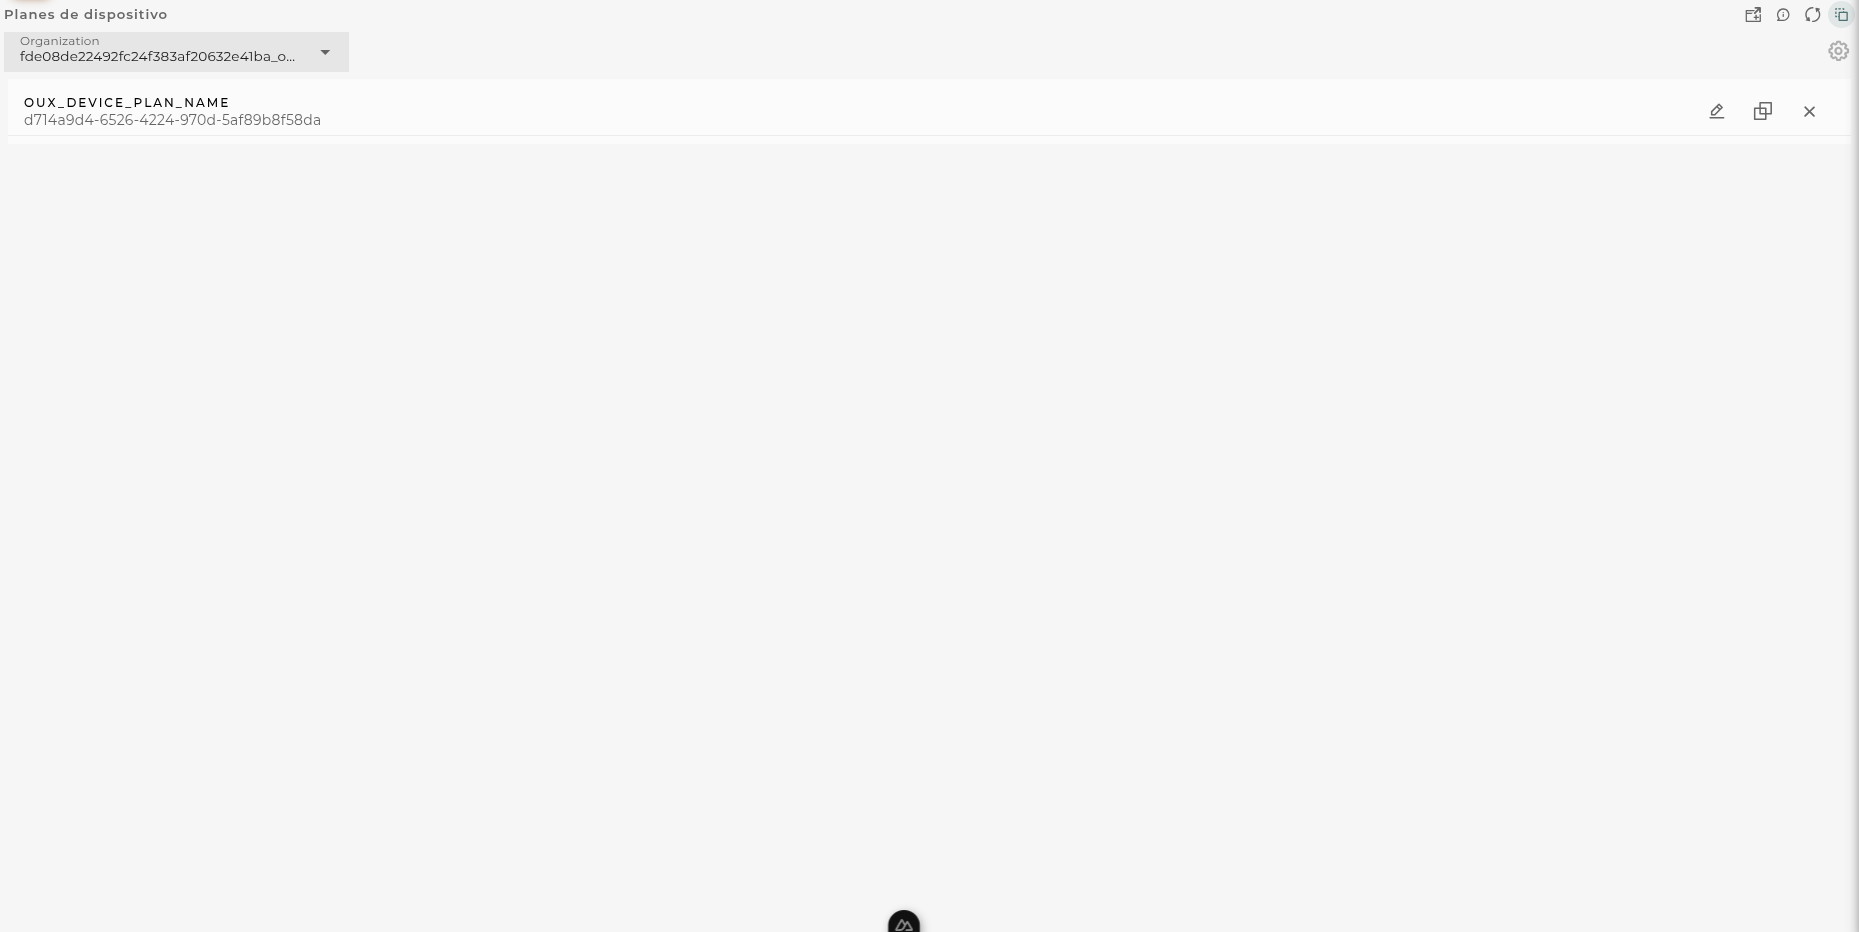
By selecting an organization, the plans belonging to it will be displayed in the browser, showing some details about them.
Widget Menu
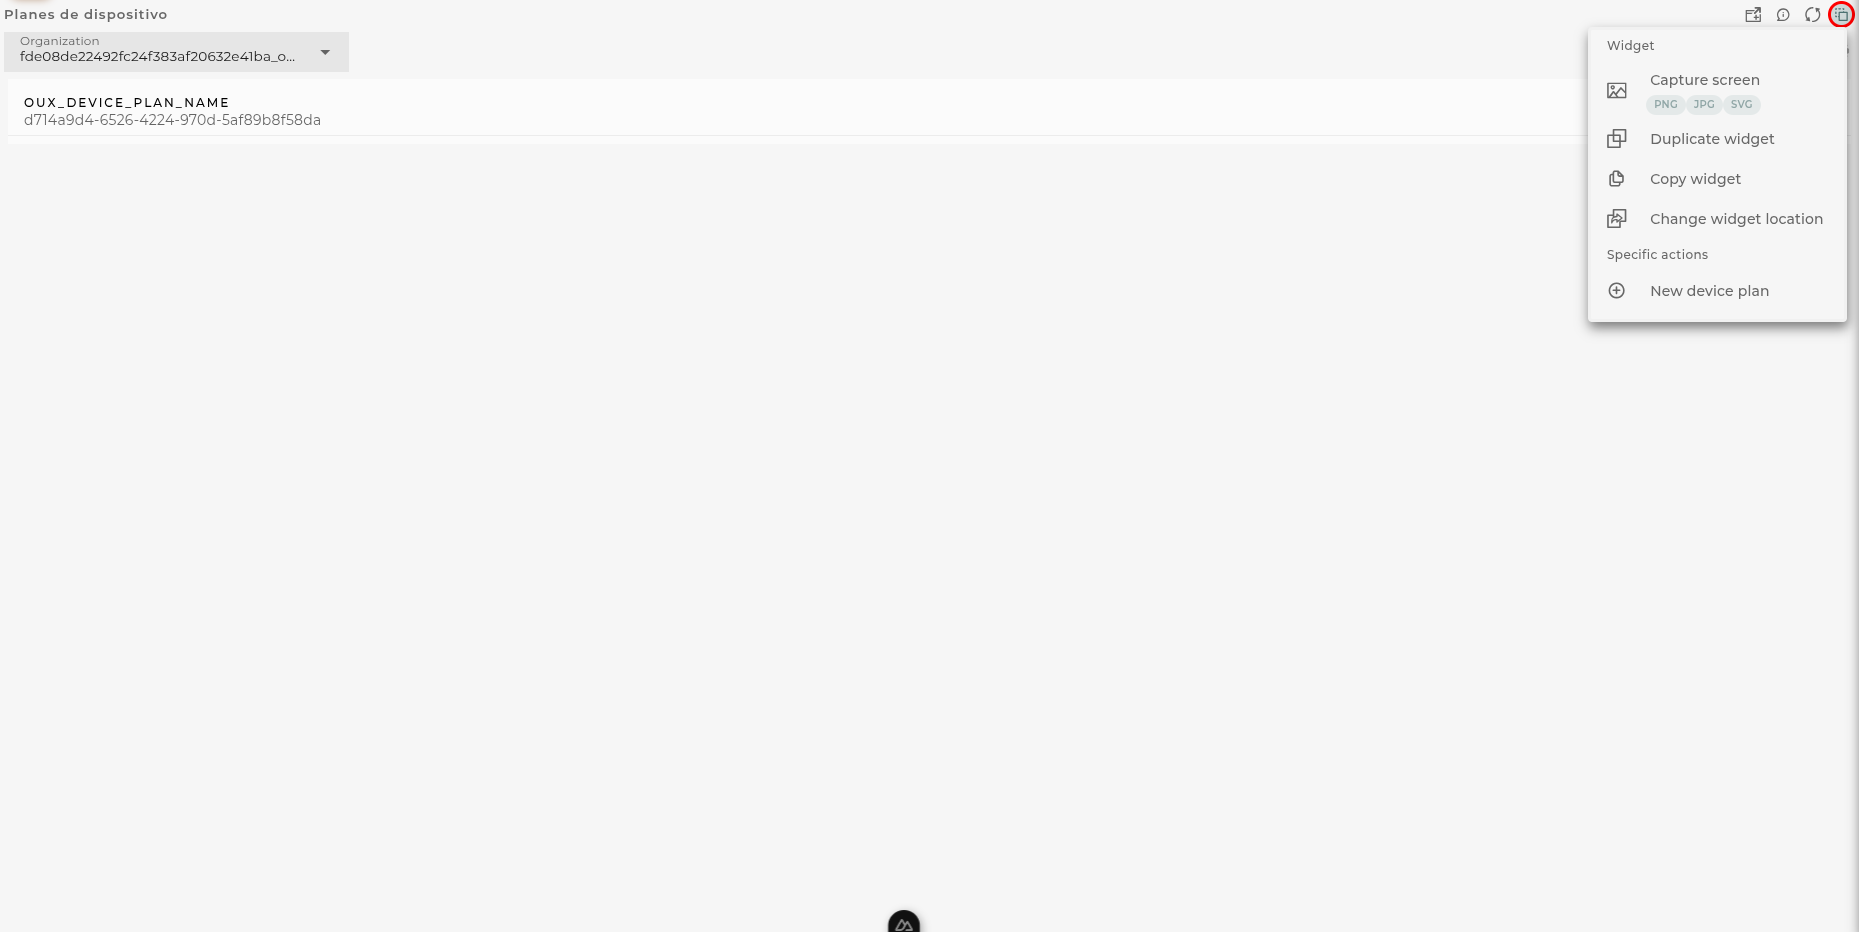
From the widget’s action menu, you can perform the following:
New Device Plan: Allows the execution of the wizard for creating a new plan (provided the necessary permissions are available).
Capture screen: Takes a screenshot of the widget.
Duplicate widget: Creates a duplicate of the widget on the dashboard.
Copy widget: Copies the widget to another dashboard.
Change widget location: Moves the widget to another dashboard.
Device Plans Actions
The following are the actions that can be performed on each plan:
Edit: Opens device plans wizard in order to edit the selected plan.
Clone: Opens device plans wizard in order to clone the selected plan.
Remove: Removes the selected plan.
Configuration
General
Boxed: widget will be displayed with background in dahsboard.
About: widget description in Markdown format.
Title: widget title. It can be configured to remain fixed in the widget or only be displayed when it receives focus.
Toolbar: configures the behavior of the widget bar on the dashboard, allowing you to hide it, hide it when not in use, or leave it always visible.
Refresh Frequency: allows configuring the data refresh frequency displayed in the list.
Extra actions: allows user to add new specific actions to the widget with your own code.
You can add a new one by pressing the New button.
Once you added a custom action it can be modified later by pressing the name in the list.
In order to remove the custom action click the delete icon button on the right.
In extra actions you can write your own code were you can open other dashboards, entities dashboards or execute wizards.
You can find all available functions and methods in Extra Information
Entities Software Browser
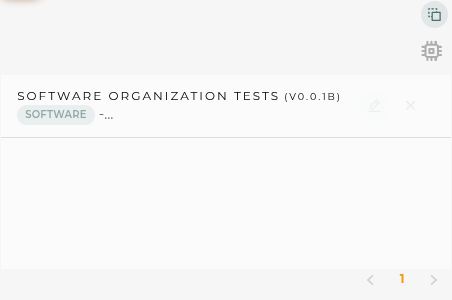
Here, you can consult and/or manage the software of your organizations.
How it Works
Widget Menu
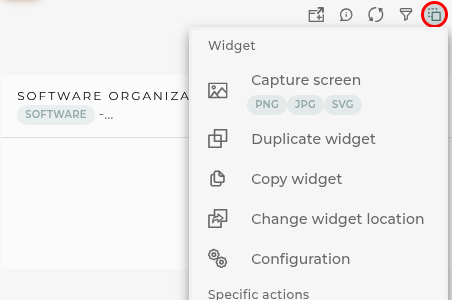
From the action menu of the widget, it will be possible to do the following:
New software: allows you to run the creation wizard for organization software (provided you have the necessary permissions).
Capture screen: Takes a screenshot of the widget.
Duplicate widget: Creates a duplicate of the widget on the dashboard.
Copy widget: Copies the widget to another dashboard.
Change widget location: Moves the widget to another dashboard.
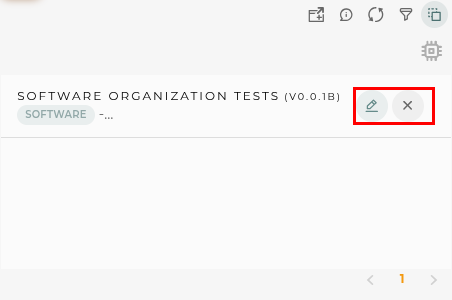
Actions by Software
The following are the possible actions to be taken for each software:
Edit: Opens the organization software wizard where you can change the software details.
Remove: Deletes the selected software. This action allows you to delete references in devices by selecting “Delete all”. Another confirmation popup will be opened.
Configuration
General
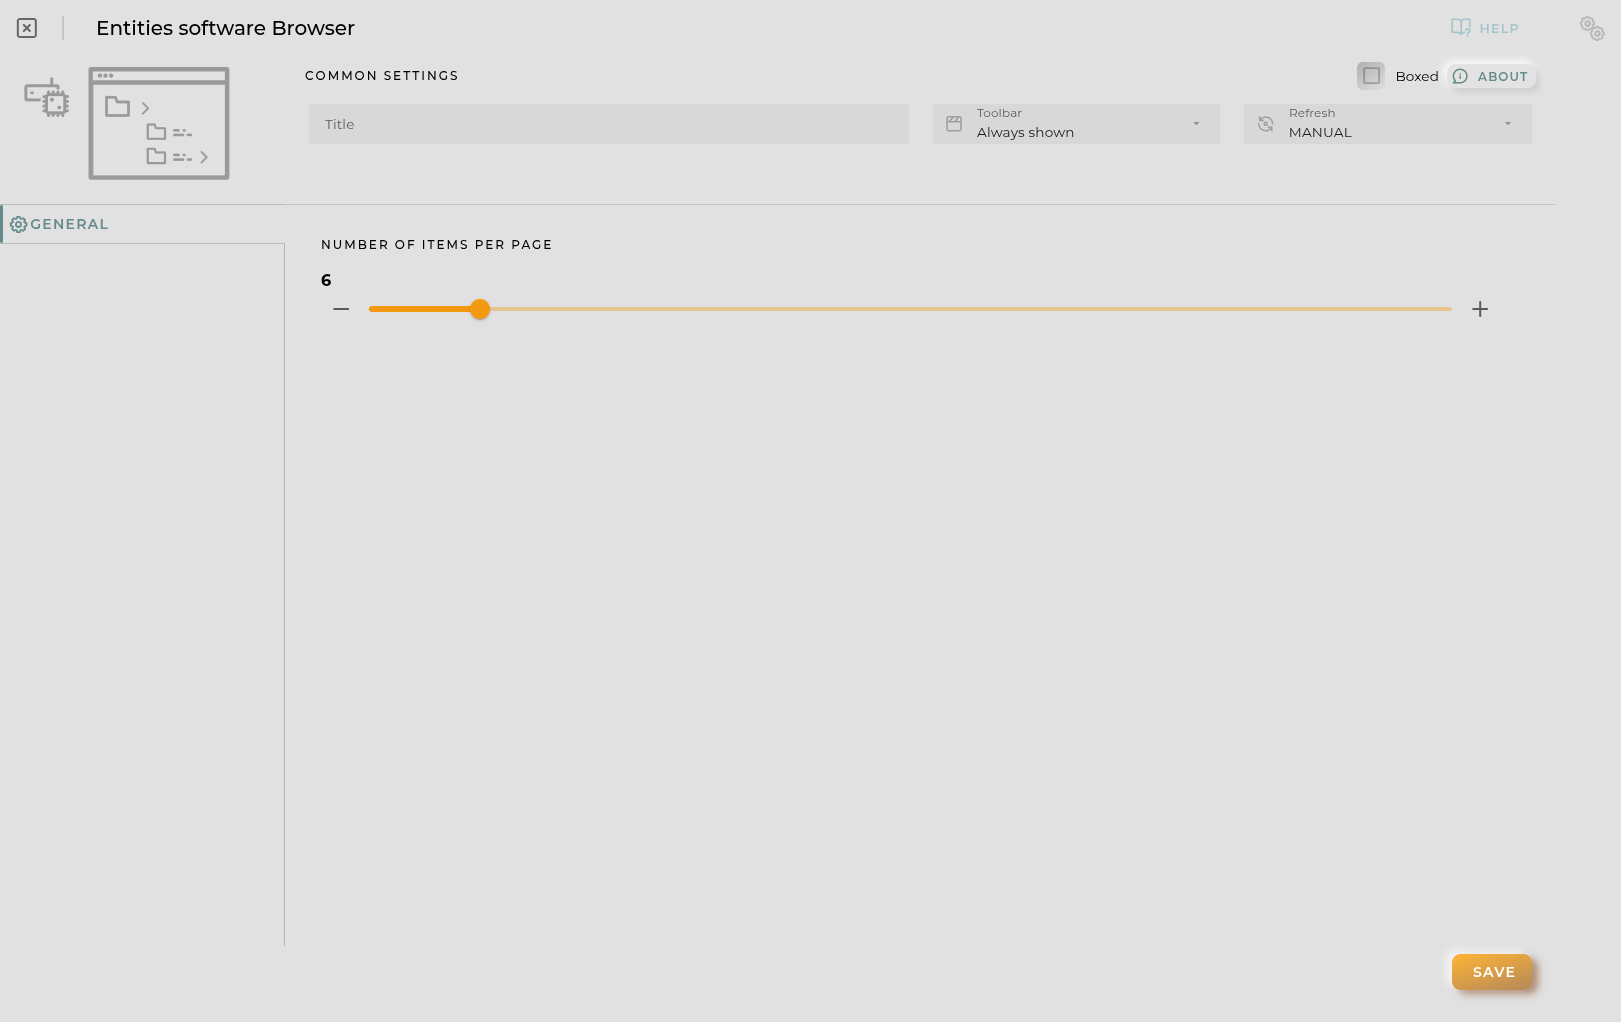
Boxed: widget will be displayed with background in dahsboard.
About: widget description in Markdown format.
Title: widget title. It can be configured to remain fixed in the widget or only be displayed when it receives focus.
Toolbar: configures the behavior of the widget bar on the dashboard, allowing you to hide it, hide it when not in use, or leave it always visible.
Refresh Frequency: allows configuring the data refresh frequency displayed in the list.
Extra actions: allows user to add new specific actions to the widget with your own code.
You can add a new one by pressing the New button.
Once you added a custom action it can be modified later by pressing the name in the list.
In order to remove the custom action click the delete icon button on the right.
In extra actions you can write your own code were you can open other dashboards, entities dashboards or execute wizards.
You can find all available functions and methods in Extra Information
Items per Page: Configures the number of software items to be displayed per page.
Image Execution Scheduler Browser
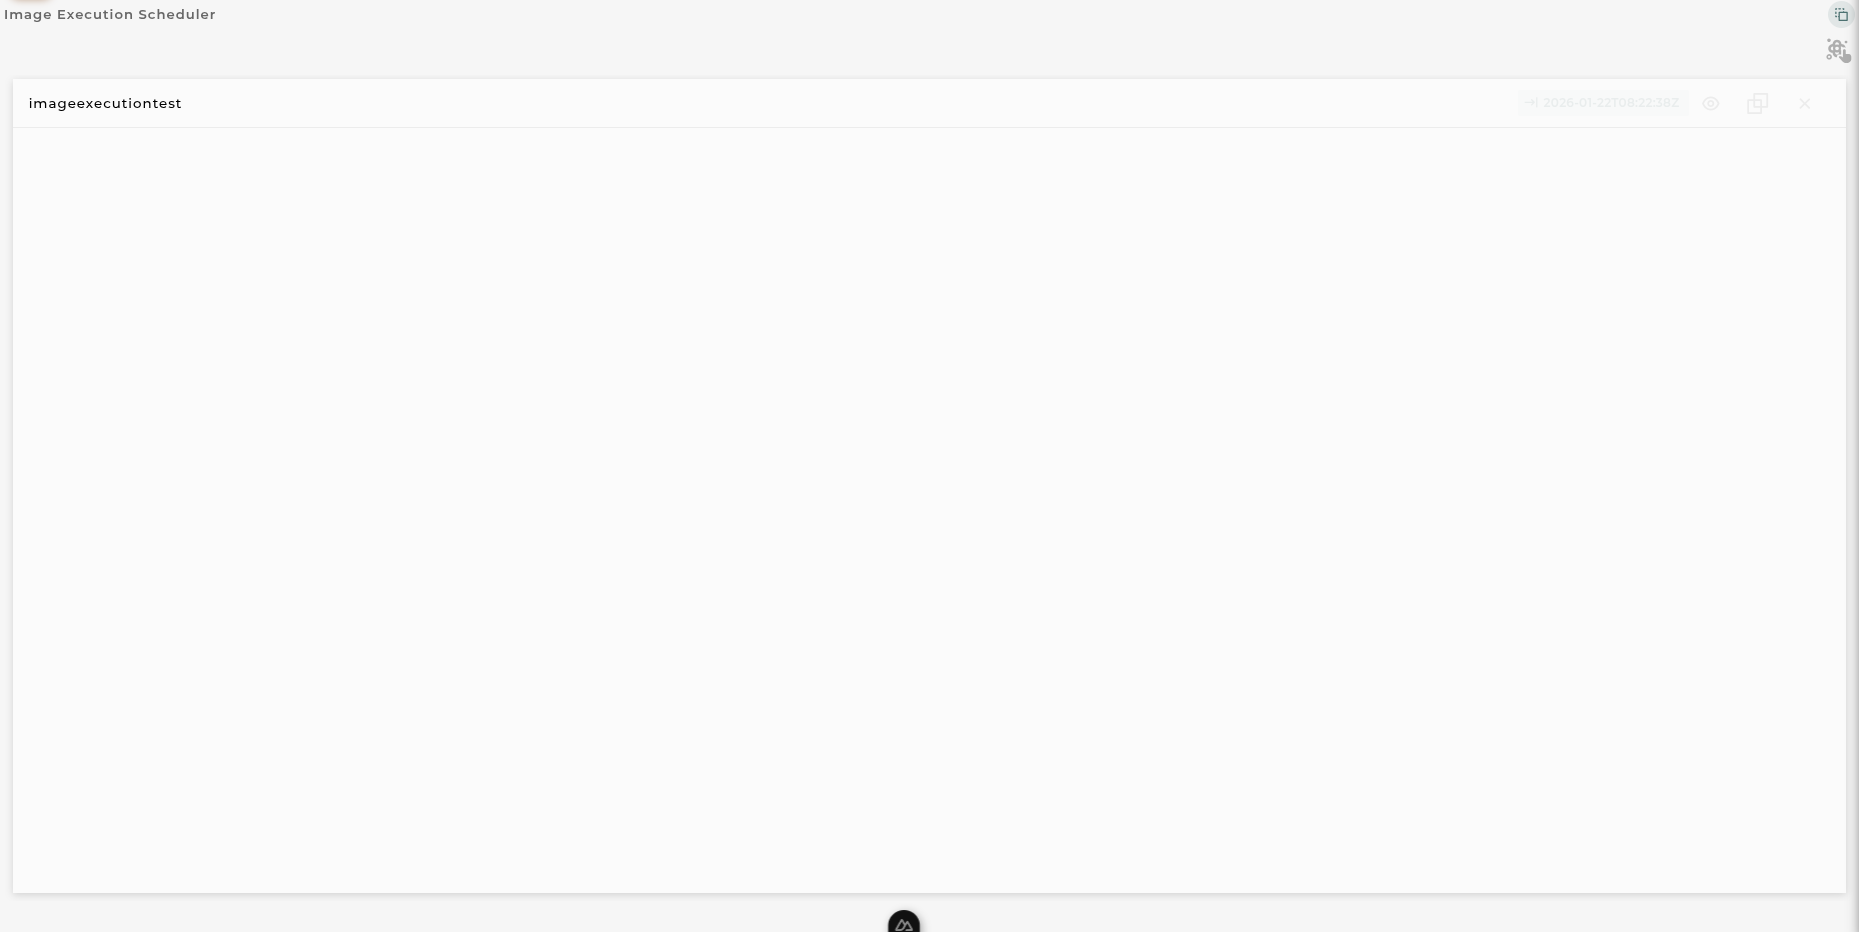
The Image Execution Scheduler Browser allows you to view/manage the image execution schedulers configured in your organization.
How it Works
Each image execution scheduler will be displayed in the browser, showing some details about them such as the type of image execution scheduler and the configuration mode used.
Widget Menu
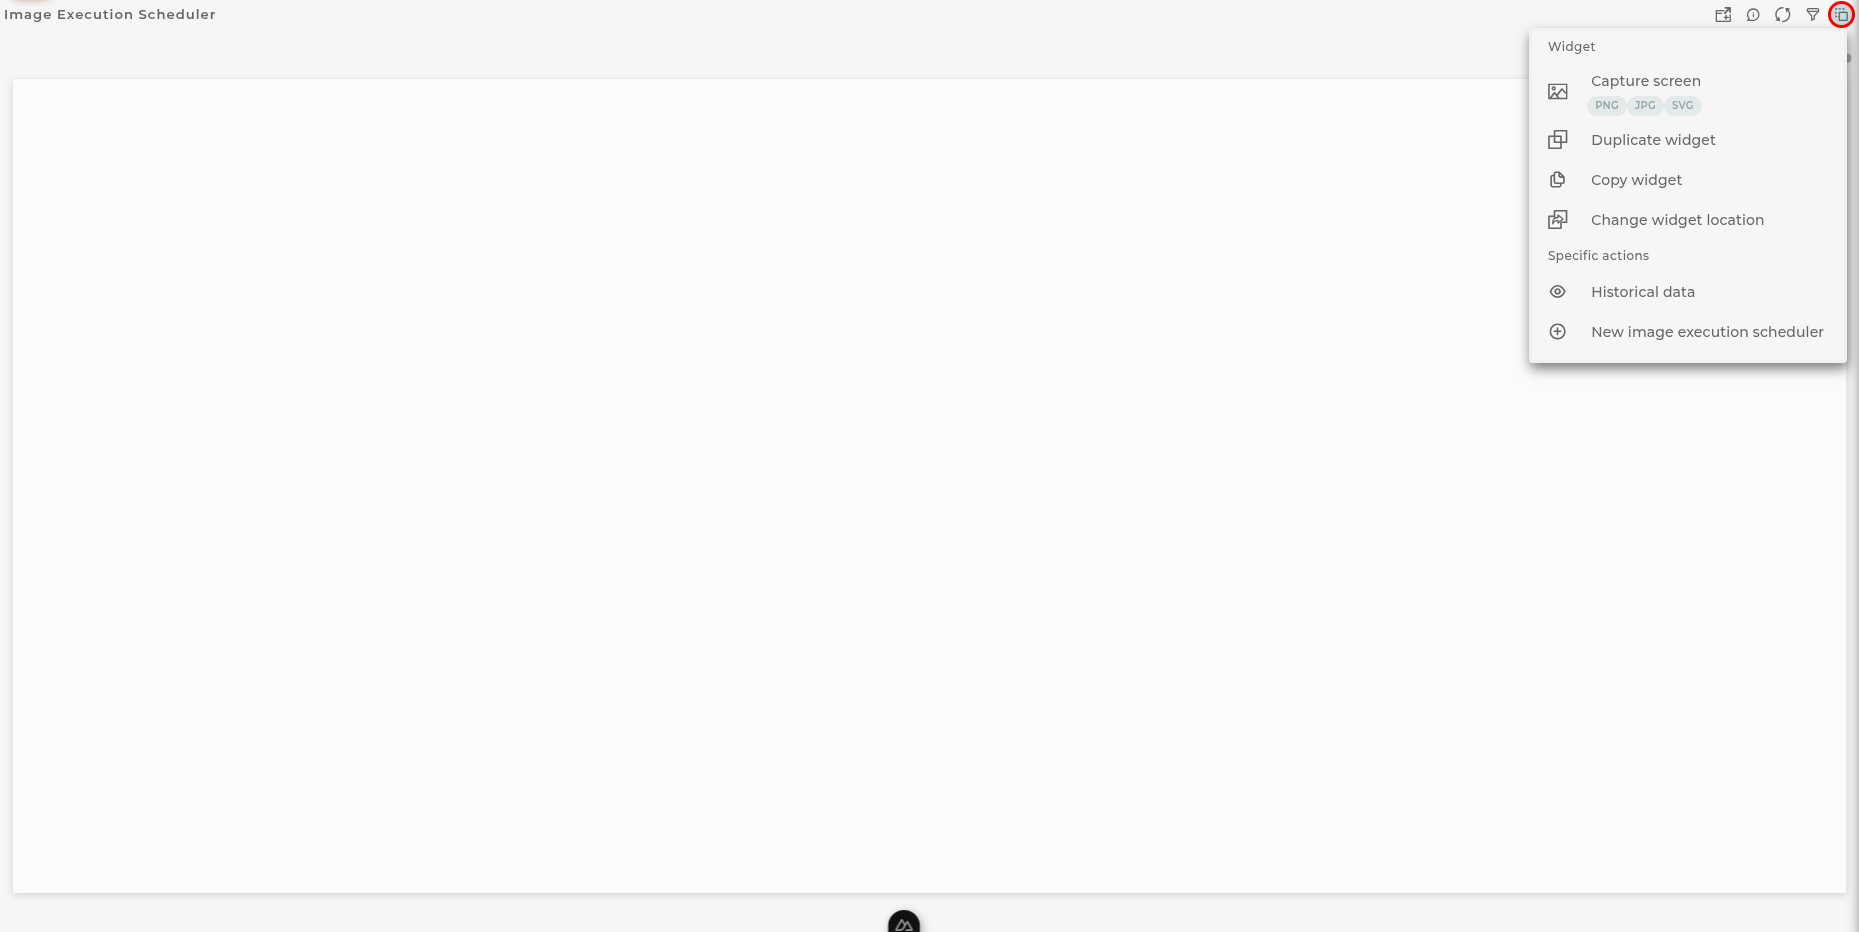
From the widget’s action menu, you can perform the following:
Executions history: Shows the executions history for all image execution scheduled.
Image Execution Scheduler wizard: Allows the execution of the wizard for creating a new image execution scheduler (provided the necessary permissions are available).
Capture screen: Takes a screenshot of the widget.
Duplicate widget: Creates a duplicate of the widget on the dashboard.
Copy widget: Copies the widget to another dashboard.
Change widget location: Moves the widget to another dashboard.
Actions per Image Execution Scheduler
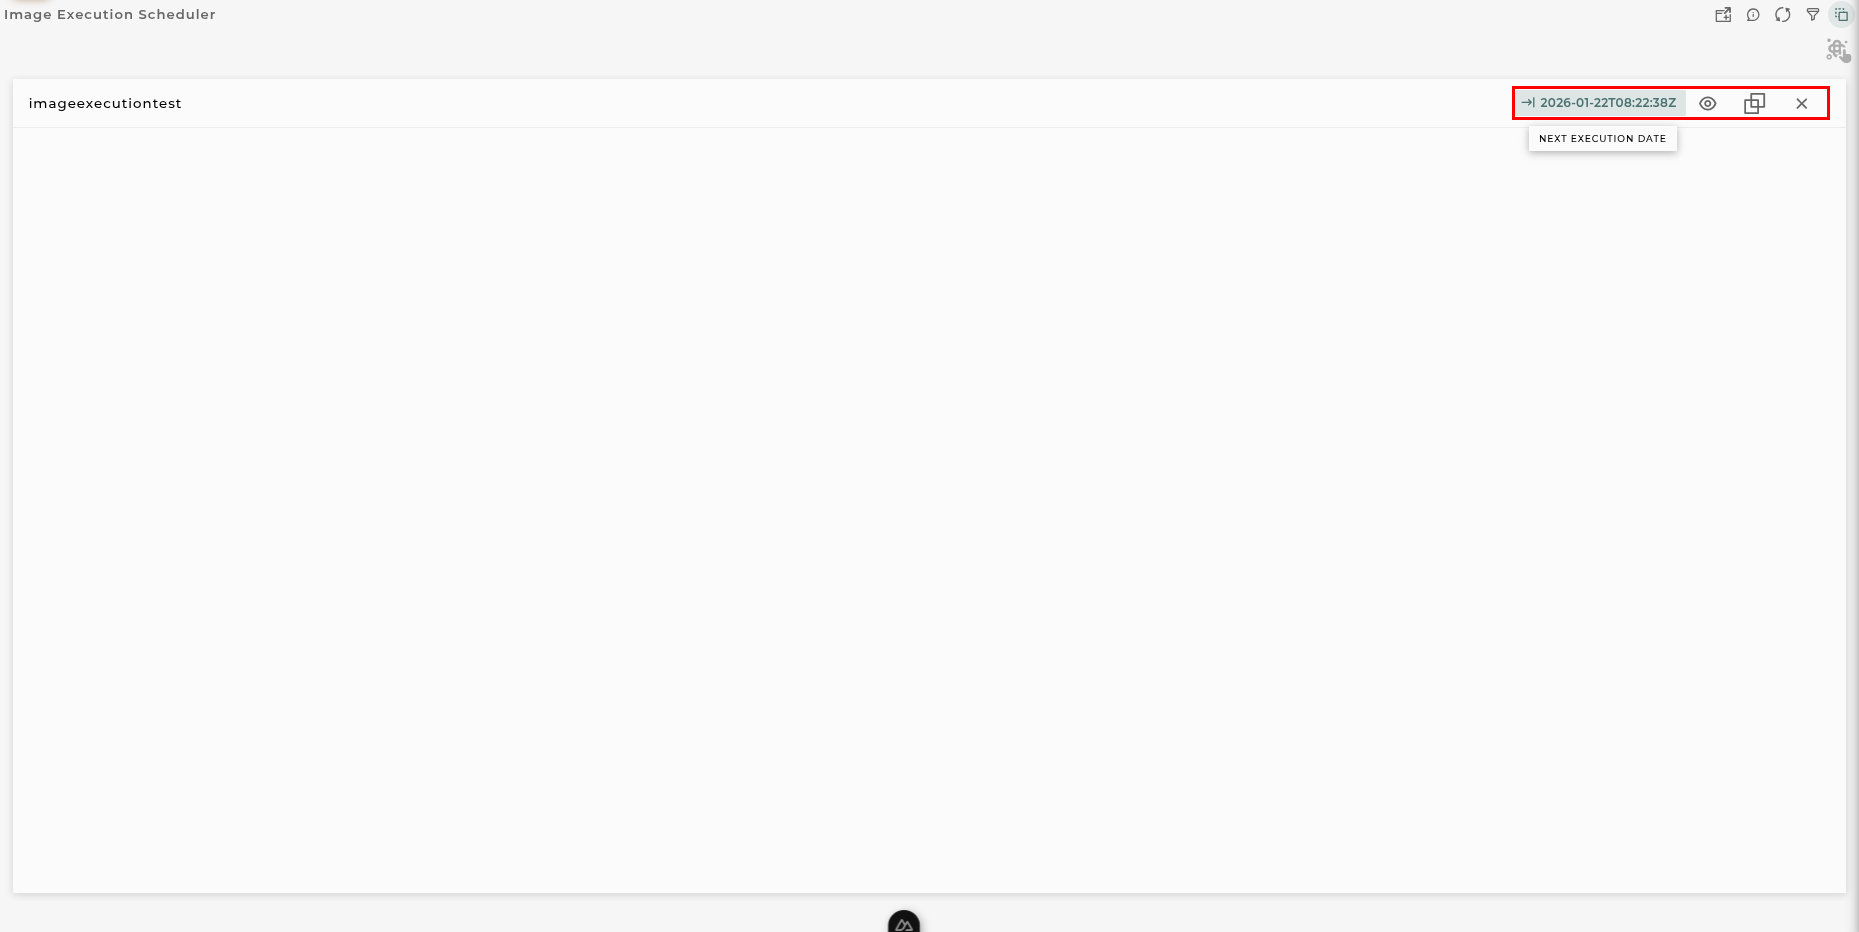
The following are the possible actions to be performed for each of the schedulers:
History opens image execution executions history in a modal.
Clone will open the image execution scheduler wizard for creating a new image execution scheduler that will contain the configuration of the selected one.
Remove deletes the selected scheduler.
Configuration
General
Boxed: widget will be displayed with background in dahsboard.
About: widget description in Markdown format.
Title: widget title. It can be configured to remain fixed in the widget or only be displayed when it receives focus.
Toolbar: configures the behavior of the widget bar on the dashboard, allowing you to hide it, hide it when not in use, or leave it always visible.
Refresh Frequency: allows configuring the data refresh frequency displayed in the list.
Extra actions: allows user to add new specific actions to the widget with your own code.
You can add a new one by pressing the New button.
Once you added a custom action it can be modified later by pressing the name in the list.
In order to remove the custom action click the delete icon button on the right.
In extra actions you can write your own code were you can open other dashboards, entities dashboards or execute wizards.
You can find all available functions and methods in Extra Information
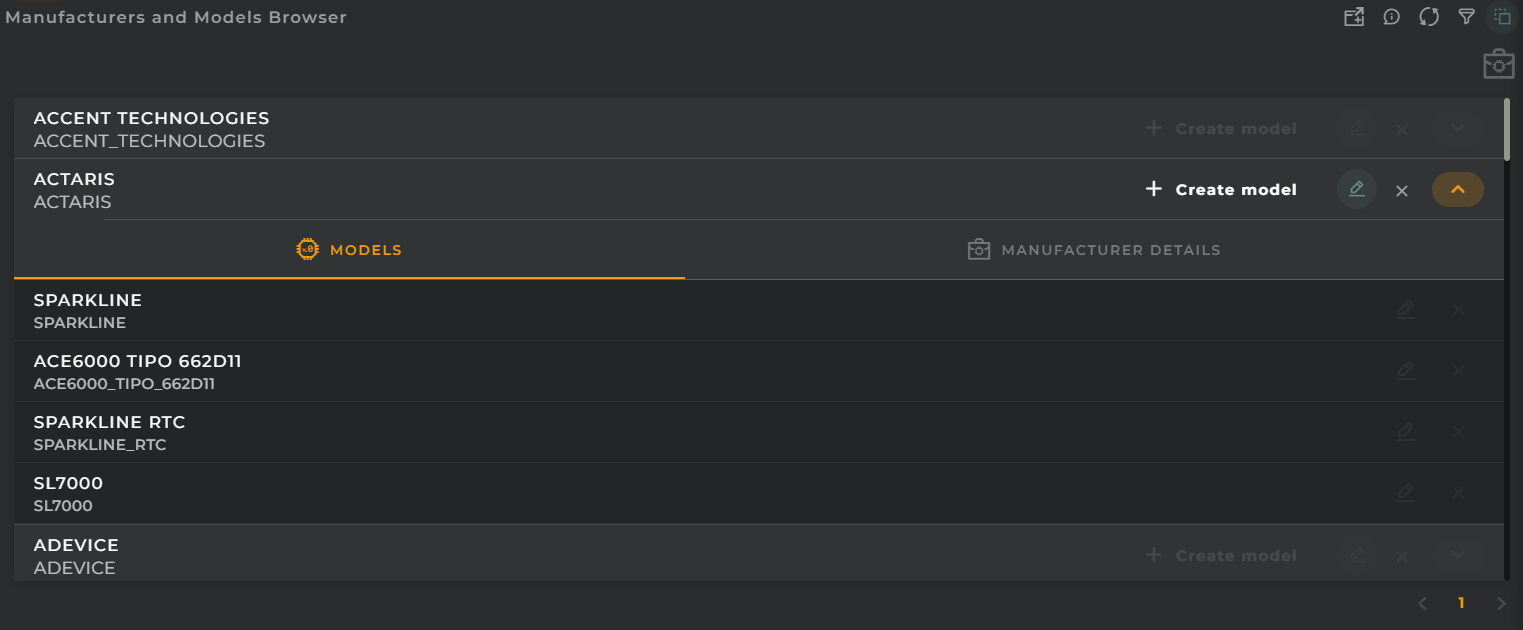
Manufacturers and Models Browser
Here, you can consult and/or manage the manufacturers and models on the platform.
How it Works
Widget Menu
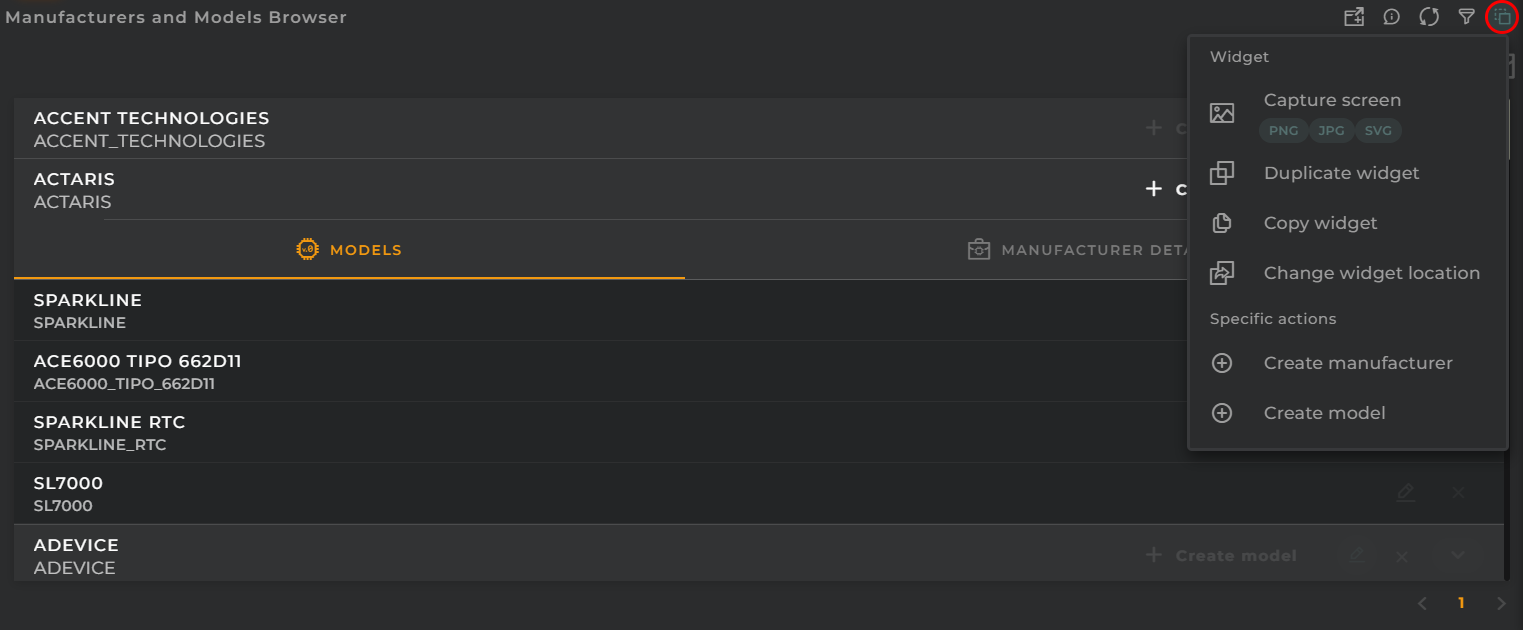
From the action menu of the widget, it will be possible to do the following:
New manufacturer: allows you to run the creation wizard for manufacturer (provided you have the necessary permissions).
New model: allows you to run the creation wizard for manufacturer model (provided you have the necessary permissions).
Capture screen: Takes a screenshot of the widget.
Duplicate widget: Creates a duplicate of the widget on the dashboard.
Copy widget: Copies the widget to another dashboard.
Change widget location: Moves the widget to another dashboard.
Any changes made will affect all organizations; therefore, maintenance is restricted to platform administrators.
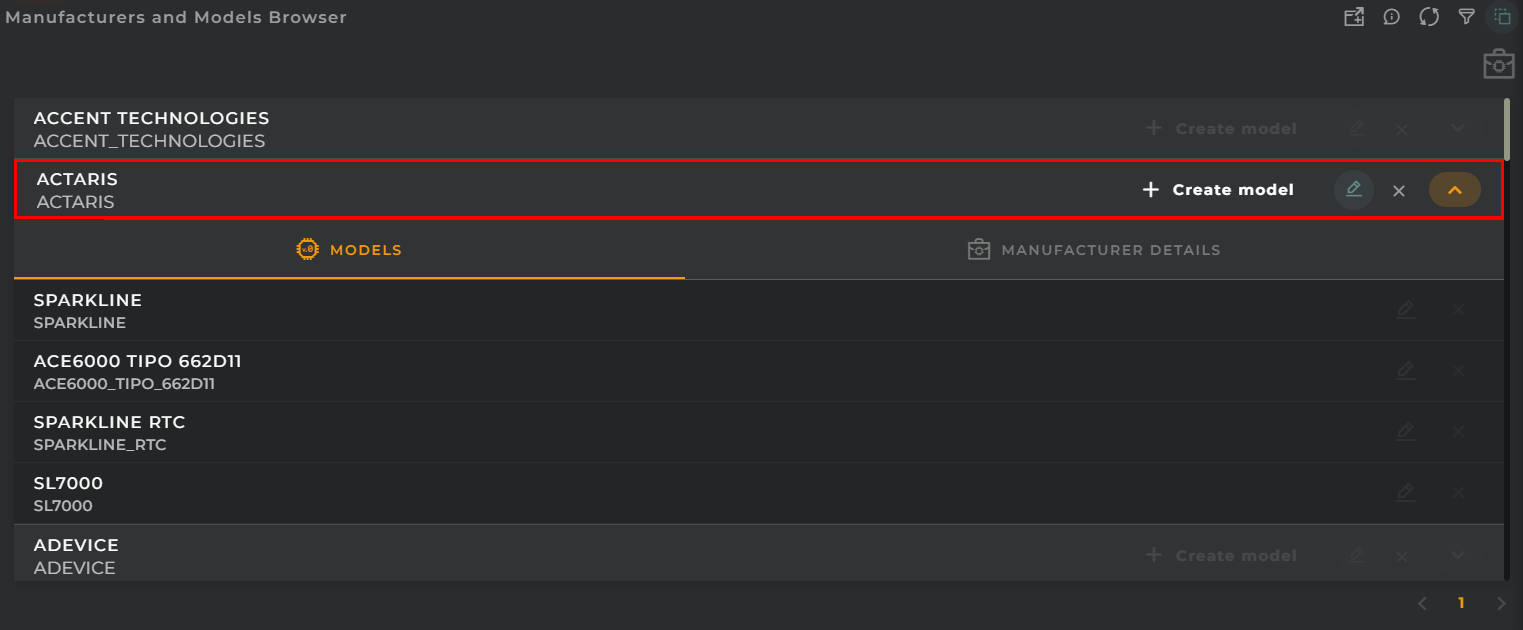
Actions by Manufacturer
The following are the possible actions to be taken for each manufacturer:
Images: If the manufacturer has attached images, this option will be displayed to view them in full screen.
New Model: Opens the model creation wizard with the selected manufacturer pre-filled.
Edit: Opens the manufacturer wizard where you can change the manufacturer’s details.
Remove: Deletes the selected manufacturer as well as all the models associated with it.
By clicking the expand button, you can see the manufacturer’s details as well as a list of all available models, if any exist.
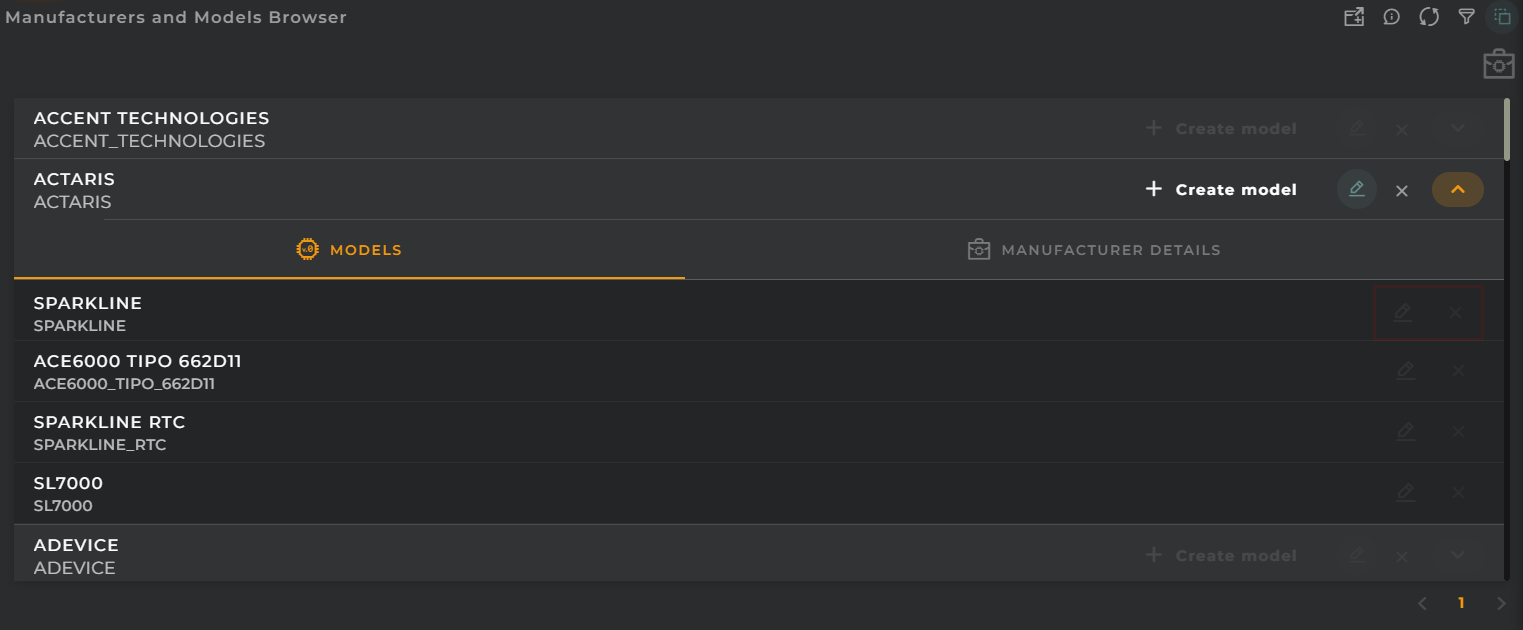
Actions by Model
The following are the possible actions for each of the available models for the manufacturer:
Change Manufacturer: Allows you to directly move the model to another manufacturer.
Edit: Opens the model configuration wizard to change its parameters.
Remove: Deletes the selected item.
Configuration
General
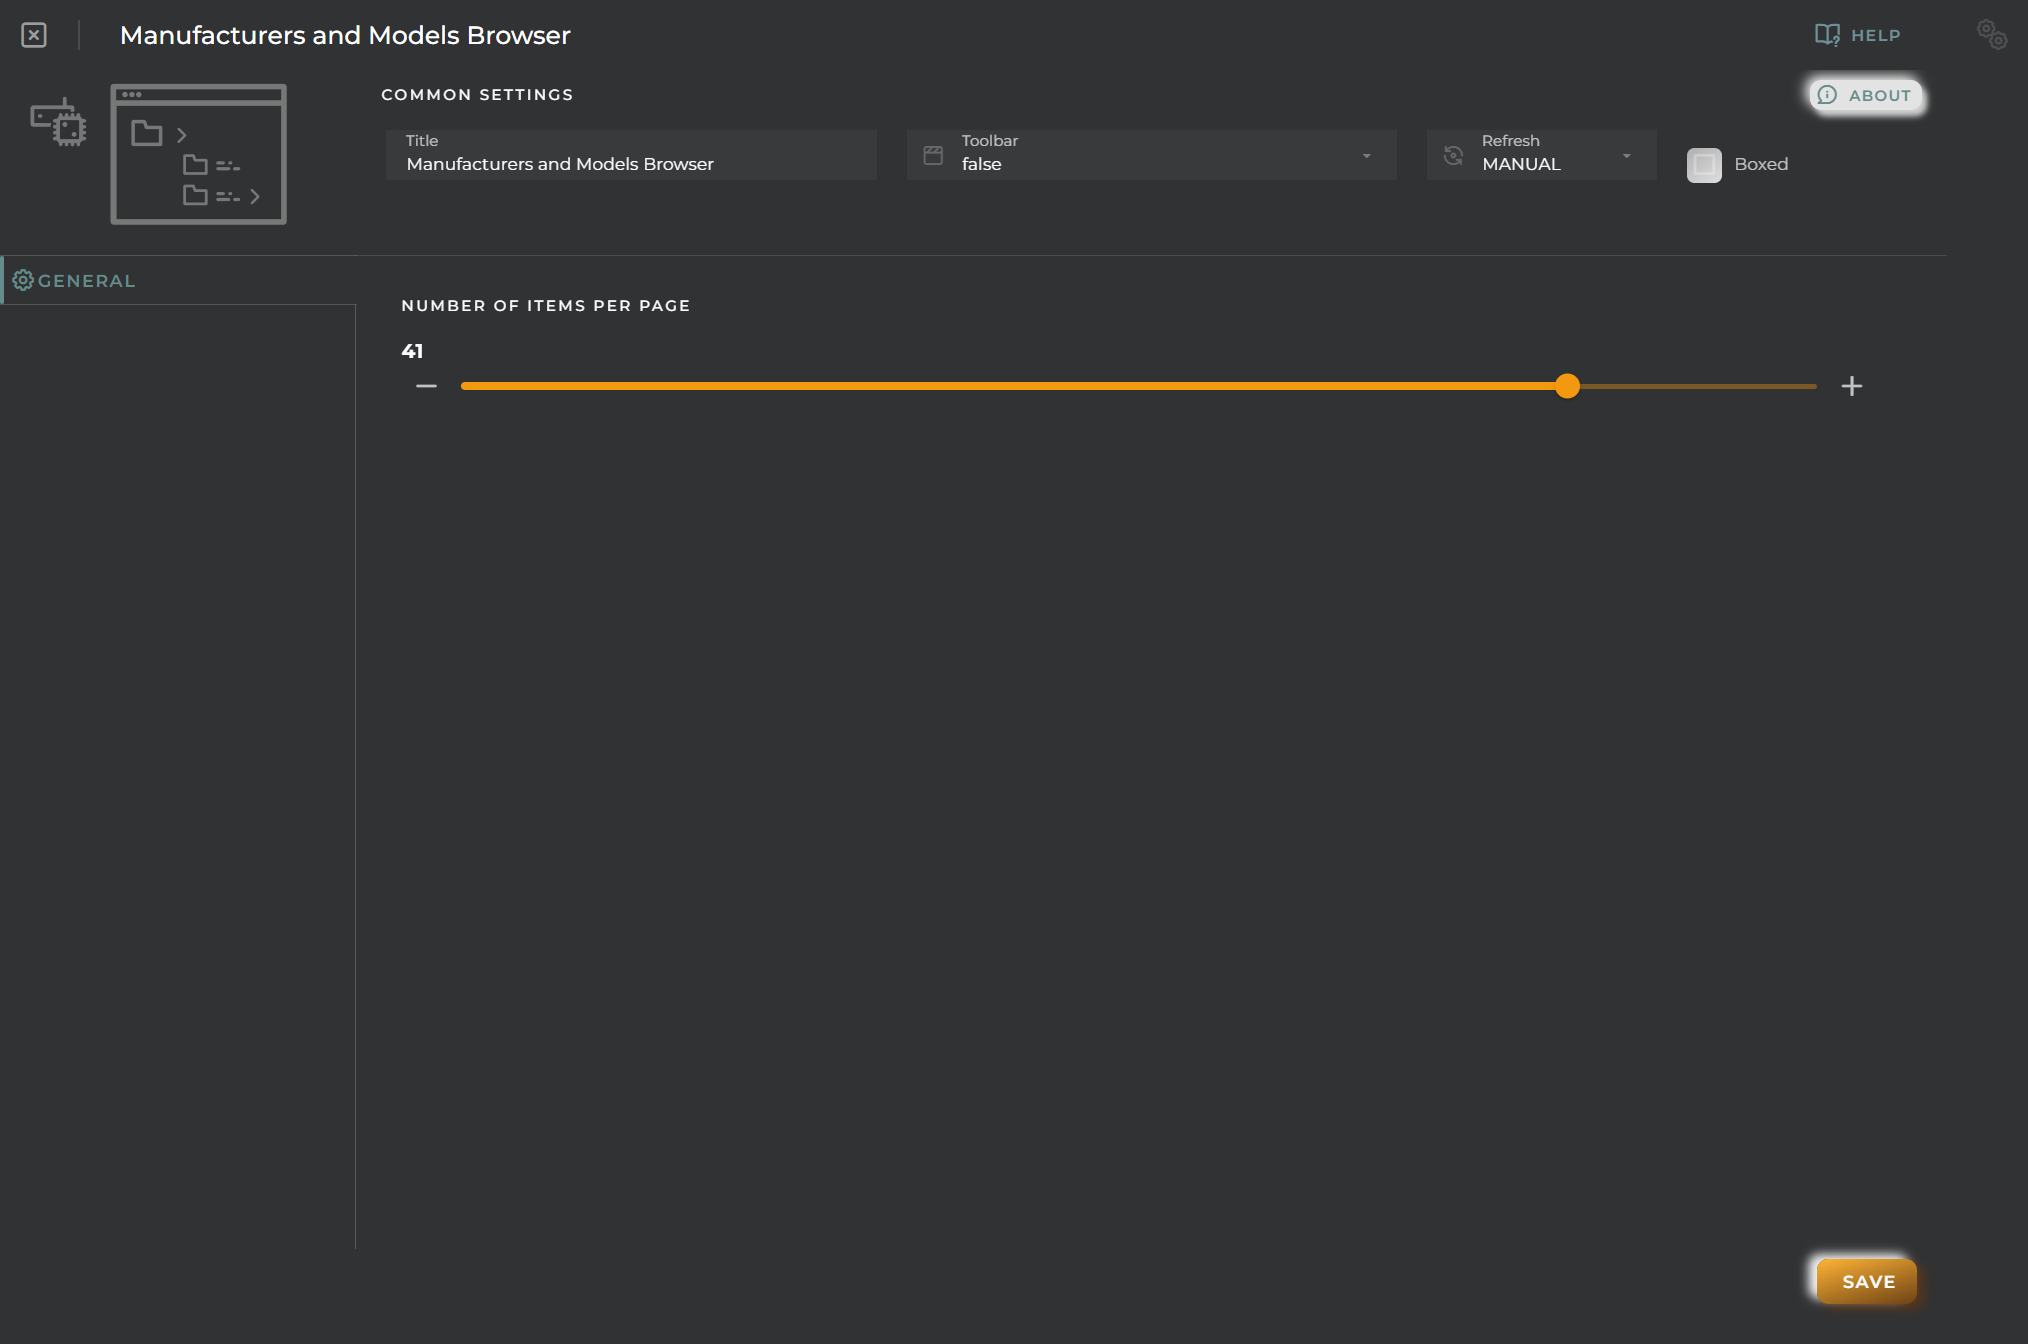
Boxed: widget will be displayed with background in dahsboard.
About: widget description in Markdown format.
Title: widget title. It can be configured to remain fixed in the widget or only be displayed when it receives focus.
Toolbar: configures the behavior of the widget bar on the dashboard, allowing you to hide it, hide it when not in use, or leave it always visible.
Refresh Frequency: allows configuring the data refresh frequency displayed in the list.
Extra actions: allows user to add new specific actions to the widget with your own code.
You can add a new one by pressing the New button.
Once you added a custom action it can be modified later by pressing the name in the list.
In order to remove the custom action click the delete icon button on the right.
In extra actions you can write your own code were you can open other dashboards, entities dashboards or execute wizards.
You can find all available functions and methods in Extra Information
Items per Page: Configures the number of manufacturers to be displayed per page.
Notebooks scheduler
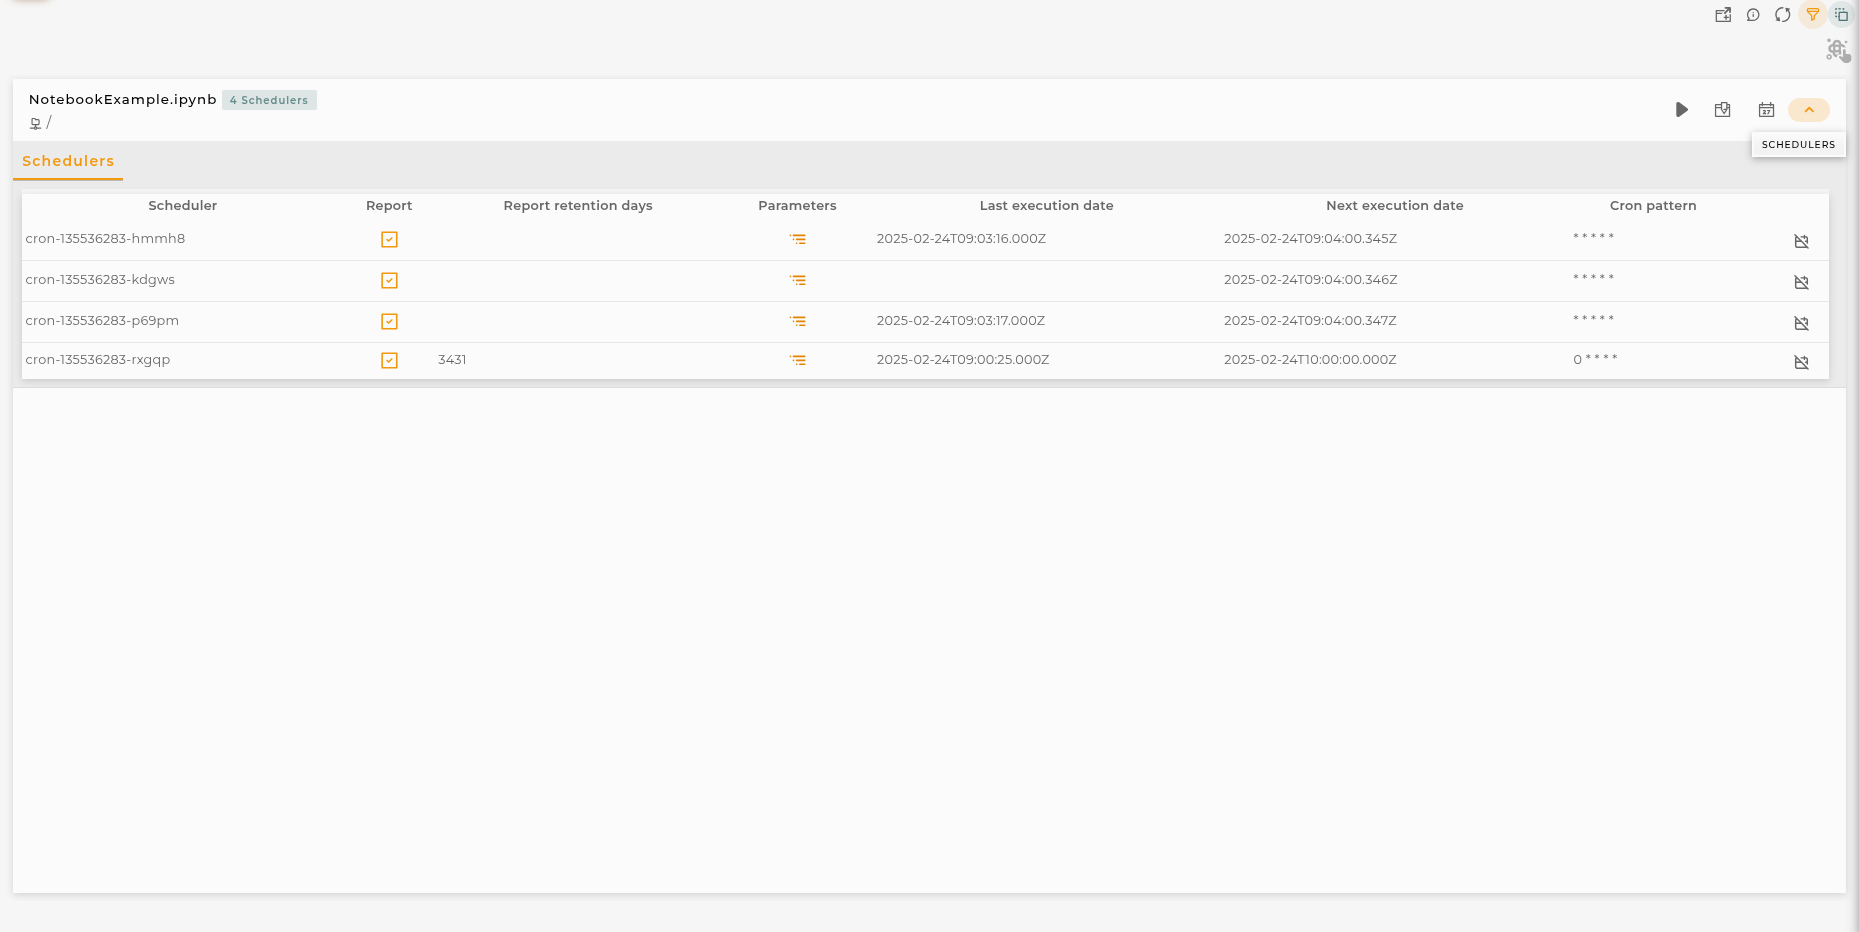
The notebooks scheduler allows you to execute and manage schedulers for datalab notebooks
How it works
From the browser, you can view the notebooks created in Opengate Data lab
Widget Menu
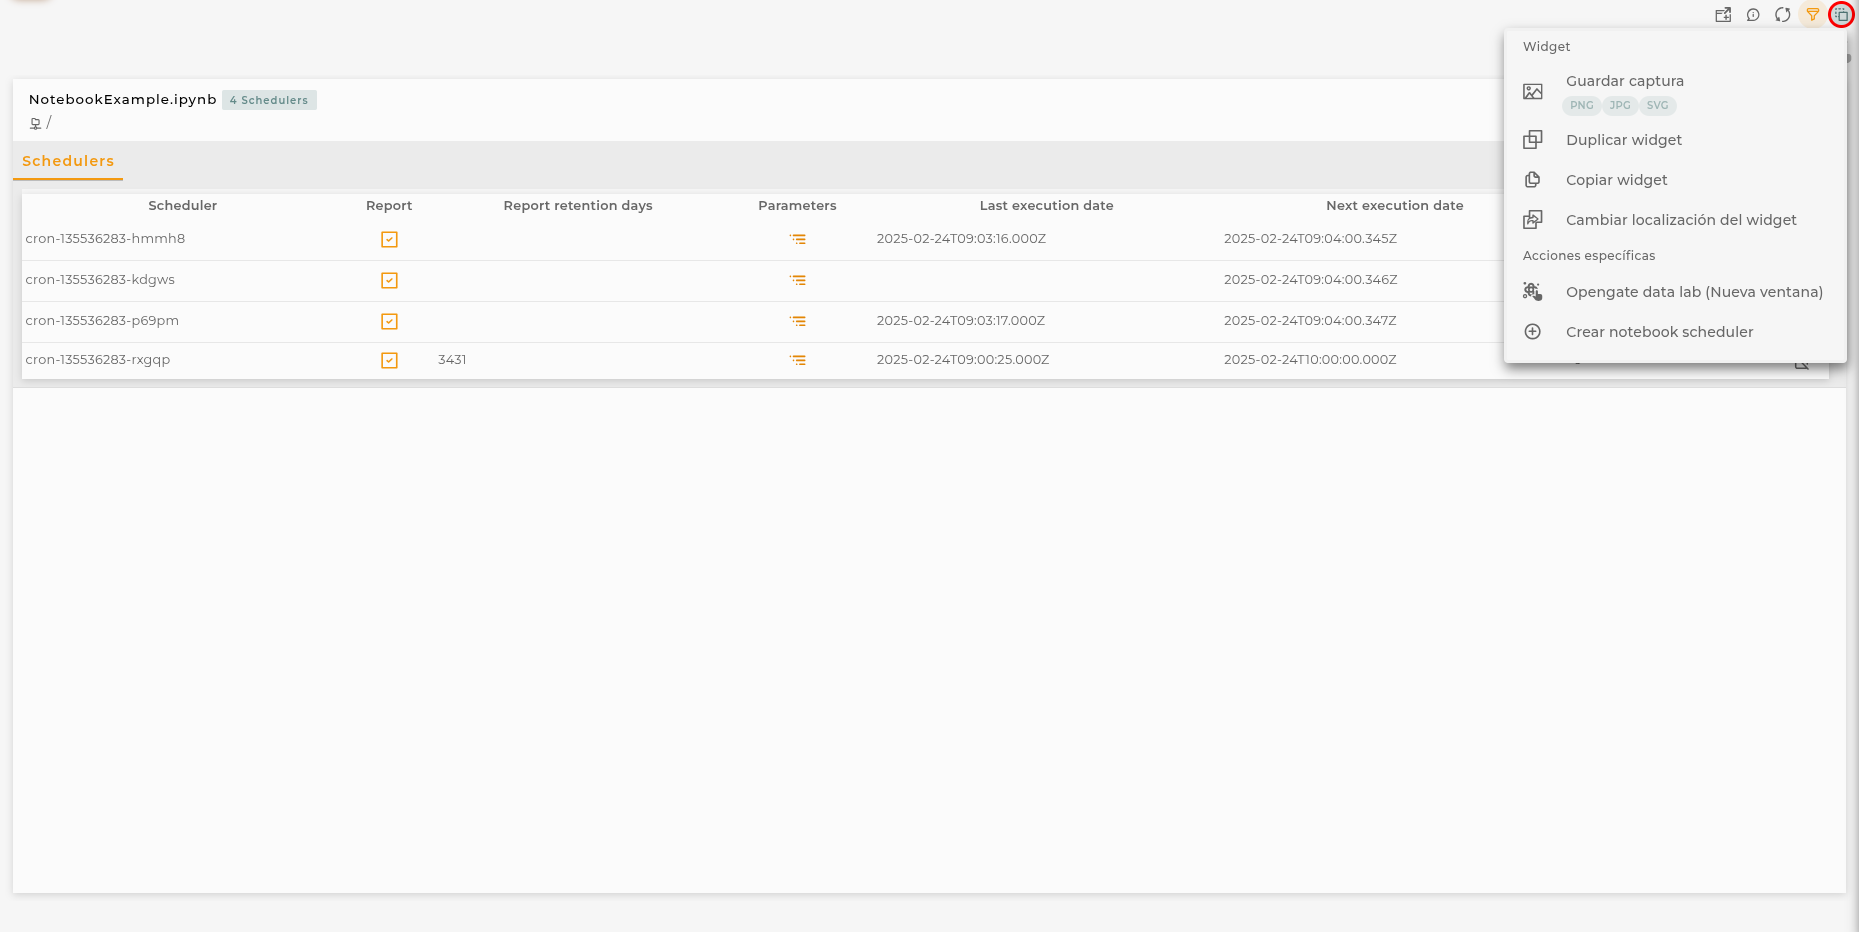
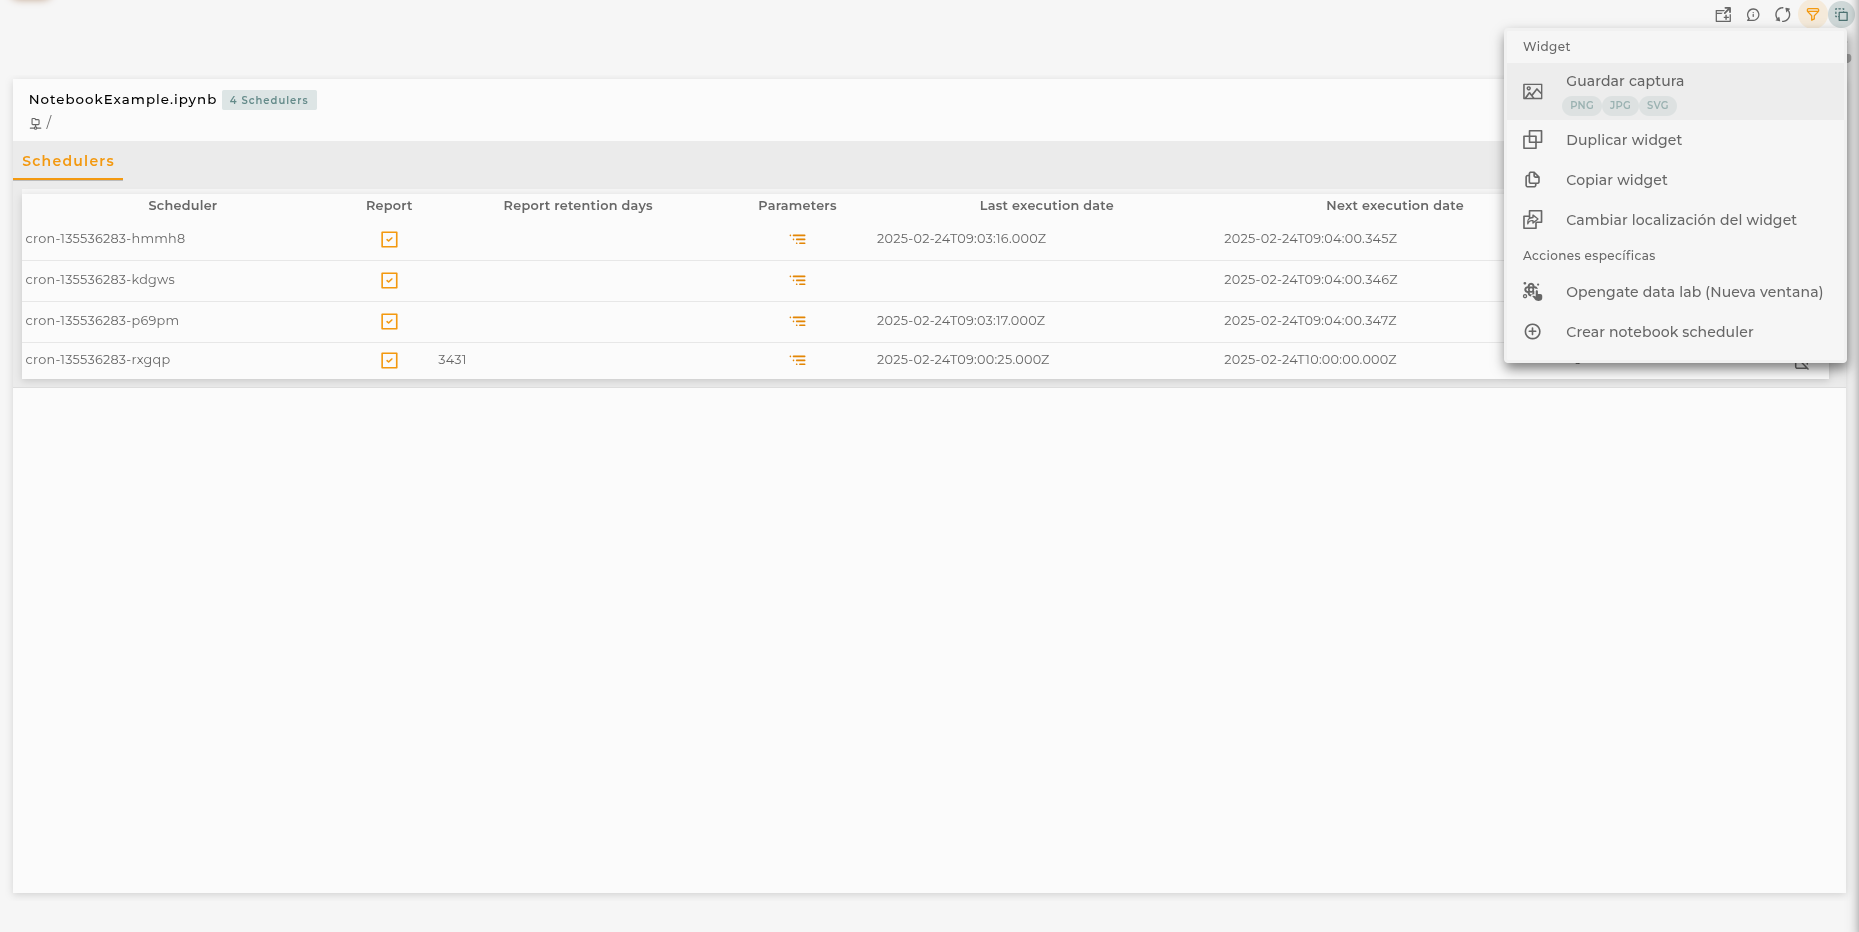
From the action menu of the widget, it will be possible to do the following:
New notebook scheduler: allows you to run the notebook scheduler wizard
Open Opengate Datalab: allows you to open the Opengate Datalab tool if available
Capture screen: Takes a screenshot of the widget.
Duplicate widget: Creates a duplicate of the widget on the dashboard.
Copy widget: Copies the widget to another dashboard.
Change widget location: Moves the widget to another dashboard.
Notebook actions
The following are the possible actions to perform for each of the organization’s own certificates.
Execute allows you to execute once the selected notebook (same as scheduler but without time settings)
Open in datalab opens notebook in the Opengate Datalab tool
Schedule opens notebook scheduler wizard in order to create a new schedule
Schedulers lists available schedulers for the selected notebook
For each scheduler you can do the following
Scheduler identifier for scheduler
Report shows if execution generates report
Report retention days days to expire report
Parameters list of configured parameters
Last execution date last time scheduler runs
Next execution date date for the next execution
Cron pattern
Configuration
General
Boxed: widget will be displayed with background in dahsboard.
About: widget description in Markdown format.
Title: widget title. It can be configured to remain fixed in the widget or only be displayed when it receives focus.
Toolbar: configures the behavior of the widget bar on the dashboard, allowing you to hide it, hide it when not in use, or leave it always visible.
Refresh Frequency: allows configuring the data refresh frequency displayed in the list.
Extra actions: allows user to add new specific actions to the widget with your own code.
You can add a new one by pressing the New button.
Once you added a custom action it can be modified later by pressing the name in the list.
In order to remove the custom action click the delete icon button on the right.
In extra actions you can write your own code were you can open other dashboards, entities dashboards or execute wizards.
You can find all available functions and methods in Extra Information
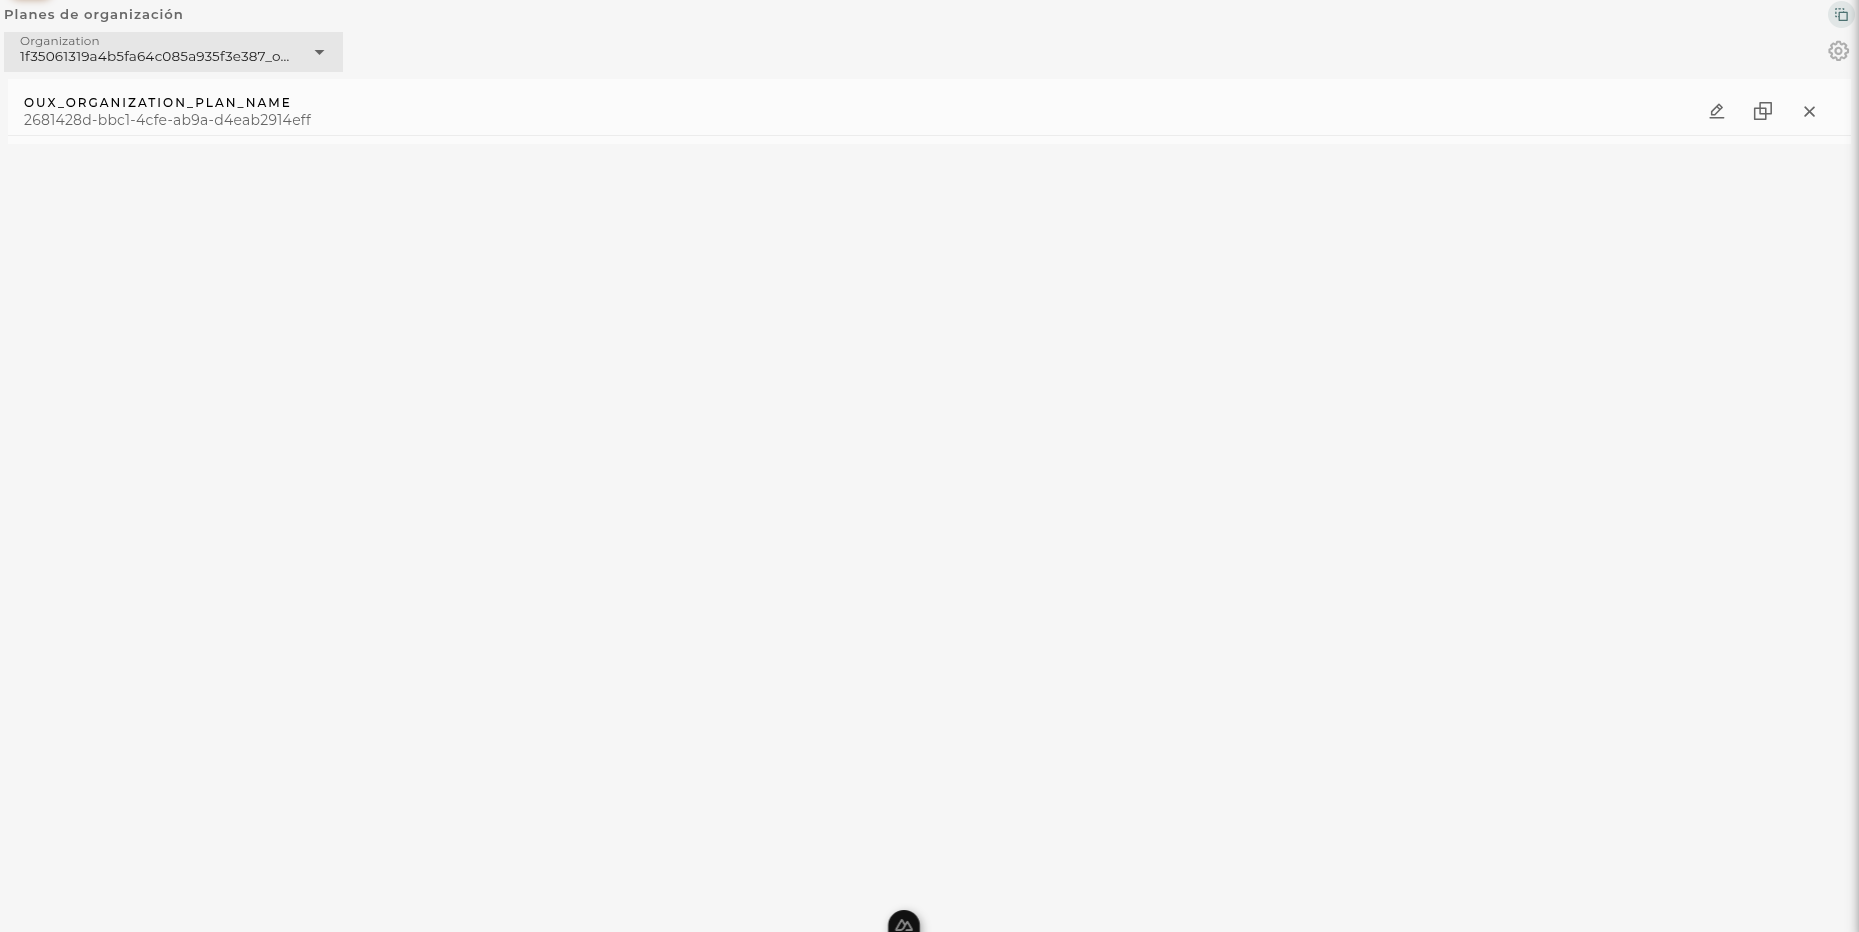
Organization Plans Browser
In this widget, you can navigate through different plans within your organization. Actions can be performed on each of the identifying elements within each organization.
How it Works
By selecting an organization, the plans belonging to it will be displayed in the browser, showing some details about them.
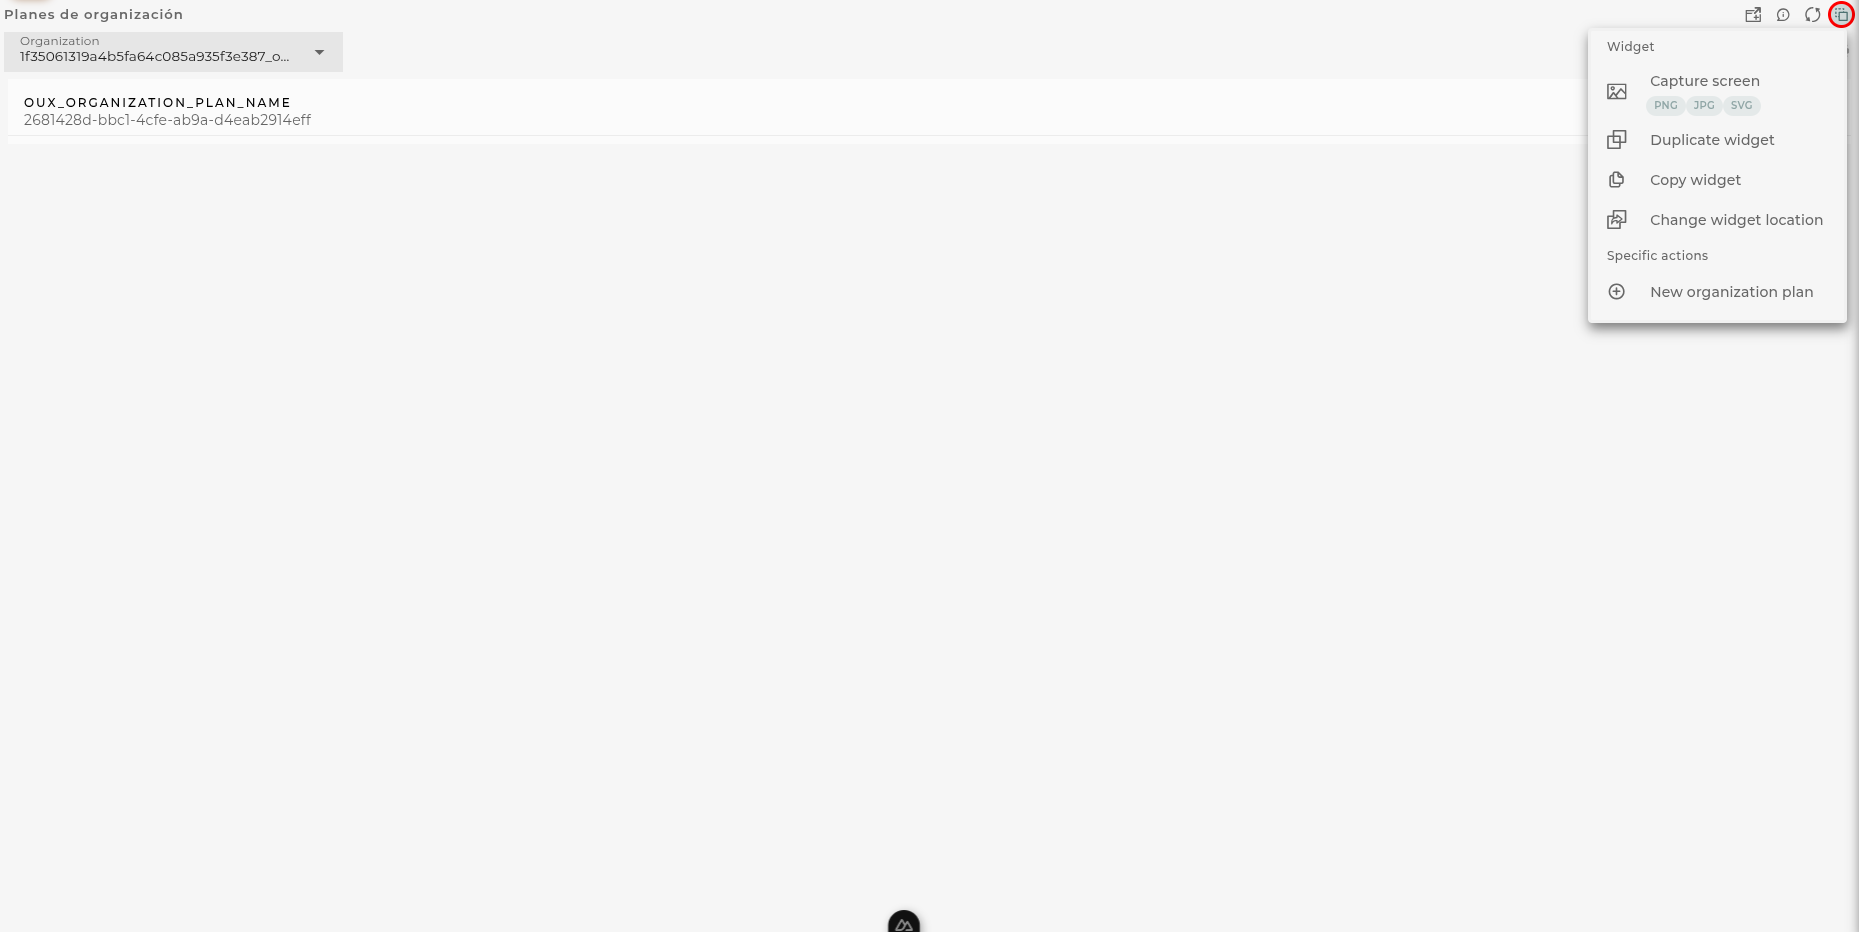
Widget Menu
From the widget’s action menu, you can perform the following:
New Organization Plan: Allows the execution of the wizard for creating a new plan (provided the necessary permissions are available).
Capture screen: Takes a screenshot of the widget.
Duplicate widget: Creates a duplicate of the widget on the dashboard.
Copy widget: Copies the widget to another dashboard.
Change widget location: Moves the widget to another dashboard.
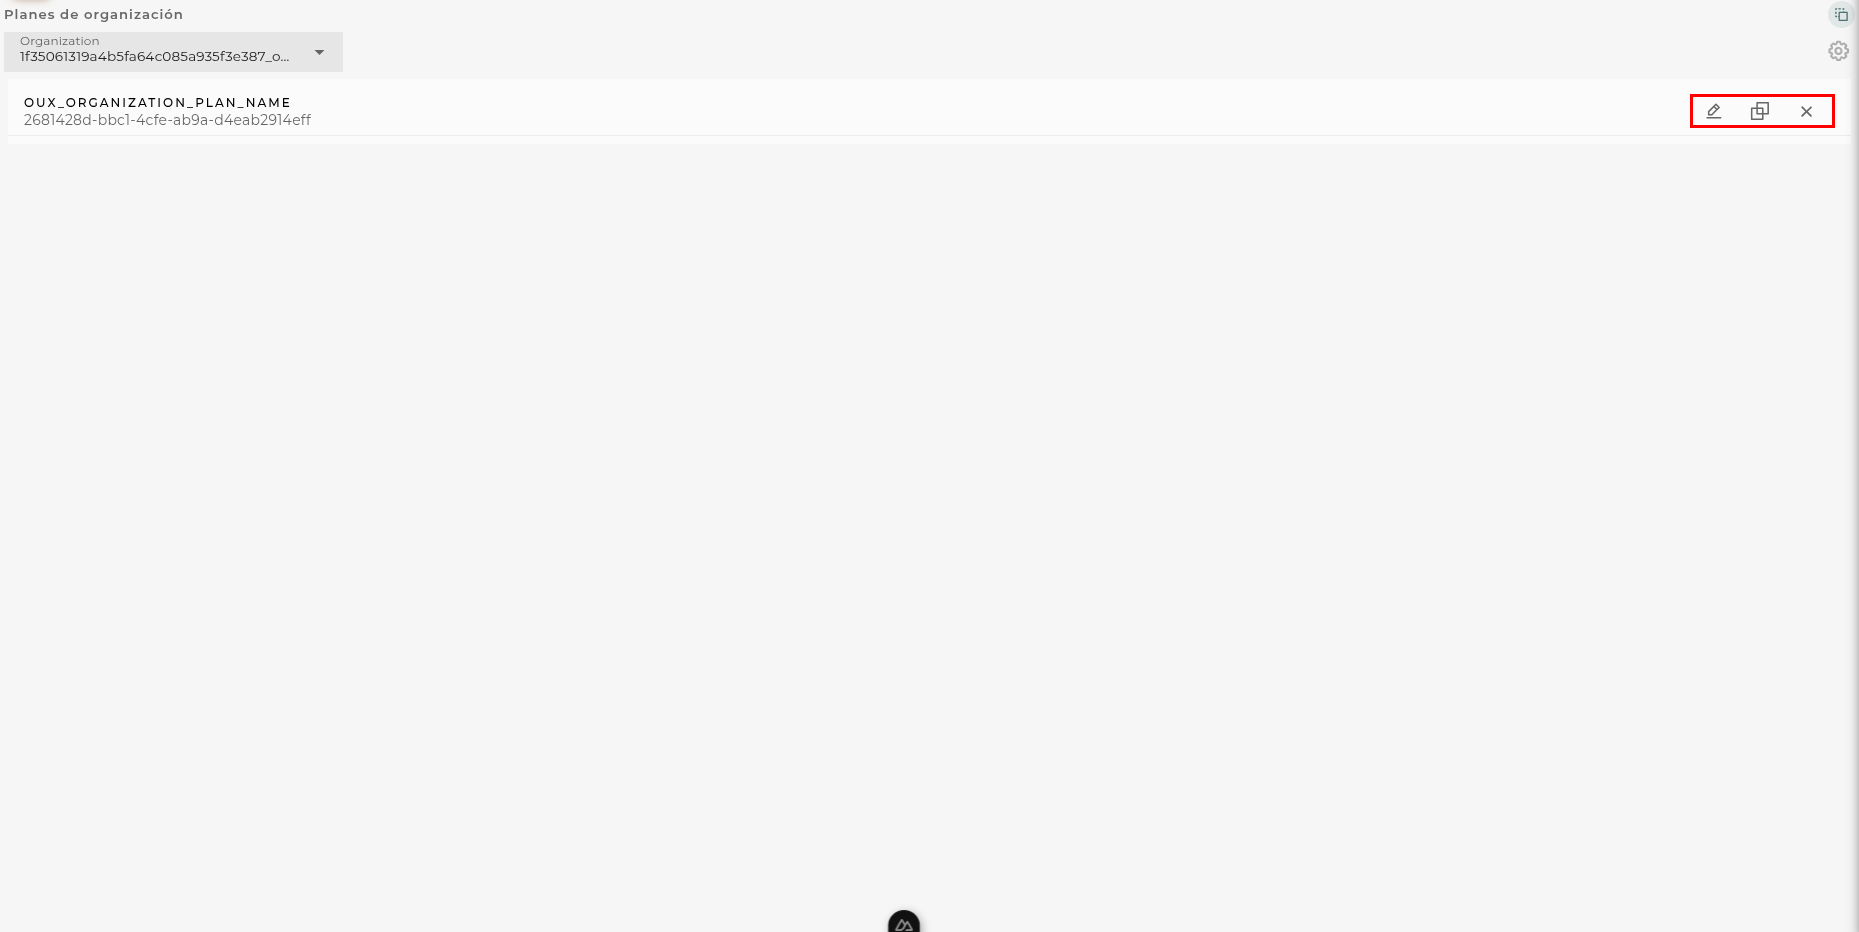
Organization Plans Actions
The following are the actions that can be performed on each plan:
Edit: Opens organization plans wizard in order to edit the selected plan.
Clone: Opens organization plans wizard in order to clone the selected plan.
Remove: Removes the selected plan.
Configuration
General
Boxed: widget will be displayed with background in dahsboard.
About: widget description in Markdown format.
Title: widget title. It can be configured to remain fixed in the widget or only be displayed when it receives focus.
Toolbar: configures the behavior of the widget bar on the dashboard, allowing you to hide it, hide it when not in use, or leave it always visible.
Refresh Frequency: allows configuring the data refresh frequency displayed in the list.
Extra actions: allows user to add new specific actions to the widget with your own code.
You can add a new one by pressing the New button.
Once you added a custom action it can be modified later by pressing the name in the list.
In order to remove the custom action click the delete icon button on the right.
In extra actions you can write your own code were you can open other dashboards, entities dashboards or execute wizards.
You can find all available functions and methods in Extra Information
Organizations Browser
In this widget, you can navigate through different organizations within your own. Actions can be performed on each of the identifying elements within each organization.
How it Works
Organization Actions
The following are the actions that can be performed on the selected organization:
Edit: Allows management of the organization data.
New Suborganization: Creates a new organization under the current organization.
New Workgroup: Opens the workgroup wizard filtered by the selected organization.
New Channel: Opens the channels wizard filtered by the selected organization.
Open Users List: Opens a user list widget in a popup, filtered by the selected organization.
Open Entities List: Opens an entities list widget in a popup, filtered by the selected organization.
Remove: Deletes the current organization.
Channels
From the Channels tab, you can see which channels exist for that organization and perform actions on them.
The following are the actions that can be performed:
Edit: Allows management of the channel data.
New Entity: Opens the entity wizard to create a new one in this channel.
New Asset: Opens the asset wizard to create a new one in this channel.
Remove: Deletes the current channel.
Workgroups
From the Workgroups tab, you can see which workgroups exist for that organization and perform actions on them.
The following are the actions that can be performed:
Edit: Allows management of the workgroup data.
Open Users List: Opens a user list widget in a popup, filtered by the selected organization.
New User: Opens the users wizard to create a new one in this workgroup.
Remove: Deletes the current workgroup.
Navigation Between Organizations
You can navigate directly to the desired organization in the organizations tree.
Configuration
General
Boxed: widget will be displayed with background in dahsboard.
About: widget description in Markdown format.
Title: widget title. It can be configured to remain fixed in the widget or only be displayed when it receives focus.
Toolbar: configures the behavior of the widget bar on the dashboard, allowing you to hide it, hide it when not in use, or leave it always visible.
Refresh Frequency: allows configuring the data refresh frequency displayed in the list.
Extra actions: allows user to add new specific actions to the widget with your own code.
You can add a new one by pressing the New button.
Once you added a custom action it can be modified later by pressing the name in the list.
In order to remove the custom action click the delete icon button on the right.
In extra actions you can write your own code were you can open other dashboards, entities dashboards or execute wizards.
You can find all available functions and methods in Extra Information
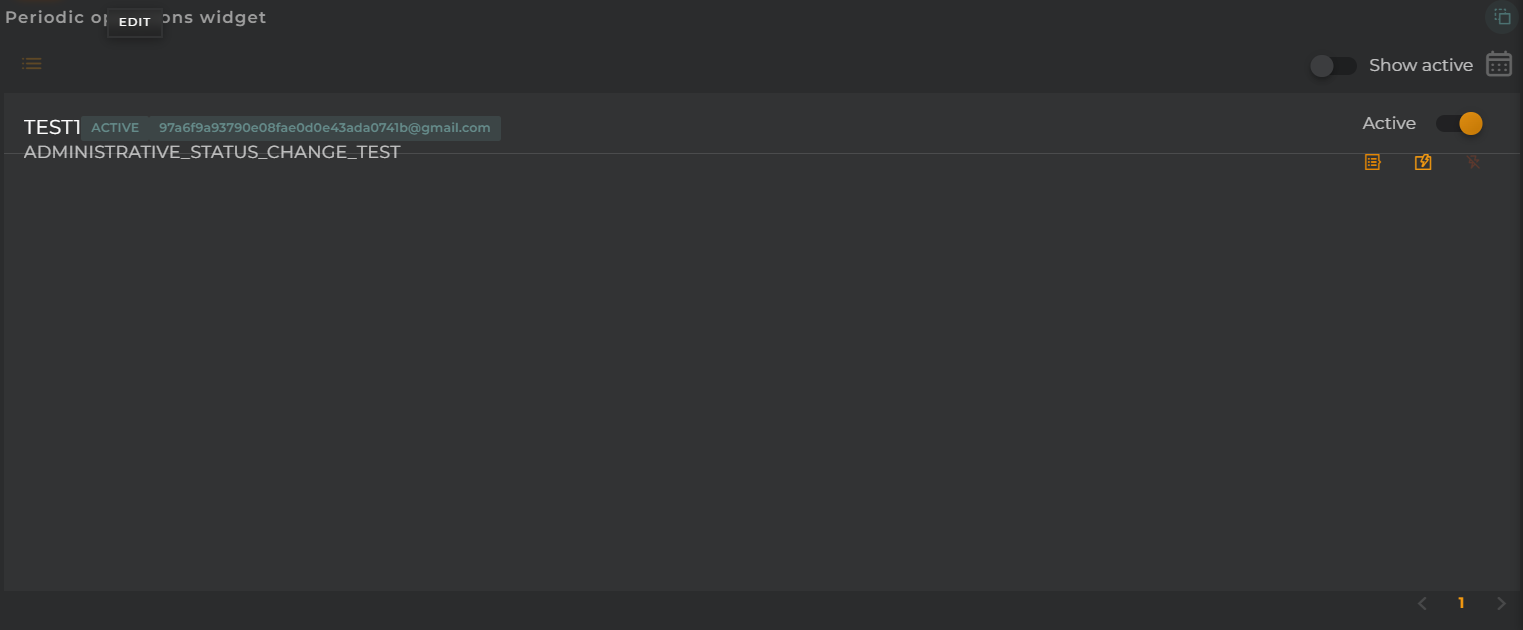
Periodic Operations Browser
In this widget, you can view/manage the periodic operations configured within the organization.
How it Works
The browser will display the name assigned to the periodic operation as well as its current status and the type of operation it performs.
Widget Menu
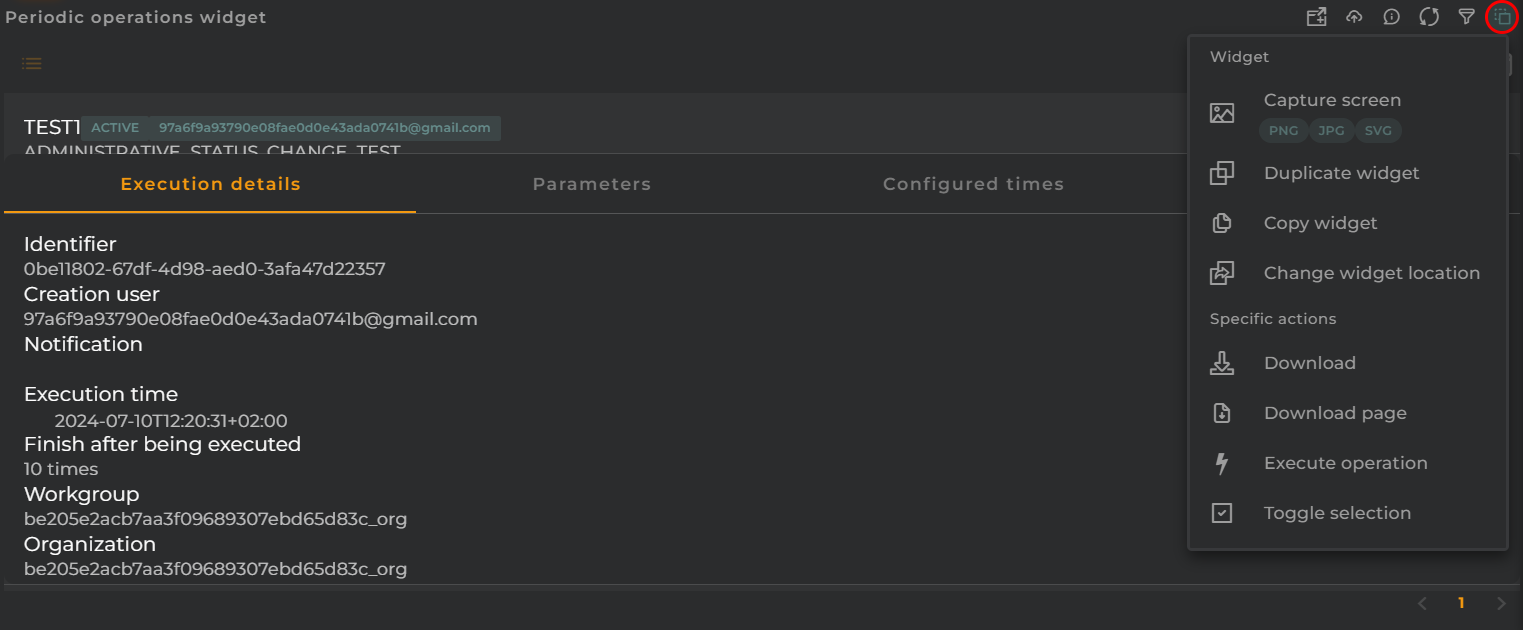
From the action menu of the widget, the following activities can be performed:
Download: Allows you to download the list of available periodic operations.
Download Page: Enables you to download the list of periodic operations that are visible at that moment.
Execute Operation: Opens the wizard to execute a new operation, provided the necessary permissions are available.
Toggle Selection: Allows you to toggle the selection of tasks using checkboxes. This enables you to view in other compatible widgets the content filtered by this information.
Capture screen: Takes a screenshot of the widget.
Duplicate widget: Creates a duplicate of the widget on the dashboard.
Copy widget: Copies the widget to another dashboard.
Change widget location: Moves the widget to another dashboard.
At the top of the widget, the following options are available:
Selection Edit: Displays the elements selected by the user and allows for their quick removal.
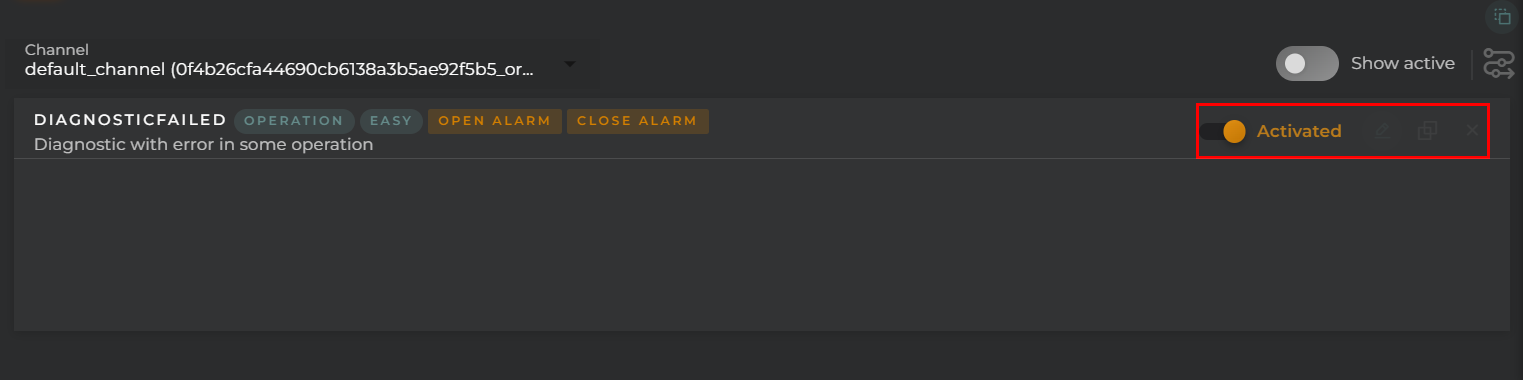
Show Active (Toggle): Instructs the widget to display only those operations that are currently active, rather than all of them.
Actions on Periodic Operations
For each periodic operation, you can perform the following actions:
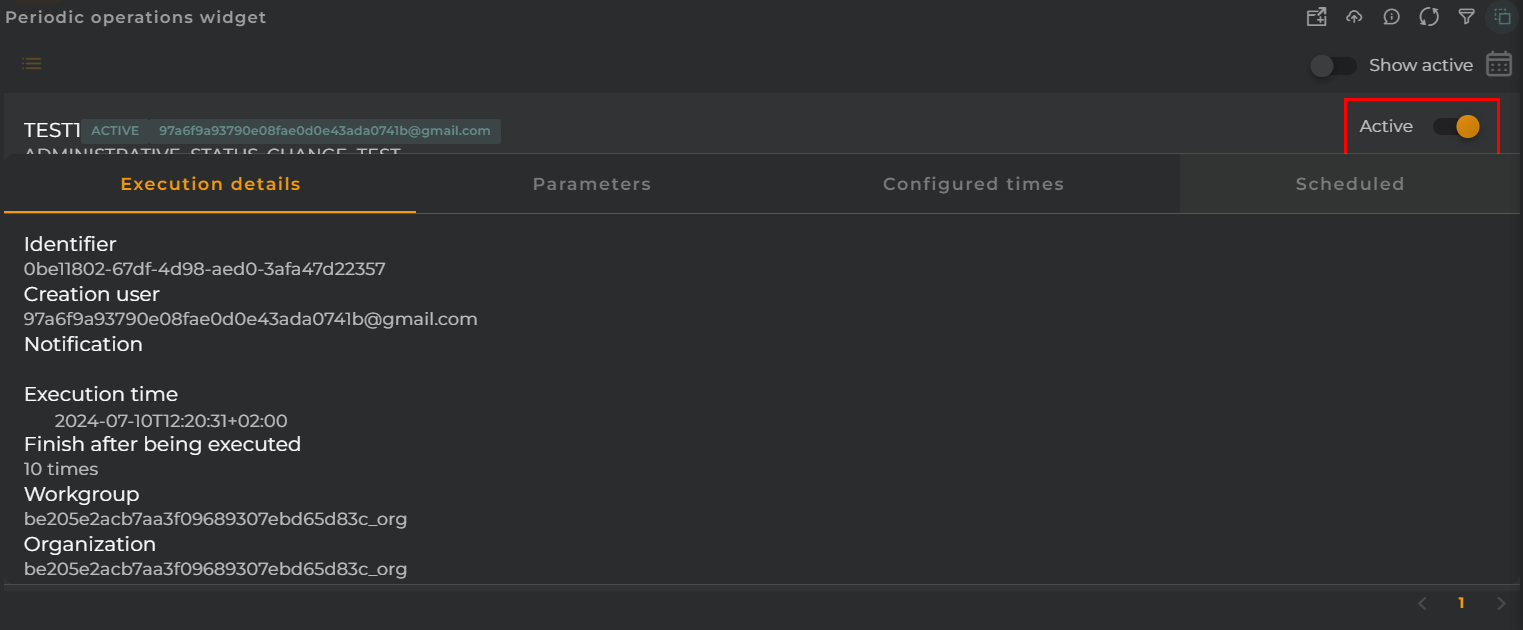
Active Switch: Enables you to activate/deactivate the periodic operation (required for changing its parameters).
Summary: Displays a panel containing details of the periodic operation.
Operations List: Opens a widget that lists operations executed by the selected periodic operation.
Cancel: Cancels the periodic operation so that it will not be executed again. This requires it to be deactivated.
Configuration
General
Boxed: widget will be displayed with background in dahsboard.
About: widget description in Markdown format.
Title: widget title. It can be configured to remain fixed in the widget or only be displayed when it receives focus.
Toolbar: configures the behavior of the widget bar on the dashboard, allowing you to hide it, hide it when not in use, or leave it always visible.
Refresh Frequency: allows configuring the data refresh frequency displayed in the list.
Extra actions: allows user to add new specific actions to the widget with your own code.
You can add a new one by pressing the New button.
Once you added a custom action it can be modified later by pressing the name in the list.
In order to remove the custom action click the delete icon button on the right.
In extra actions you can write your own code were you can open other dashboards, entities dashboards or execute wizards.
You can find all available functions and methods in Extra Information
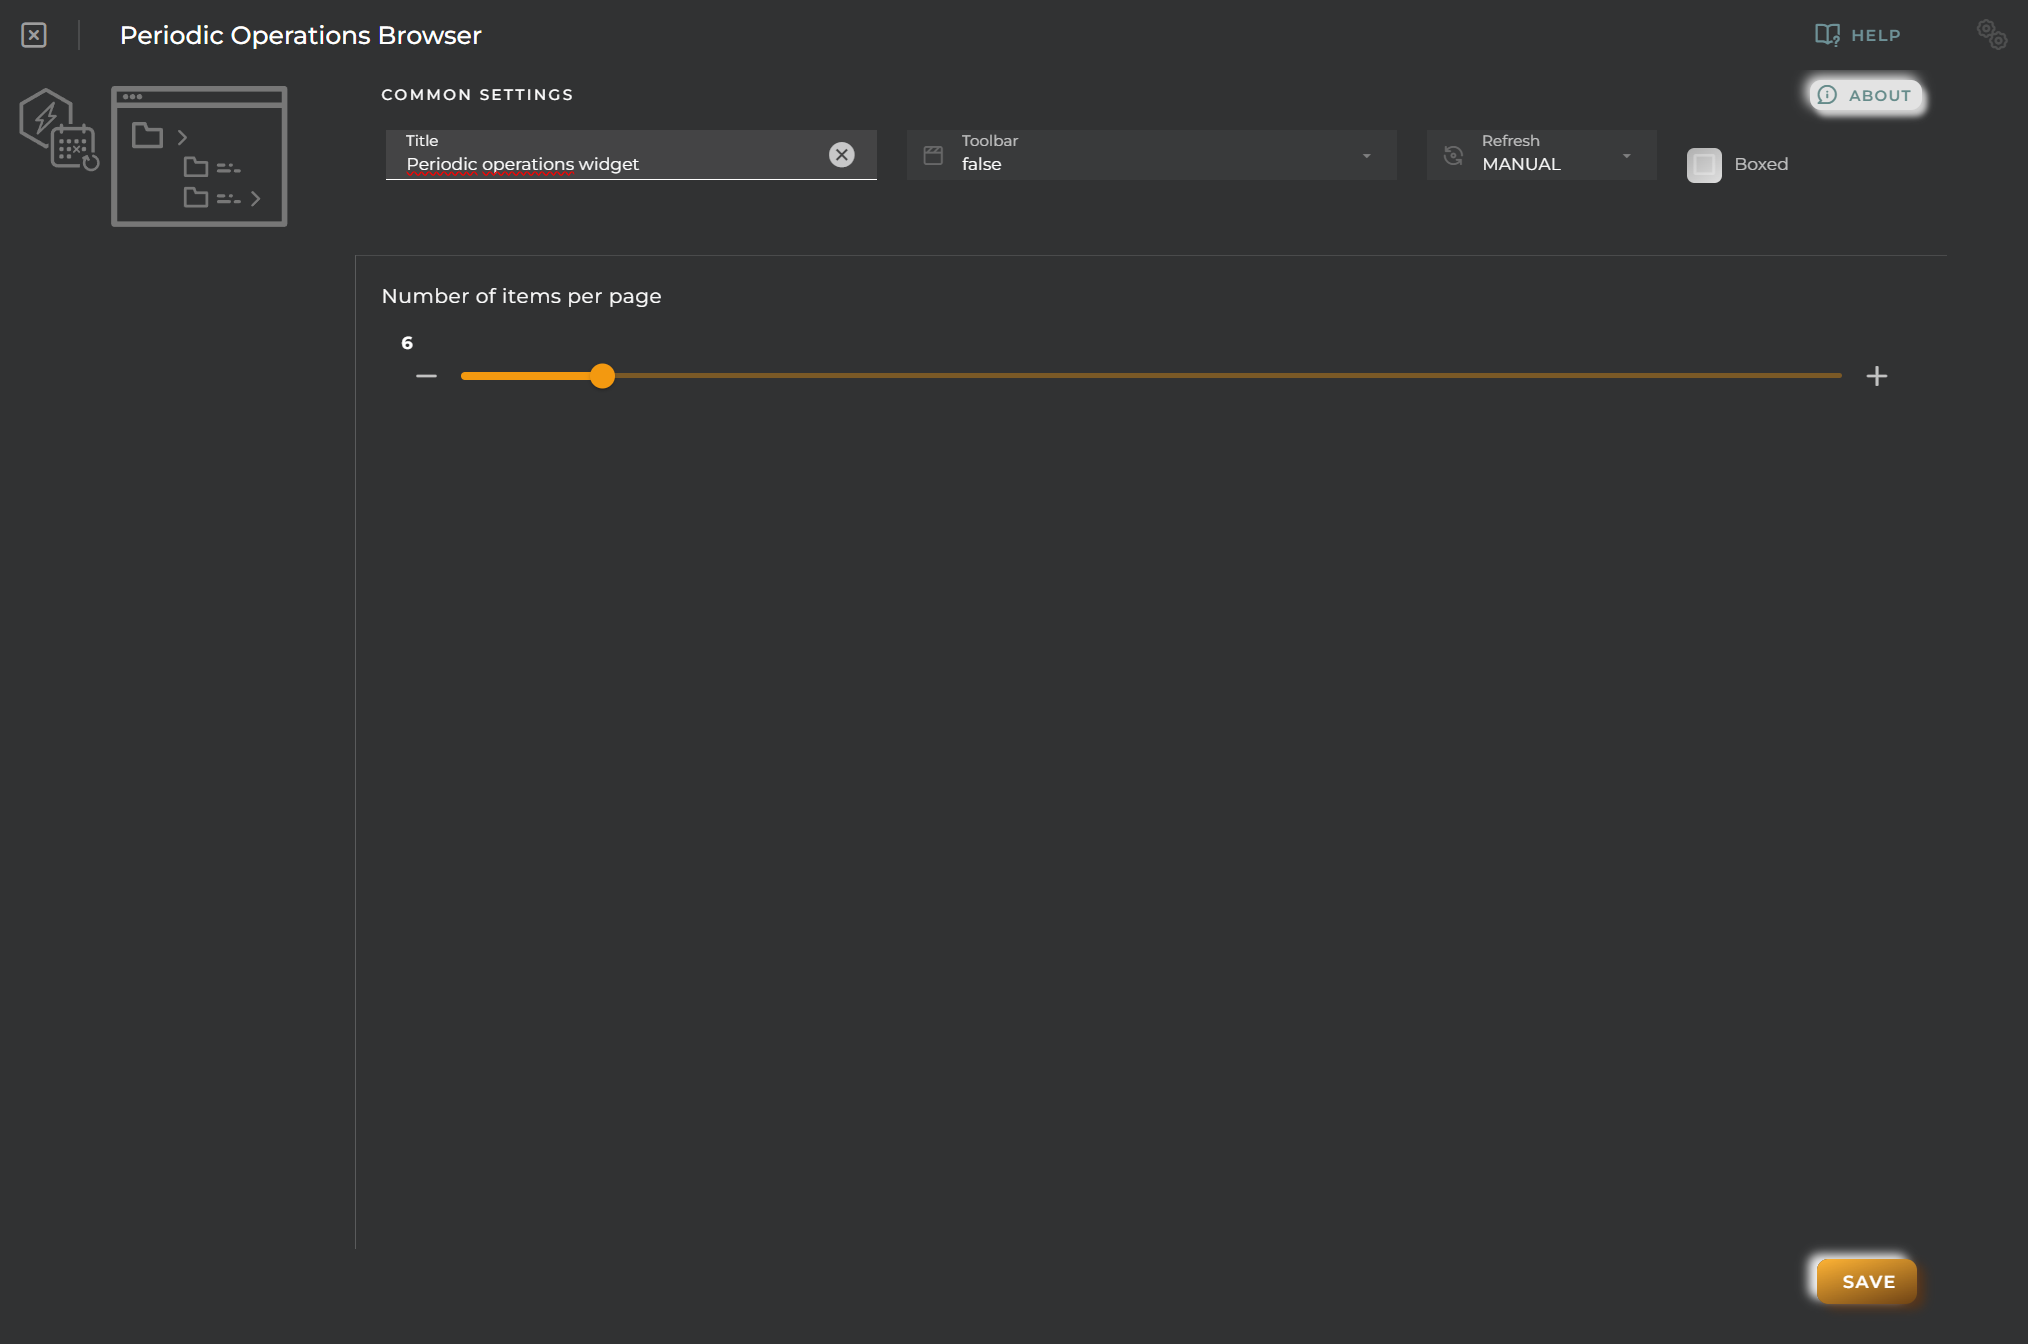
Items per Page: Specifies the number of elements to be displayed per page.
Periodic operations calendar
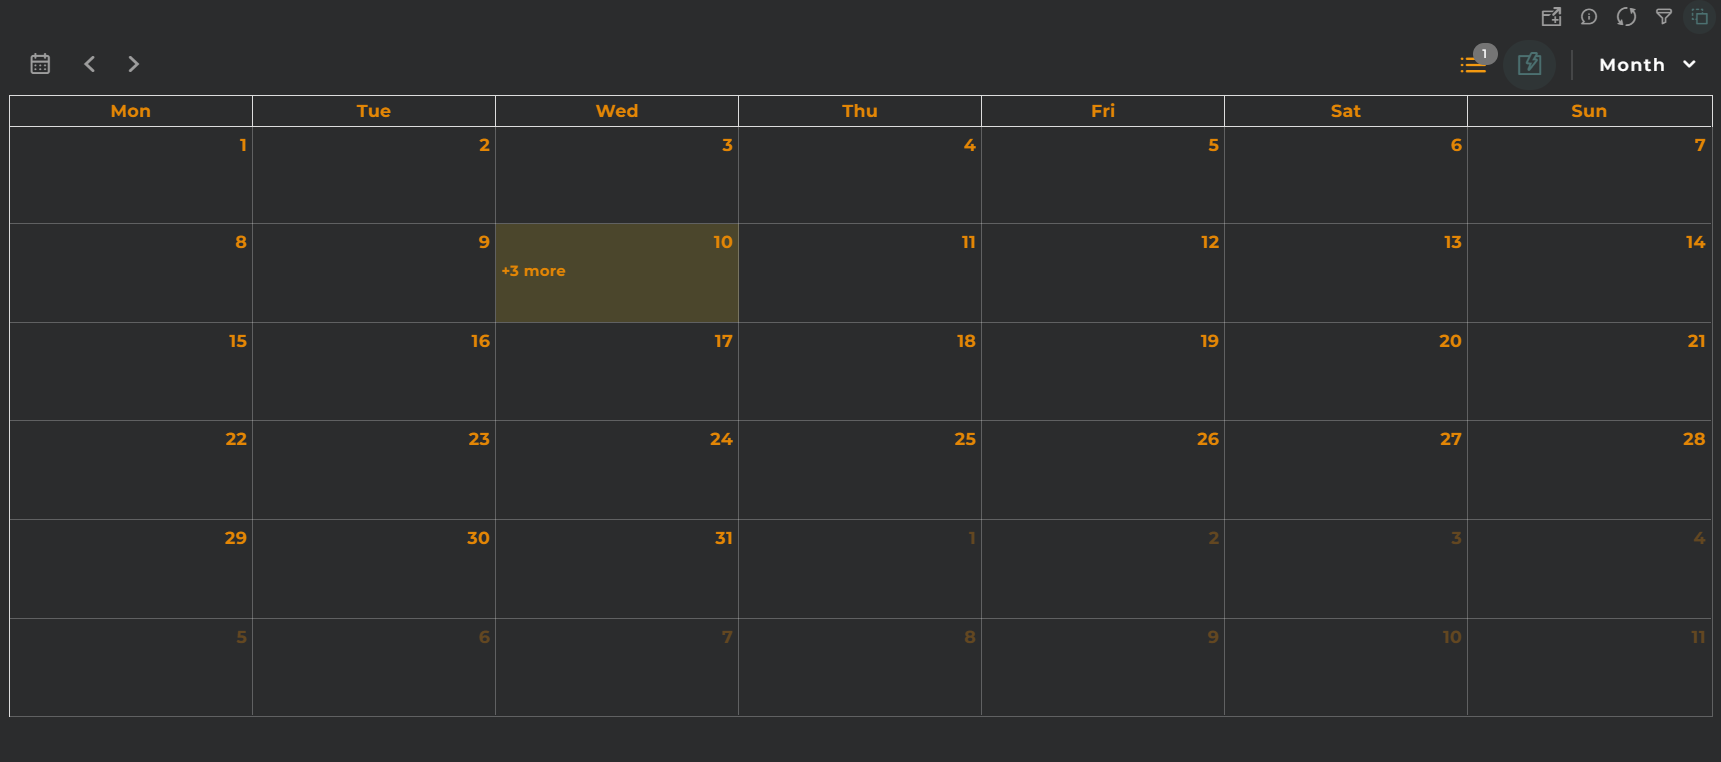
In this widget, you can view the executions of periodic operations in a calendar format.
How it Works
The calendar for periodic operations will display the operations that correspond to the selected periodicities.
Widget Menu
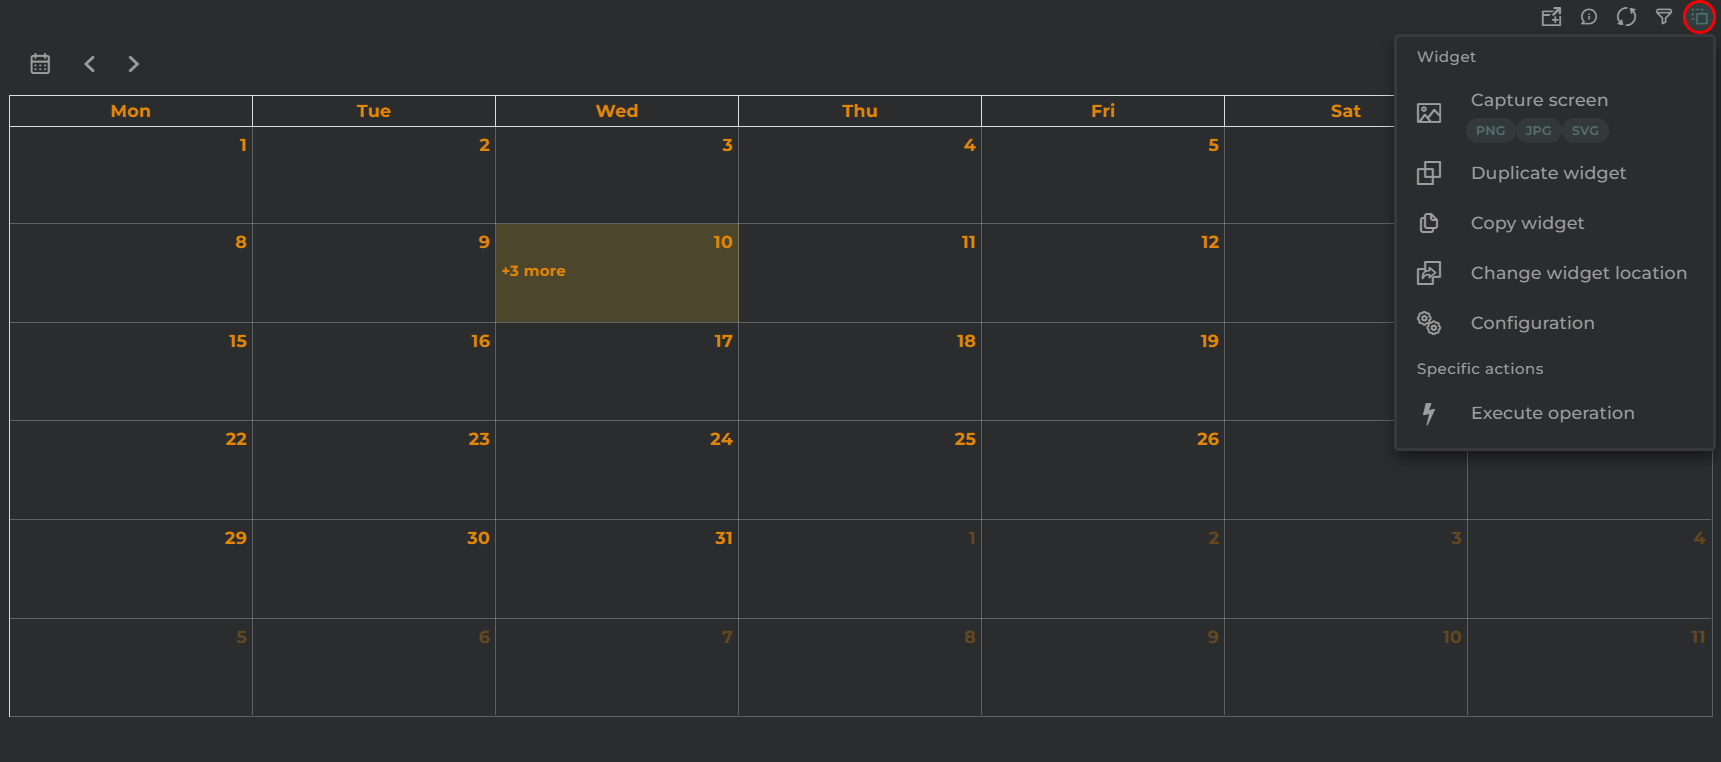
From the widget’s action menu, it will be possible to perform the following:
Execute Operation: Opens the wizard to execute a new operation, provided the necessary permissions are available.
Capture screen: Takes a screenshot of the widget.
Duplicate widget: Creates a duplicate of the widget on the dashboard.
Copy widget: Copies the widget to another dashboard.
Change widget location: Moves the widget to another dashboard.
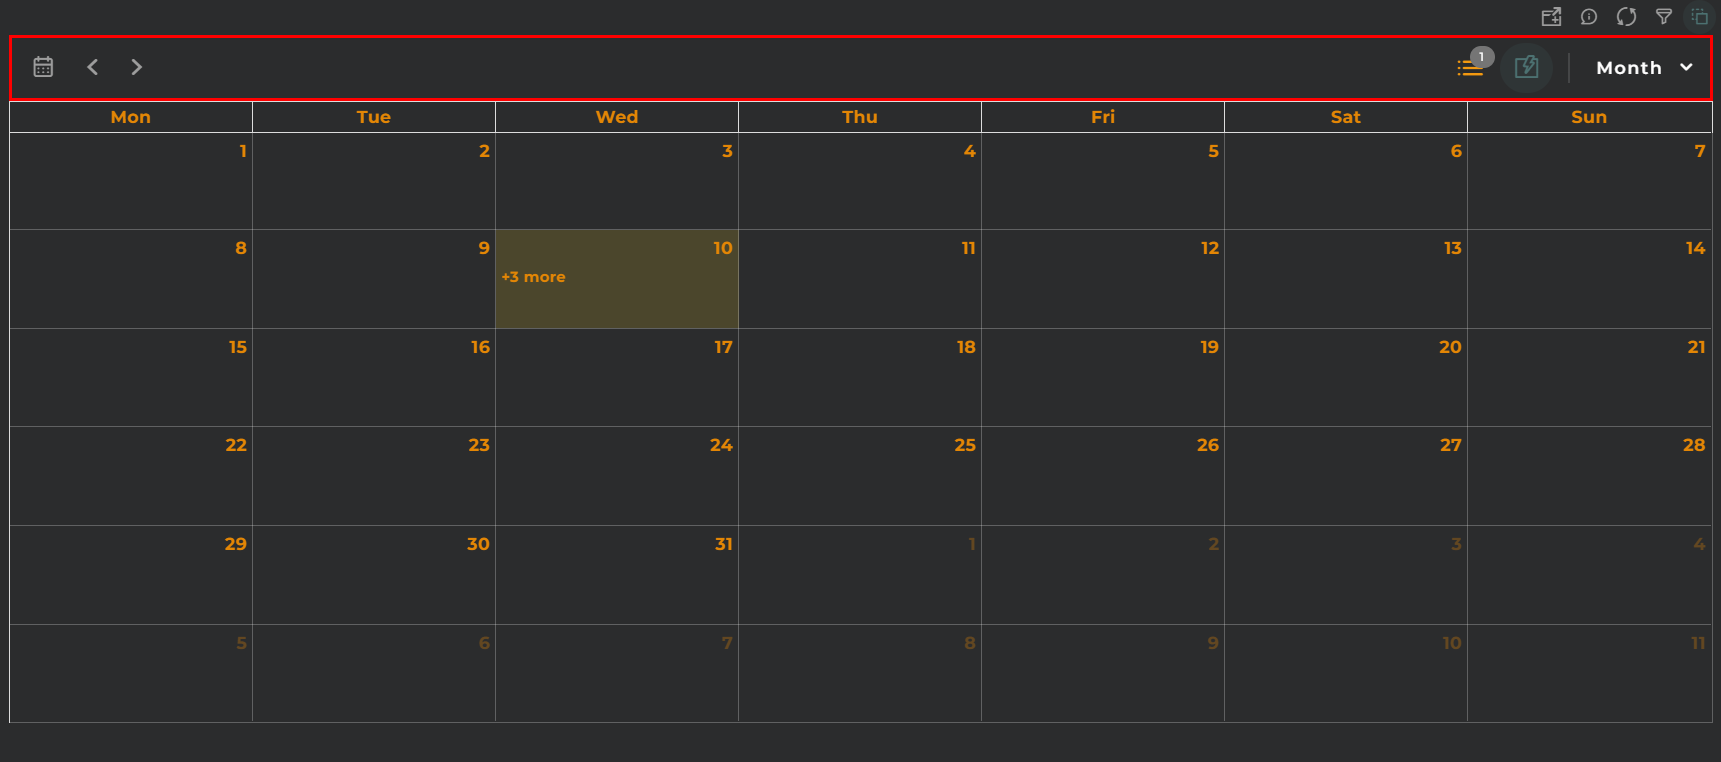
In the widget’s toolbar, we find the following options (in order of appearance):
Today (Button): Allows quick navigation to the current day on the calendar.
Previous/Next Arrows (Buttons): Navigate to the previous/next item in the current calendar depending on its type.
Current Month: Displays the month and year of the calendar being viewed.
Selected Tasks List: A list of tasks selected for display on the calendar.
Tasks List: Opens a widget with a list of configured periodic operations. This is used to select what to display on the calendar.
Zoom In/Out (Buttons): Controls the zoom level of the displayed data.
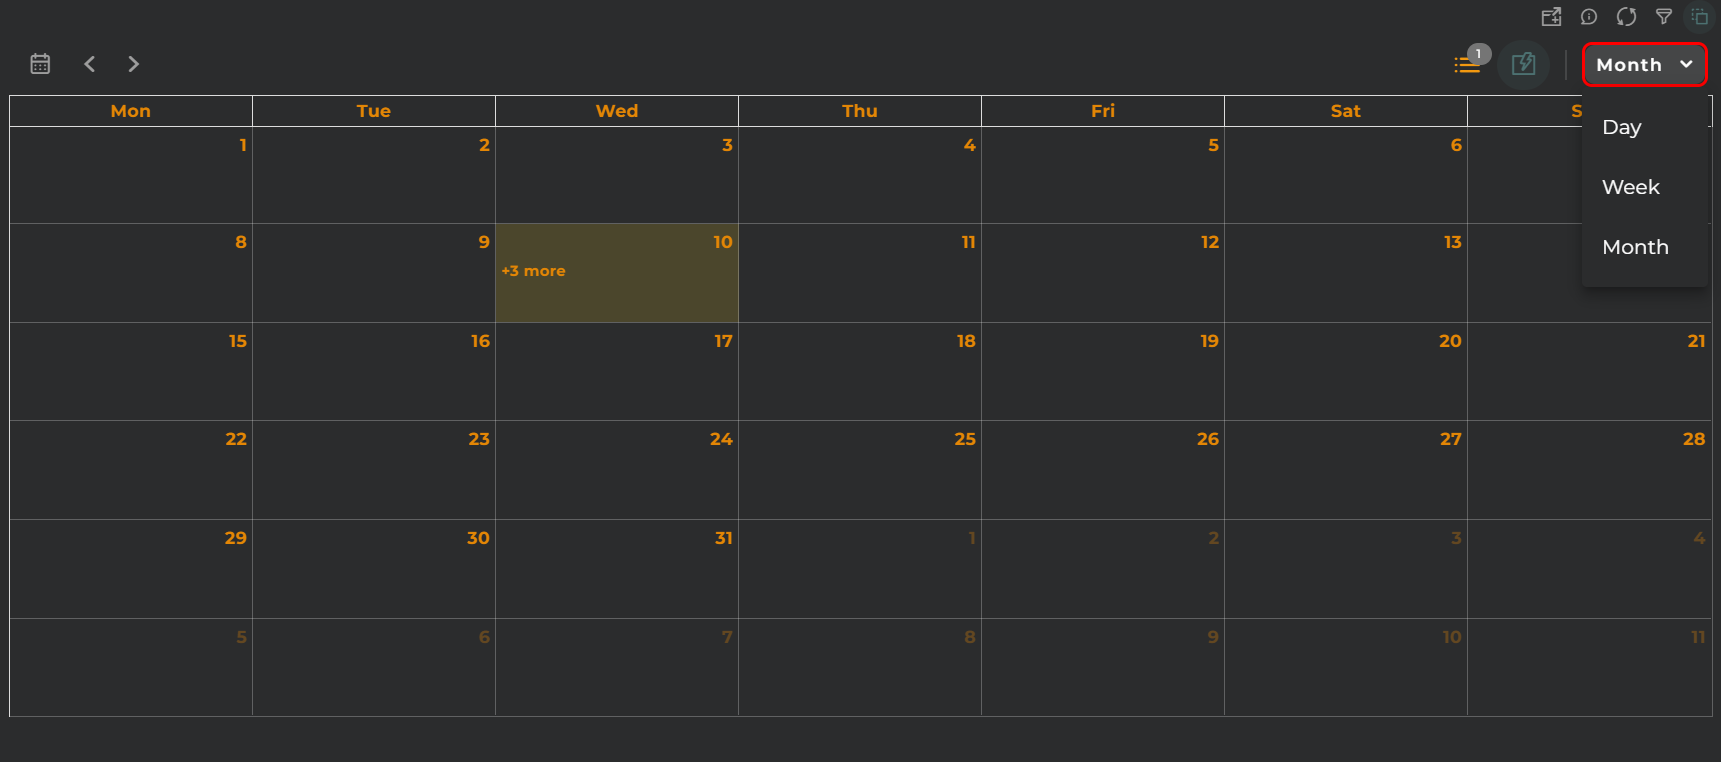
Period Selector: Allows the selection of the period to be displayed.
The different periods to be displayed are:
Day: Displays all planned and executed operations for the selected periodic operations.
Day/Operation: Displays all planned and executed operations for the selected periodic operations, allocating a column for each periodicity.
Week: Displays all operations planned for the selected week.
Month: Displays all operations planned for the selected month.
Actions on Periodic Operations
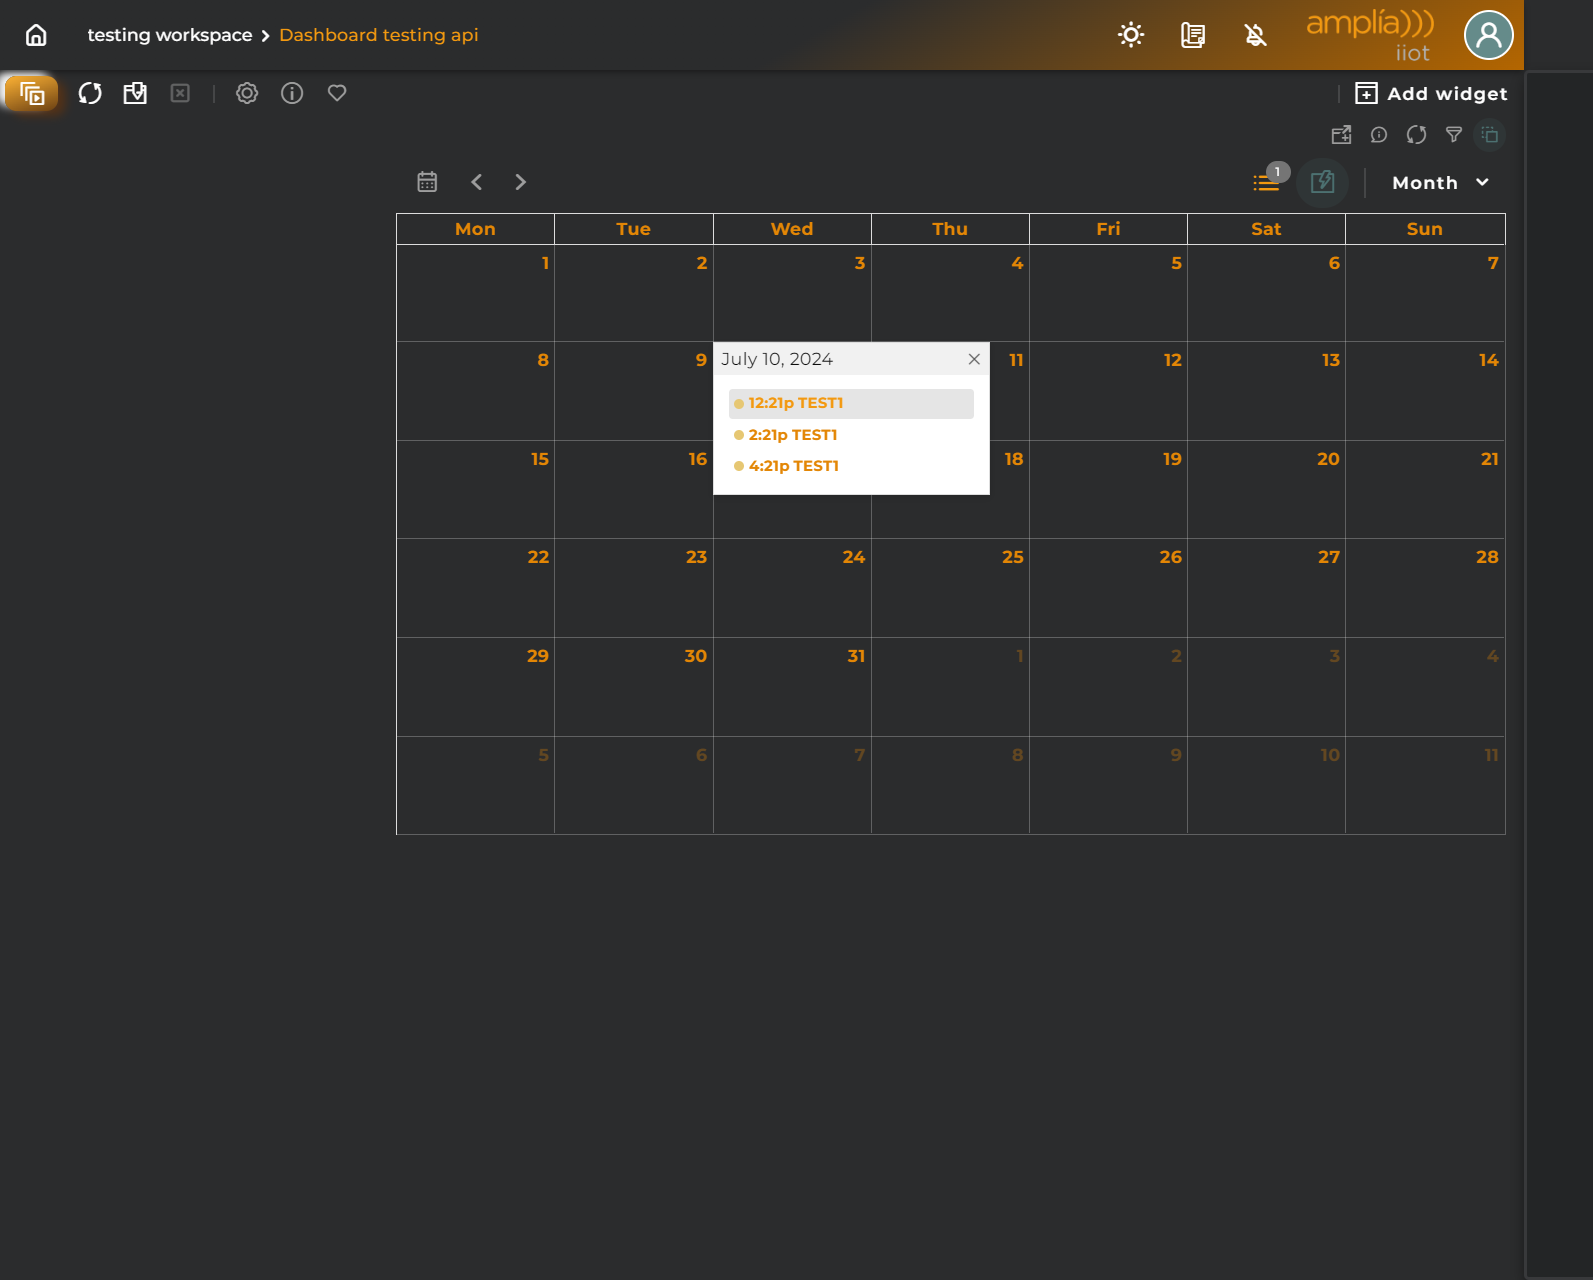
By clicking on an operation, you can view its configuration data.
The displayed information is categorized as follows:
Execution Details: Here the summary of the selected operation is shown.
Parameters: Displays the operation’s parameters.
Configured Times: Details the times set for the operation.
Scheduled: Displays the periodicity settings for the operation.
If the selected item has already been executed, the following additional data will be displayed:
Execution Details: Here the summary of the executed operation is shown.
Parameters: Displays the operation’s parameters.
Timing: Details the timing of the operation.
Result: Provides a summary of how the operation has transpired.
Configuration
General
Boxed: widget will be displayed with background in dahsboard.
About: widget description in Markdown format.
Title: widget title. It can be configured to remain fixed in the widget or only be displayed when it receives focus.
Toolbar: configures the behavior of the widget bar on the dashboard, allowing you to hide it, hide it when not in use, or leave it always visible.
Refresh Frequency: allows configuring the data refresh frequency displayed in the list.
Extra actions: allows user to add new specific actions to the widget with your own code.
You can add a new one by pressing the New button.
Once you added a custom action it can be modified later by pressing the name in the list.
In order to remove the custom action click the delete icon button on the right.
In extra actions you can write your own code were you can open other dashboards, entities dashboards or execute wizards.
You can find all available functions and methods in Extra Information
Pipeline Scheduler Browser
The Pipeline Scheduler Browser allows you to view/manage the pipeline schedulers configured in your organization.
How it Works
Each pipeline scheduler will be displayed in the browser, showing some details about them such as the type of pipeline scheduler and the configuration mode used.
Widget Menu
From the widget’s action menu, you can perform the following:
Executions history: Shows the executions history for all pipeline scheduled.
Pipeline Scheduler wizard: Allows the execution of the wizard for creating a new pipeline scheduler (provided the necessary permissions are available).
Capture screen: Takes a screenshot of the widget.
Duplicate widget: Creates a duplicate of the widget on the dashboard.
Copy widget: Copies the widget to another dashboard.
Change widget location: Moves the widget to another dashboard.
Actions per Pipeline Scheduler
The following are the possible actions to be performed for each of the schedulers:
History opens pipeline executions history in a modal.
Clone will open the pipeline scheduler wizard for creating a new pipeline scheduler that will contain the configuration of the selected one.
Remove deletes the selected scheduler.
Configuration
General
Boxed: widget will be displayed with background in dahsboard.
About: widget description in Markdown format.
Title: widget title. It can be configured to remain fixed in the widget or only be displayed when it receives focus.
Toolbar: configures the behavior of the widget bar on the dashboard, allowing you to hide it, hide it when not in use, or leave it always visible.
Refresh Frequency: allows configuring the data refresh frequency displayed in the list.
Extra actions: allows user to add new specific actions to the widget with your own code.
You can add a new one by pressing the New button.
Once you added a custom action it can be modified later by pressing the name in the list.
In order to remove the custom action click the delete icon button on the right.
In extra actions you can write your own code were you can open other dashboards, entities dashboards or execute wizards.
You can find all available functions and methods in Extra Information
Provisioning Functions Navigator
In this widget, you will find the provisioning functions configured for your organization.
How it Works
In the browser, you will find a list of provisioning functions along with the available actions for each, depending on the permissions you hold.
Widget Menu
From the widget’s action menu, you can perform the following:
New provision function: Allows the execution of the wizard for creating provisioning functions (provided the necessary permissions are available).
Capture screen: Takes a screenshot of the widget.
Duplicate widget: Creates a duplicate of the widget on the dashboard.
Copy widget: Copies the widget to another dashboard.
Change widget location: Moves the widget to another dashboard.
Organization Selector
A user can manage the provisioning functions for organizations that are dependent on the user’s own organization. To switch between organizations, you must use the selector available at the top of the widget.
Actions on Time Series
For each time series, you can perform the following actions:
Edit: Opens the editing wizard to modify the parameters of the provisioning function.
Summary: Displays information on the configuration of the provisioning function within the widget itself.
Delete: Removes the selected item.
Configuration
General
Boxed: widget will be displayed with background in dahsboard.
About: widget description in Markdown format.
Title: widget title. It can be configured to remain fixed in the widget or only be displayed when it receives focus.
Toolbar: configures the behavior of the widget bar on the dashboard, allowing you to hide it, hide it when not in use, or leave it always visible.
Refresh Frequency: allows configuring the data refresh frequency displayed in the list.
Extra actions: allows user to add new specific actions to the widget with your own code.
You can add a new one by pressing the New button.
Once you added a custom action it can be modified later by pressing the name in the list.
In order to remove the custom action click the delete icon button on the right.
In extra actions you can write your own code were you can open other dashboards, entities dashboards or execute wizards.
You can find all available functions and methods in Extra Information
Rest Request Scheduler Browser
The Rest Request Scheduler Browser allows you to view/manage the rest request schedulers configured in your organization.
How it Works
Each rest request scheduler will be displayed in the browser, showing some details about them such as the type of rest request scheduler and the configuration mode used.
Widget Menu
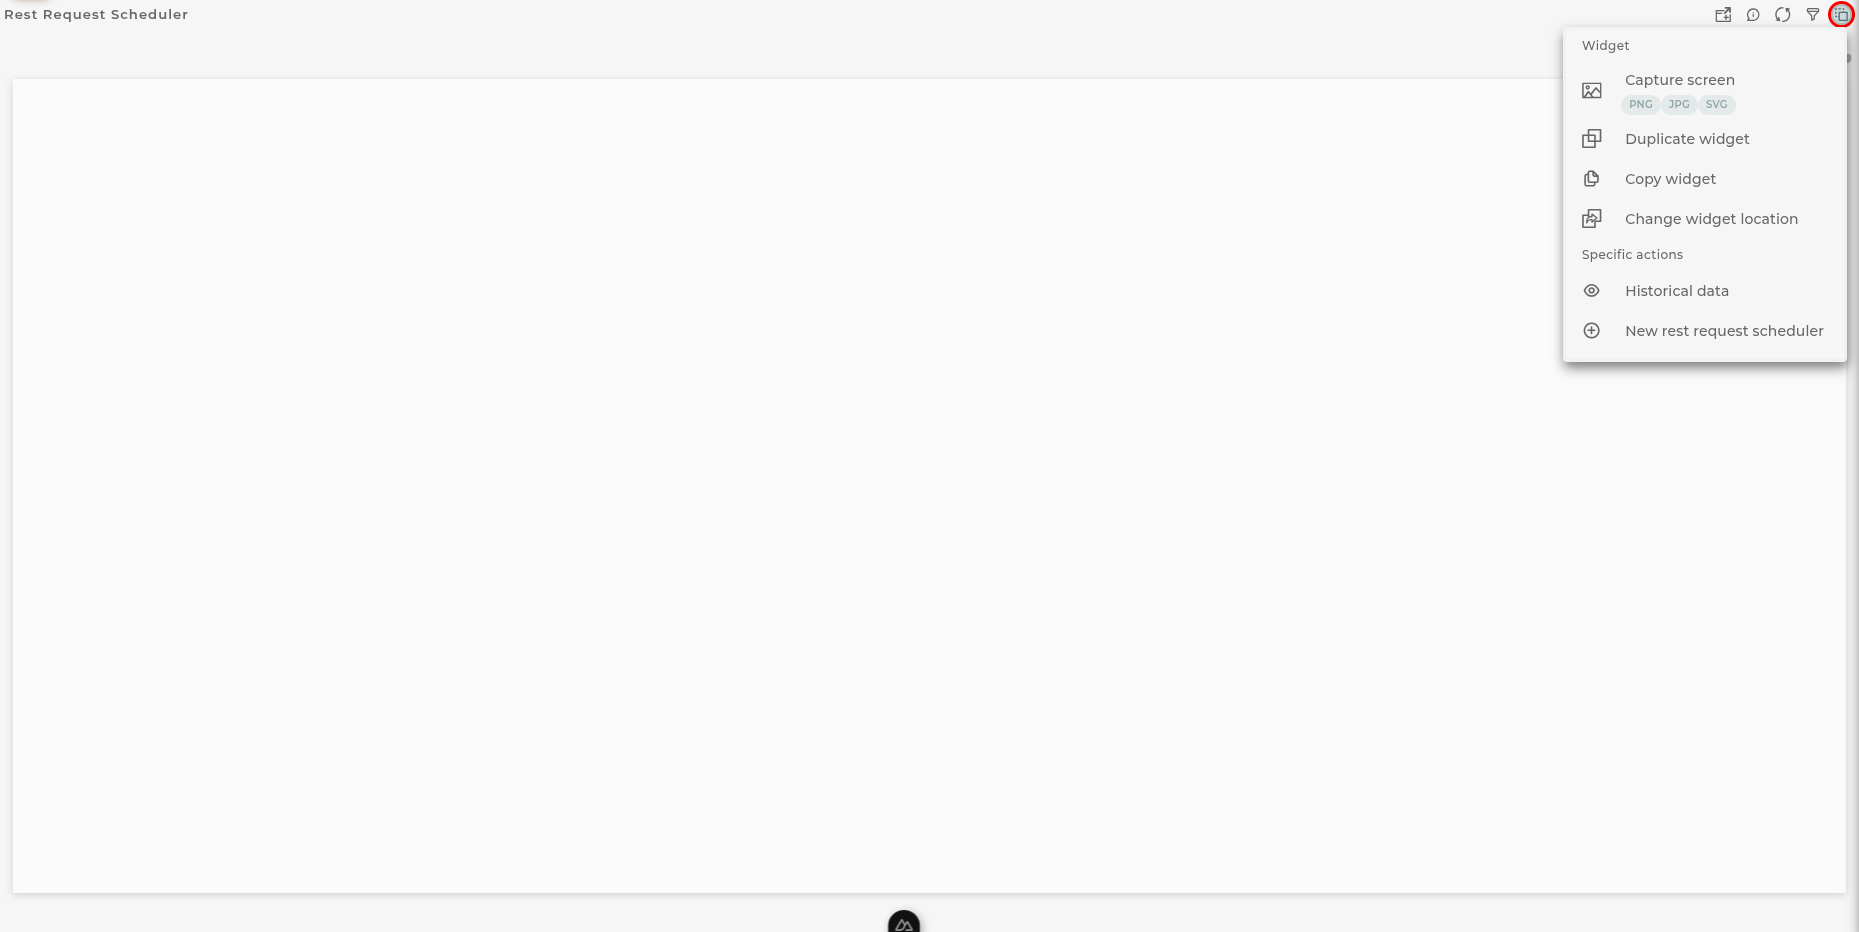
From the widget’s action menu, you can perform the following:
Executions history: Shows the executions history for all rest request scheduled.
Rest Request Scheduler wizard: Allows the execution of the wizard for creating a new rest request scheduler (provided the necessary permissions are available).
Capture screen: Takes a screenshot of the widget.
Duplicate widget: Creates a duplicate of the widget on the dashboard.
Copy widget: Copies the widget to another dashboard.
Change widget location: Moves the widget to another dashboard.
Actions per RestRequest
The following are the possible actions to be performed for each of the schedulers:
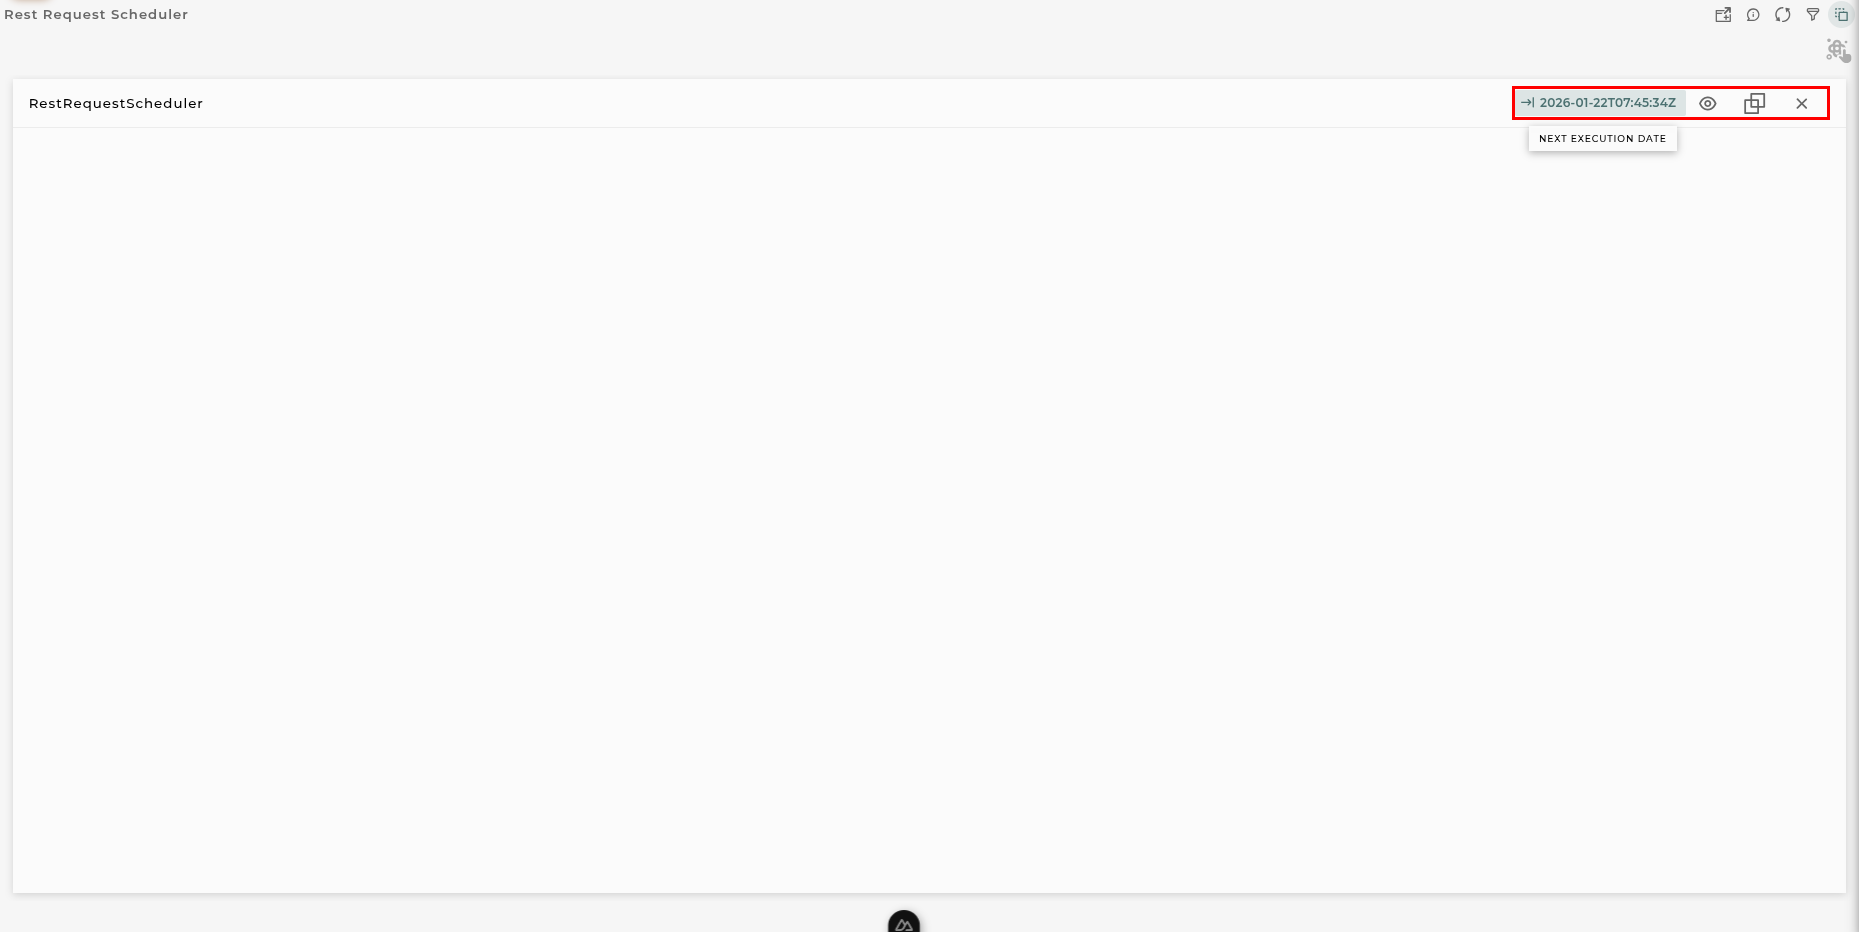
History opens rest request executions history in a modal.
Clone will open the rest request scheduler wizard for creating a new rest request scheduler that will contain the configuration of the selected one.
Remove deletes the selected scheduler.
Configuration
General
Boxed: widget will be displayed with background in dahsboard.
About: widget description in Markdown format.
Title: widget title. It can be configured to remain fixed in the widget or only be displayed when it receives focus.
Toolbar: configures the behavior of the widget bar on the dashboard, allowing you to hide it, hide it when not in use, or leave it always visible.
Refresh Frequency: allows configuring the data refresh frequency displayed in the list.
Extra actions: allows user to add new specific actions to the widget with your own code.
You can add a new one by pressing the New button.
Once you added a custom action it can be modified later by pressing the name in the list.
In order to remove the custom action click the delete icon button on the right.
In extra actions you can write your own code were you can open other dashboards, entities dashboards or execute wizards.
You can find all available functions and methods in Extra Information
Rules Configuration Browser
The Rules Browser allows you to view/manage the rules configured in your organization.
How it Works
Each rule will be displayed in the browser, showing some details about them such as the type of rule and the configuration mode used.
Widget Menu
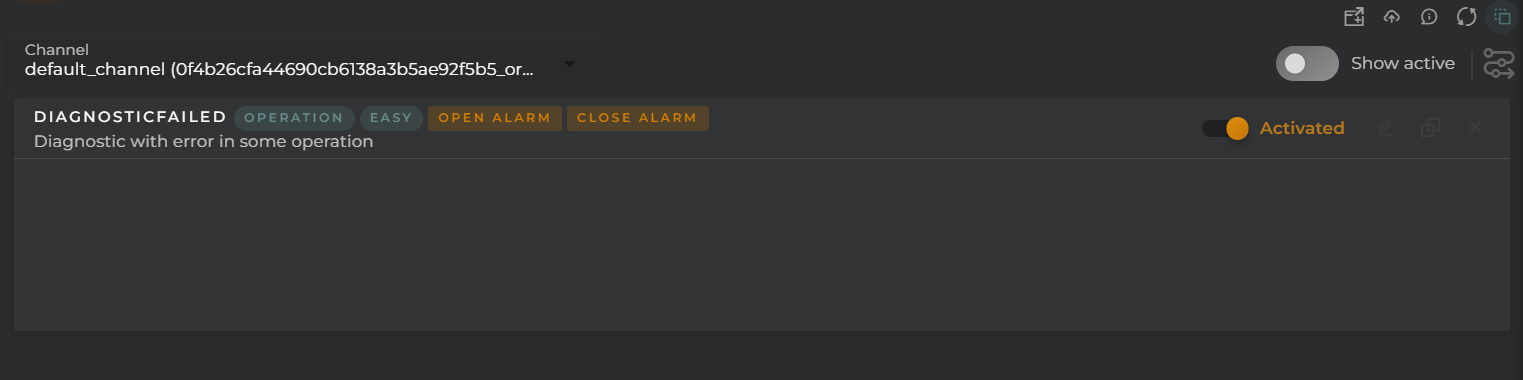
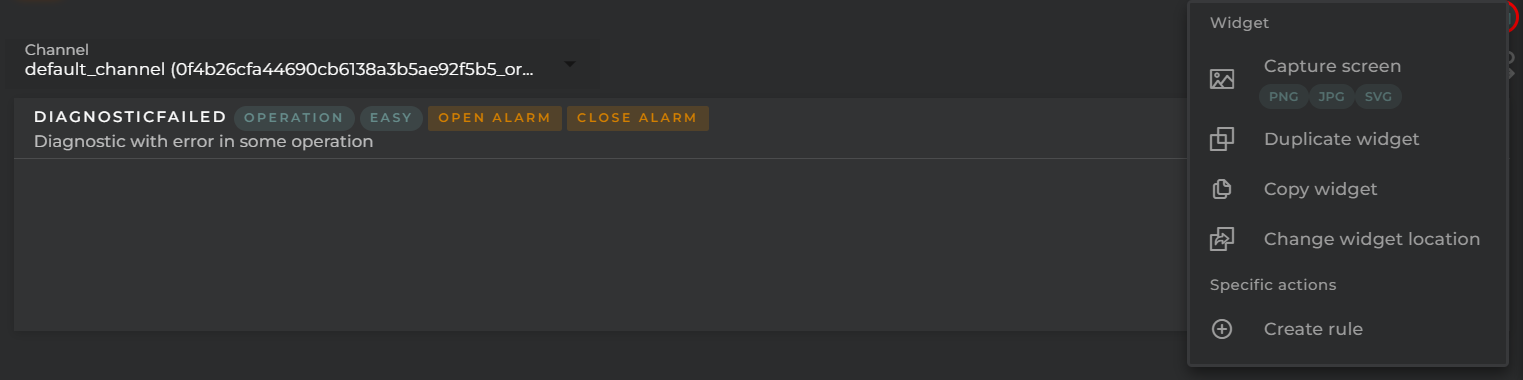
From the widget’s action menu, you can perform the following:
Rules wizard: Allows the execution of the wizard for creating a new rule (provided the necessary permissions are available).
Capture screen: Takes a screenshot of the widget.
Duplicate widget: Creates a duplicate of the widget on the dashboard.
Copy widget: Copies the widget to another dashboard.
Change widget location: Moves the widget to another dashboard.
Additionally, you can toggle between active and inactive rules to facilitate sampling according to needs.
Channel Selector
A user can manage the connector functions for those channels that depend on the user’s organization. To switch between channels, you must use the selector available at the top of the widget.
Actions per Rule
The following are the possible actions to be performed for each of the rules:
Activation toggle allows the immediate activation and deactivation of the rule.
Edit opens the rules configurator to modify the parameters of the rule.
Clone will open the rules configurator for creating a new rule that will contain the configuration of the selected one.
Remove deletes the selected rule.
Configuration
General
Boxed: widget will be displayed with background in dahsboard.
About: widget description in Markdown format.
Title: widget title. It can be configured to remain fixed in the widget or only be displayed when it receives focus.
Toolbar: configures the behavior of the widget bar on the dashboard, allowing you to hide it, hide it when not in use, or leave it always visible.
Refresh Frequency: allows configuring the data refresh frequency displayed in the list.
Extra actions: allows user to add new specific actions to the widget with your own code.
You can add a new one by pressing the New button.
Once you added a custom action it can be modified later by pressing the name in the list.
In order to remove the custom action click the delete icon button on the right.
In extra actions you can write your own code were you can open other dashboards, entities dashboards or execute wizards.
You can find all available functions and methods in Extra Information
Specific types Browser
In this widget, you will find the Specific types configured for your organization.
How it Works
In the browser, you will find a list of Specific types along with the available actions for each, based on the permissions you have.
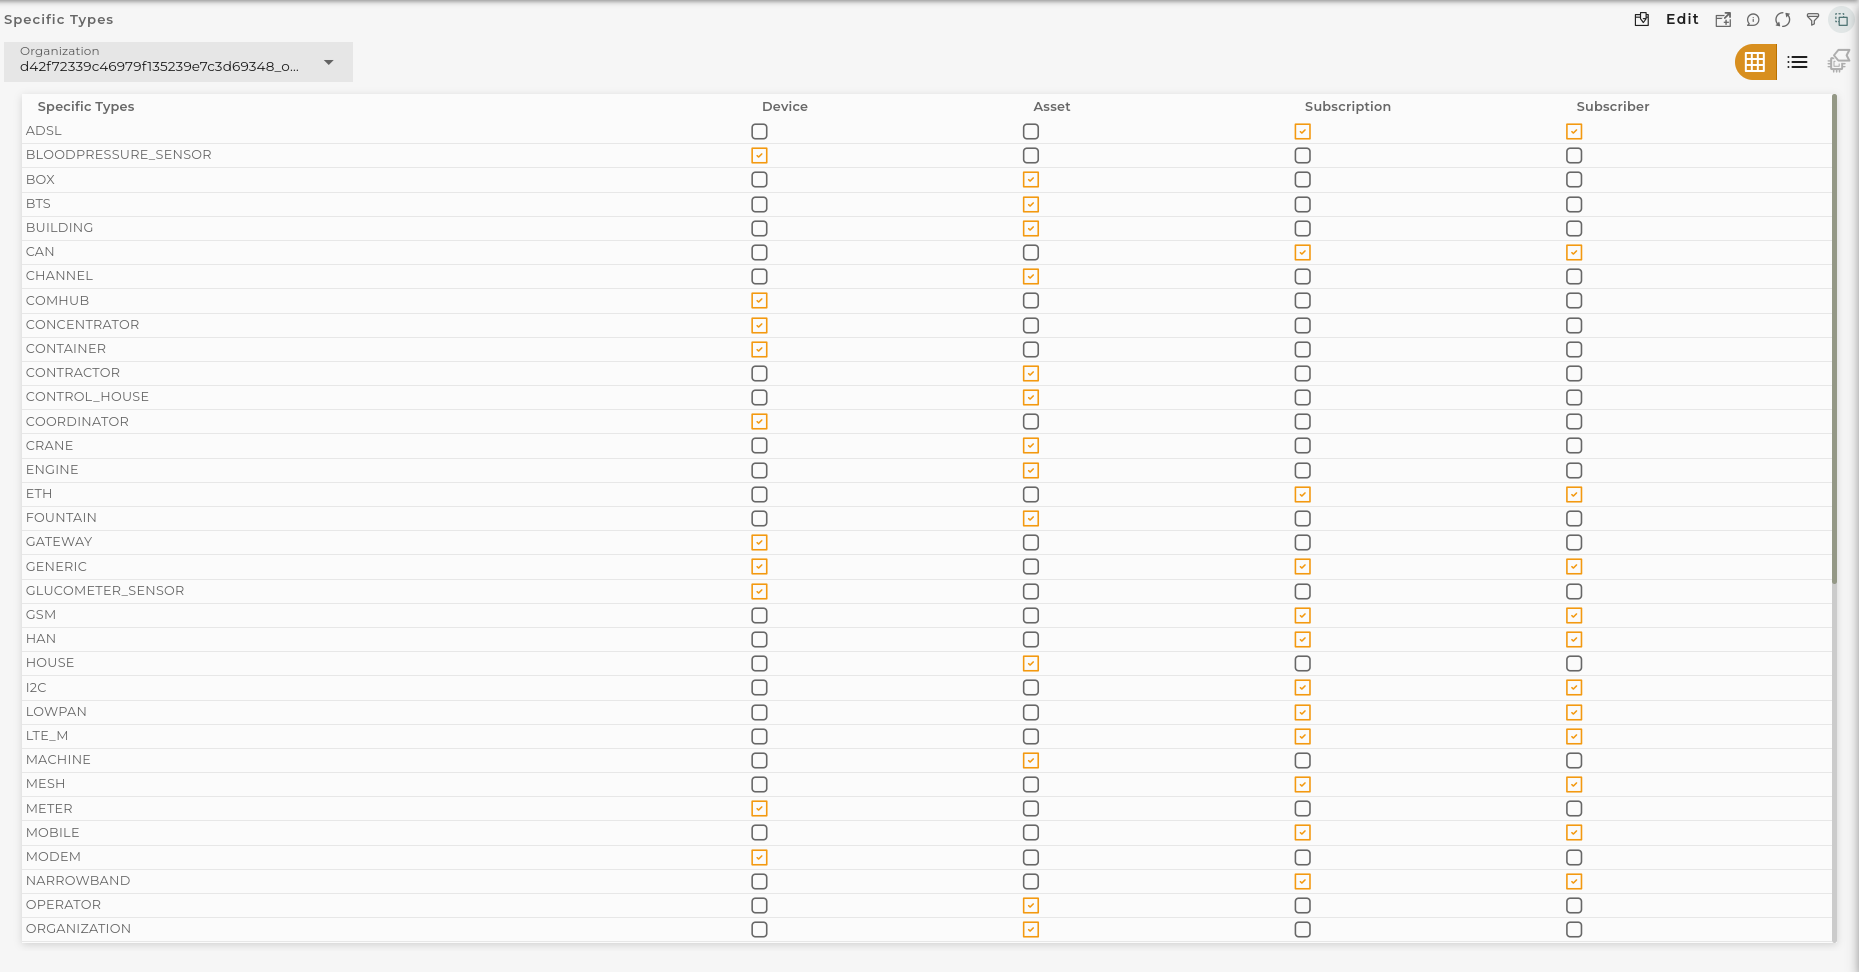
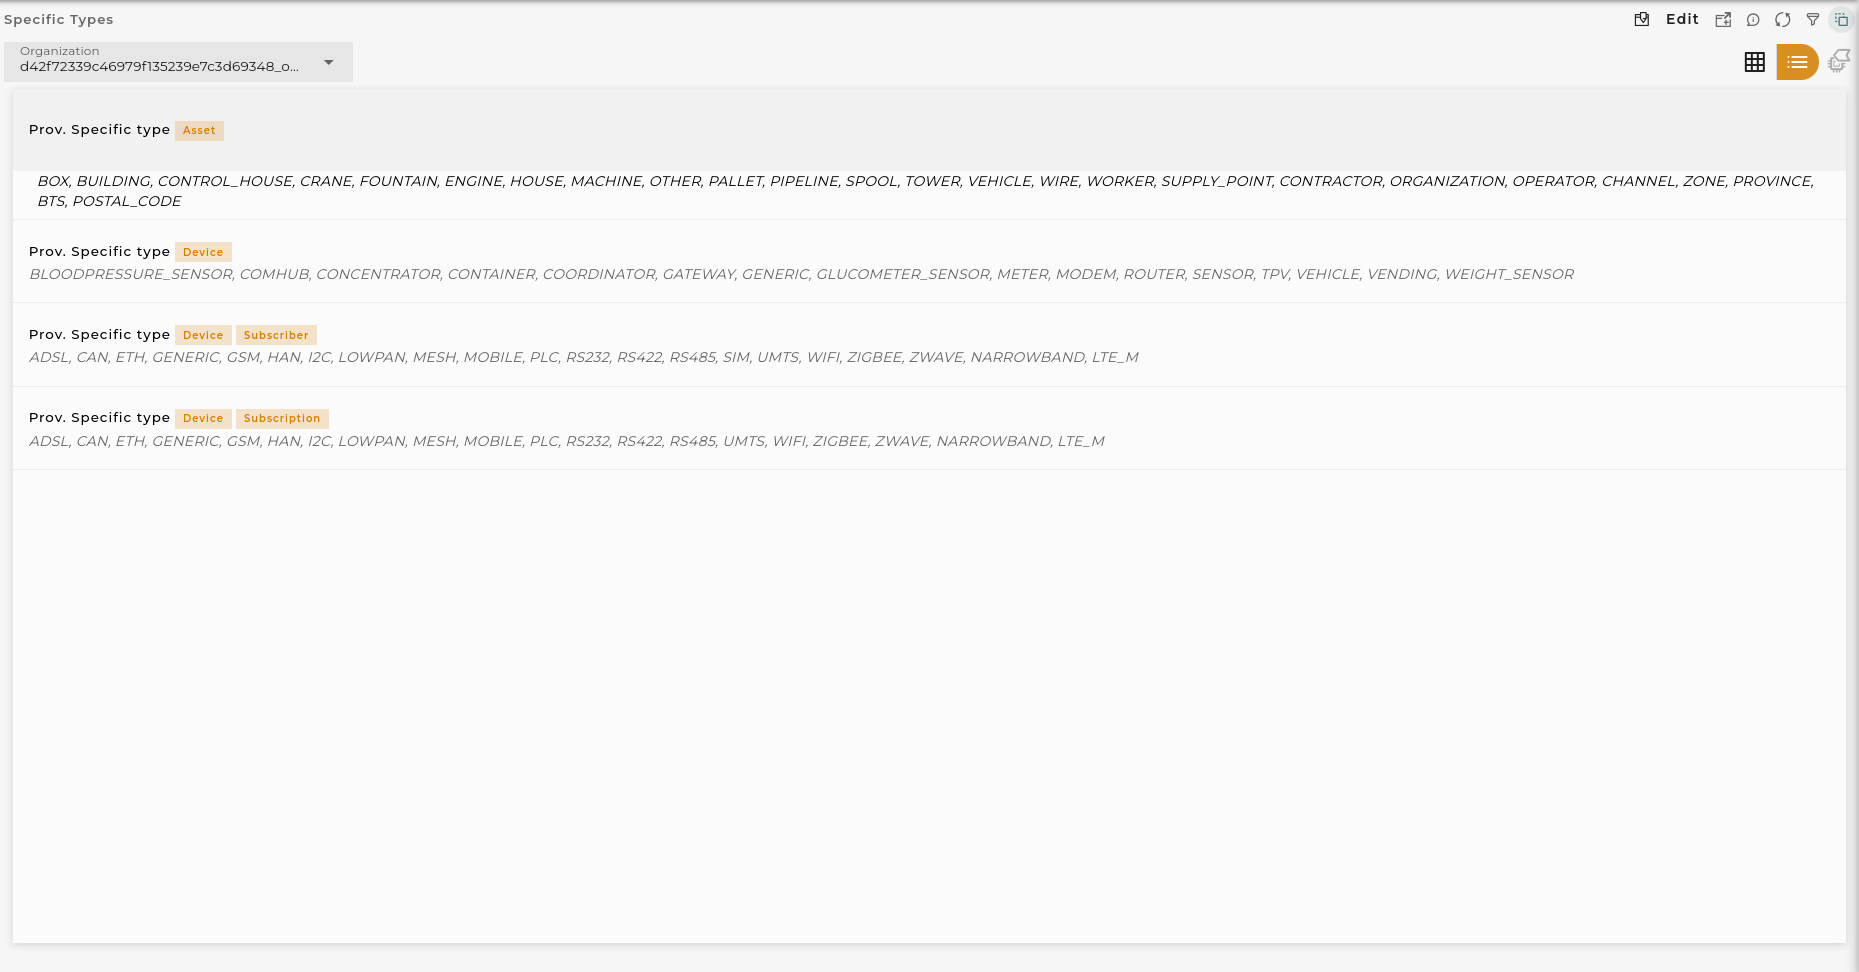
Browser allows to view the data in 2 different modes:
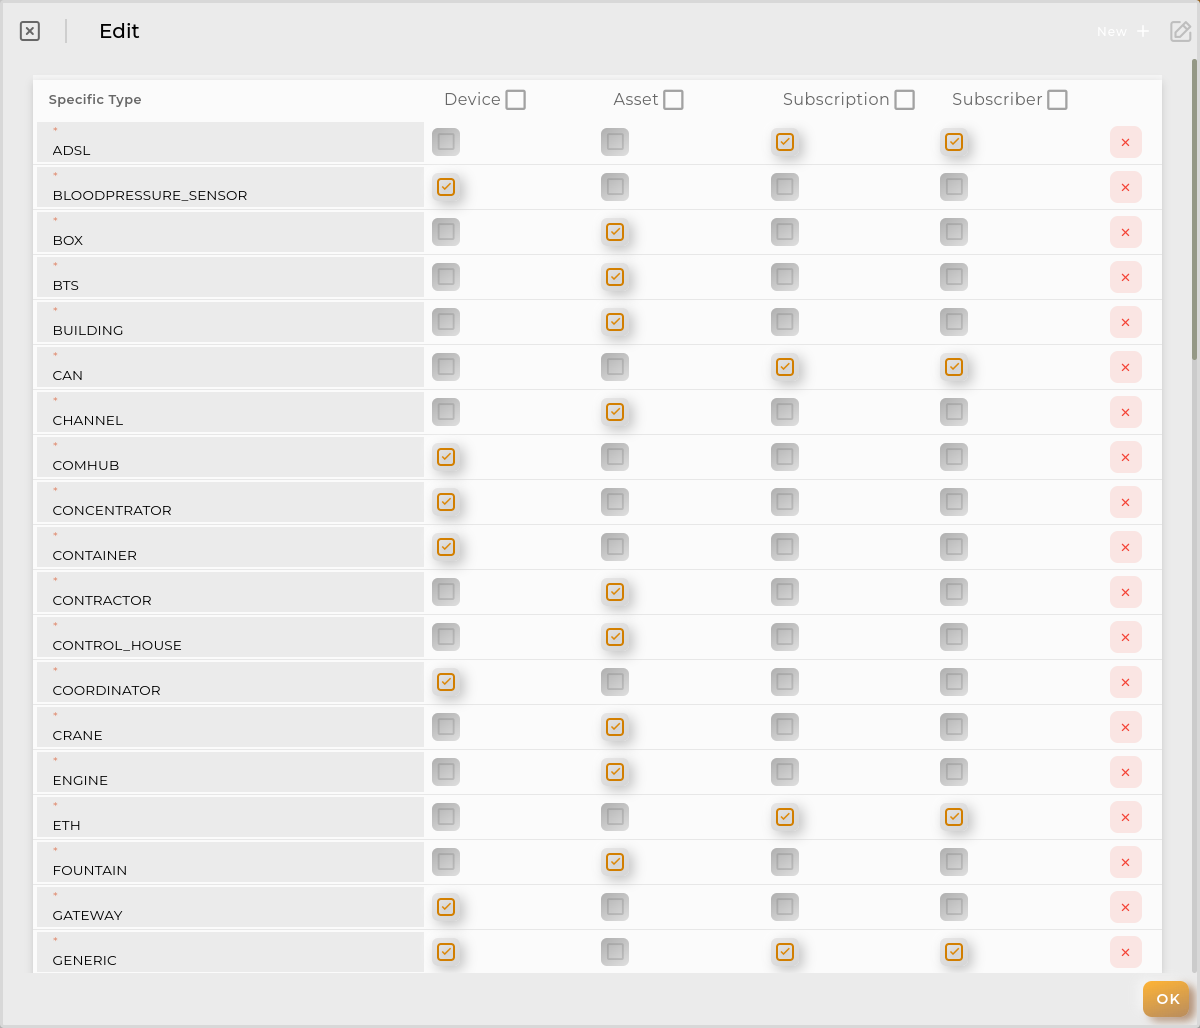
Grid: shows the complete list of specific types with the resource types supported in a grid of checkboxes (default view)
List: shows a list with the different resource types and their supported specific types.
Widget Menu
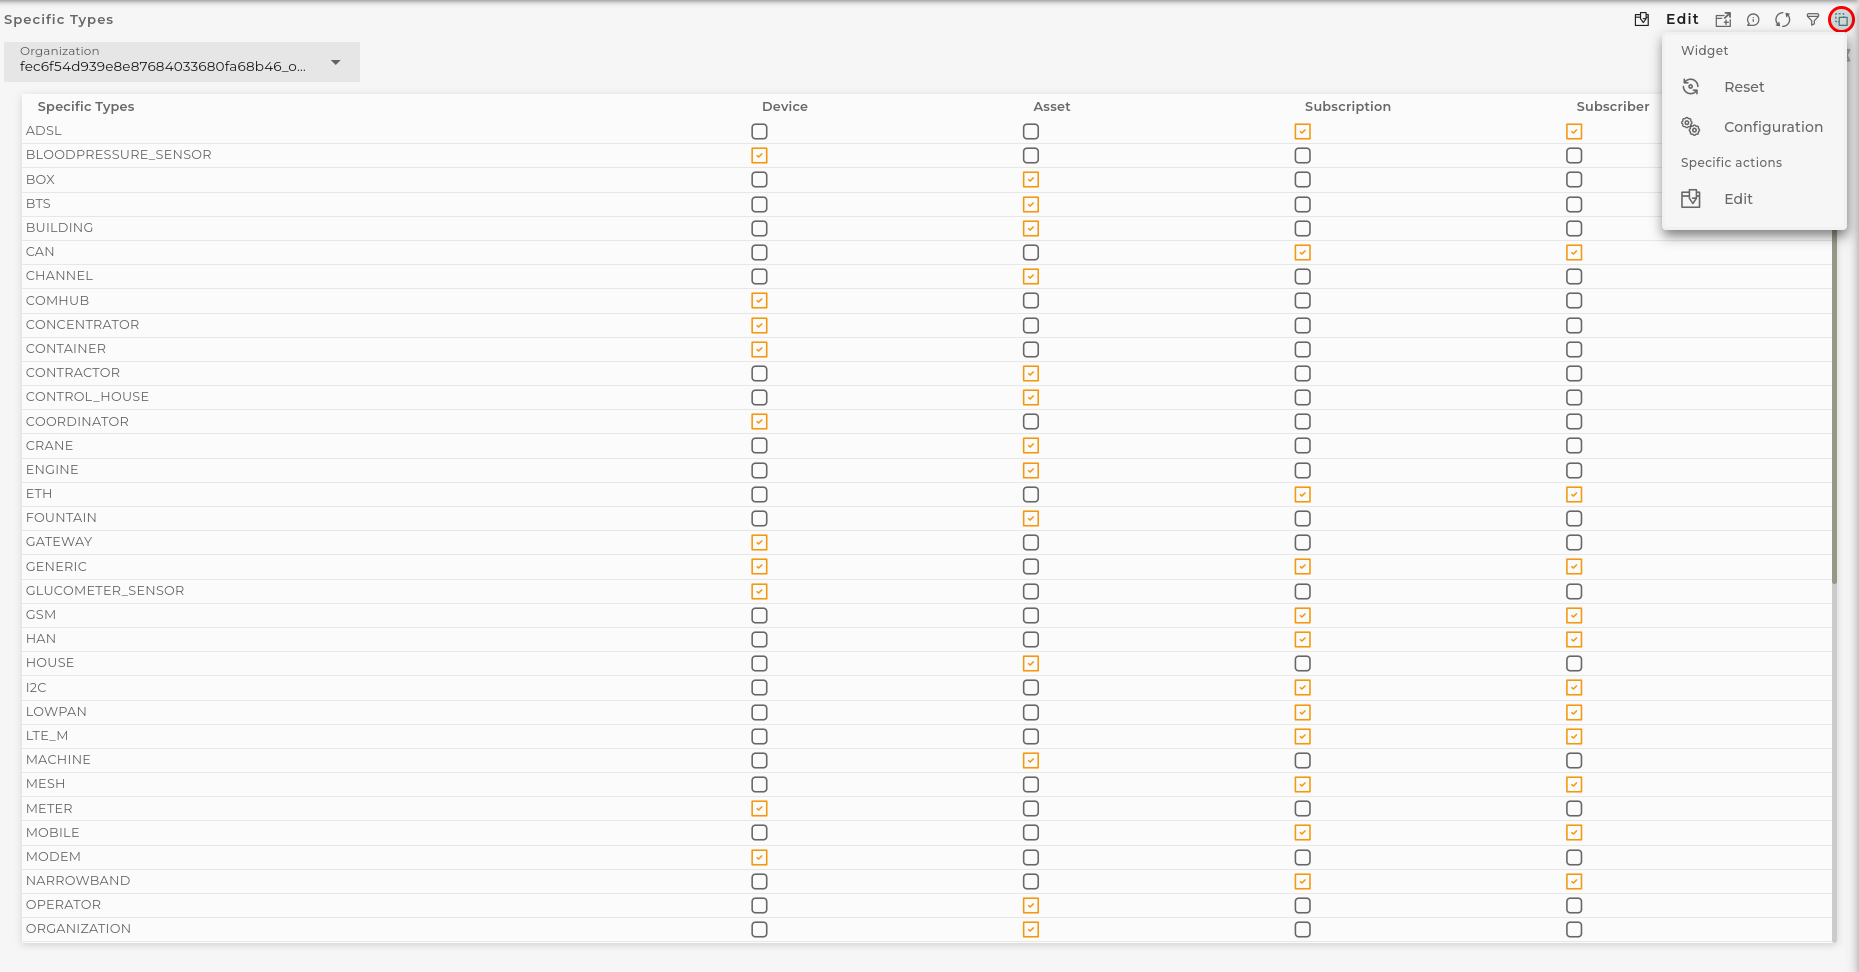
From the action menu of the widget, you can perform the following:
Capture screen: Takes a screenshot of the widget.
Duplicate widget: Creates a duplicate of the widget on the dashboard.
Copy widget: Copies the widget to another dashboard.
Change widget location: Moves the widget to another dashboard.
Edit opens Specific Type manager modal.
Organization Selector
A user can manage the Specific types for those organizations that are dependent on the user’s own organization. To switch between organizations, you must select it from the selector available at the top of the widget.
Actions on Specific types
A user with privileges can add new Specific Types and edit and/or delete existing ones.
Every Specific Type must have one resource type selected and cannot be duplicated.
Configuration
General
Boxed: widget will be displayed with background in dahsboard.
About: widget description in Markdown format.
Title: widget title. It can be configured to remain fixed in the widget or only be displayed when it receives focus.
Toolbar: configures the behavior of the widget bar on the dashboard, allowing you to hide it, hide it when not in use, or leave it always visible.
Refresh Frequency: allows configuring the data refresh frequency displayed in the list.
Extra actions: allows user to add new specific actions to the widget with your own code.
You can add a new one by pressing the New button.
Once you added a custom action it can be modified later by pressing the name in the list.
In order to remove the custom action click the delete icon button on the right.
In extra actions you can write your own code were you can open other dashboards, entities dashboards or execute wizards.
You can find all available functions and methods in Extra Information
Time Series Browser
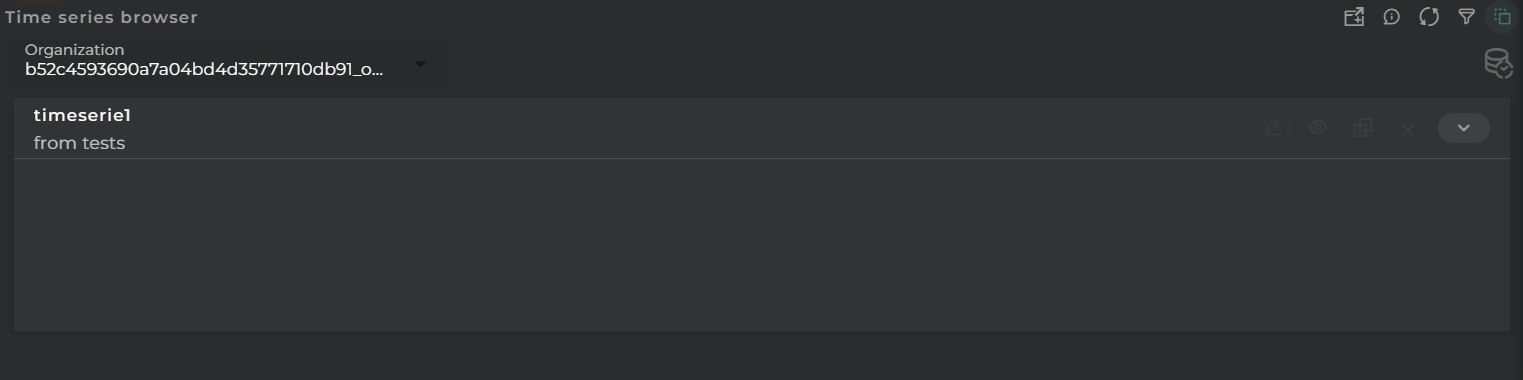
In this widget, you will find the time series configured for your organization.
How it Works
In the browser, you will find a list of time series along with the available actions for each, depending on the permissions you hold.
Widget Menu
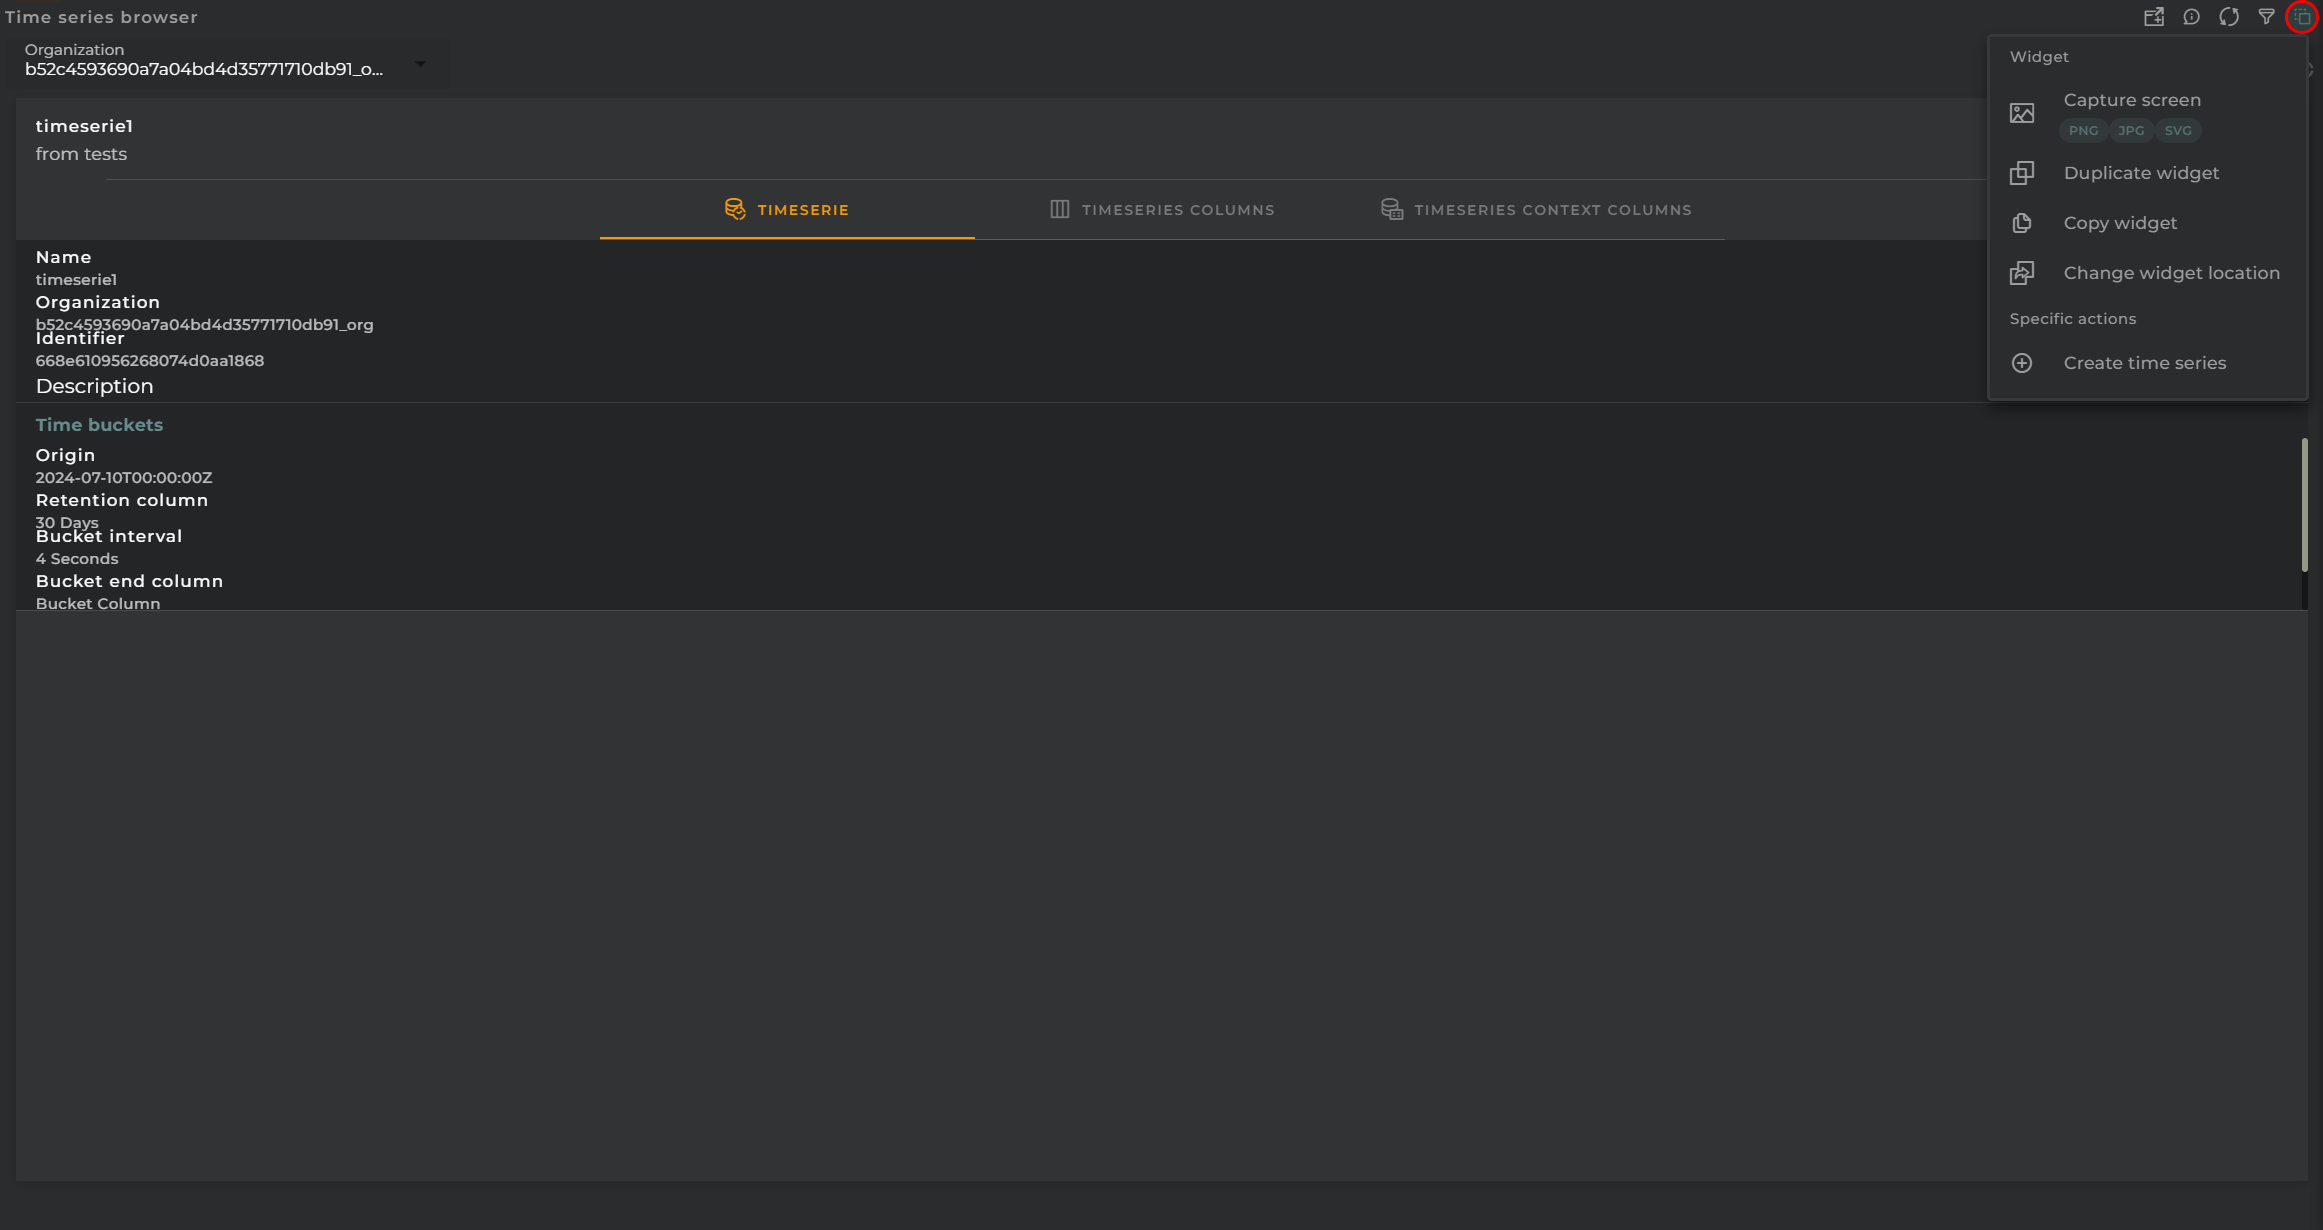
From the widget’s action menu, you can perform the following:
New time series: Allows the execution of the wizard for creating new time series (provided the necessary permissions are available).
Capture screen: Takes a screenshot of the widget.
Duplicate widget: Creates a duplicate of the widget on the dashboard.
Copy widget: Copies the widget to another dashboard.
Change widget location: Moves the widget to another dashboard.
Organization Selector
A user can manage the time series for organizations that are dependent on the user’s own organization. To switch between organizations, you must use the selector available at the top of the widget.
Actions on Time Series
For each time series, you can perform the following actions:
View data: Opens a time series listing widget where you can view the data of the selected time series.
Edit: Initiates a wizard for editing the time series using the configuration data of the current one.
Clone: Initiates a wizard for creating a new time series using the configuration data of the current one.
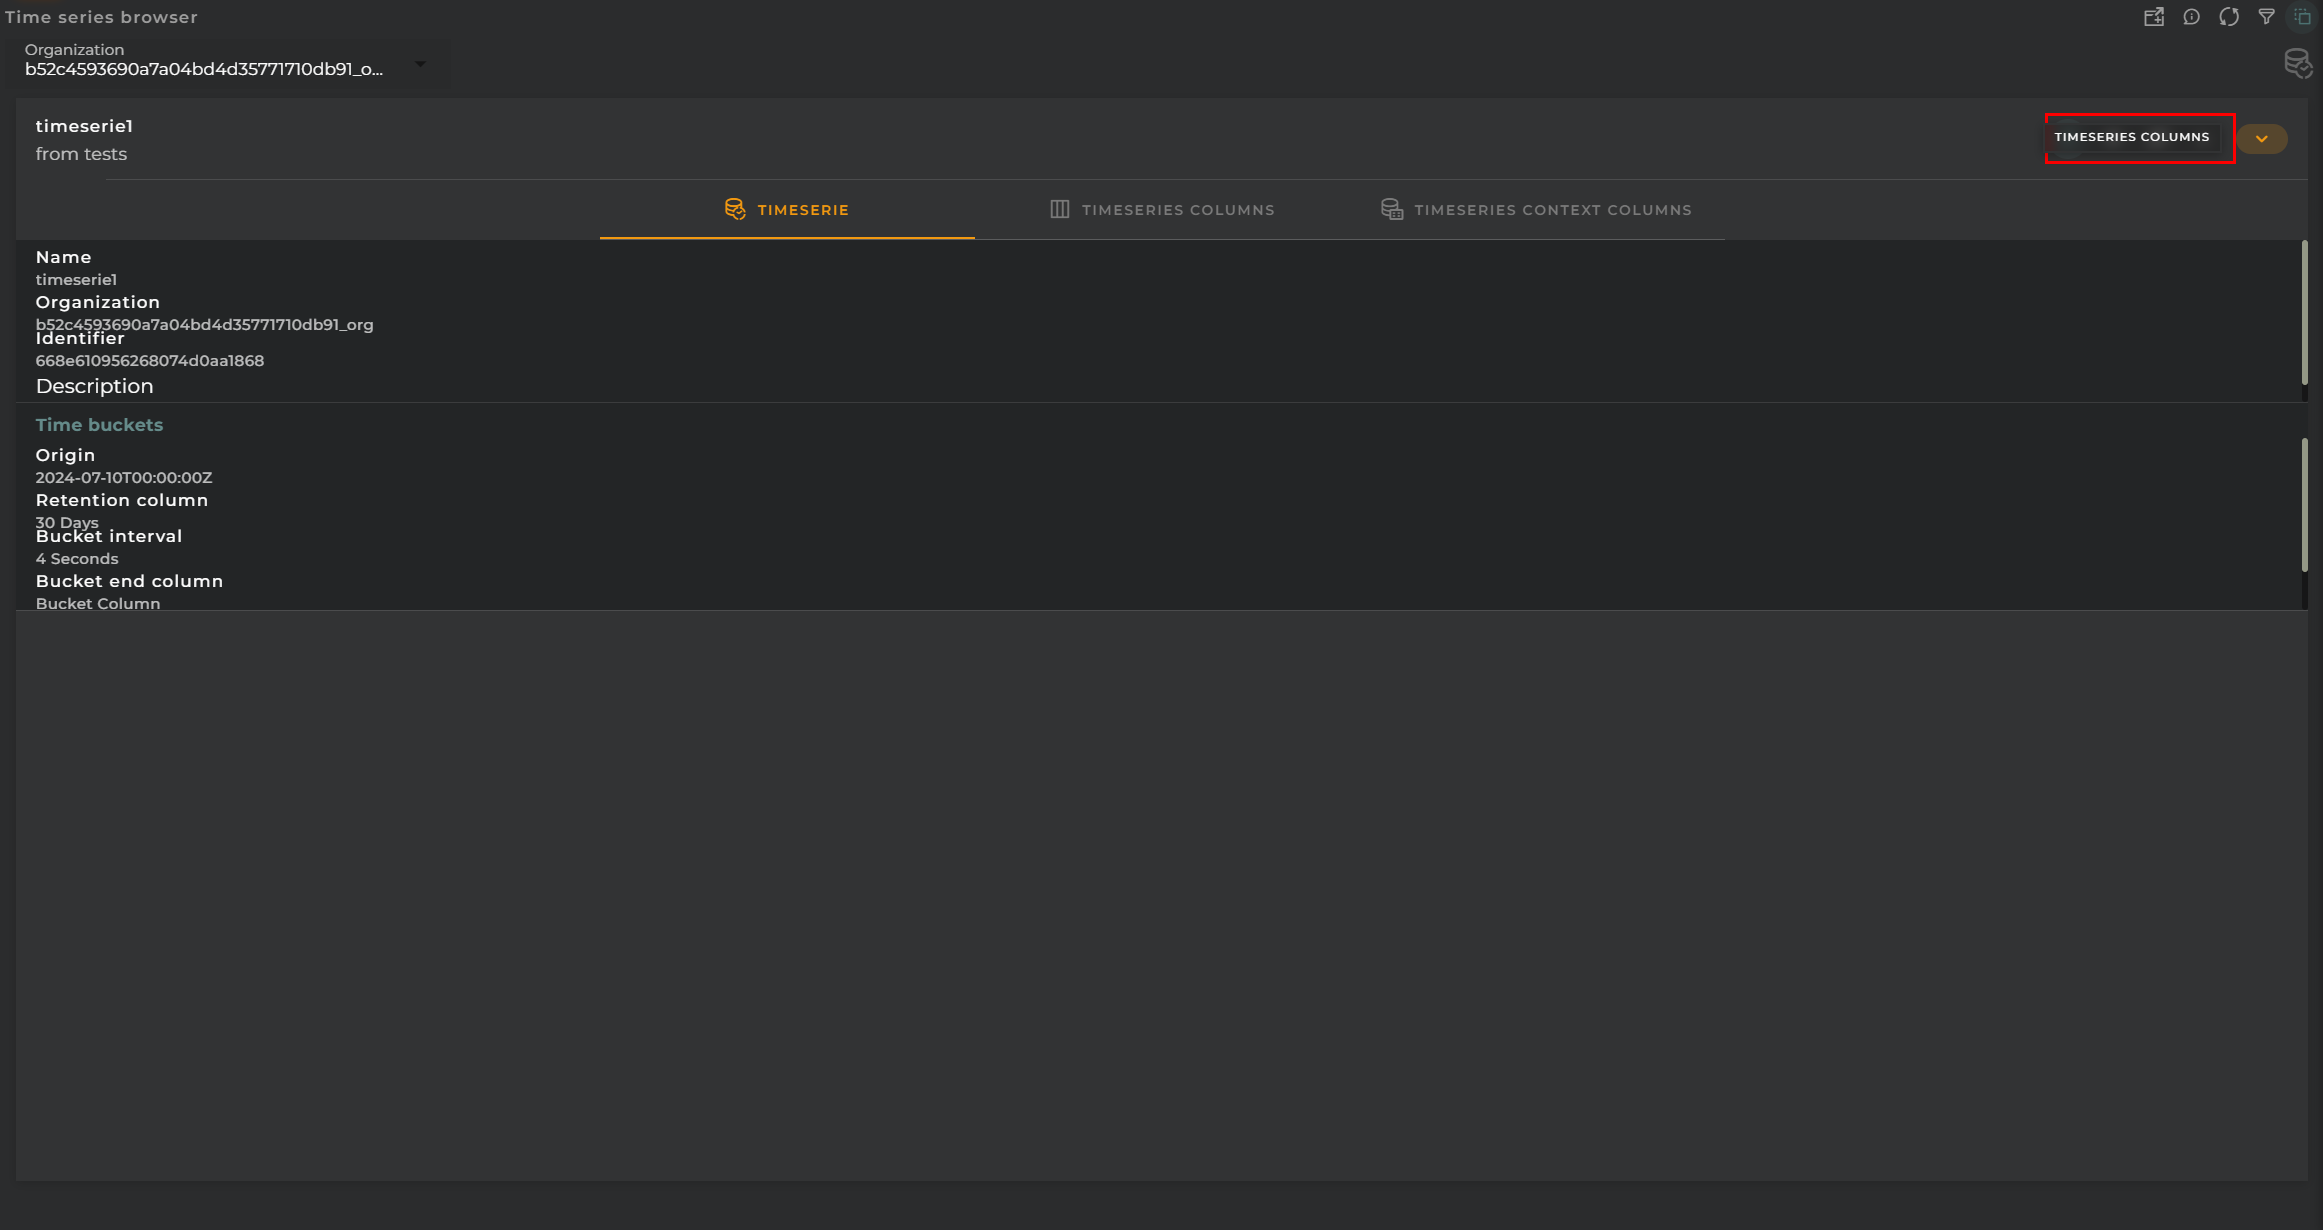
Columns: Displays within the widget itself information on the time series configuration as well as the configured columns.
Delete: Removes the selected time series and all its data.
Configuration
General
Boxed: widget will be displayed with background in dahsboard.
About: widget description in Markdown format.
Title: widget title. It can be configured to remain fixed in the widget or only be displayed when it receives focus.
Toolbar: configures the behavior of the widget bar on the dashboard, allowing you to hide it, hide it when not in use, or leave it always visible.
Refresh Frequency: allows configuring the data refresh frequency displayed in the list.
Extra actions: allows user to add new specific actions to the widget with your own code.
You can add a new one by pressing the New button.
Once you added a custom action it can be modified later by pressing the name in the list.
In order to remove the custom action click the delete icon button on the right.
In extra actions you can write your own code were you can open other dashboards, entities dashboards or execute wizards.
You can find all available functions and methods in Extra Information
Time series function Browser
In this widget, you will find the time series functions configured for your organization.
How it Works
In the browser, you will find a list of time series functions along with the available actions for each, based on the permissions you have.
You can see this information for each function:
Name: function name
Origin: who provides the function. It can be PLATFORM (product preconfigured) and ORGANIZATION (user created).
Value Types: input value types allowed by the function
Description: the function algorithm description
Widget Menu
From the action menu of the widget, you can perform the following:
New Time Series Function: This allows you to run the time series function creation wizard (provided you have the necessary permissions).
Capture screen: Takes a screenshot of the widget.
Duplicate widget: Creates a duplicate of the widget on the dashboard.
Copy widget: Copies the widget to another dashboard.
Change widget location: Moves the widget to another dashboard.
Organization Selector
A user can manage the time series functions for those organizations that are dependent on the user’s own organization. To switch between organizations, you must select it from the selector available at the top of the widget.
Actions on Time Series Function
For each time series function, you can perform the following actions:
Clone: Allows you to initiate a time series function creation wizard with the configuration data of the current one.
Edit: Allows you to initiate a time series function update wizard with the configuration data of the current one. Only ORGANIZATION functions.
Delete: Removes the selected time series function and all its associated data. Only ORGANIZATION functions.
Configuration
General
Boxed: widget will be displayed with background in dahsboard.
About: widget description in Markdown format.
Title: widget title. It can be configured to remain fixed in the widget or only be displayed when it receives focus.
Toolbar: configures the behavior of the widget bar on the dashboard, allowing you to hide it, hide it when not in use, or leave it always visible.
Refresh Frequency: allows configuring the data refresh frequency displayed in the list.
Extra actions: allows user to add new specific actions to the widget with your own code.
You can add a new one by pressing the New button.
Once you added a custom action it can be modified later by pressing the name in the list.
In order to remove the custom action click the delete icon button on the right.
In extra actions you can write your own code were you can open other dashboards, entities dashboards or execute wizards.
You can find all available functions and methods in Extra Information