9. Easy mode rules
Perfecto, Daniel — vamos a pulirlo para que mantenga un estilo coherente, profesional y visualmente atractivo. He ajustado los emojis para que aparezcan principalmente en los títulos, y he corregido todas las menciones a “alertas” para que se refieran exclusivamente a “alarmas”. Aquí tienes la versión refinada:
🚦 Easy Mode Rules in OpenGate
Welcome to one of the most powerful features in OpenGate: the Rules Engine. This system allows you to automate responses based on incoming data, enabling smarter and more efficient workflows across your IoT ecosystem.
There are two rule-building modes available:
- Easy Mode: A simplified, intuitive interface for quick rule creation. This allows you to create rules using an assisted interface.
- Advanced Mode: A flexible editor for complex logic and custom flows. Use the power of JavaScript toconfgire your rule.
In this tutorial, we’ll focus on Easy Mode, using a practical example from our warehouse environment.
🛠️ Creating an Easy Rule
for this tutorial, we will consider that we want to monitor the temperature levels of our warehouse.
We’ll create a rule that triggers an alarm when the temperature exceeds 24°C. The alarm message will be:
“It’s hot!”
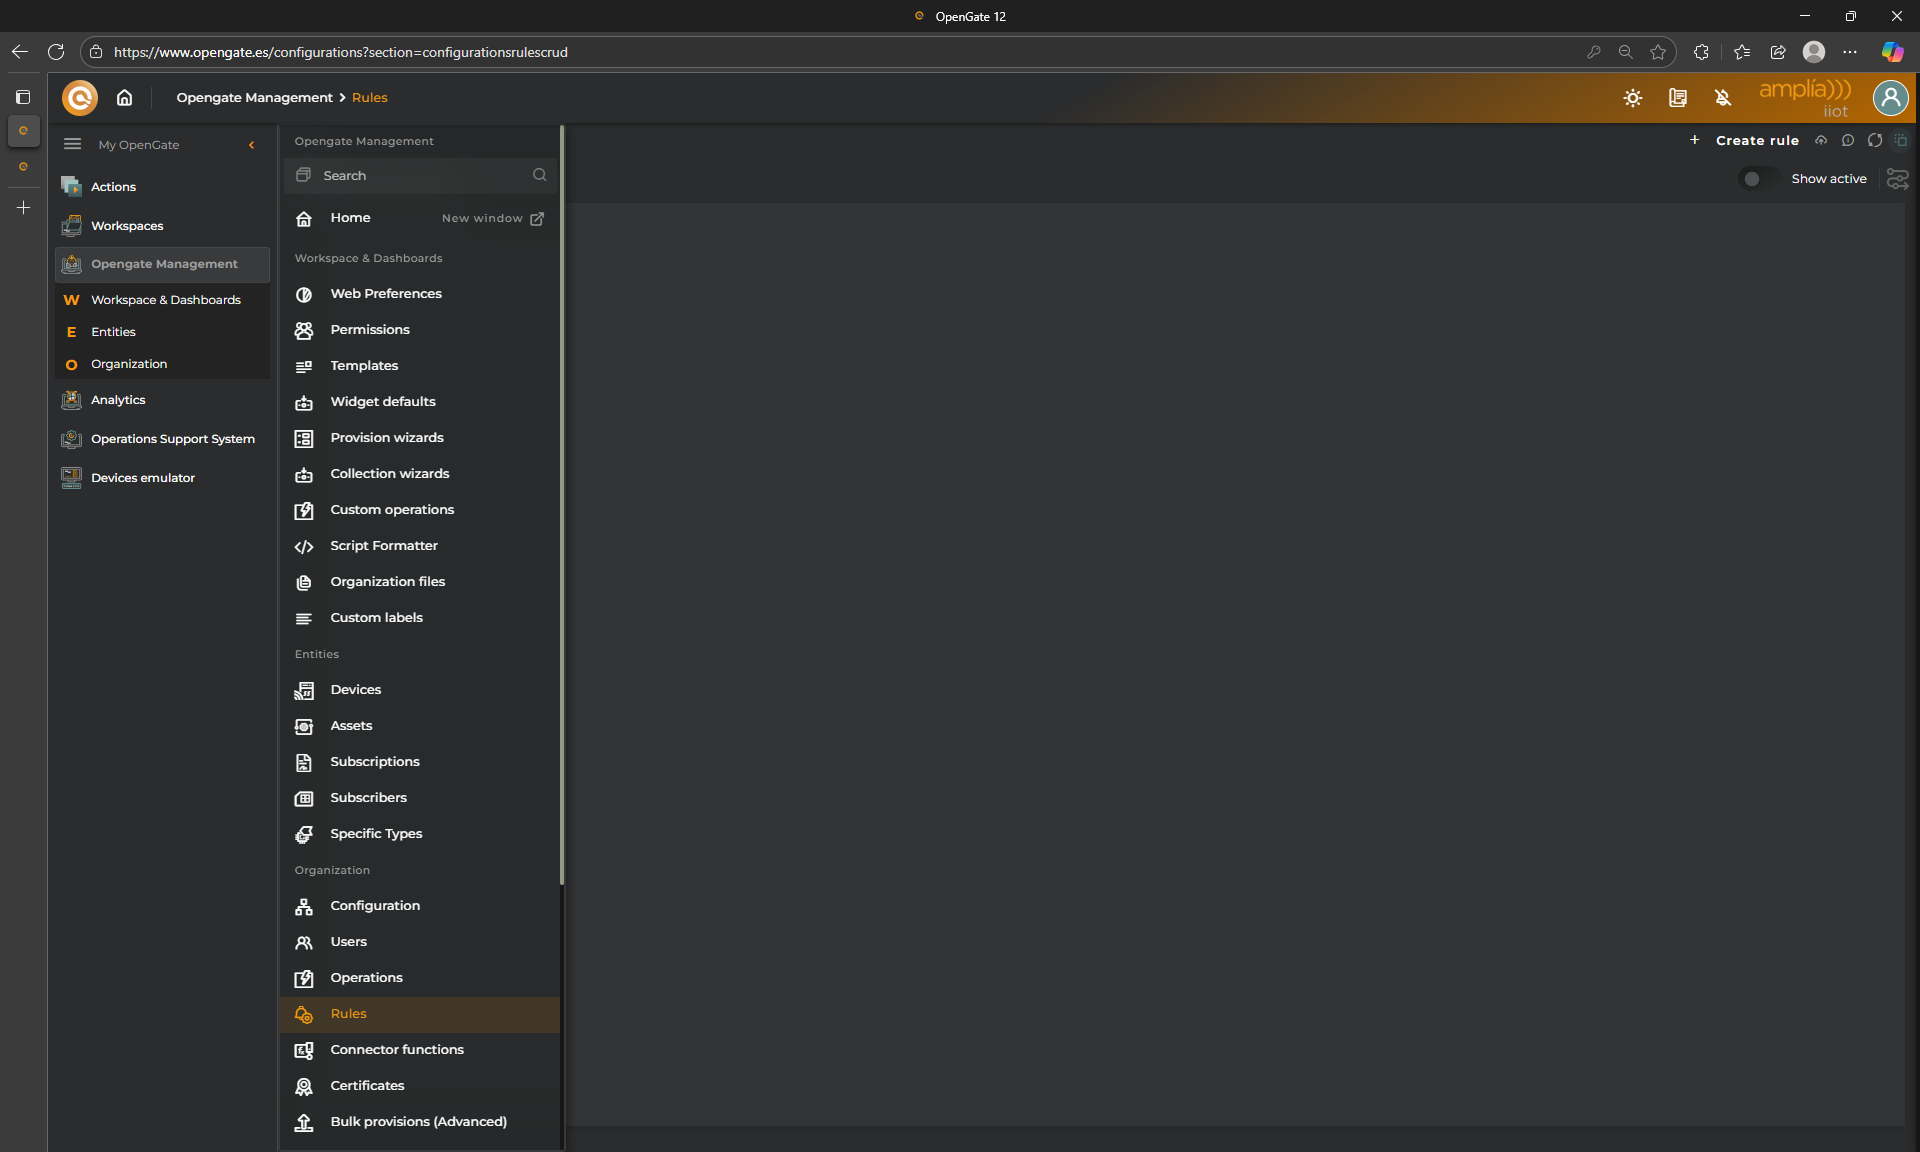
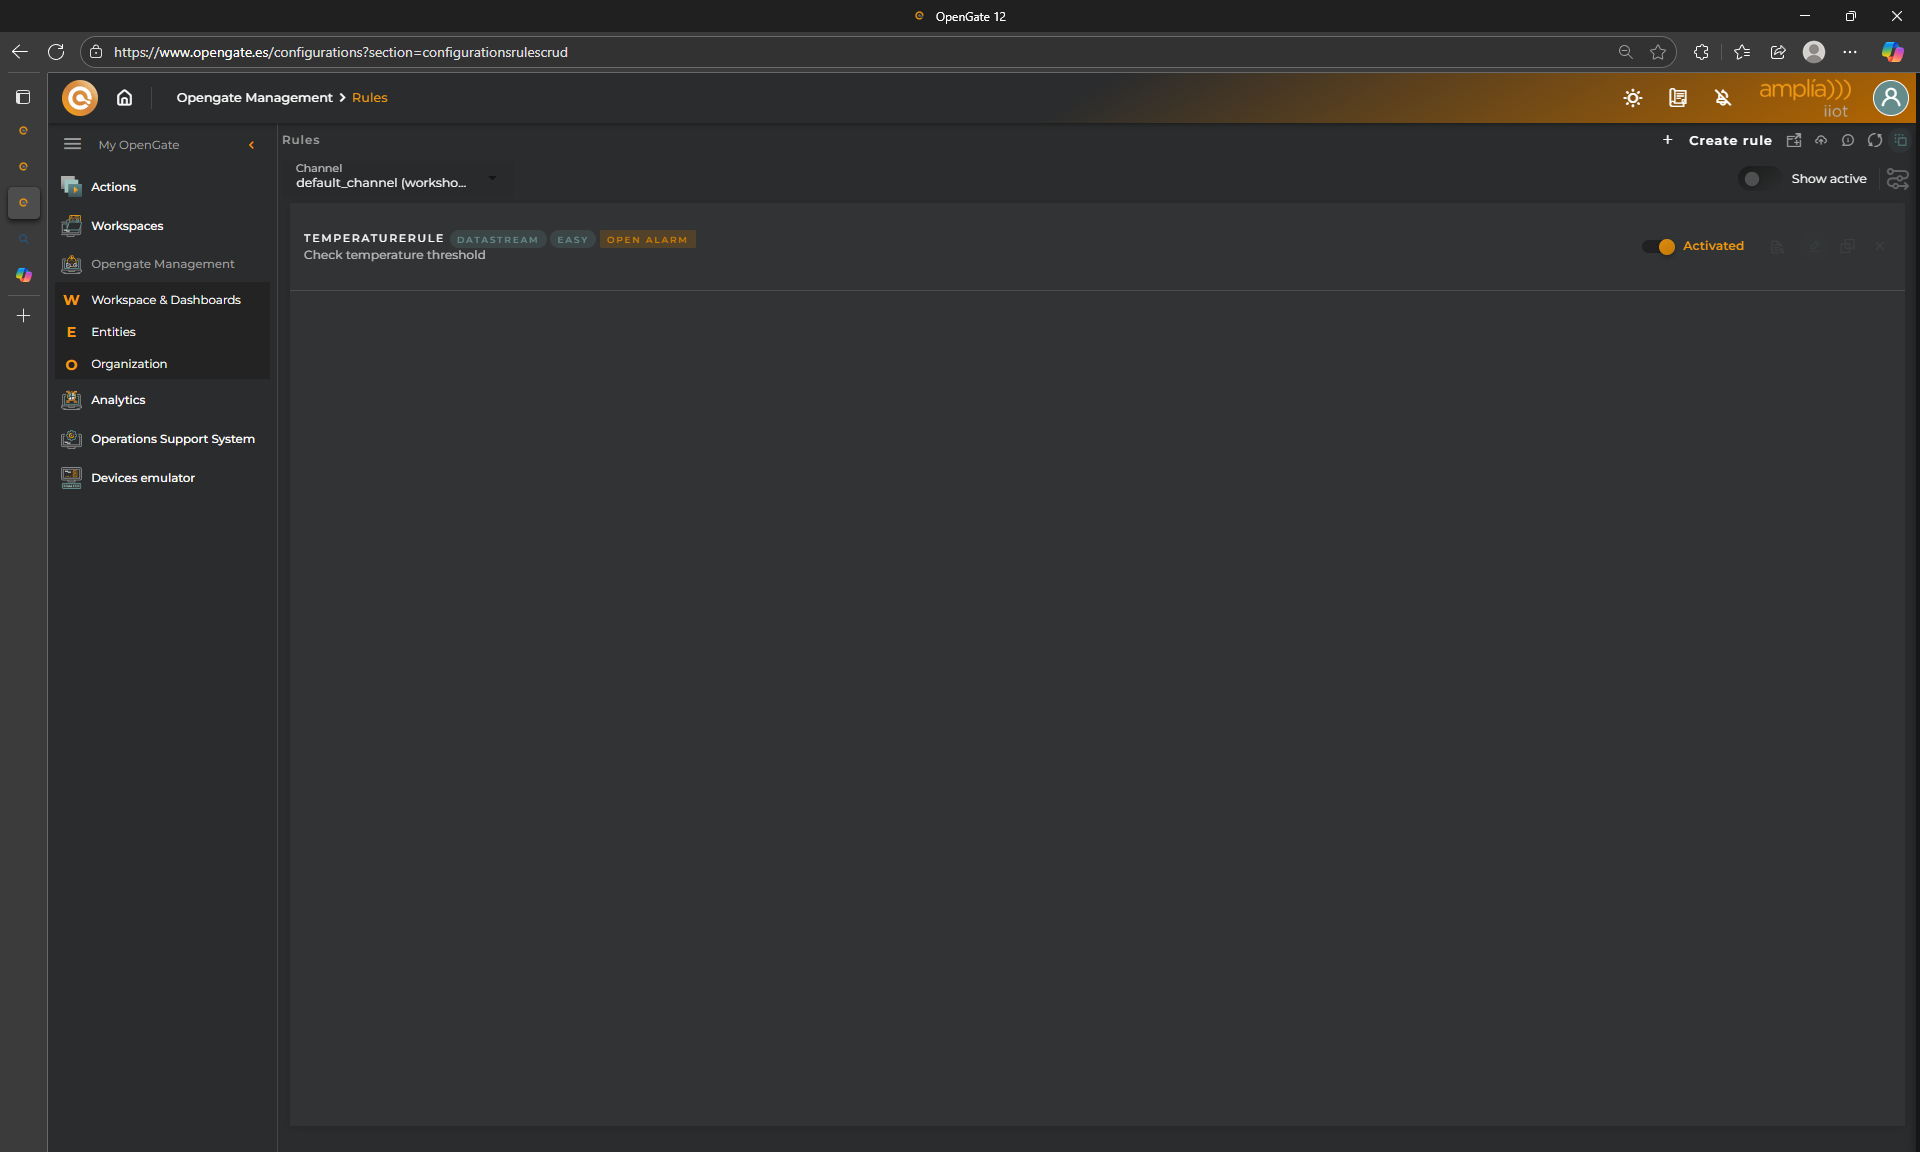
Go to OpenGate Management > Rules and click Create new rule
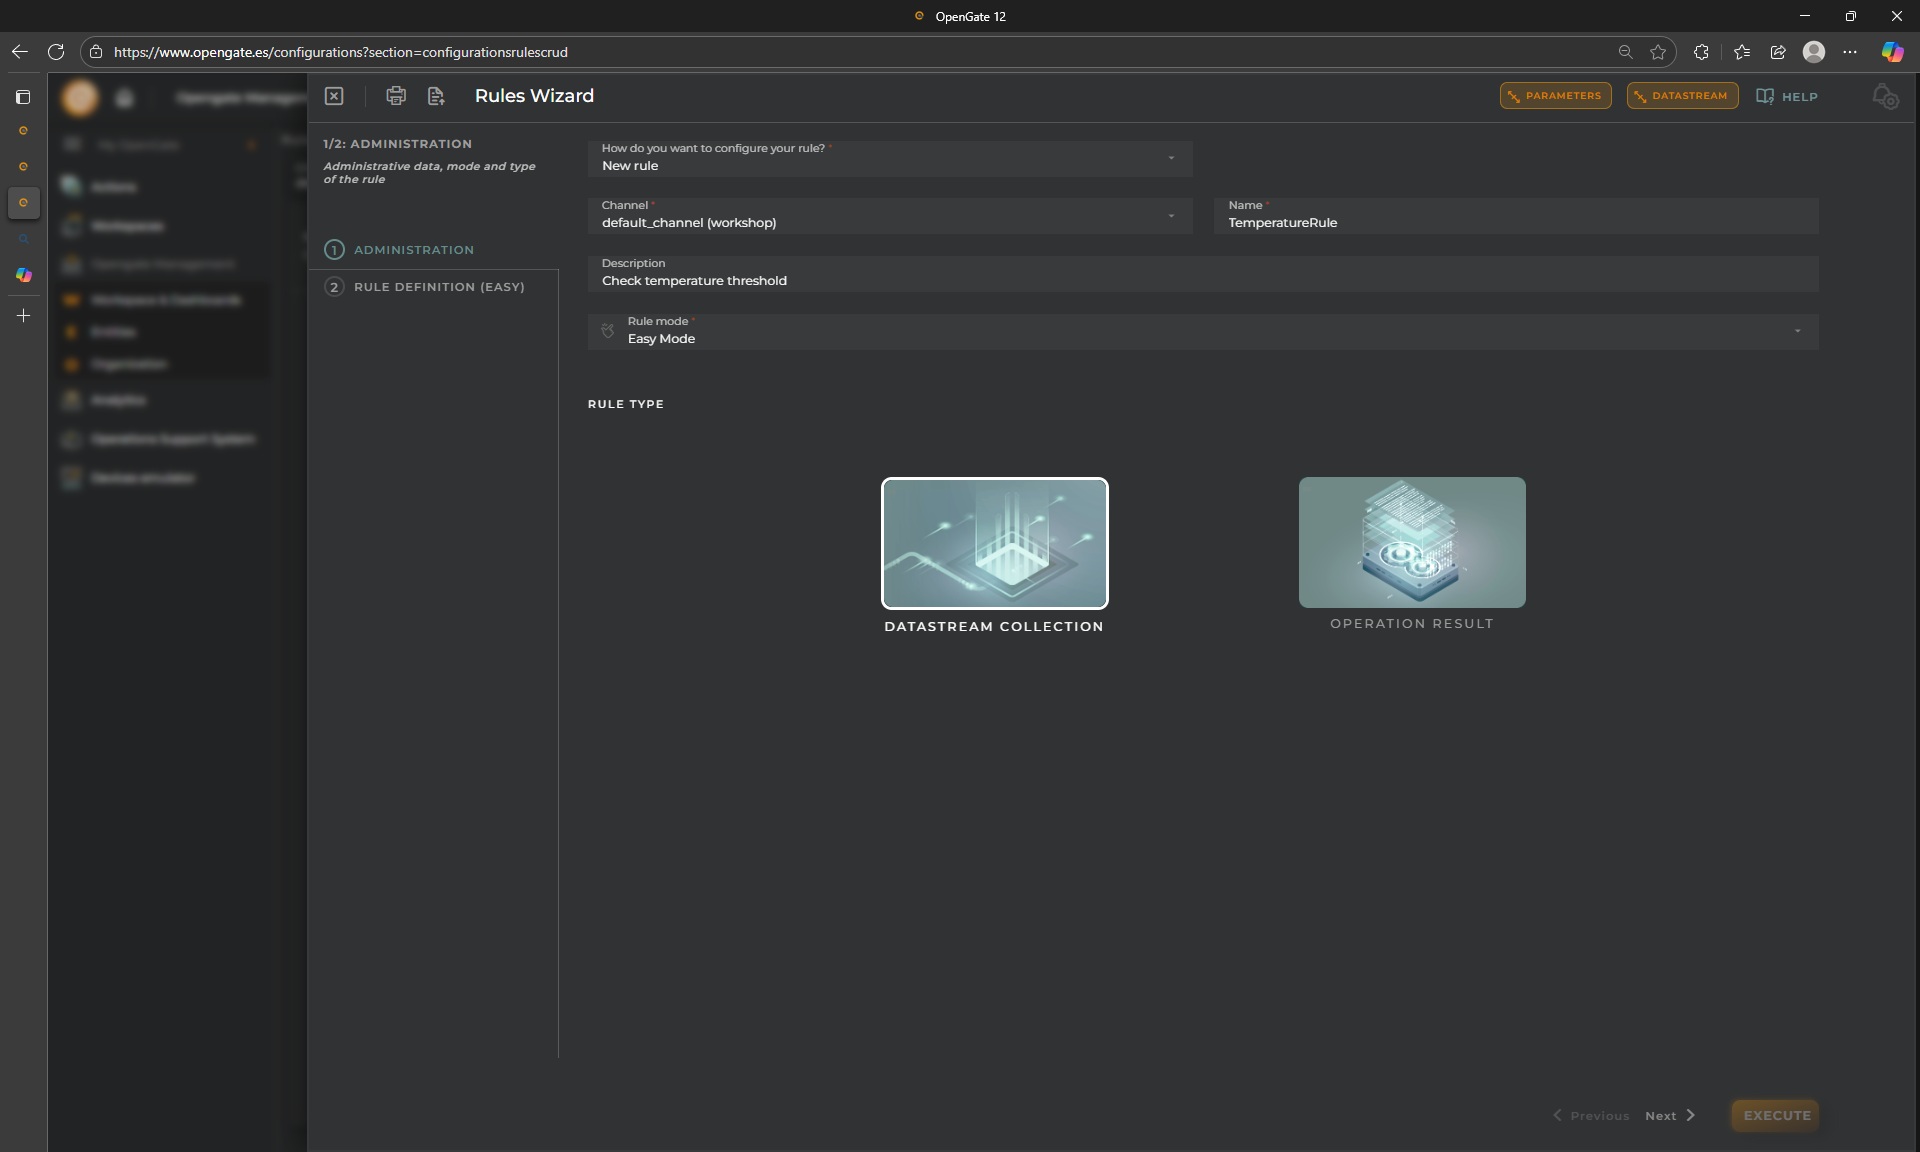
STEP 1: Rule Administration data
This is the first step of the Rules wizard. As the other wizards that we’ve achieve together, the first step allows you to set the basic info of the rule
- New Rule: We will choose “NEW RULE” but as with the Operations, OpenGate offers you the possibility to clone an existing rule or use one from the product catalog. Because is our first rule, lets configure a new one together. Choose
New Rule - Name: Use
TemperatureRule - Description: It is optional but use
Check temperature threshold - Rule mode: for this tutorial, we will use
Easy Mode - Rule Type: We could configure rules to check “Operation Result” when are collected into de platform after perform any OpenGate Operation. For this tutorial, we are configuring a “Datastream Colection” rule. We want to check the received events. Choose
DATASTREAM COLLECTION
STEP 2: Rule Definition
Here we are goint to define some things:
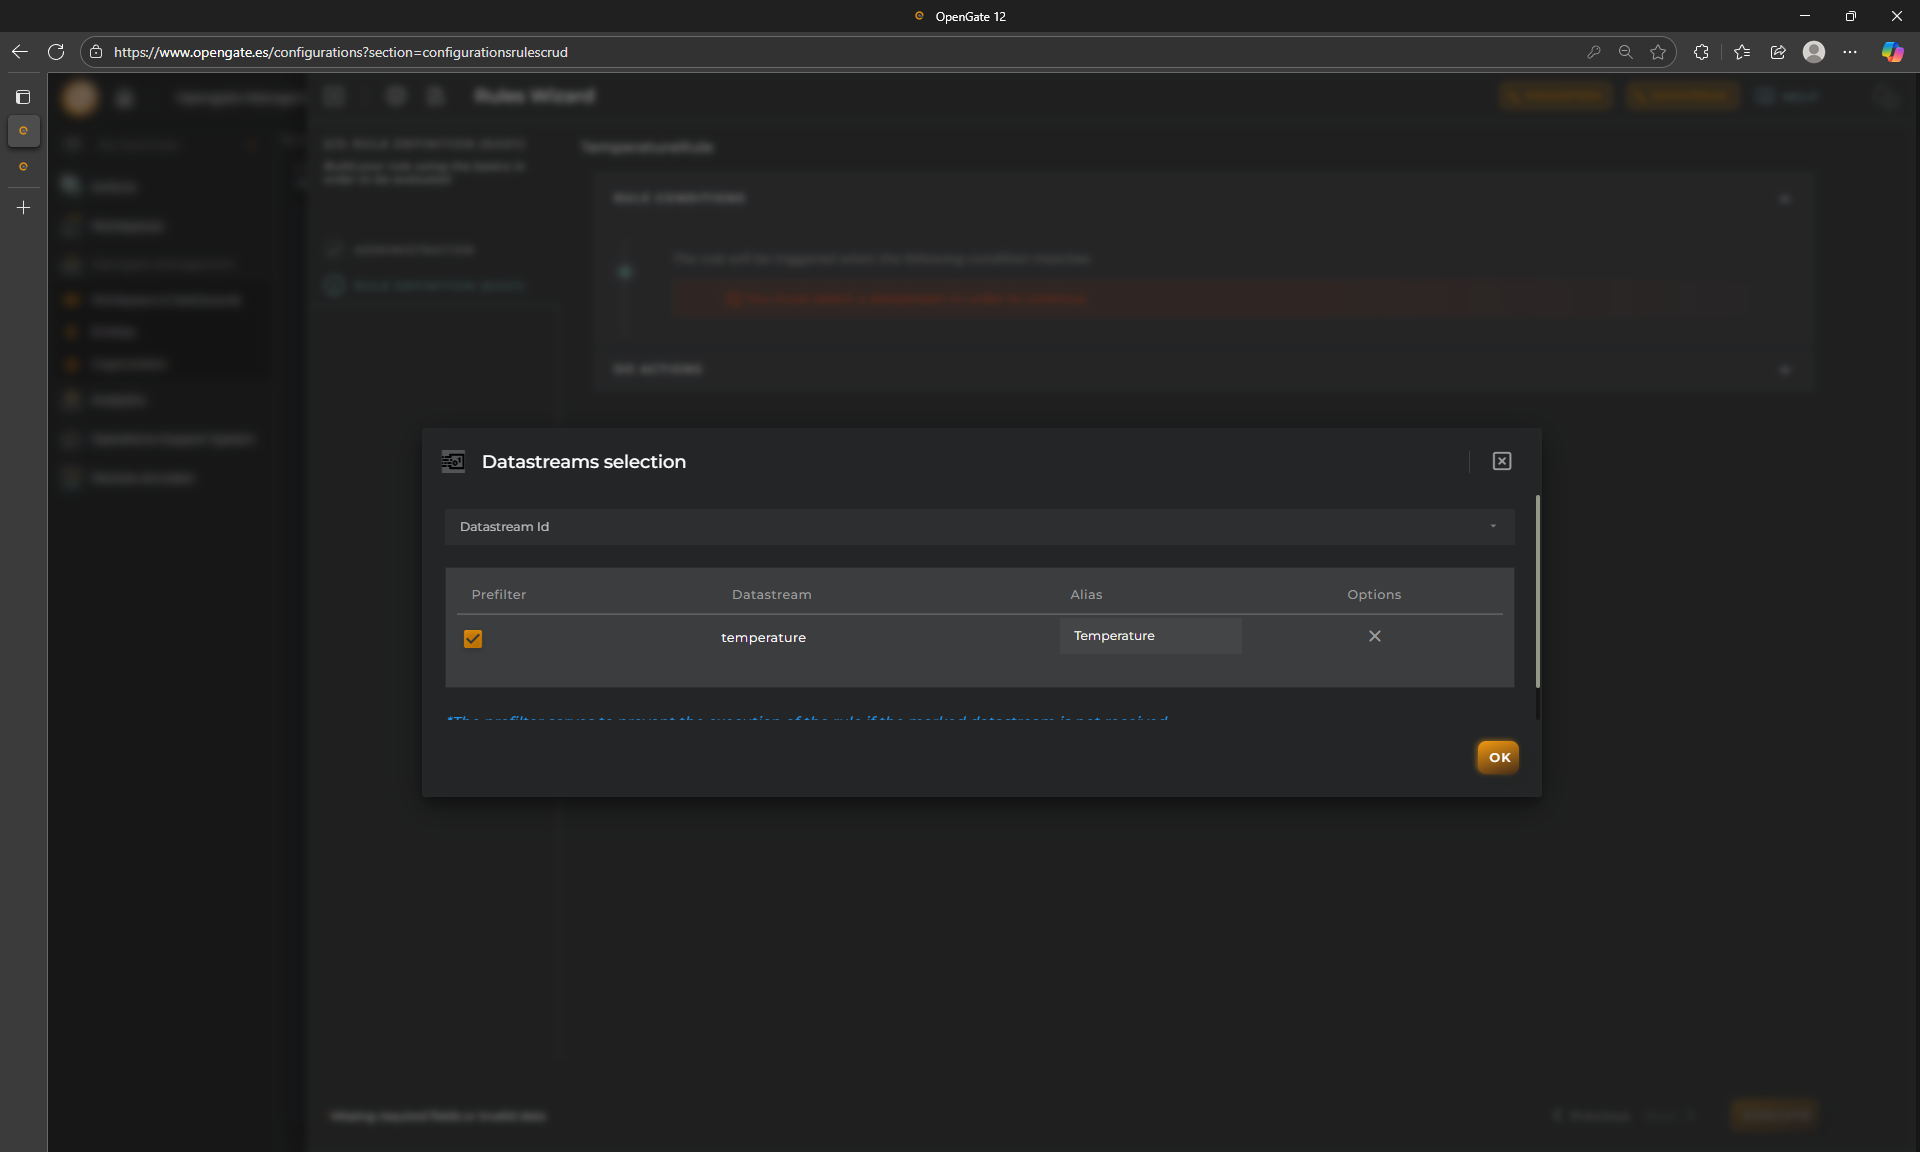
1. DATASTREAMS:
We need to define the datastreams that we use in the rule. Do you see the two buttons on the top part of the wizard?
We will use them to configure our rule basis

Choose temperature from our “warehose” datamodel and check the Prefilter option.
This rule only triggers when this datastream is received in any entity collection envent. This increase performance.
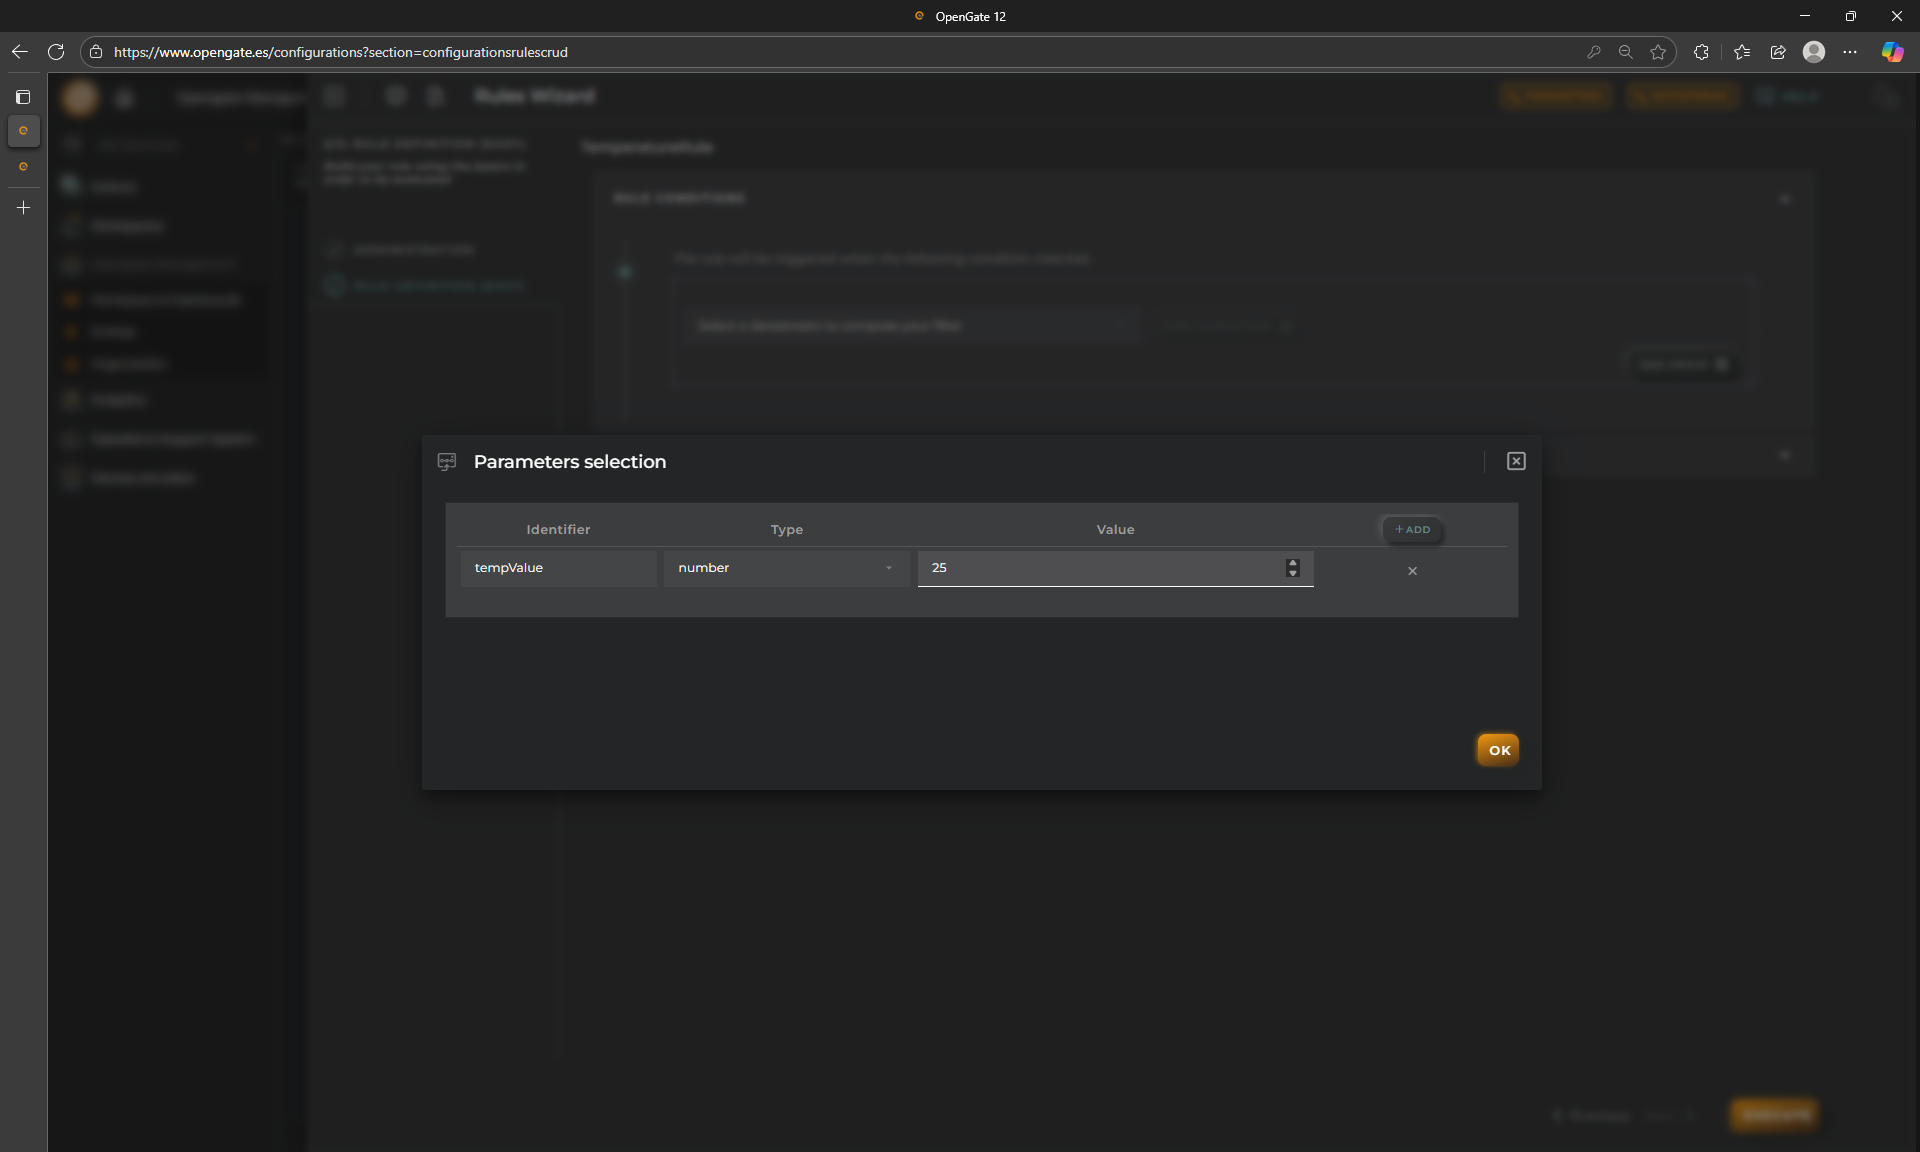
2. PARAMETERS:
This allows you to parametrize de values o the rule. If your rule is so complex, it is usefull to have all parameters together to check or edit them. This is not mandatory, but recommended.
3. RULE CONDITIONS: Let’s configure our easy rule. As you can see you have some conditional tools available to configure the logic for the trigger of the rule. This is the configuration of the condition to the rule results true, and so, execute the actions that we will cofngure later. For this demo, we want to triger an alarm when any room facility register a temperature greater or equals 25ºC. To accomplish this, we need to do the following:
- Add a condition for
resource.Typewith the operatoreqto asset. This means that we only generate an alarm when the asset receive the value. - Add another condition with our datastream temperature from “warehouse” datamodel, and choose the opreator
gteand then, choose our parameter. - Ensure that the GROUP condition is
AND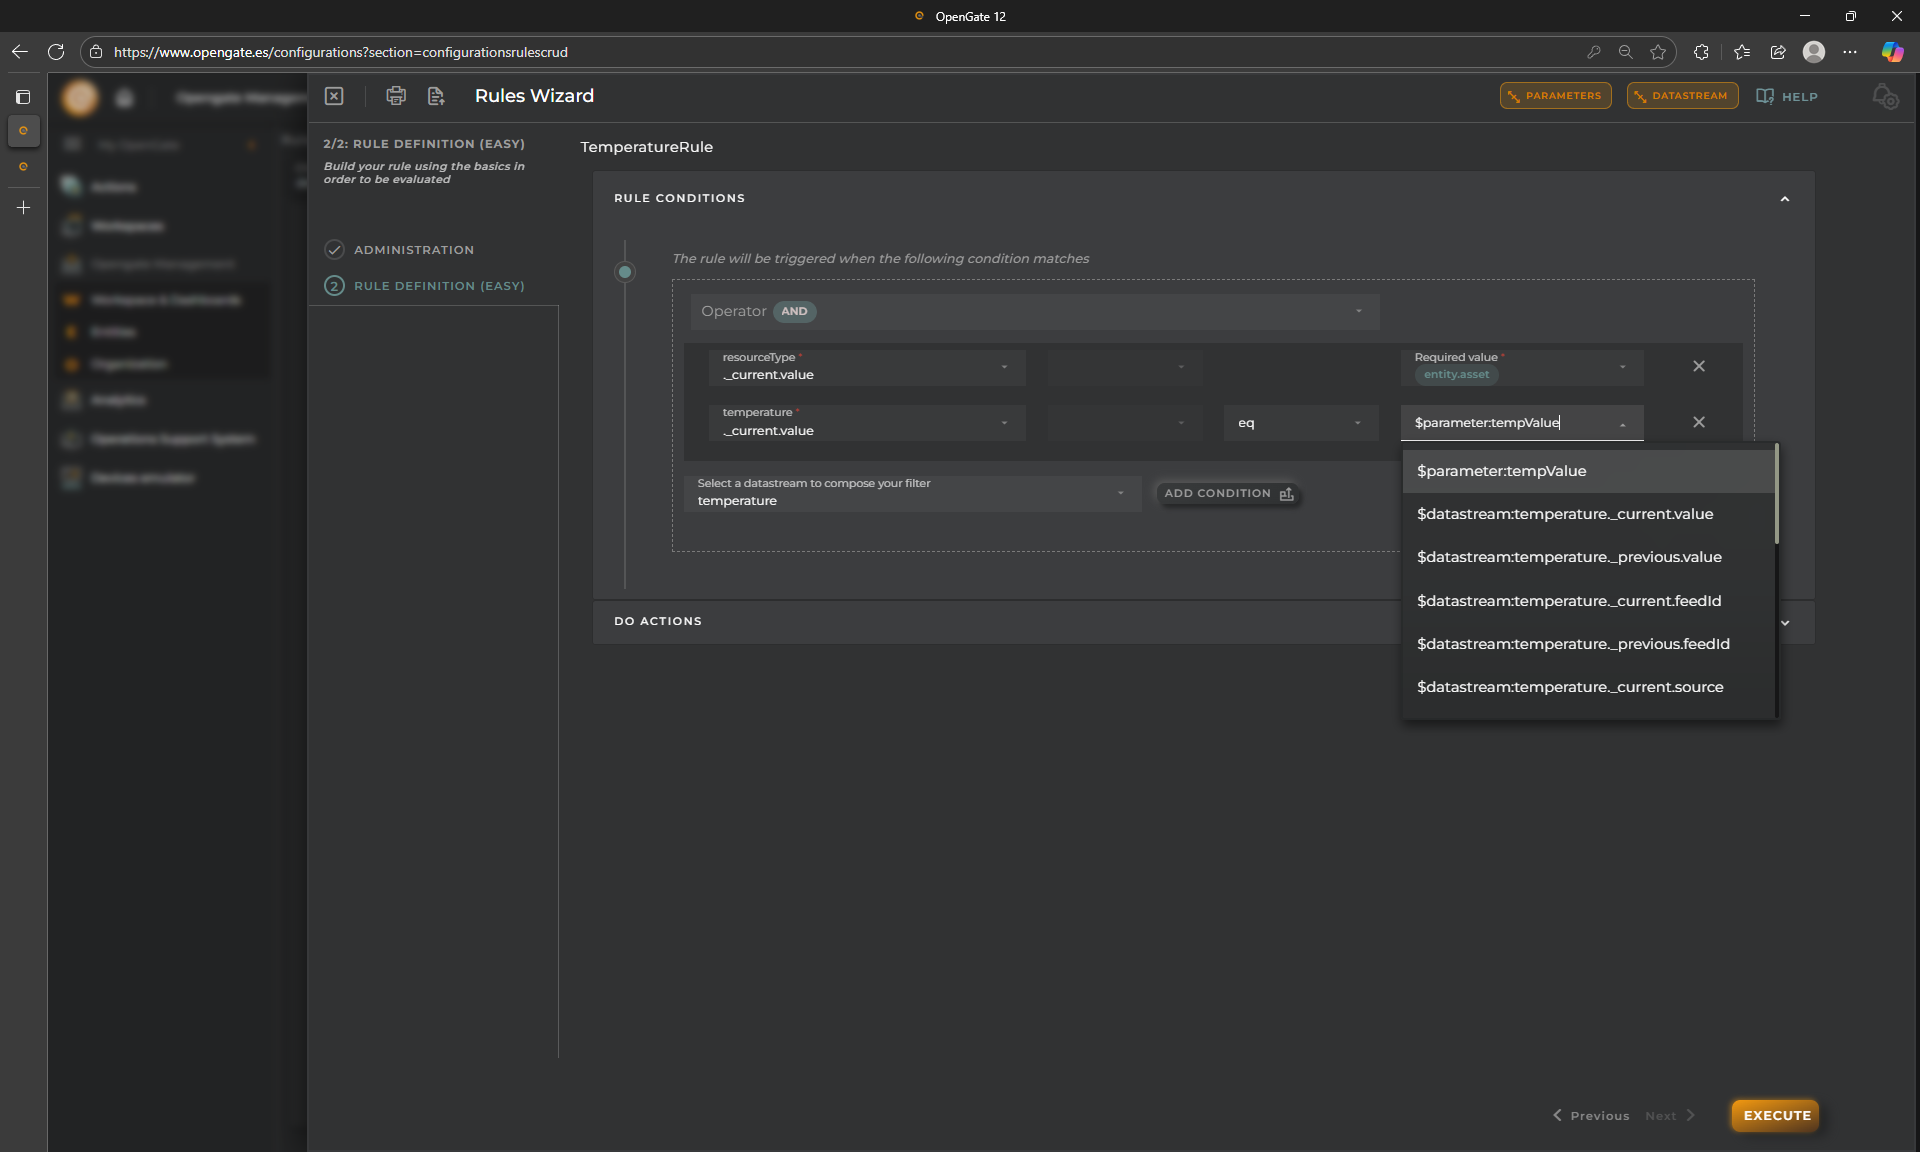
4. DO ACTIONS:
Now we will decide what the rule must do when the condition occurs.
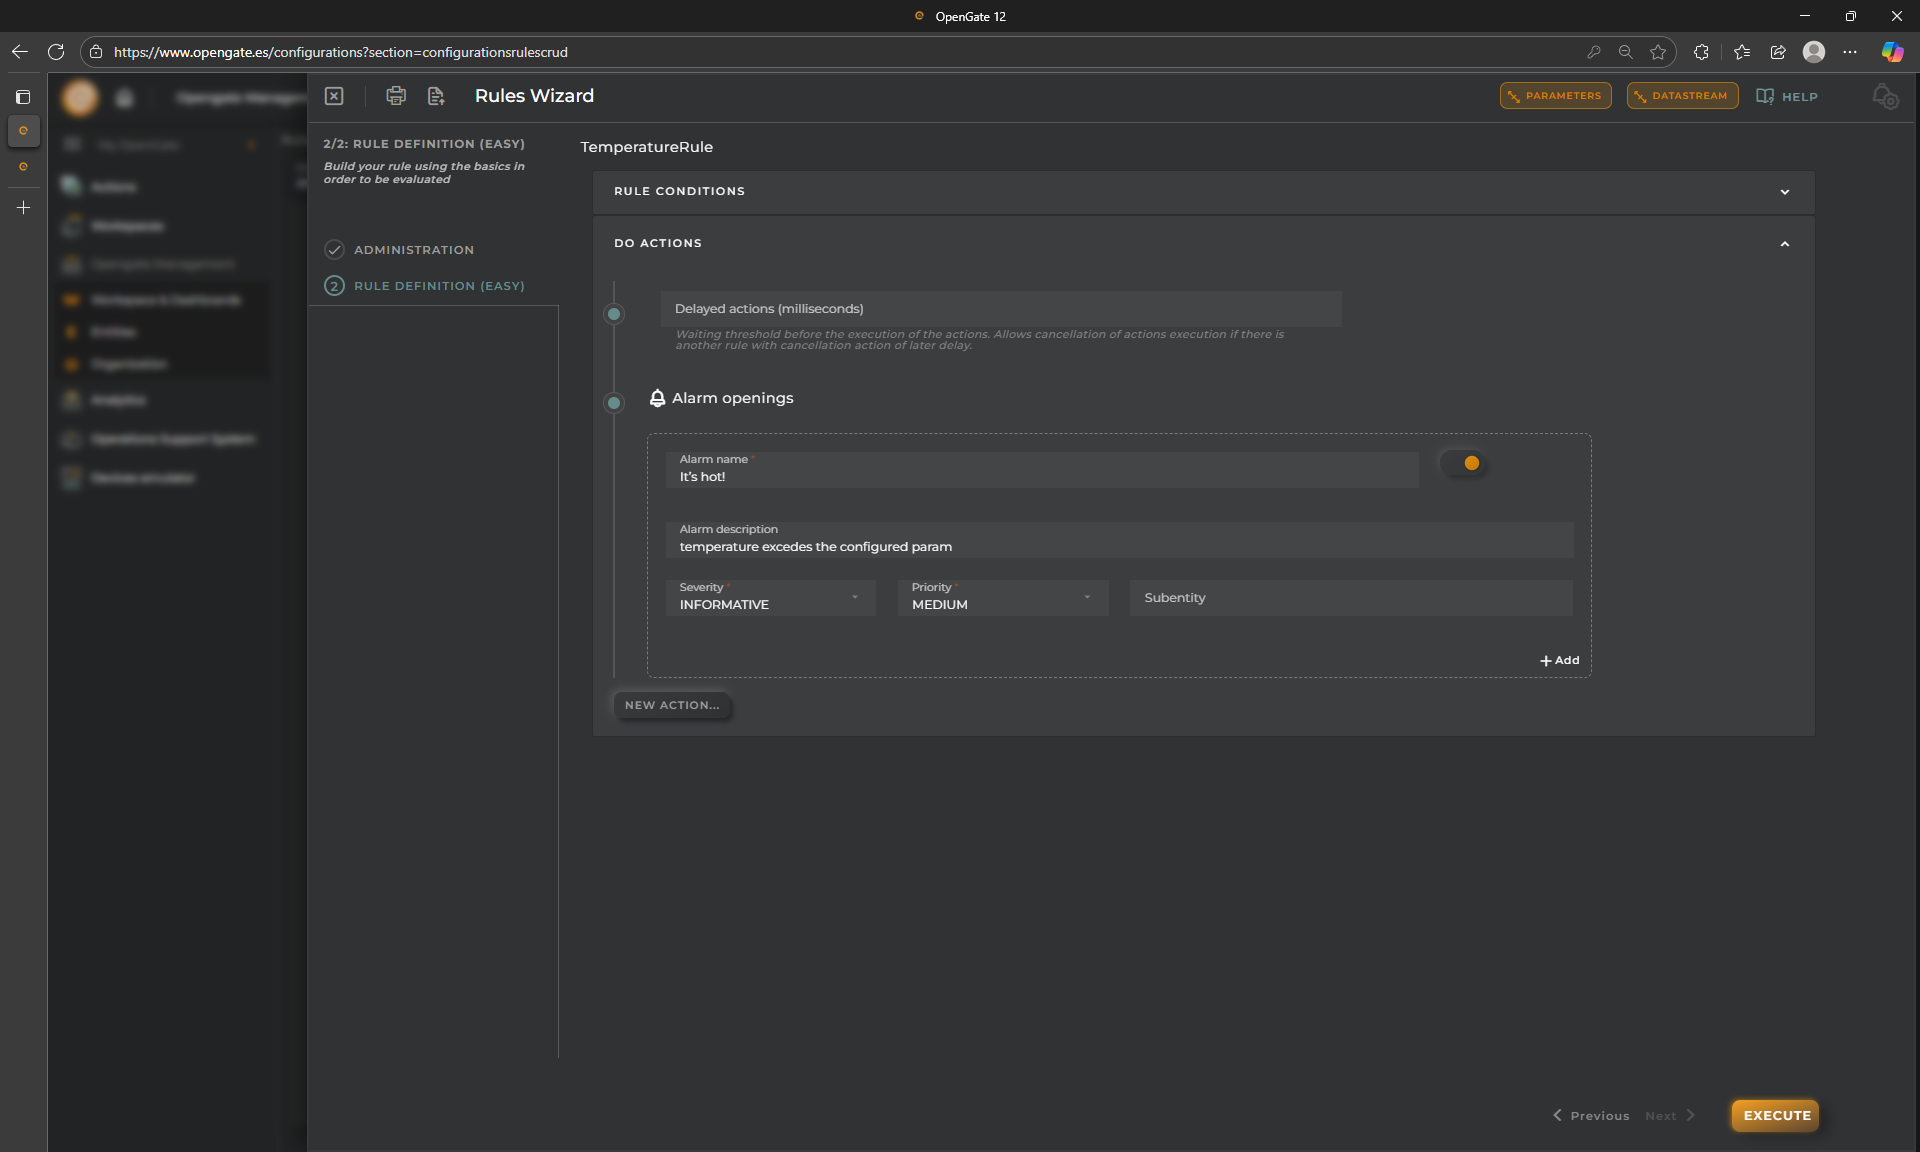
So let’s indicate tha we want to OPEN ALARM by clicking on “NEW ACTION”. Then configure the following:
- Alarm name:
It’s hot! - Alarm Description:
temperature excedes the configured param - Severity:
INFORMATIVE - Priority:
MEDIUM - Ensures that the check is activated, if not, this action will never execute.
5. Save your changes
Click on “EXECUTE” to activate the rule
👏 Congratulations, you create your first rule!!
🧪 Testing the Rule
So easy right? Let’s verify that the rule behaves as expected.
-
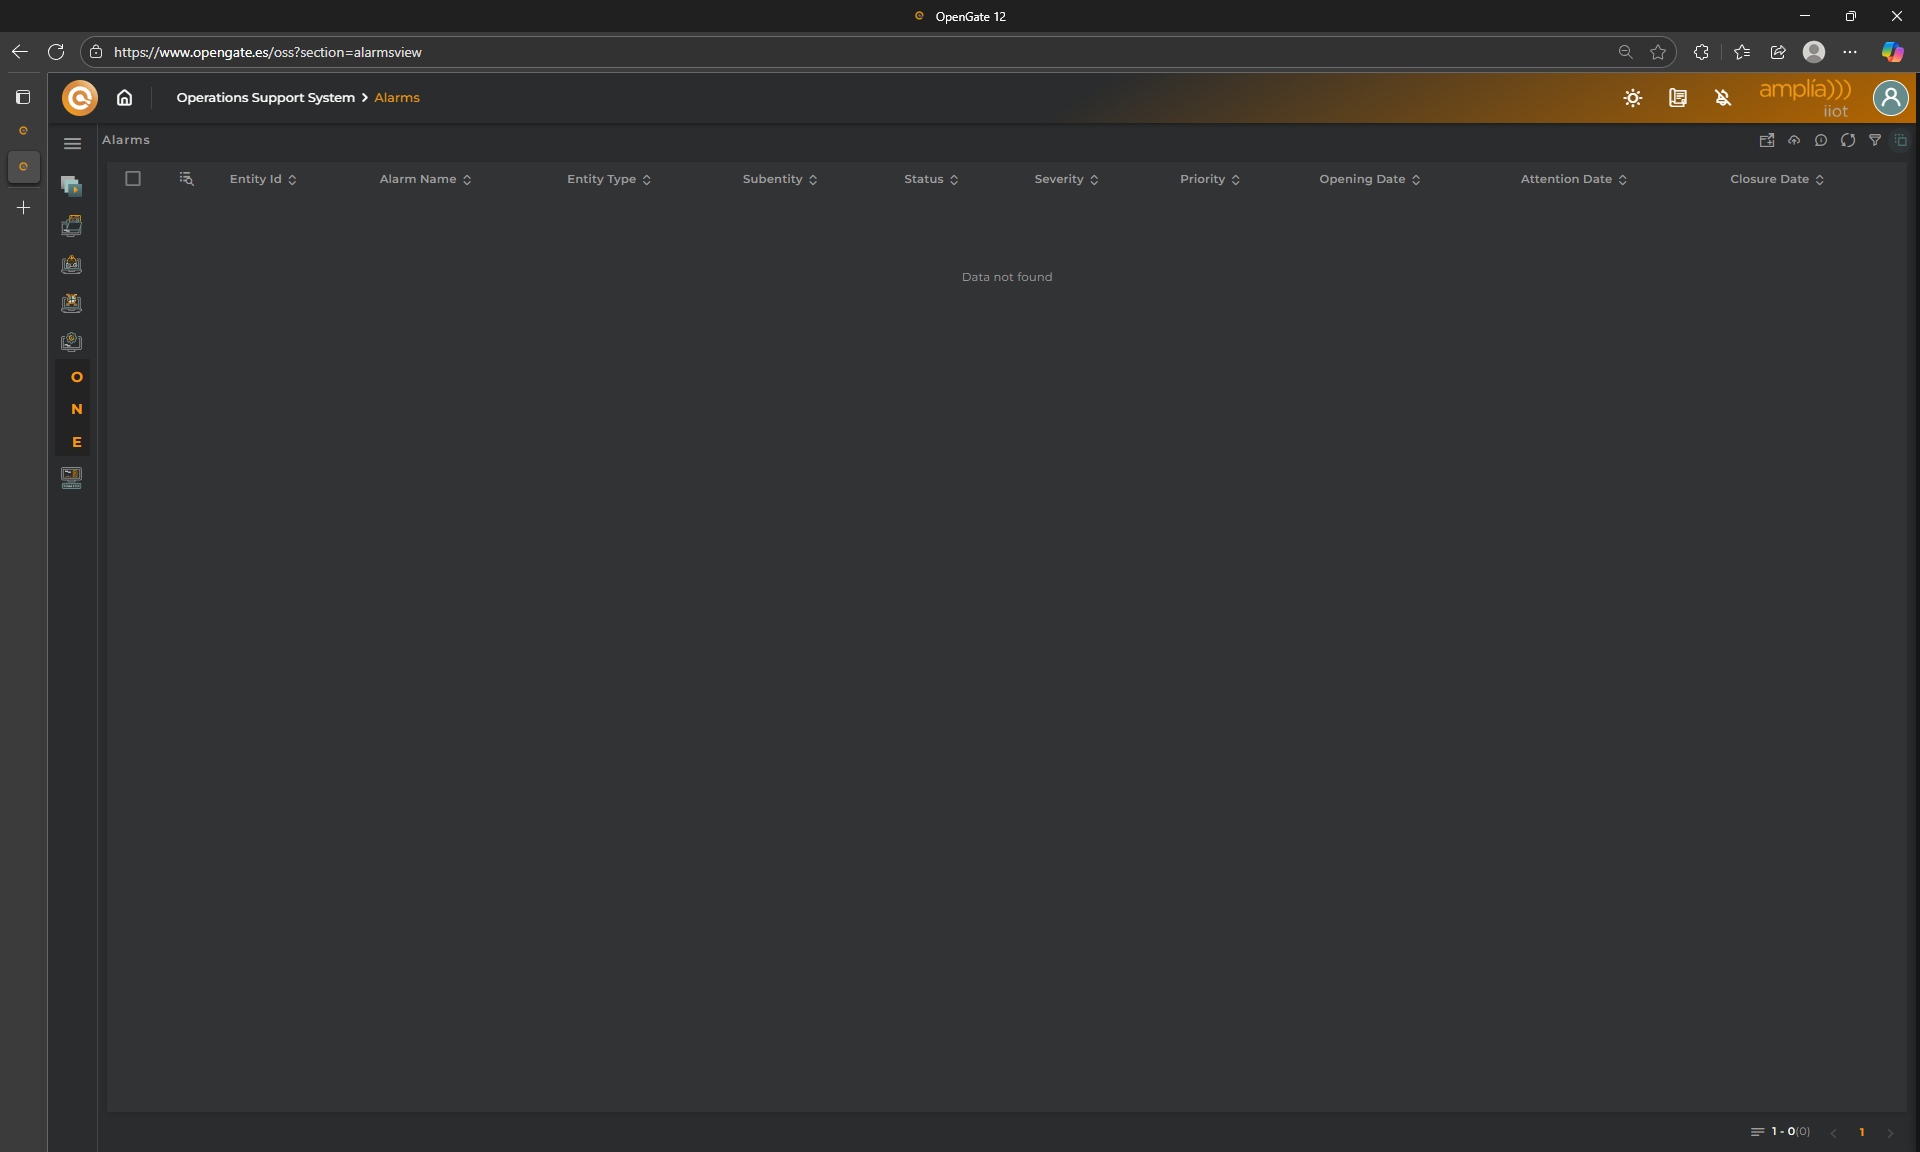
Go to the “alarms list” As always, you have a predefined solution to check your triggered alarms, but you can create your own dasboards. Let’s try the predefined “Alarms List”. Just go to “Operatons Support System > Alarms”, and open it in a new window
-
Send a normal value Use the OpenGate Device Emulator to send a
21value fortemperaturedatastream, for the device[YourPrefix]-stemp-02, you know how. Return to the Alarms List. Nothing happens, why? because we are under our threshold -
Now enter a value above our threshold Use again the “Opengate Device Emulator” to collect, this time, a
27value Return to the Alarms List and check what happens now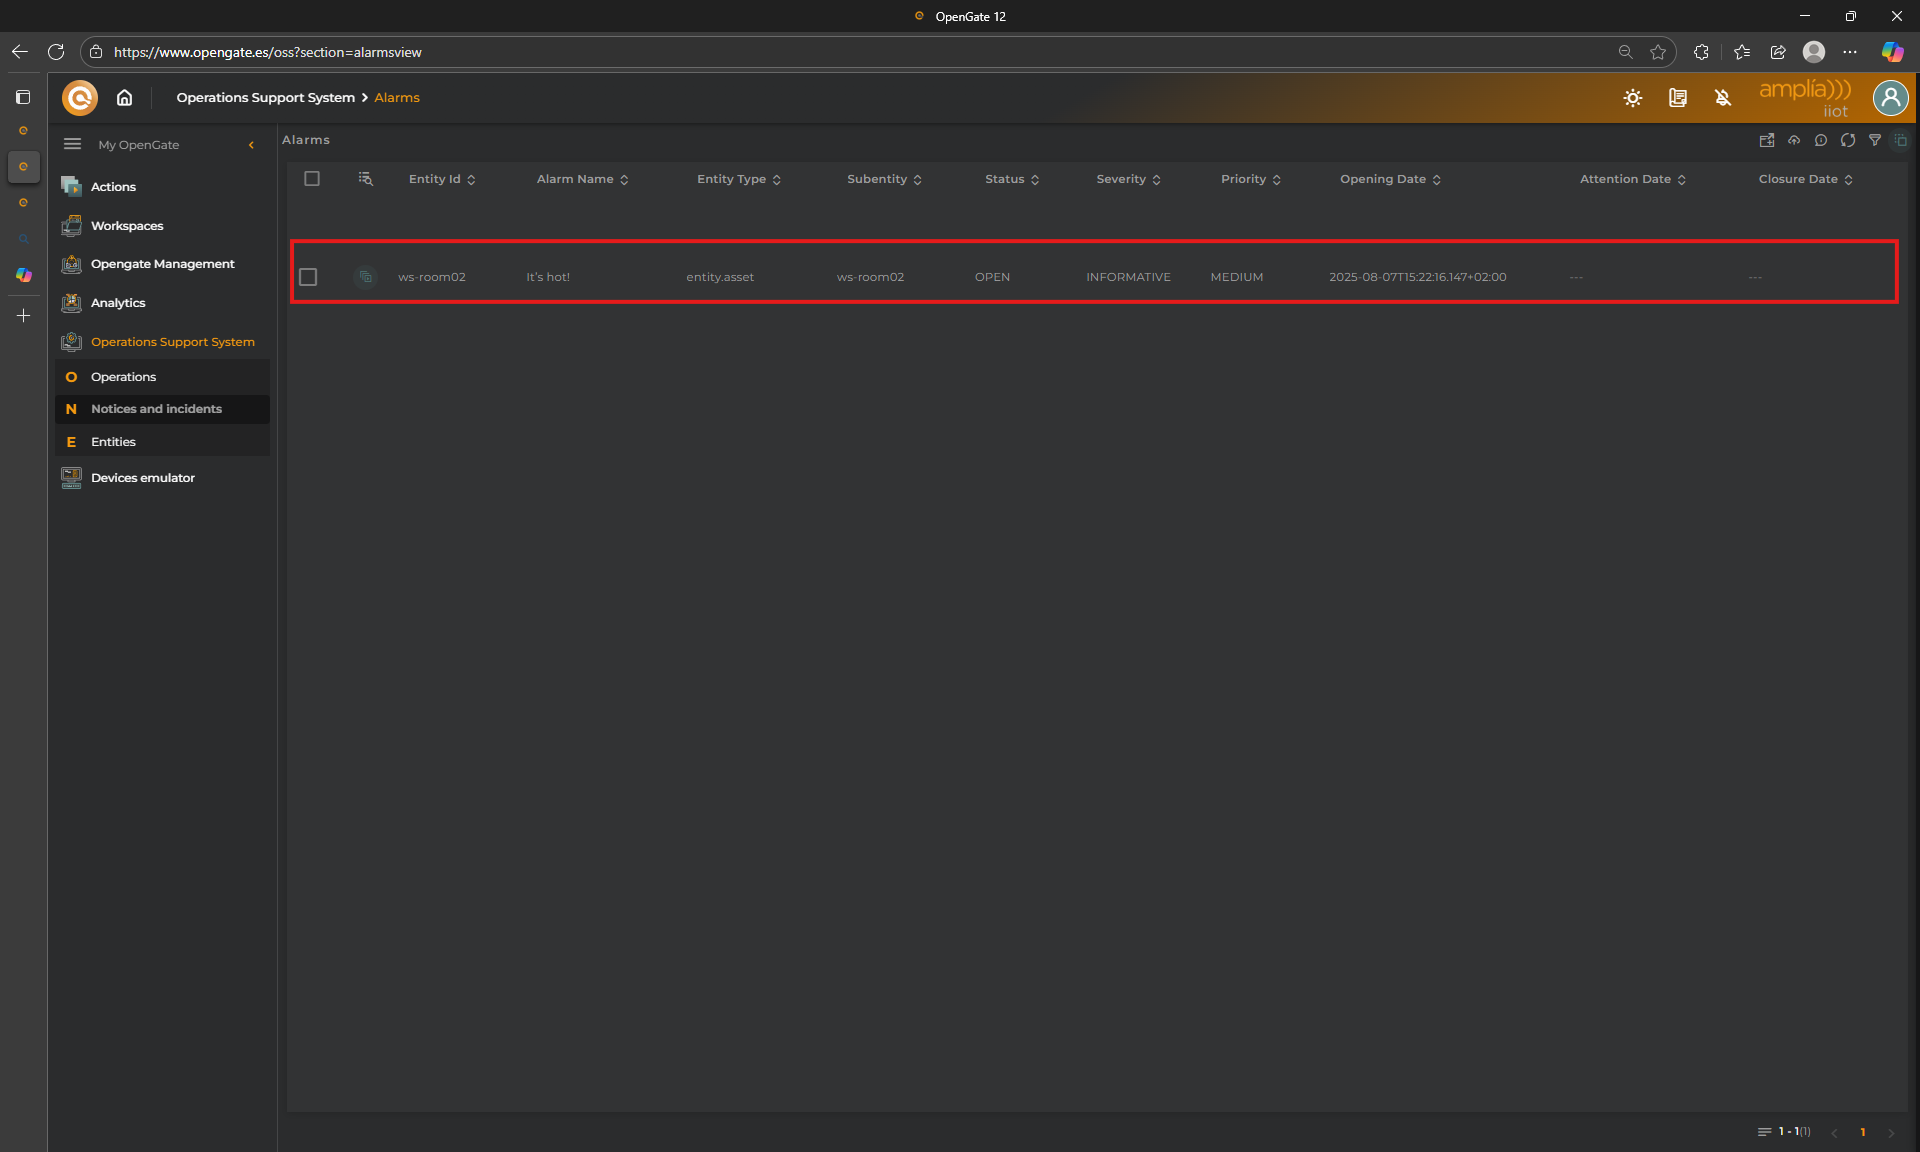
🚨 As you can see a new alarm appears.
This alarm is triggered because when you collected the 27 value for temperature, this value is populated to the asset and is above the alarm configured threshold.
🚨 Managing Alarms
Trigger alarms to aumomatically detect what is happening on your solution is great but if something is detected is for you to do something, right? Now we understand how alarms works and how are generated, let’s explore the available options using the alarm we just triggered.
From the alarms list page, each alarm has its own menu to operate with the alarm:
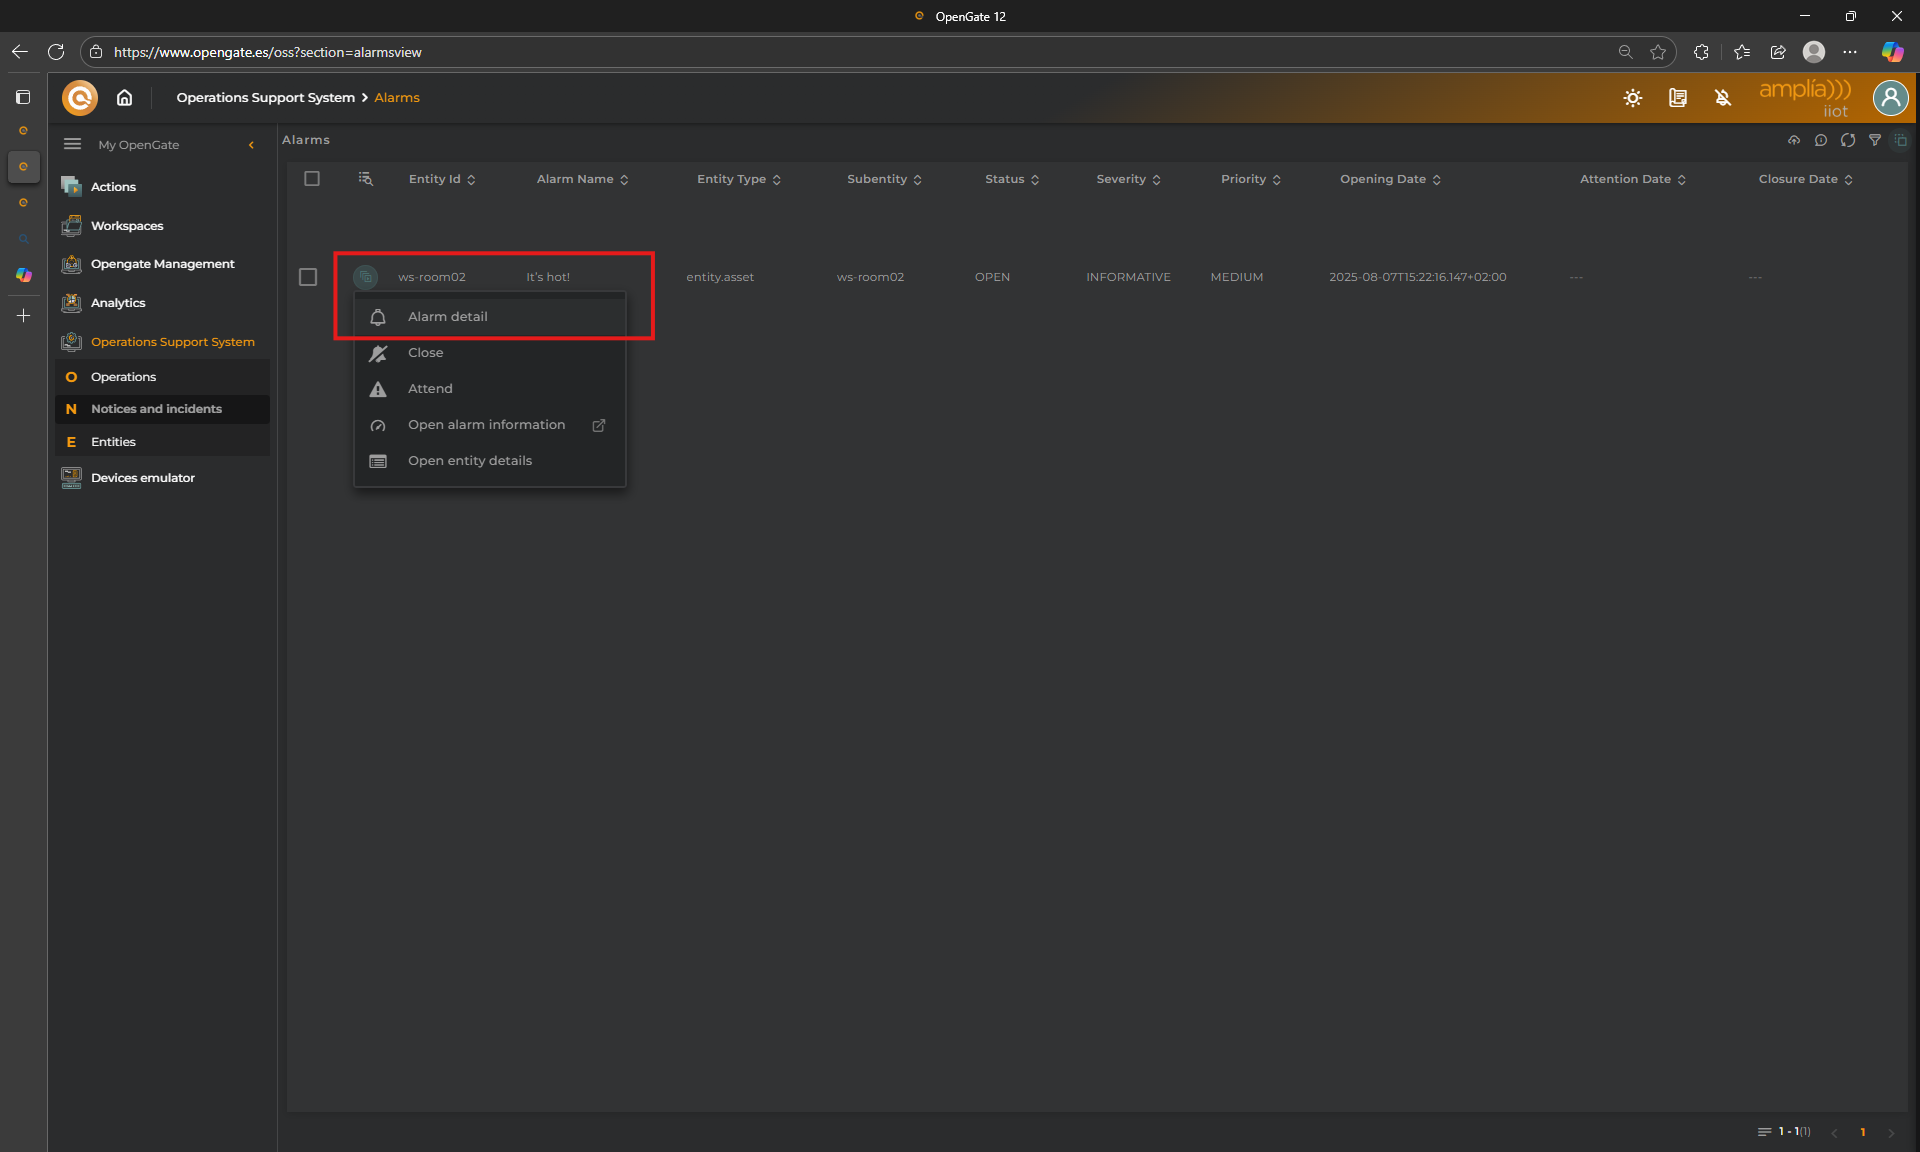
Review the alarm details
Click on the alarm menu, then “Alarm detail”, to check all the alarm information
Here you can see all the history related with the alarm. The most relevant information is:
- Openning time: The timestampt when the alarm is triggered by the rules engine
- Status: The current status of the Alarm (OPEN or CLOSED)
- Clossure time: Timestampt if the status is CLOSED
- EntityID: The entityID that triggers the alarm
- Rule Name: The name of the rule that triggers the alarm
- Rule Description: The description of the rule. this ussually helps for better understanding
- Severity:
- Alarm timeline: This view show different actions (available also from the alarm menu if you look the previous image in detail)
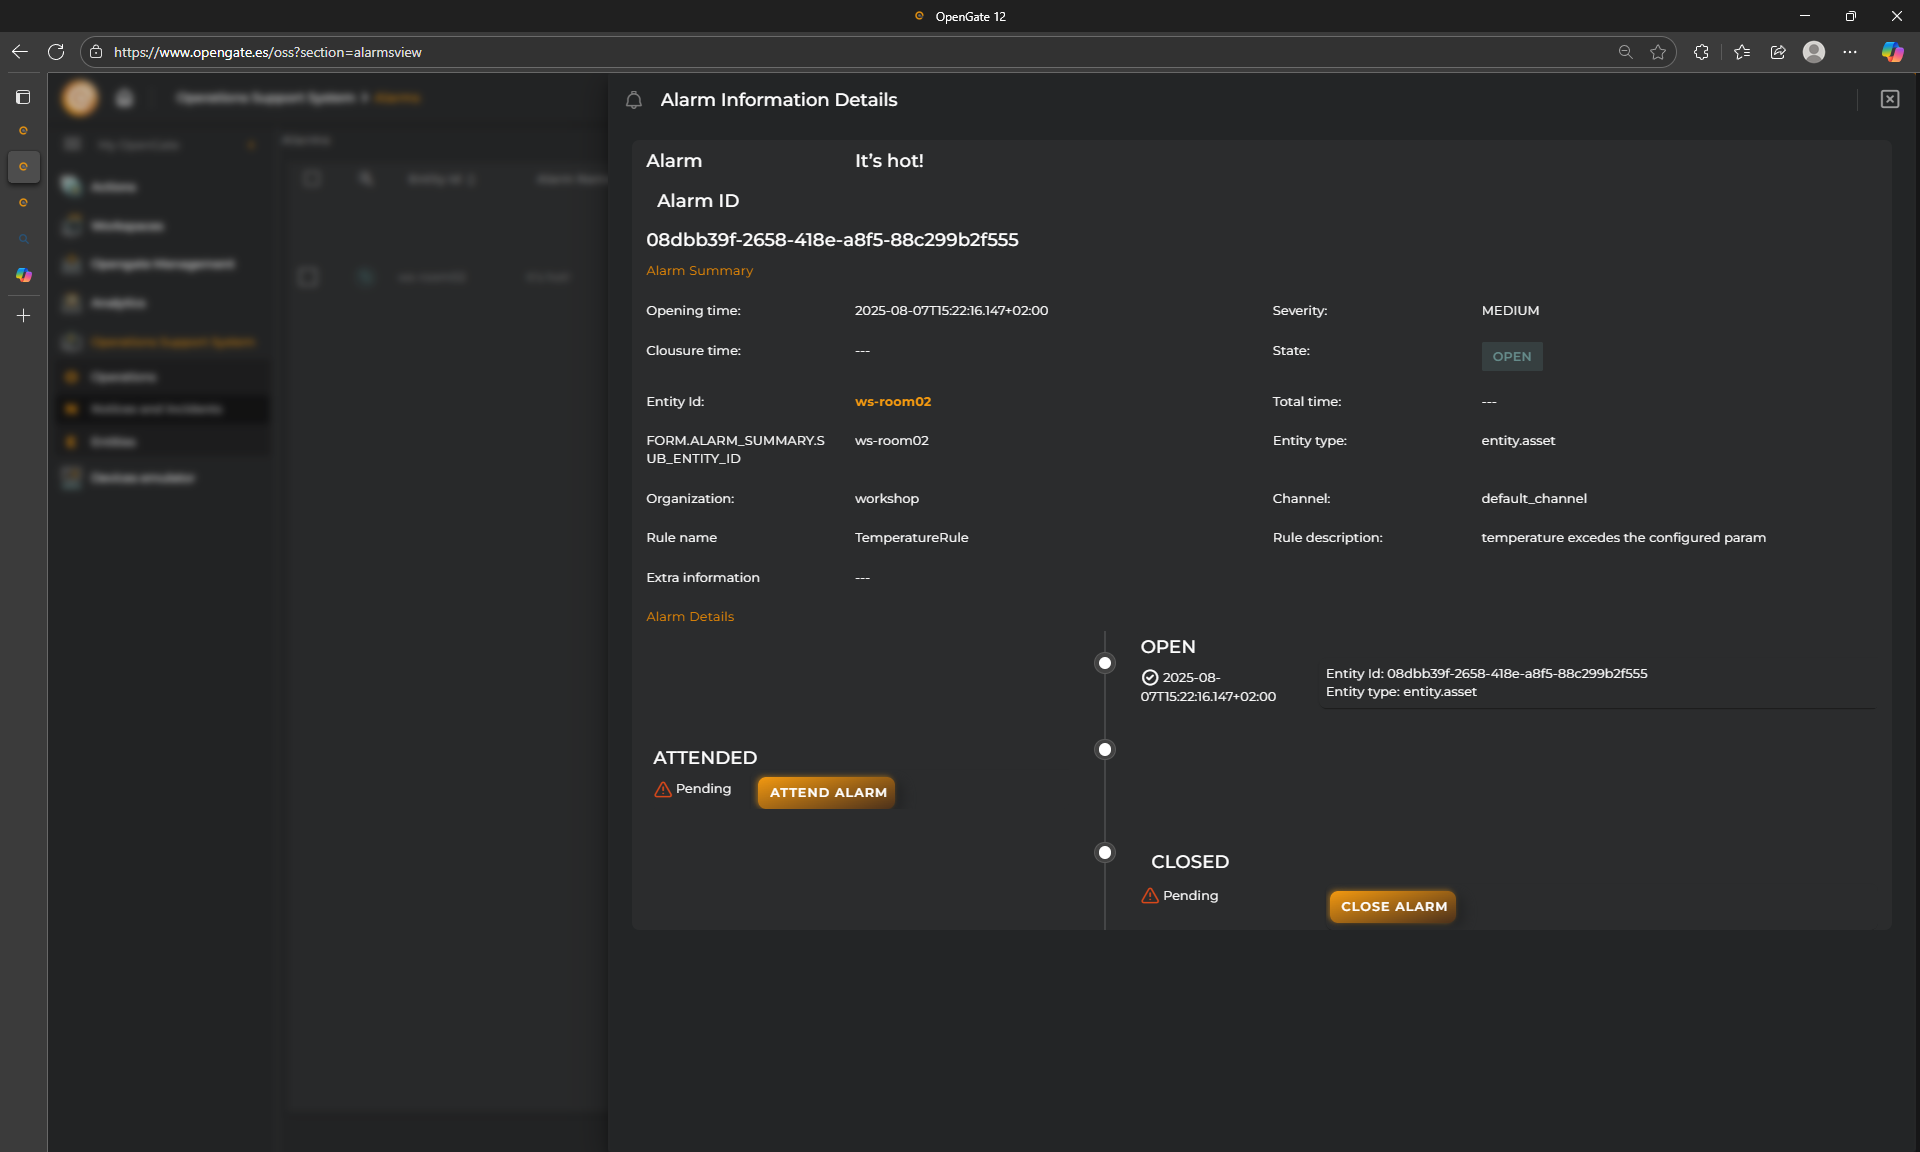
Attend the alarm
It is possible to attend the alarm to register some work by the users. By clicking on “Attend Alarm” option, you will be able to introduce some notes and so it keeps registered with the alarm information.
Close the alarm
You can close directly the alarm without attend it before. In any case, you can add some notes related with the alarm closure proccess.