4. Entity Provisioning
🌐 The OpenGate Entity Types
OpenGate models several types of entities to structure and manage your IoT ecosystem. These entities are:
- Asset: A digital representation of something that may have one or more related devices. For example: a parking slot, a warehouse room, a patient, a wind turbine, or a solar plant.
- Device: Typically a physical component such as a sensor or machine. Examples include temperature or motion sensors, industrial PLCs, water/gas meters, or generators.
- Subscription: The communication contract associated with a device. This could be a 5G or NB-IoT mobile data plan.
- Subscriber: The identifier that enables communication, usually a SIM or eSIM number.
- Ticket: A special entity used to log work within the platform, such as on-site deployments or repair processes.
- Organization: Represents a company or its sub-organizations.
- Channel: A logical grouping of devices, often organized by location, function, or asset group.
⚙️ Provision new Entities
To begin collecting data from your ecosystem, you’ll need to provision entities in OpenGate. There are three ways to do this:
IMPORTANT: In case you are using OpenGate Cloud, take into account that the IDs for the entities are unique for all the OpenGate instance. OpenGate cloud is an unique instance for all our public cloud customers, and because of the behaviour of some manufacturers and protocols, the device ID must be as is without modifications (MAC address, UUID for people, and so on). We need this ID to identificate the device correlation to your OpenGate account so may occur that if you use custom identifiers, those identifiers alread exists on OpenGate Cloud.
We always recommend that you should define a prefix to create virtual or simulated entities.
For this tutorial, define a [YourPrefix] to replace later the JSON provided with the examples.
🧙♂️ Using the Wizard
OpenGate includes a guided wizard to help you create new entities easily, step by step. Although the wizard is customizable, for this tutorial we’ll use the default version.
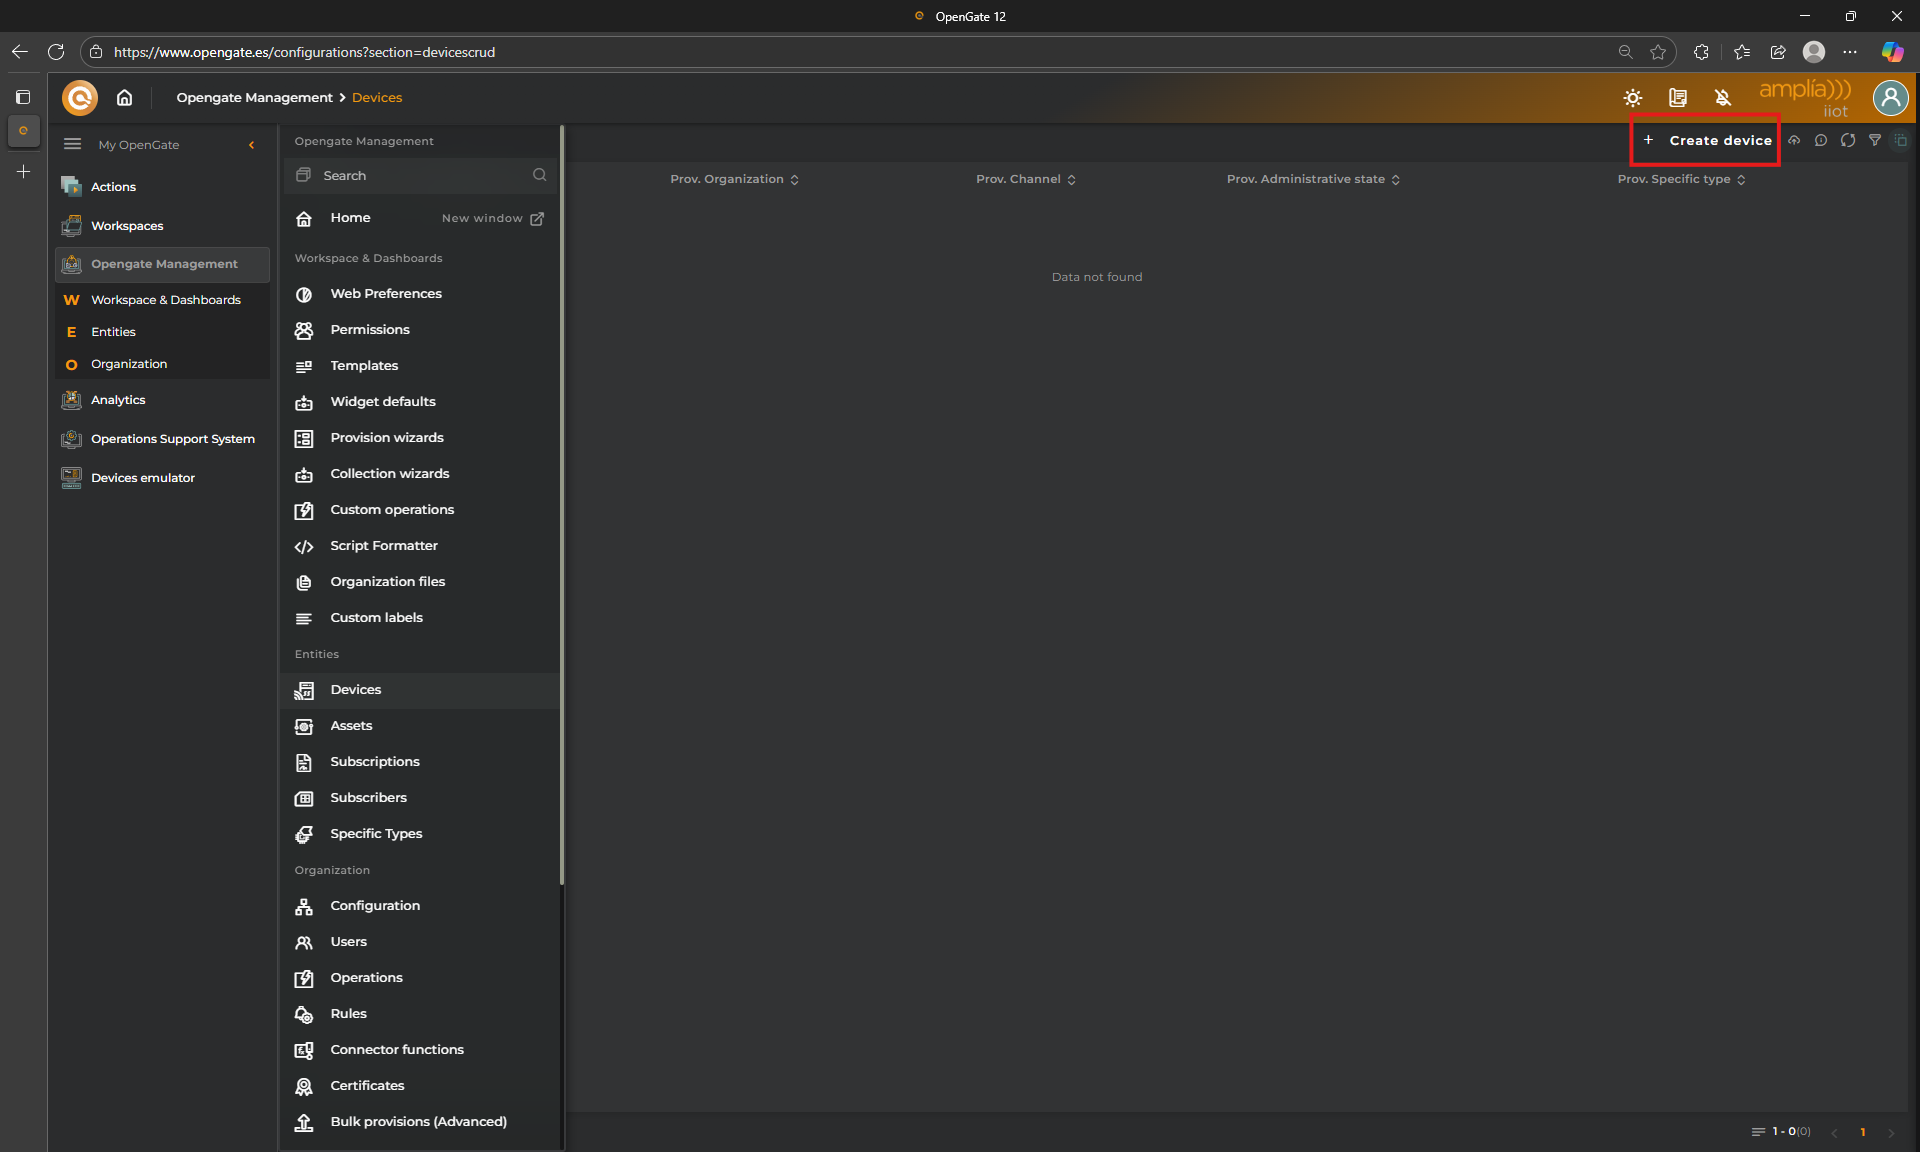
1. Open the wizard from the UI.
Go to “Opengate Management > Devices”, then click on “+ Create Device” and the wizard start
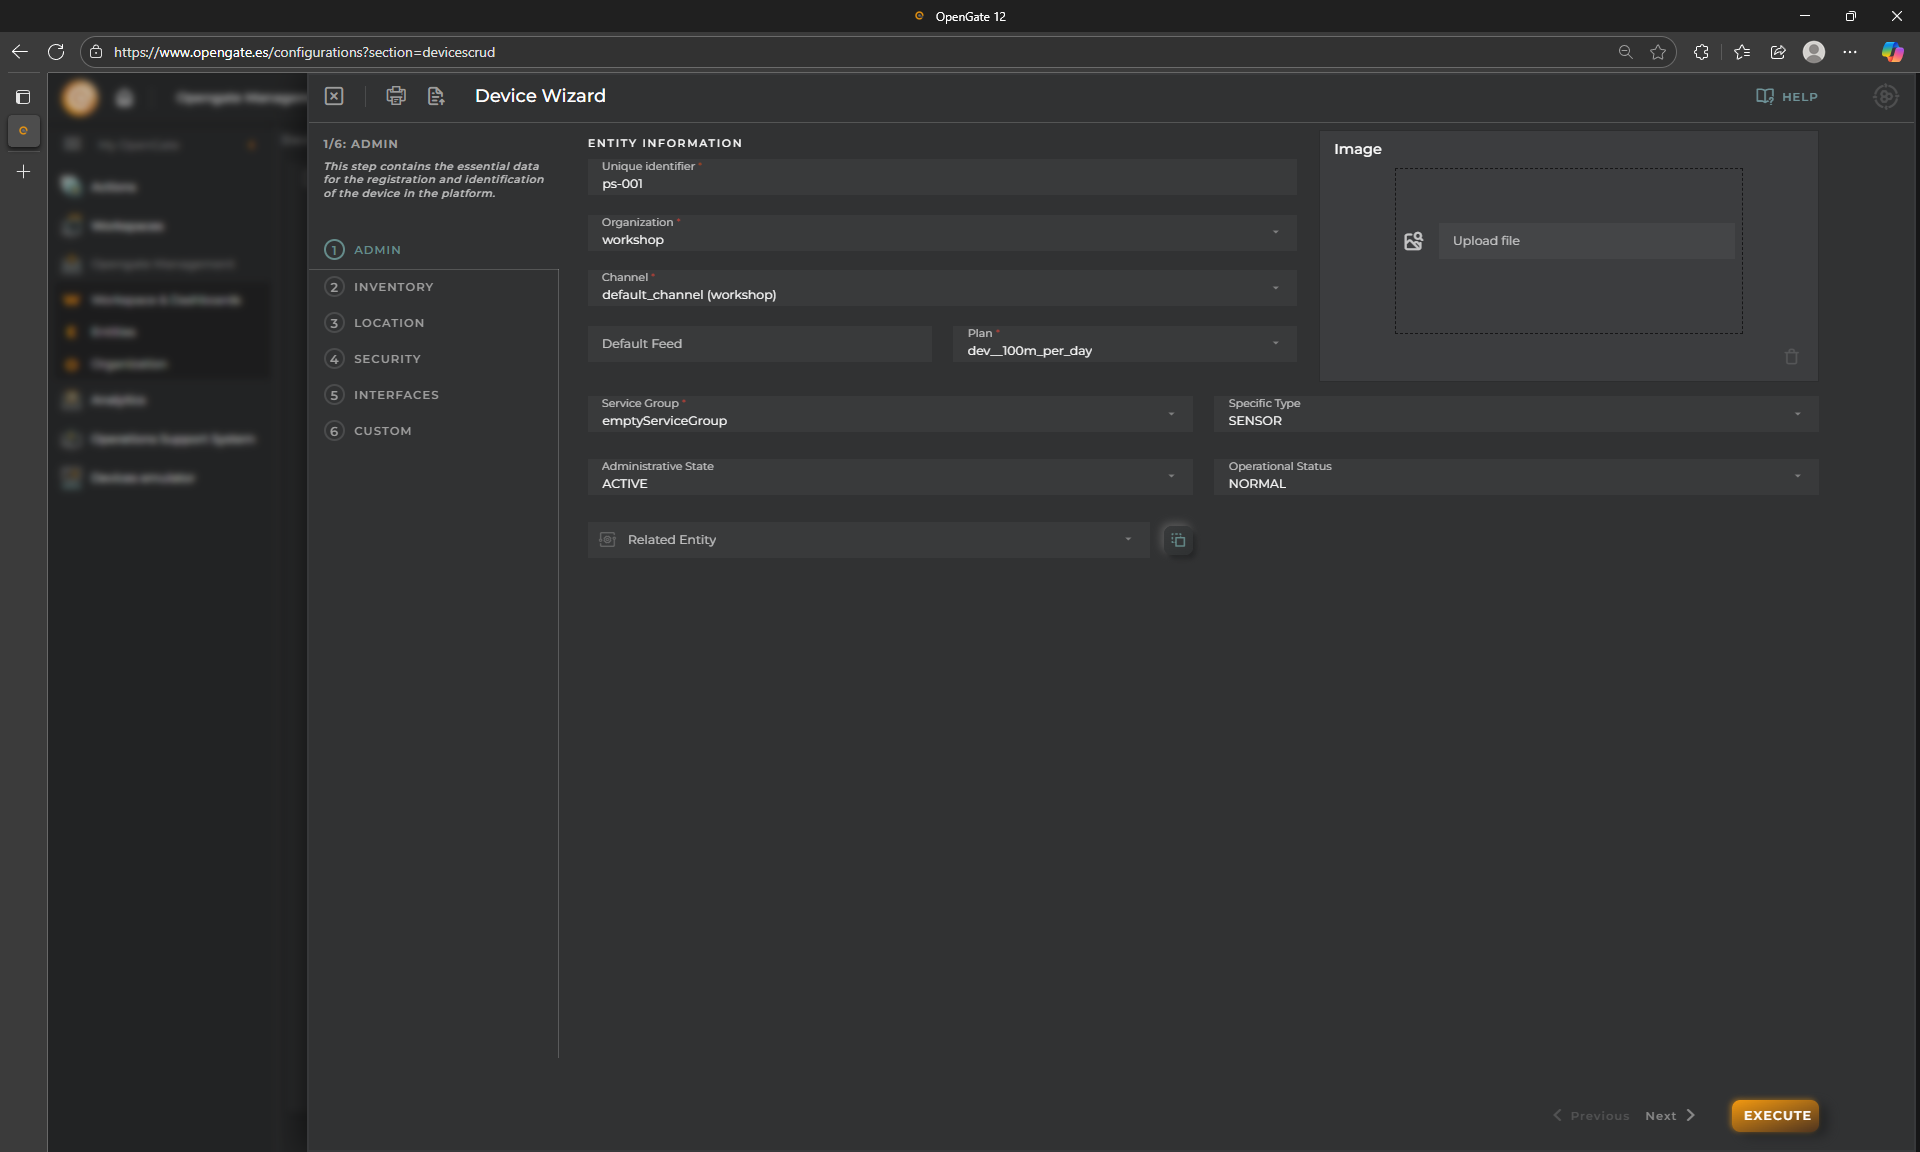
2. Fill the first step: Enter administrative information (name, type, organization, etc.).
As this tutorial pourpose, we will fill the most commonly used fields, that are:
- Unique Identifier: This is the unique ID of the device on the platform, use
[YourPrefix]-ps-001 - Organization: To what organization this entity belongs. We have not more in this tutorial, use
workshop - Channel: Group of devices, in this tutorial we just have
default_channel (workshop) - Plan and Service Group: We don’t go deeper in this tutorial for these fields but Plan indicates the traffic and data policy for this devices, and ServiceGroup, indicates the operations group of the entity. Use defaults
- Specific Type: As the name indicates, this allows you to set the specific type of device. This works like a label, and later we will see how to create filters based on this field. The options here are predefined but an Administrator user can customize them. Use
SENSOR - Administrative Status: This is the Administrative Status of the entity, use
ACTIVE - Operational Status: This is the operational Status of this entity, use
NORMAL
🎯NOTE: The next steps are optional, but for this tutorial we will show you the most relevant standard fields
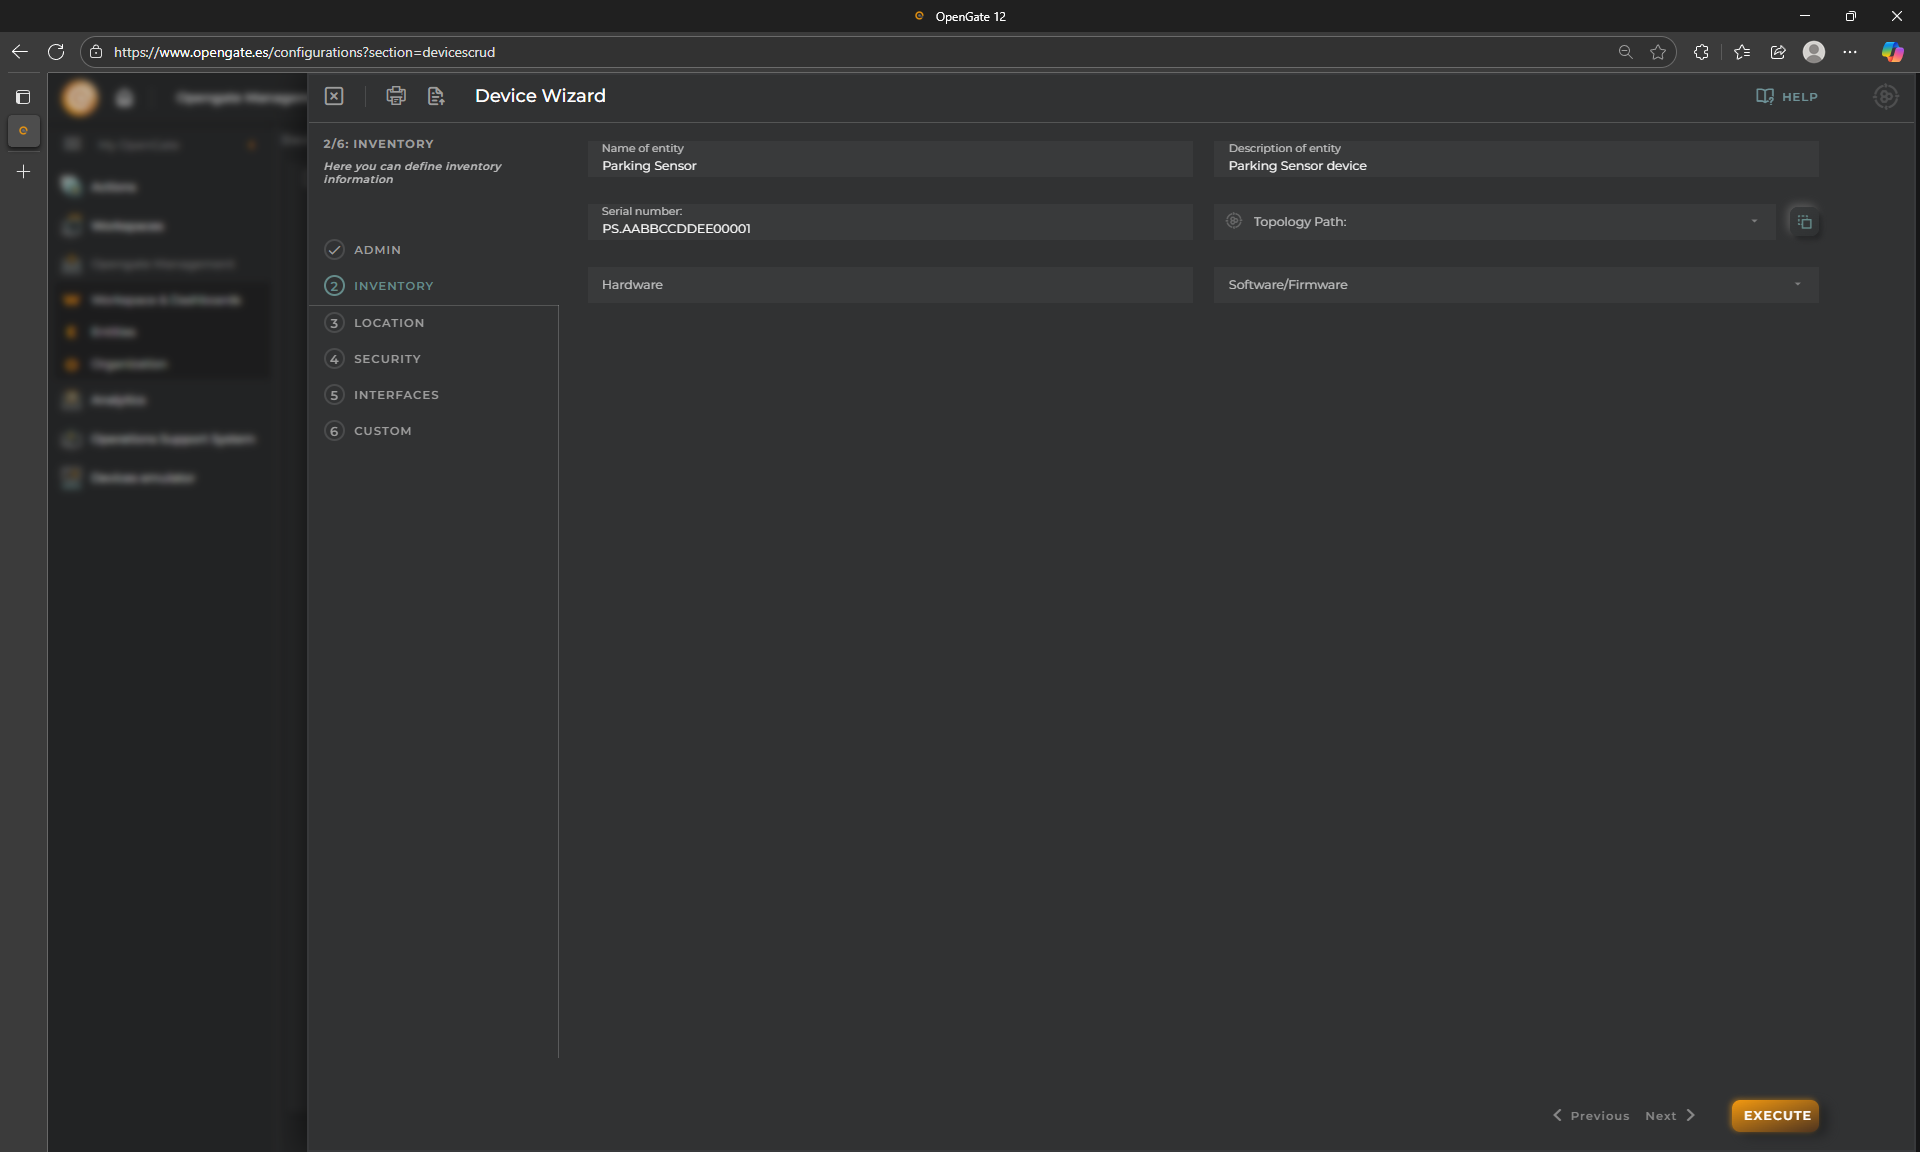
3. Step 2: Inventory
This step allows you to define other device info, lets fill the following:
- Name: This is the name of the entity, ussually this is a commonly used name in your solution. Use:
Parking Sensor 001 - Serial Number: This is the serial number, usually a device serial number is an unique number for the hardware itself. Use:
PS.AABBCCDDEE00001
This group of fields are not mandatory and we will not fill in this tutorial, but just for clarification the others fields are:
- Description: Obvious, a free text description for the entity just in case we need some notes.
- Topology Path: Some times there are devices that have not communication capabilities by itselves or that require another entity to play as gateway to send the information depending on the architecture requirements. This field allows you to provision the device that play this role for this entity. It is possible to choose one or create a new one from this same screen.
- Hardware and Software/Firmare: Are used to indicate the inventory information for the hardware and software/firmware version of the device. This information is provisioned by a user, and may differ from the information collected from the device.
After fill the fields that we need, you should see this:
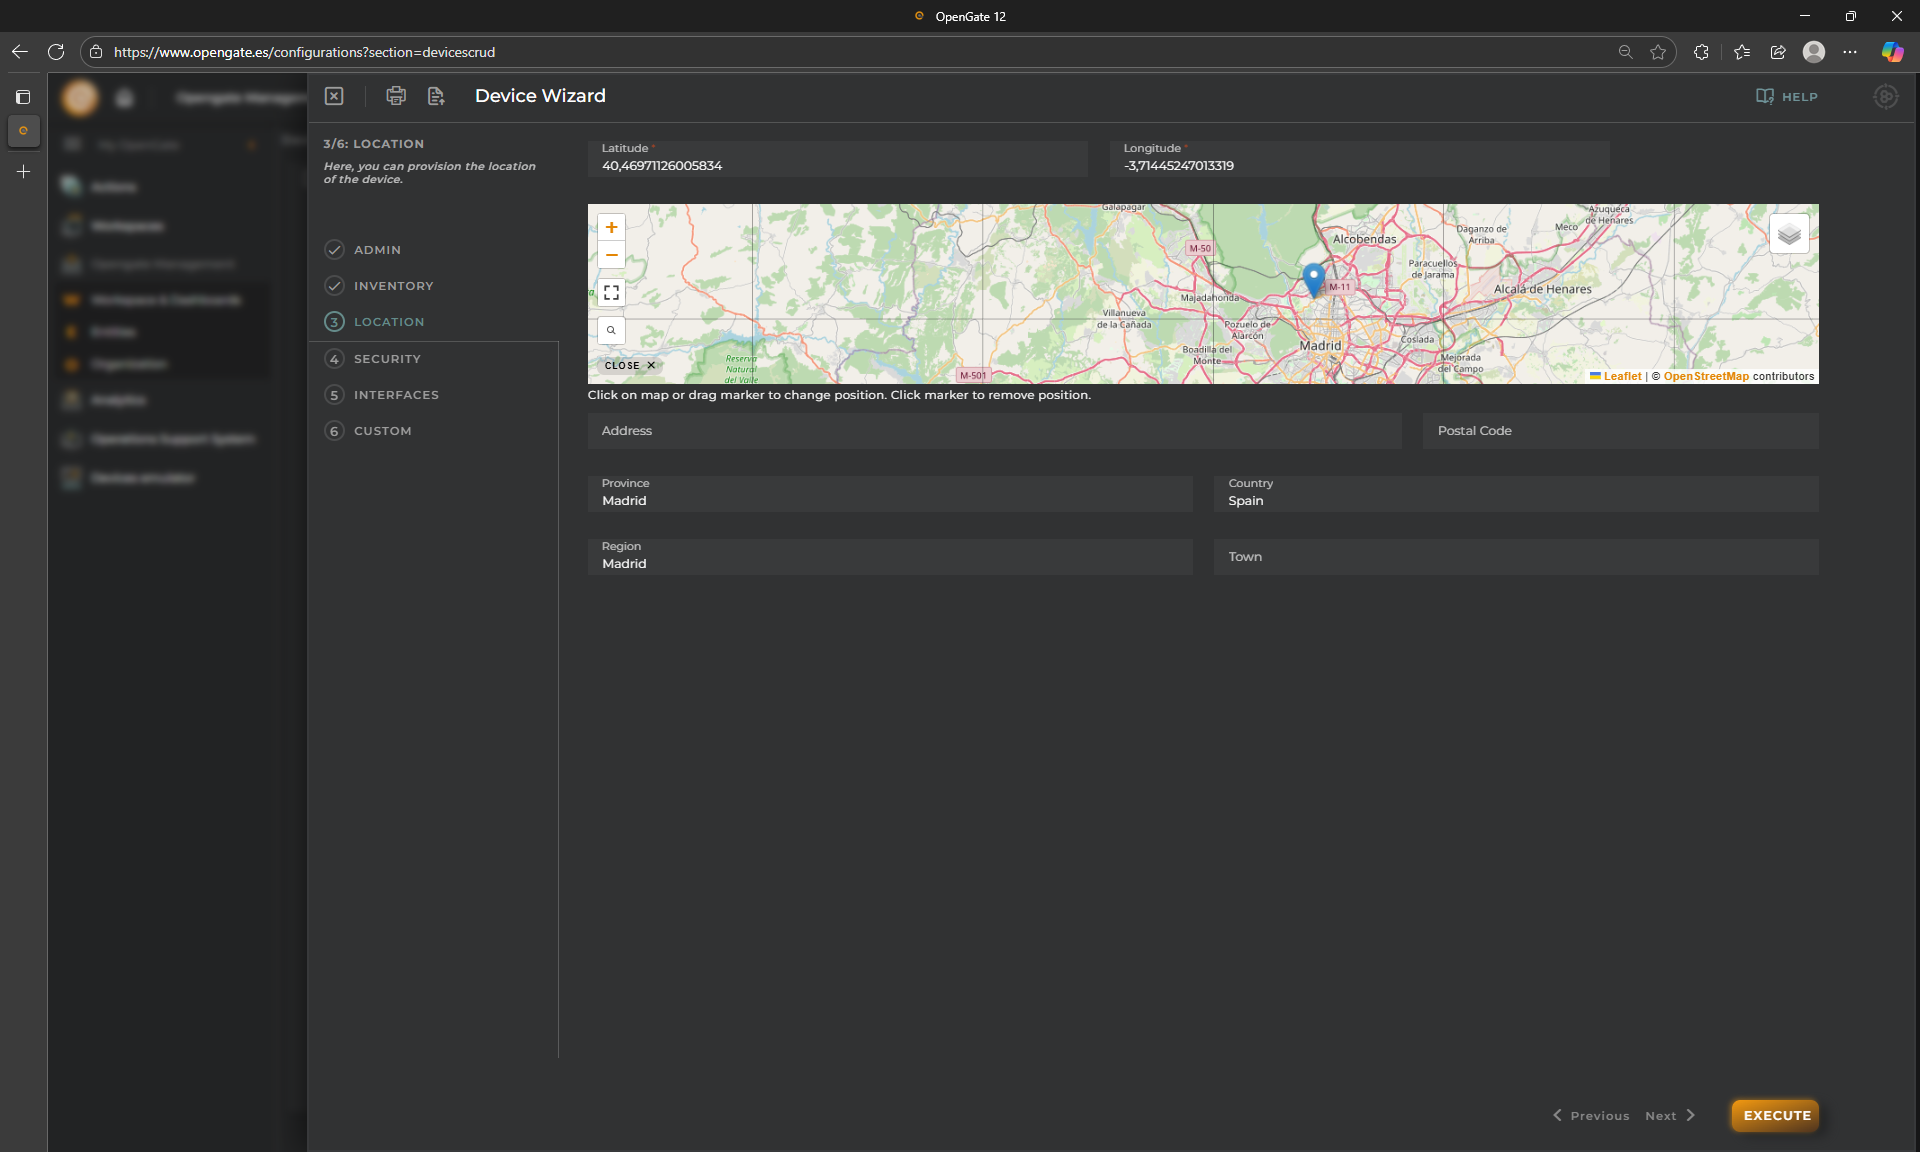
4. Step 3: Location
It is possible to define the location of the devices. For that this wizard step allows you to use directly the map to click on the entity location. Additionally, you can fill the information manually.
For this demo poruposes use the location that you want. Try to click in the map, you use the map left bar to show it in full screen
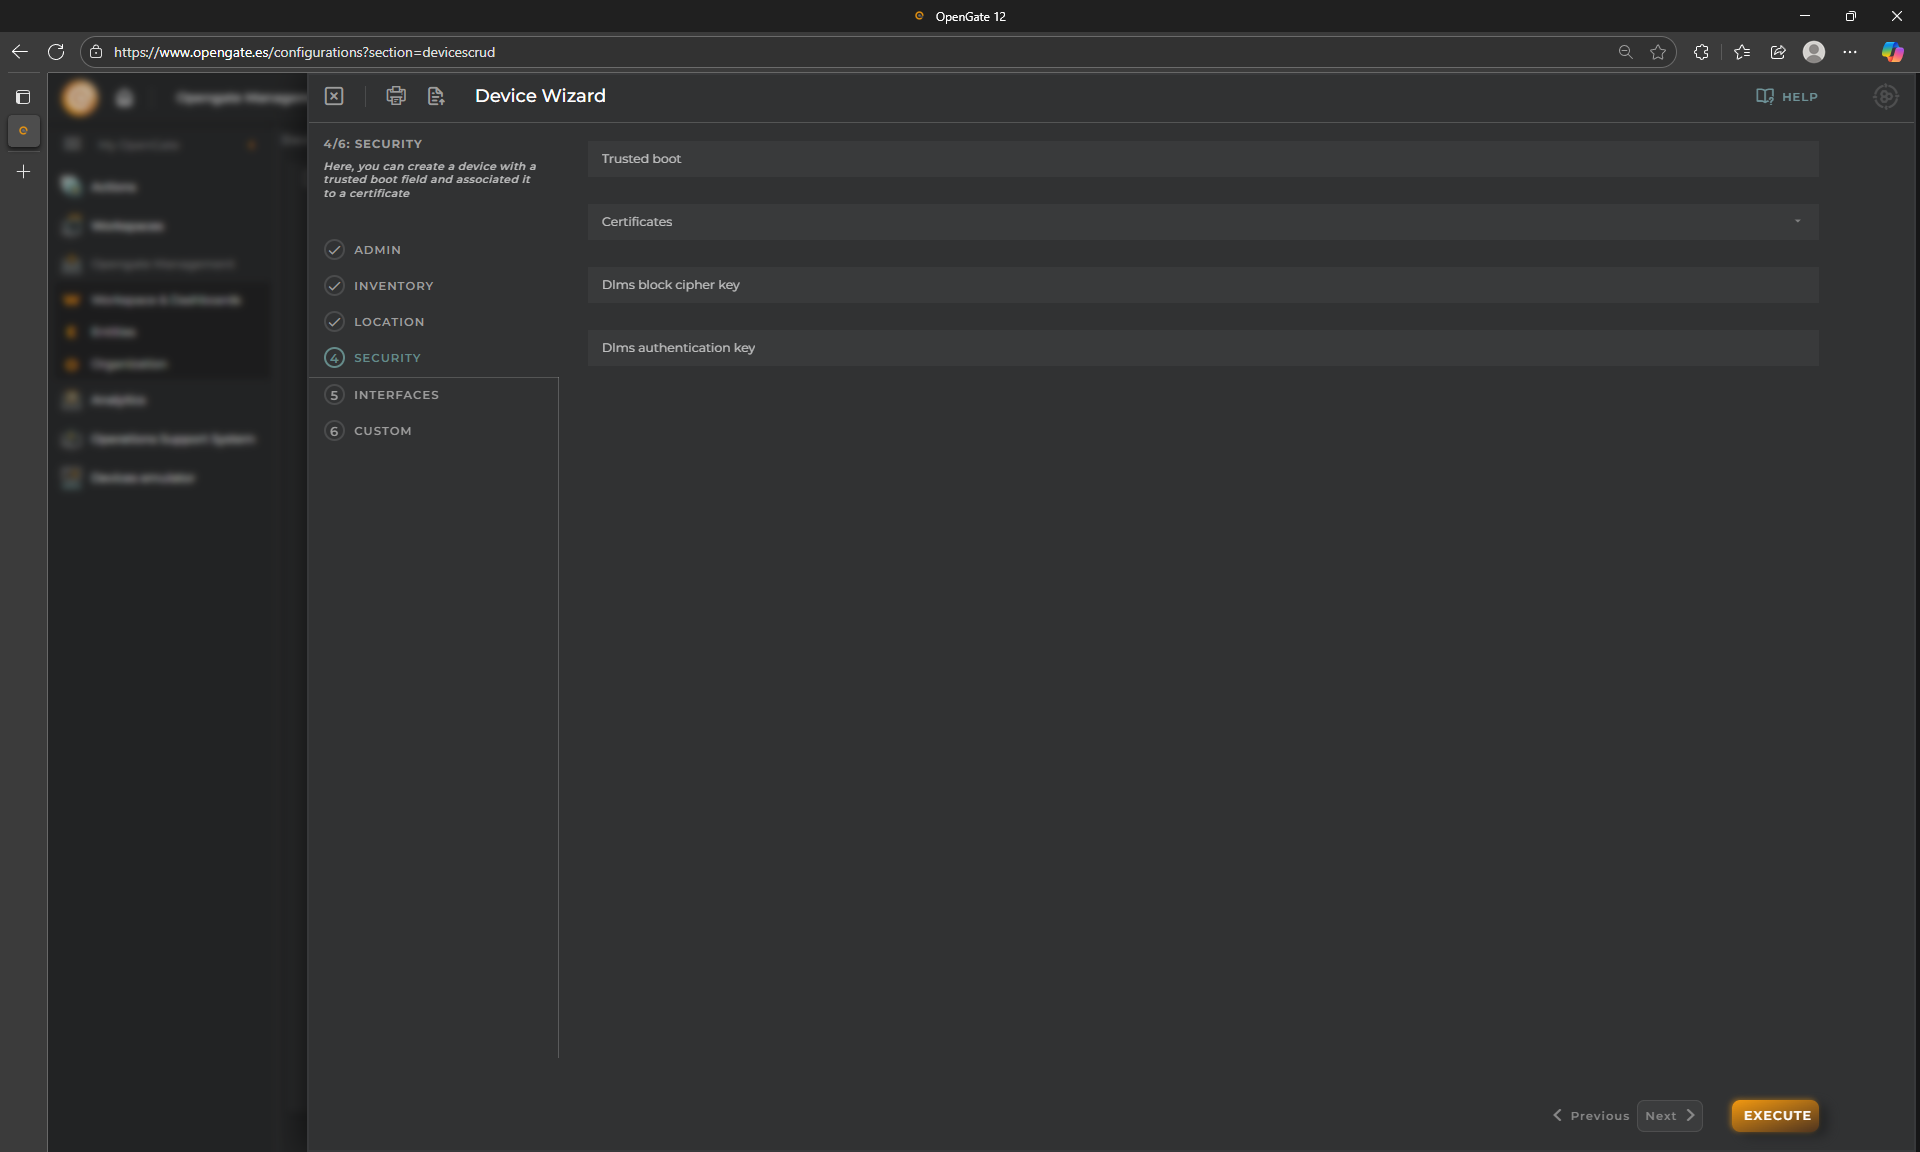
5. Step 4: Security
This step allows you to provision the standard OpenGate security options. We will not use it in this demo to easy accomplish the tutorial but you can provide here:
- Trusted Boot: If configured a device must present this value on each collection event
- Certificates: An administrator can add and manage certificates for your OpenGate organization
- DLMS security params: DLMS devices are supported by OpenGate for different protocols and so, you should provide its security information to use them.
6. Step 5: Interfaces
As we mention before in this HowTo’s serie, OpenGate can work with several parts of the IoT Value Chain and so, our platform allows you to manage and monitor even the communications layer, assotiated with your entities. This includes its communication modules, so from here you can provision the communications modules that the device has
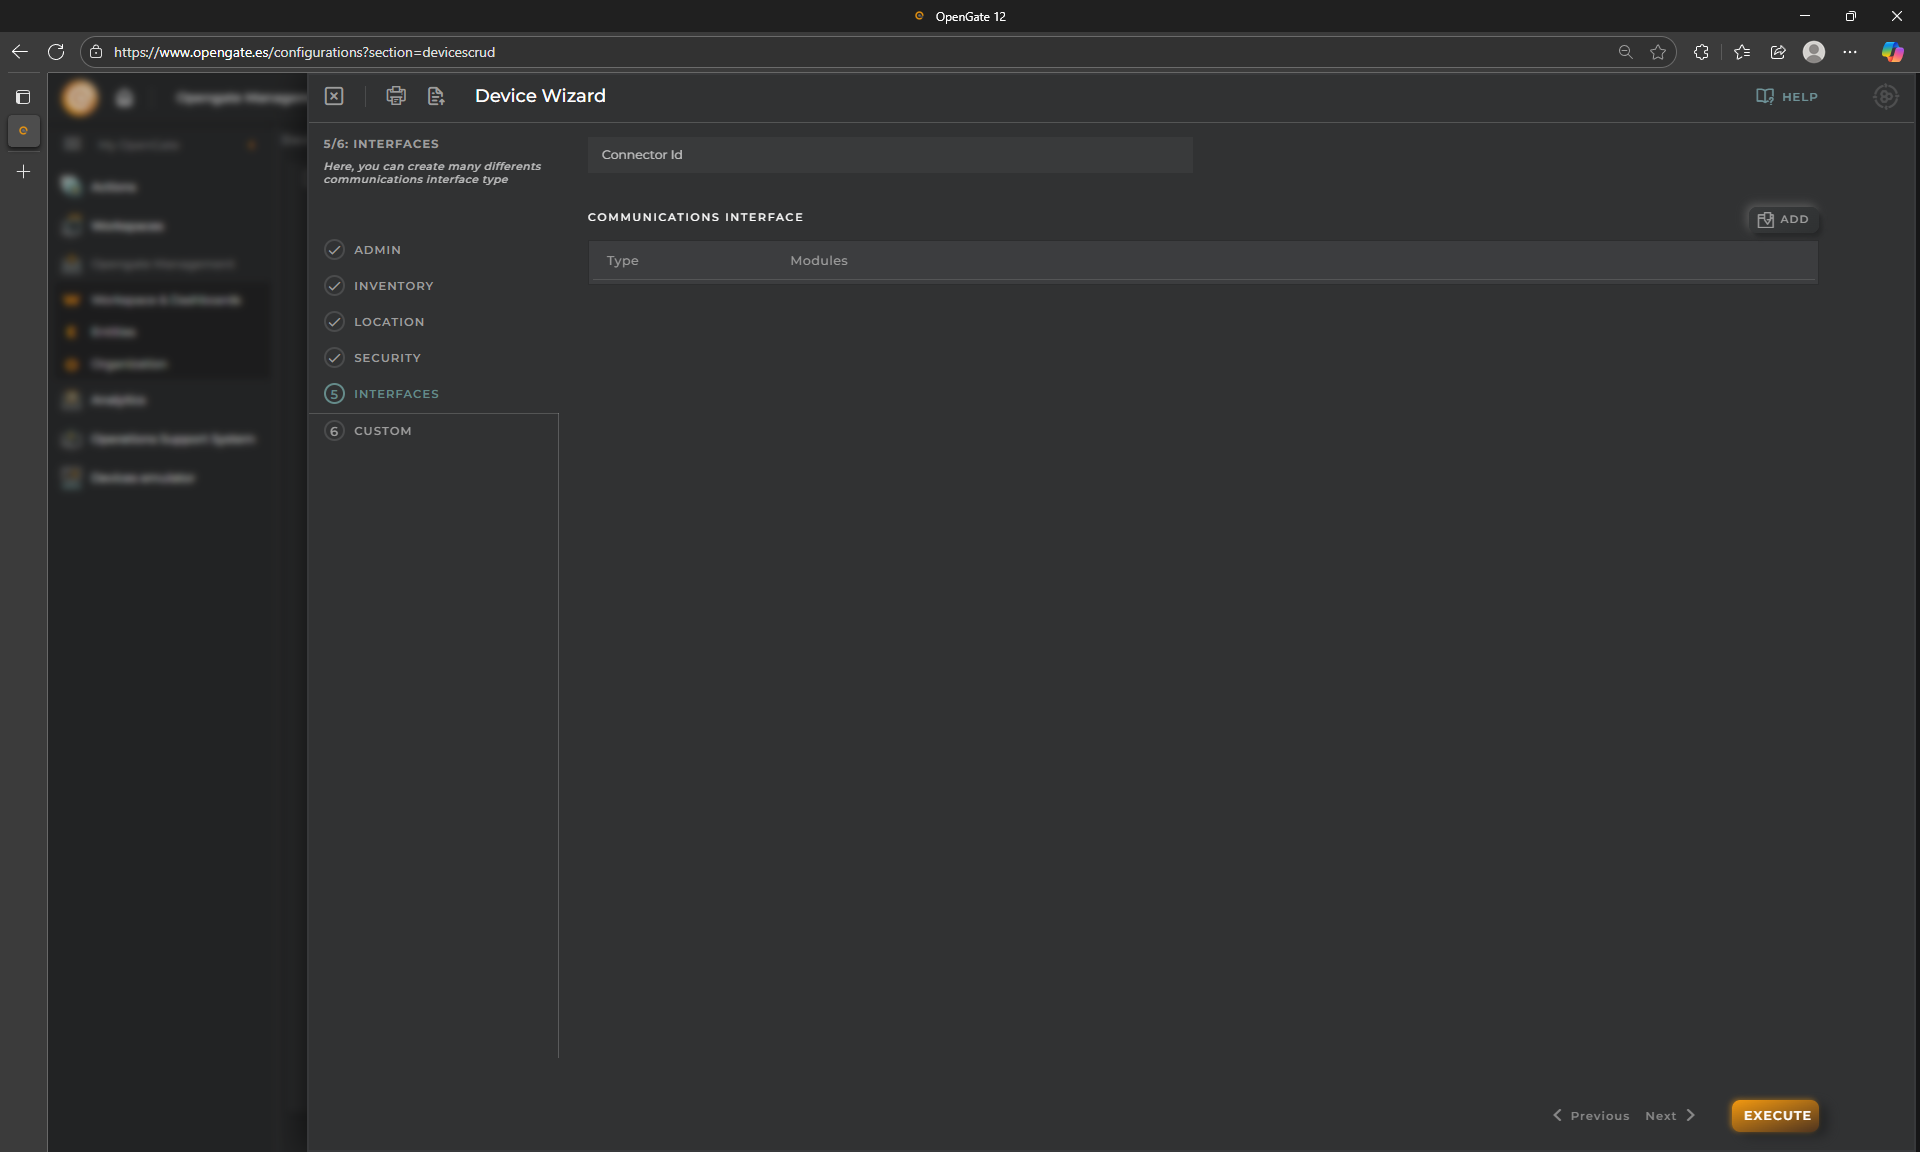
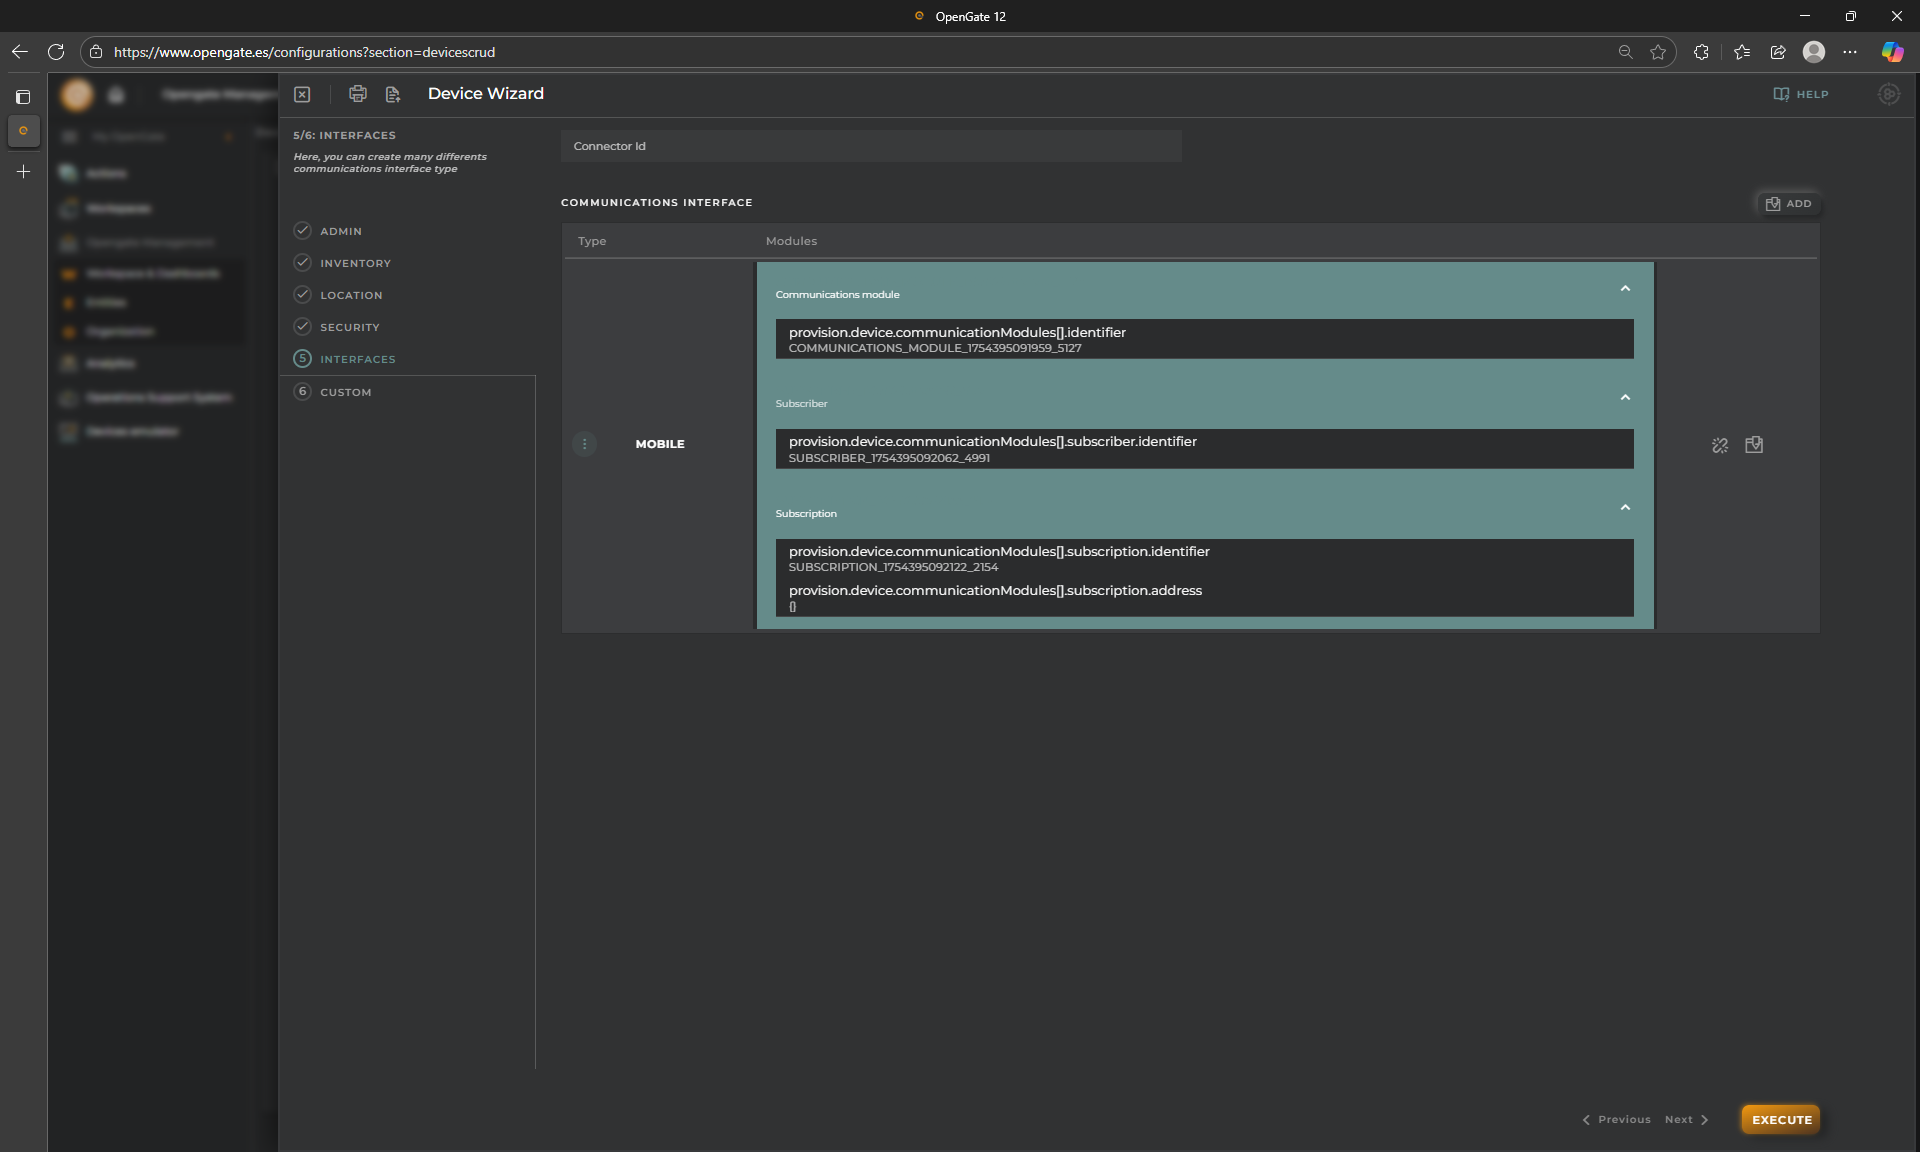
For this demo, we will add one communication module (a device can have many) and we will add a Mobile communications module.
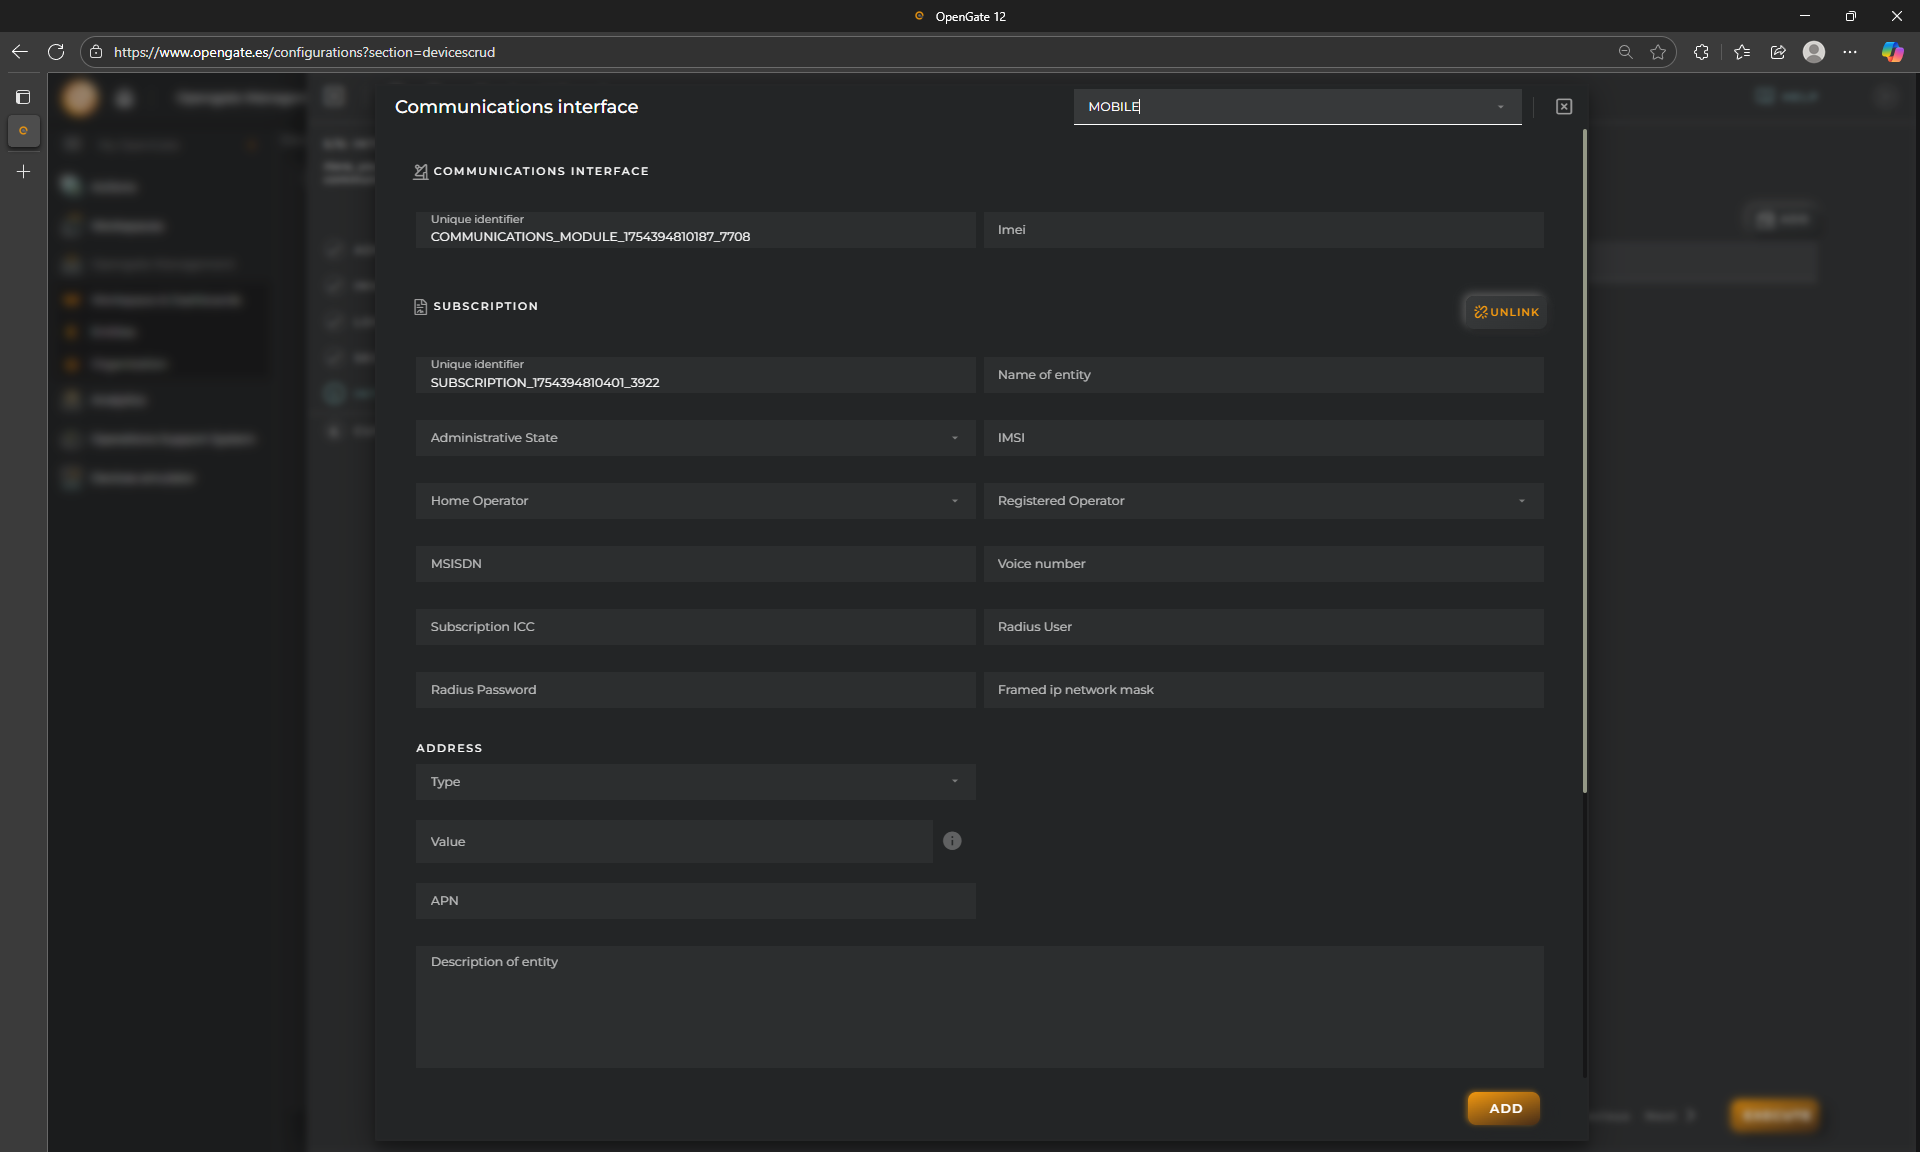
Click on “ADD” button and the platform will fill default values for the Subscription and the Subscriber. In case you have a real device with this capabilities, and so your own communications layer, you can fill this step form with your real values. In any case, you should see something like this:
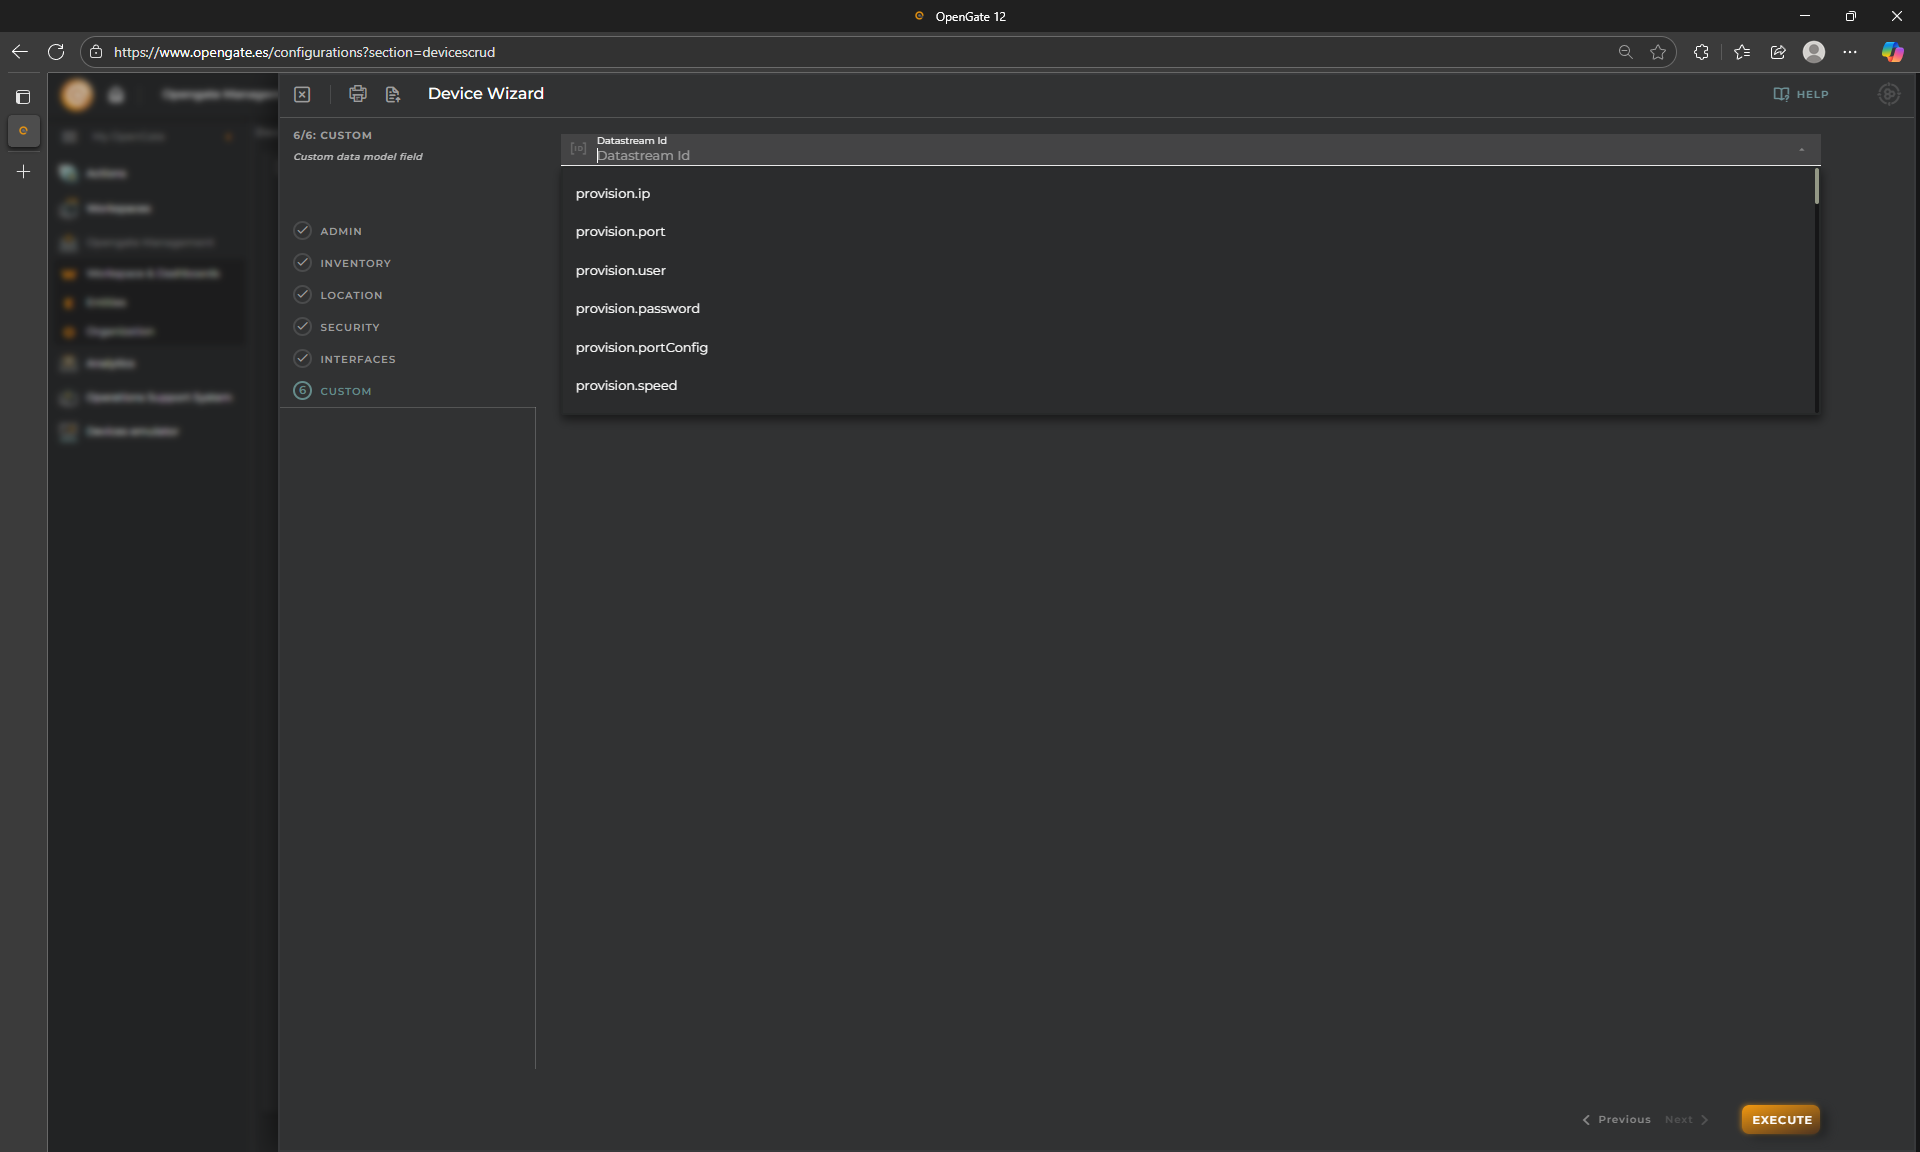
7. Step 6: Custom
This field allows you to fill any other “provision datastream” from the OpenGate standard catalog, or another one that you create in your own datamodel by searching it from the imput field
8. Confirm your settings
Click on “Execute” and check the confirmation message
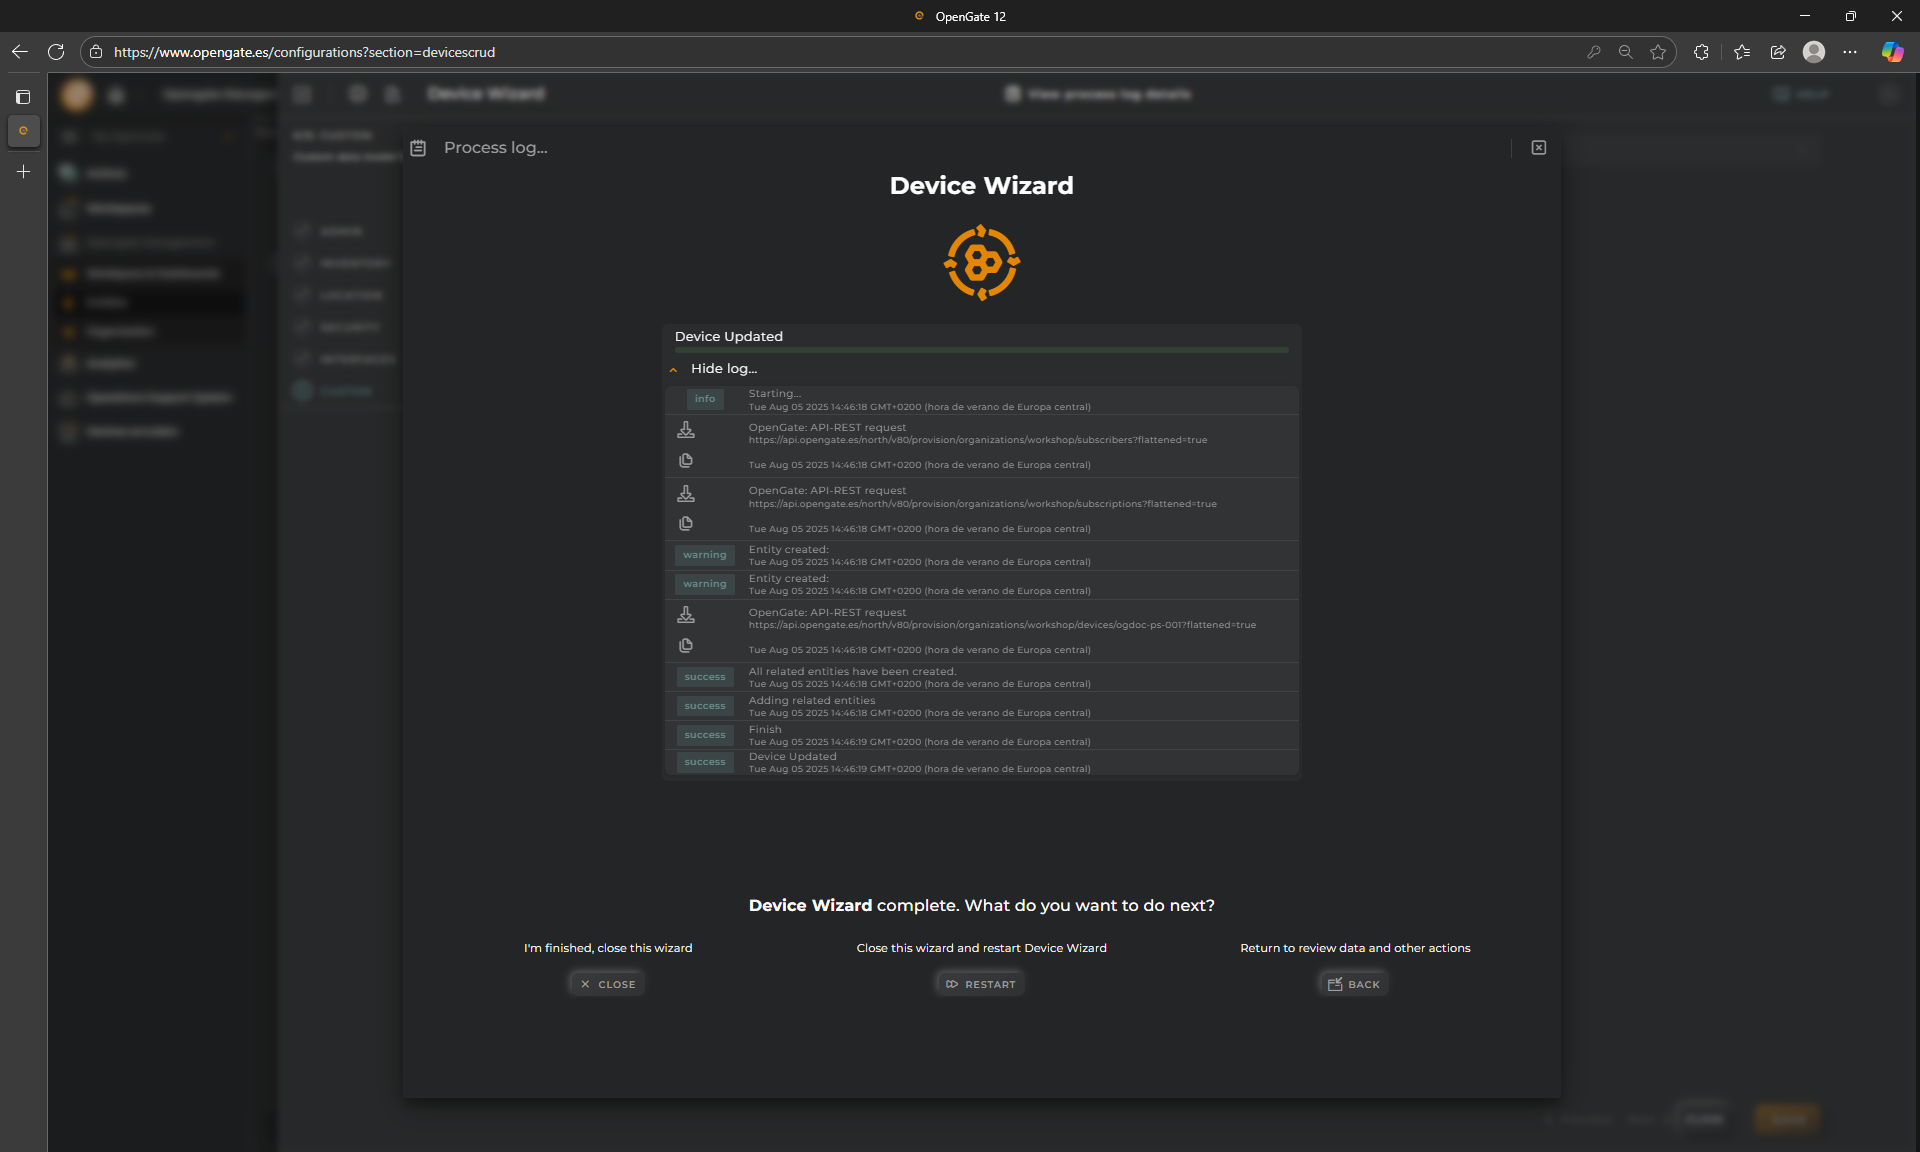
🎉 Your new Entity is created!
Finish your work
Now, to continue this tutorial, you can go to the bottom of this chapter and create all the needed entities contained in the excel files using the wizard, or give a try to the provision functions on the section bellow “Bulk Provisioning”
🚀 When to use this method:
Best for onboarding a small number of entities manually or quick add unitary devices. It is especially useful during prototyping, demos, or for users unfamiliar with API or scripting tools.
📦 Bulk Provisioning
Bulk provisioning enables you to register multiple entities at once via uploaded templates and custom logic. This method uses Provision Functions, which allow you to apply JavaScript logic to Excel files to create, modify, or remove entities in bulk. The configured JavaScript logic will be applied to each row and the result will be noted in an additional column. A great feature is that, after the provision function execution, you can download the result file to check what happened with every row, so you can fix the rows with problems if exists and execute again the provision function with this file so only the pending rows will be executed (what a powerful tool! right?)
Let’s use this method to provision some sample entities
1. Open the wizard
Go to “Opengate Management > Provision functions”, then click on “+ Create Provision Function*” and the wizard start

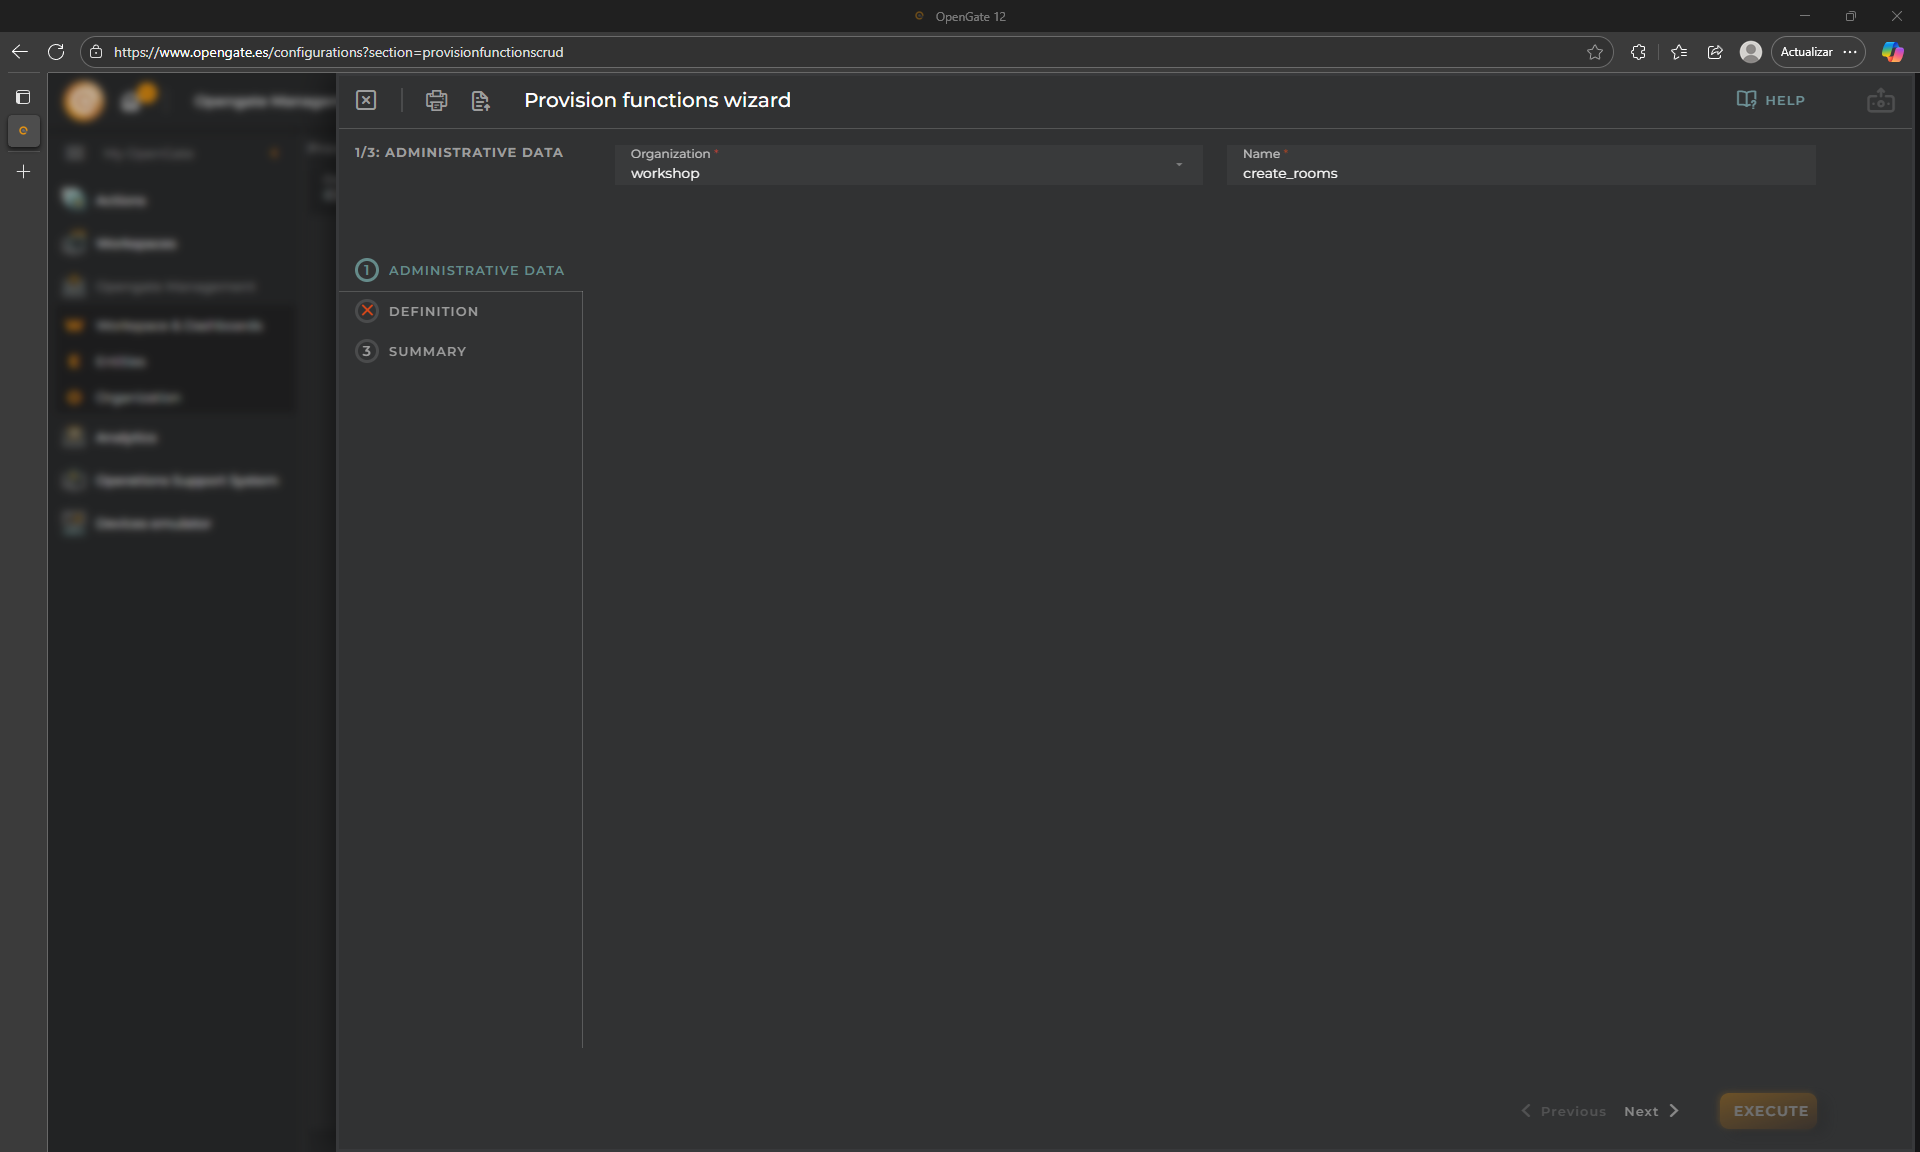
2. Step 1: Administration info
Fill the Name of the Provision Function. For this tutorial, we are going to configure a our provision function to create rooms as assets for our warehouse from an excel file, so we call it CreateRooms. This will create as many assets as rows contains the excel file during the provision function execution.
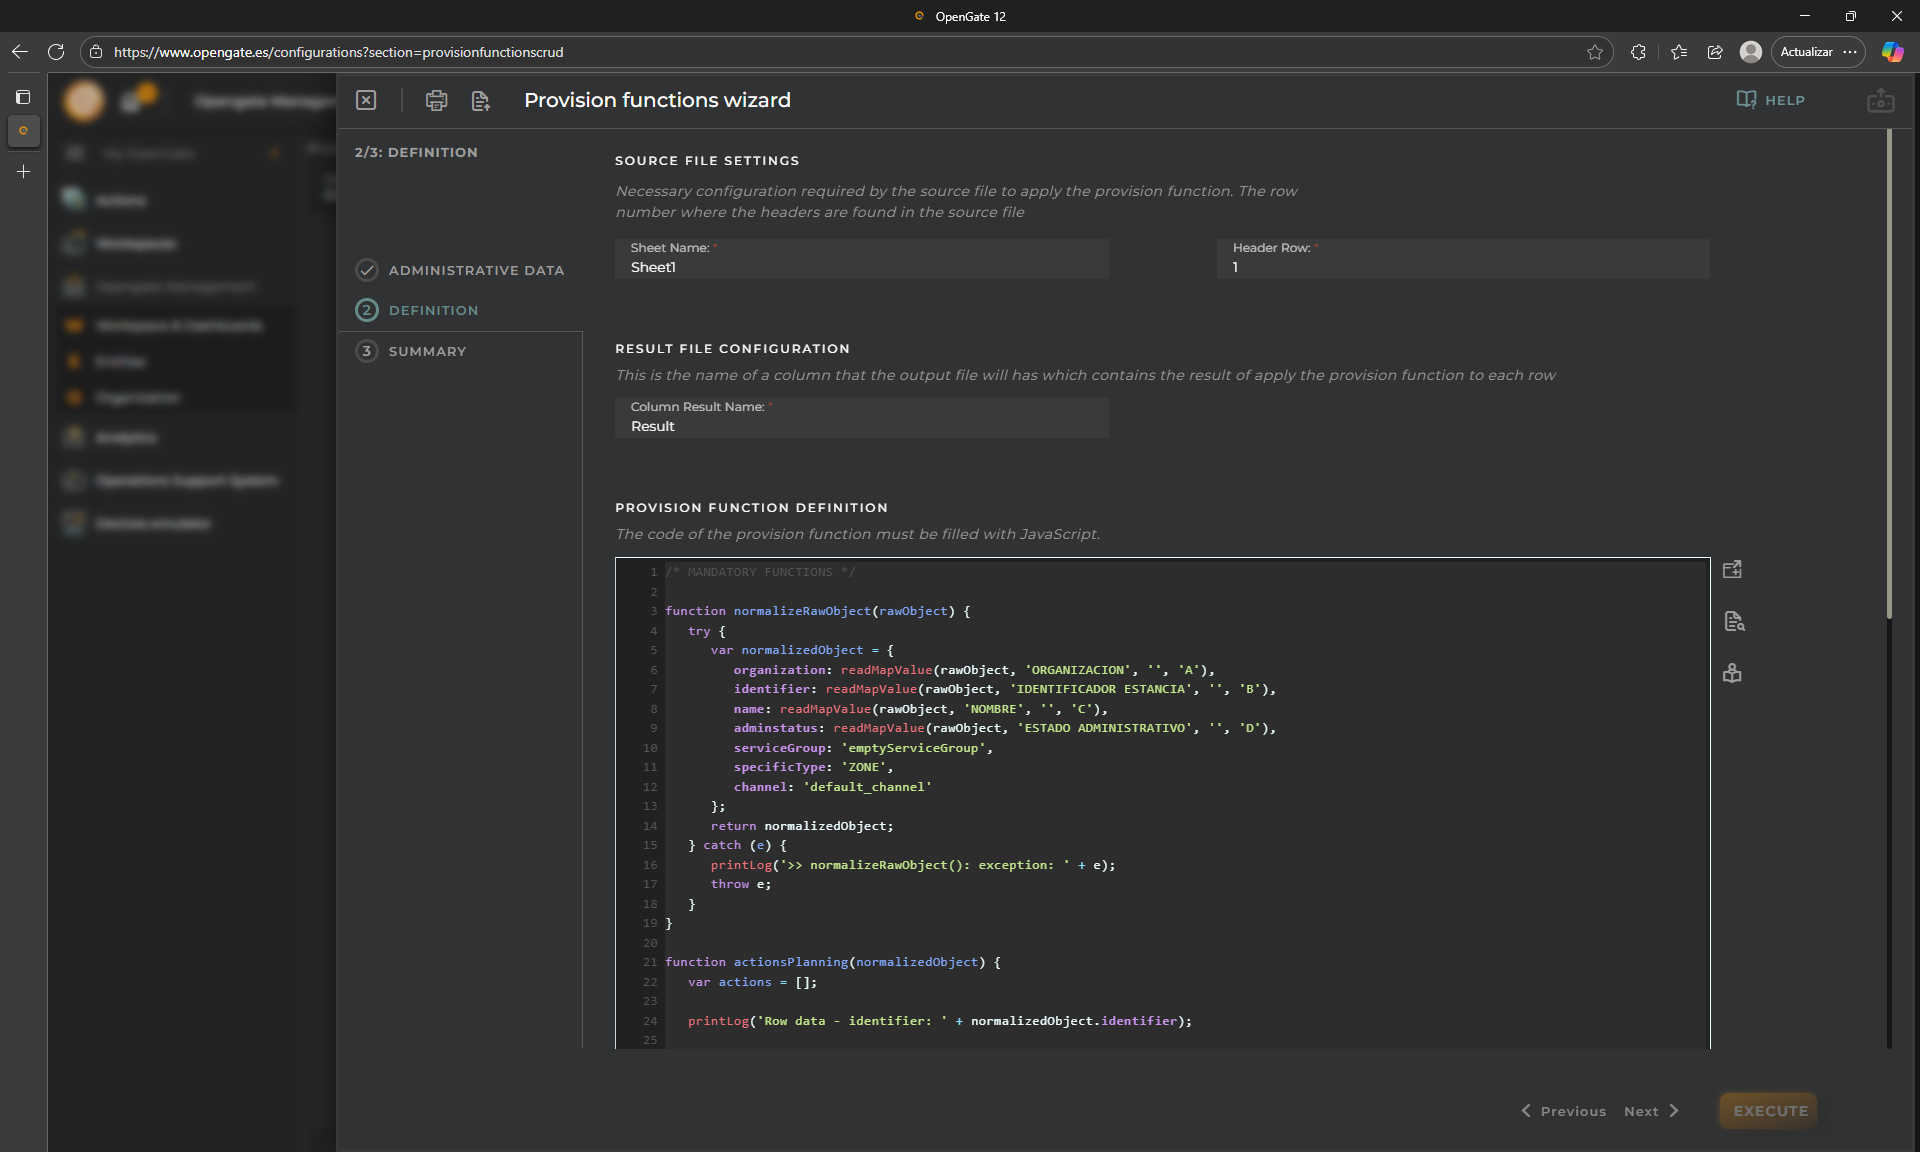
3. Step 2: configure your provision function
Now we are goint to create ou provision function to create assets… The OpenGate Provision Functions allows you to use javascript to manipulate the excel file and to do whatever you need during the provision function execution.
The parameters you need to indicate are:
- Source file settings: “Sheet Name” of the file, and “Header row” number fo find the data to be used during the provision proccess. Use:
Sheet1and1 - Result file configuration: This is the name of the column where the result of each row will be shown.
- Provision function definition: The javascript code to execute within the provision funtion.
To this tutorial, we prepare the code for this provision function that creates rooms as assets, so you can download it and test this functionality:
Copy the following JavaScript and paste into the code box:
You should obtain this:
4. Step 3: Summary and execute
As with the other OpenGate wizards, the final step always shows you the summary of what you configured to confirm and the “EXECUTE” option.
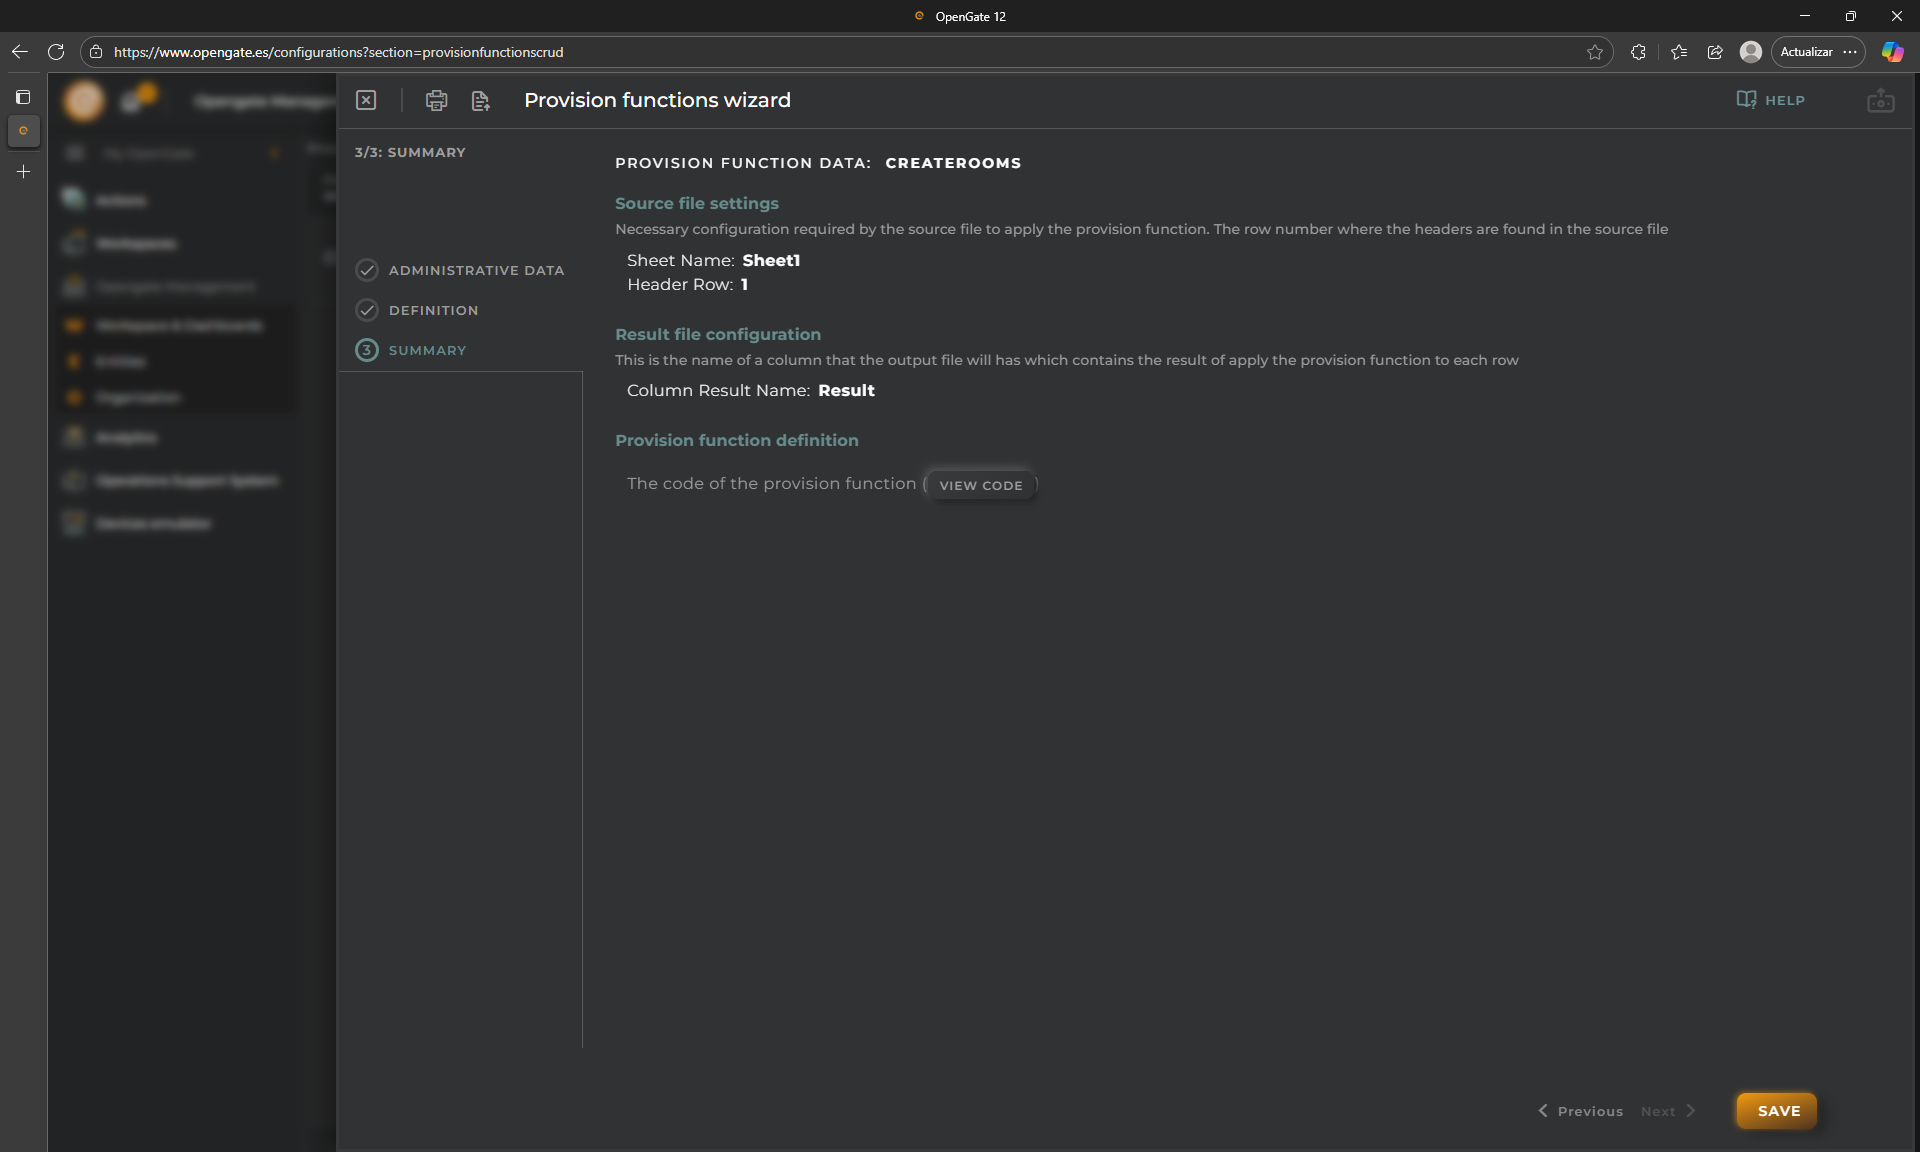
👏 You created your first provision function!
5. Using the provision function:
Now that we have our connector function, let’s use it to create our assets that represents the rooms of our warehouse:
5.1 Go to “OpenGate Management > Bulk provisions (Advanced)” and click on “Upload Bulk File (Advanced)”
This opens the wizard to execute a provision function process

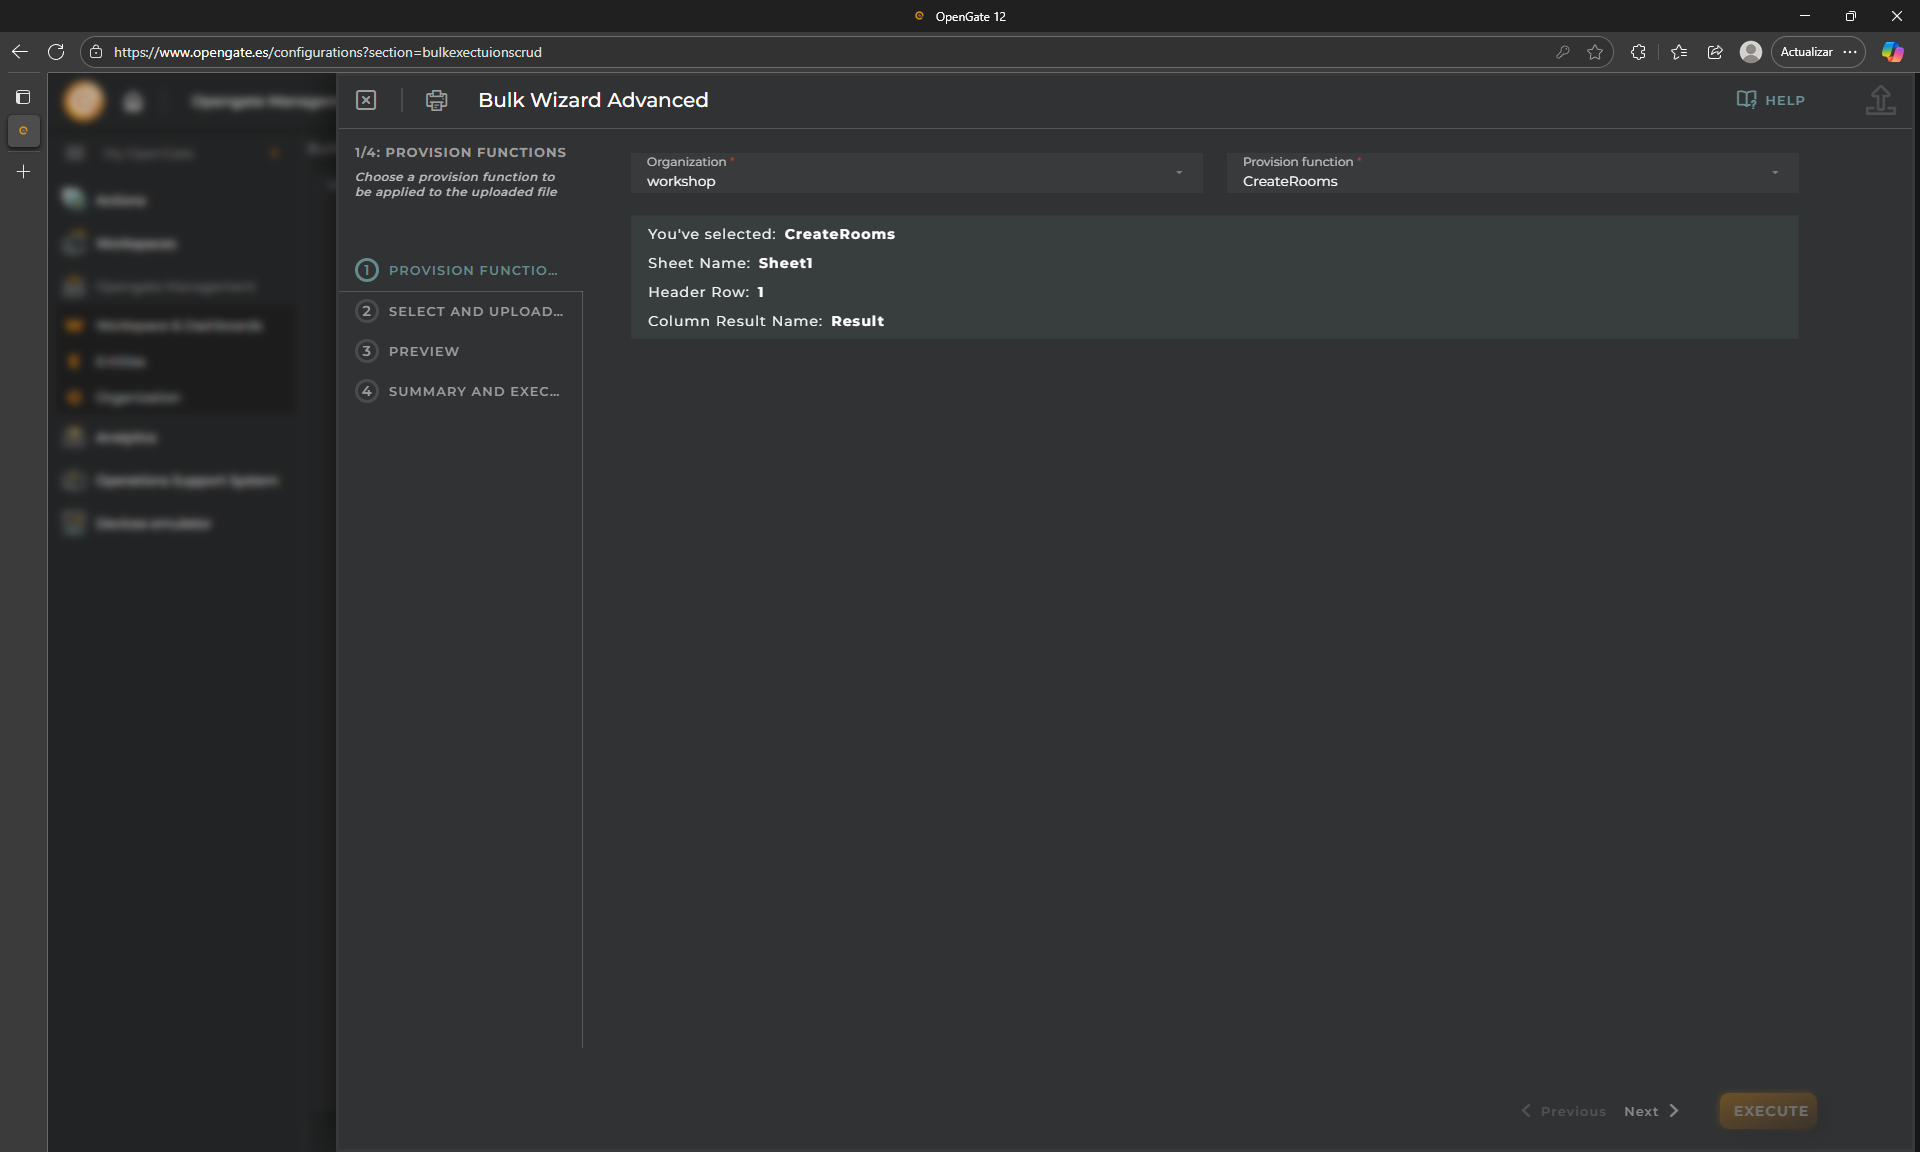
5.2 Step 1: Choose our Provision Function
Choose our new provision function “CreateRooms”
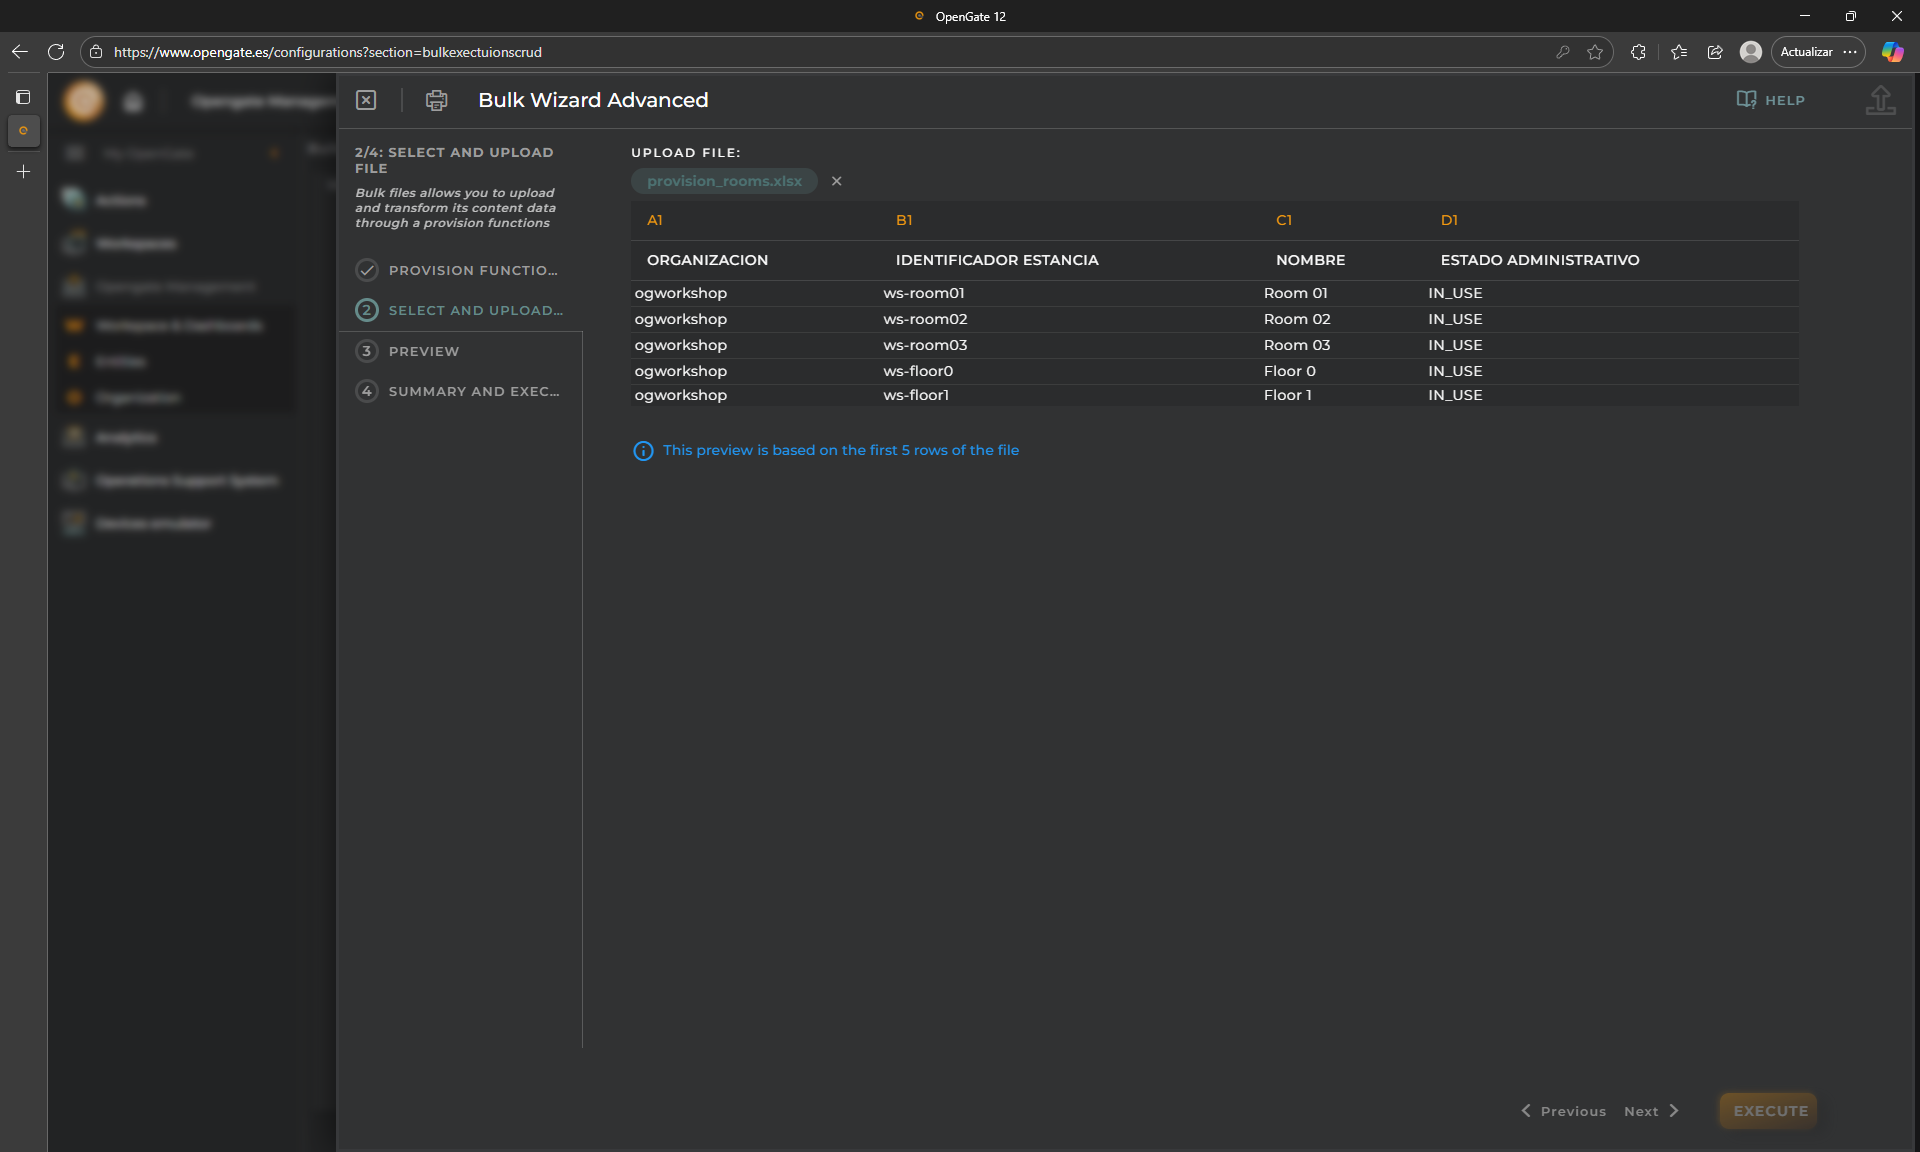
5.3 Step 2: Upload your file Use the file 🗒️provision_rooms.xlsx. This file contains some rooms to be populated into our OpenGate.
⚠️IMPORTANT: Please edit them and change [YourPrefix] and [YourOrganization] with your values
After upload the file, you will see the first rows as preview
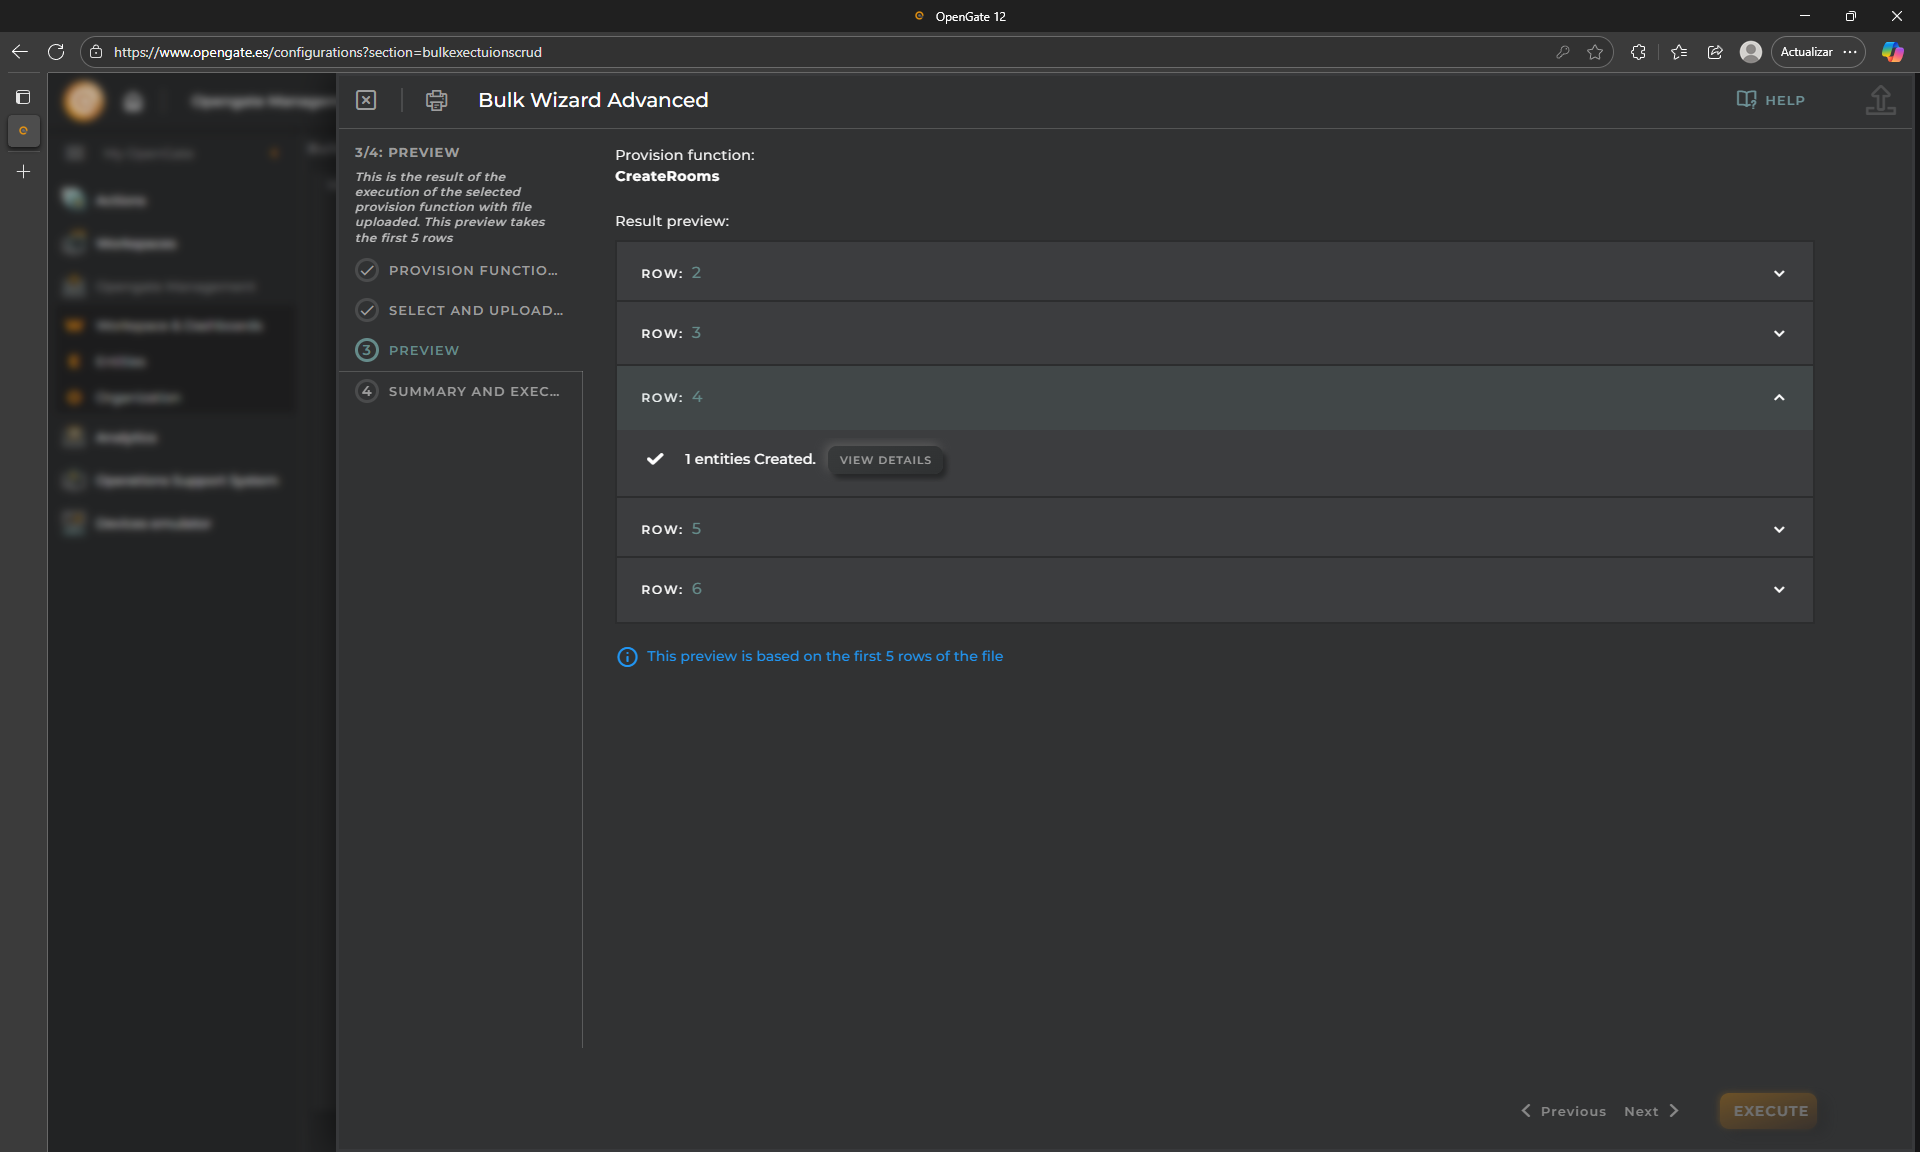
5.4 Step 3: Preview results
Because this is a critical functionality, this step allows you to check as preview what the provision function selected will do with the first rows.
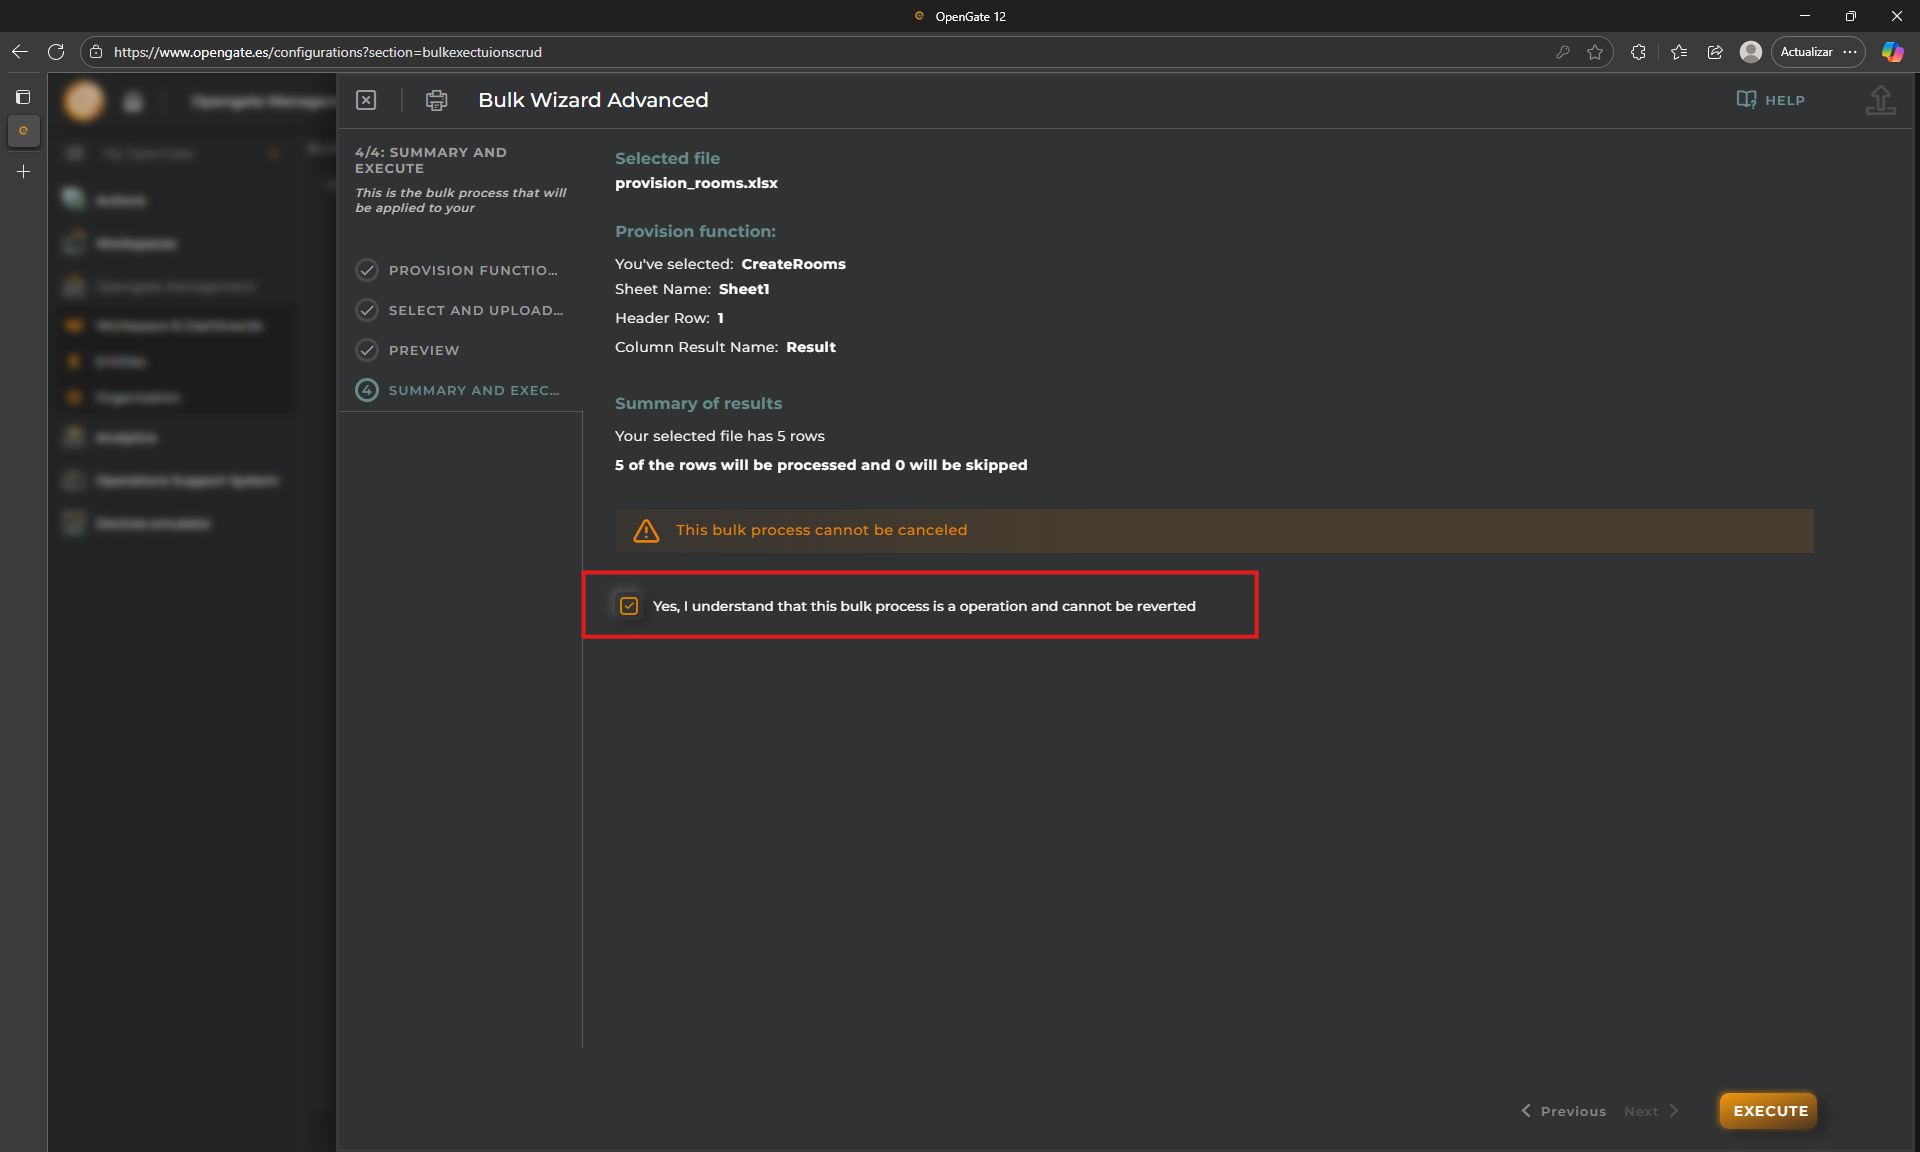
5.5 Step 4: confirmation
We want to repeat this… Because this is a critical functionality, you must check the doble confirmation before click on “EXECUTE”
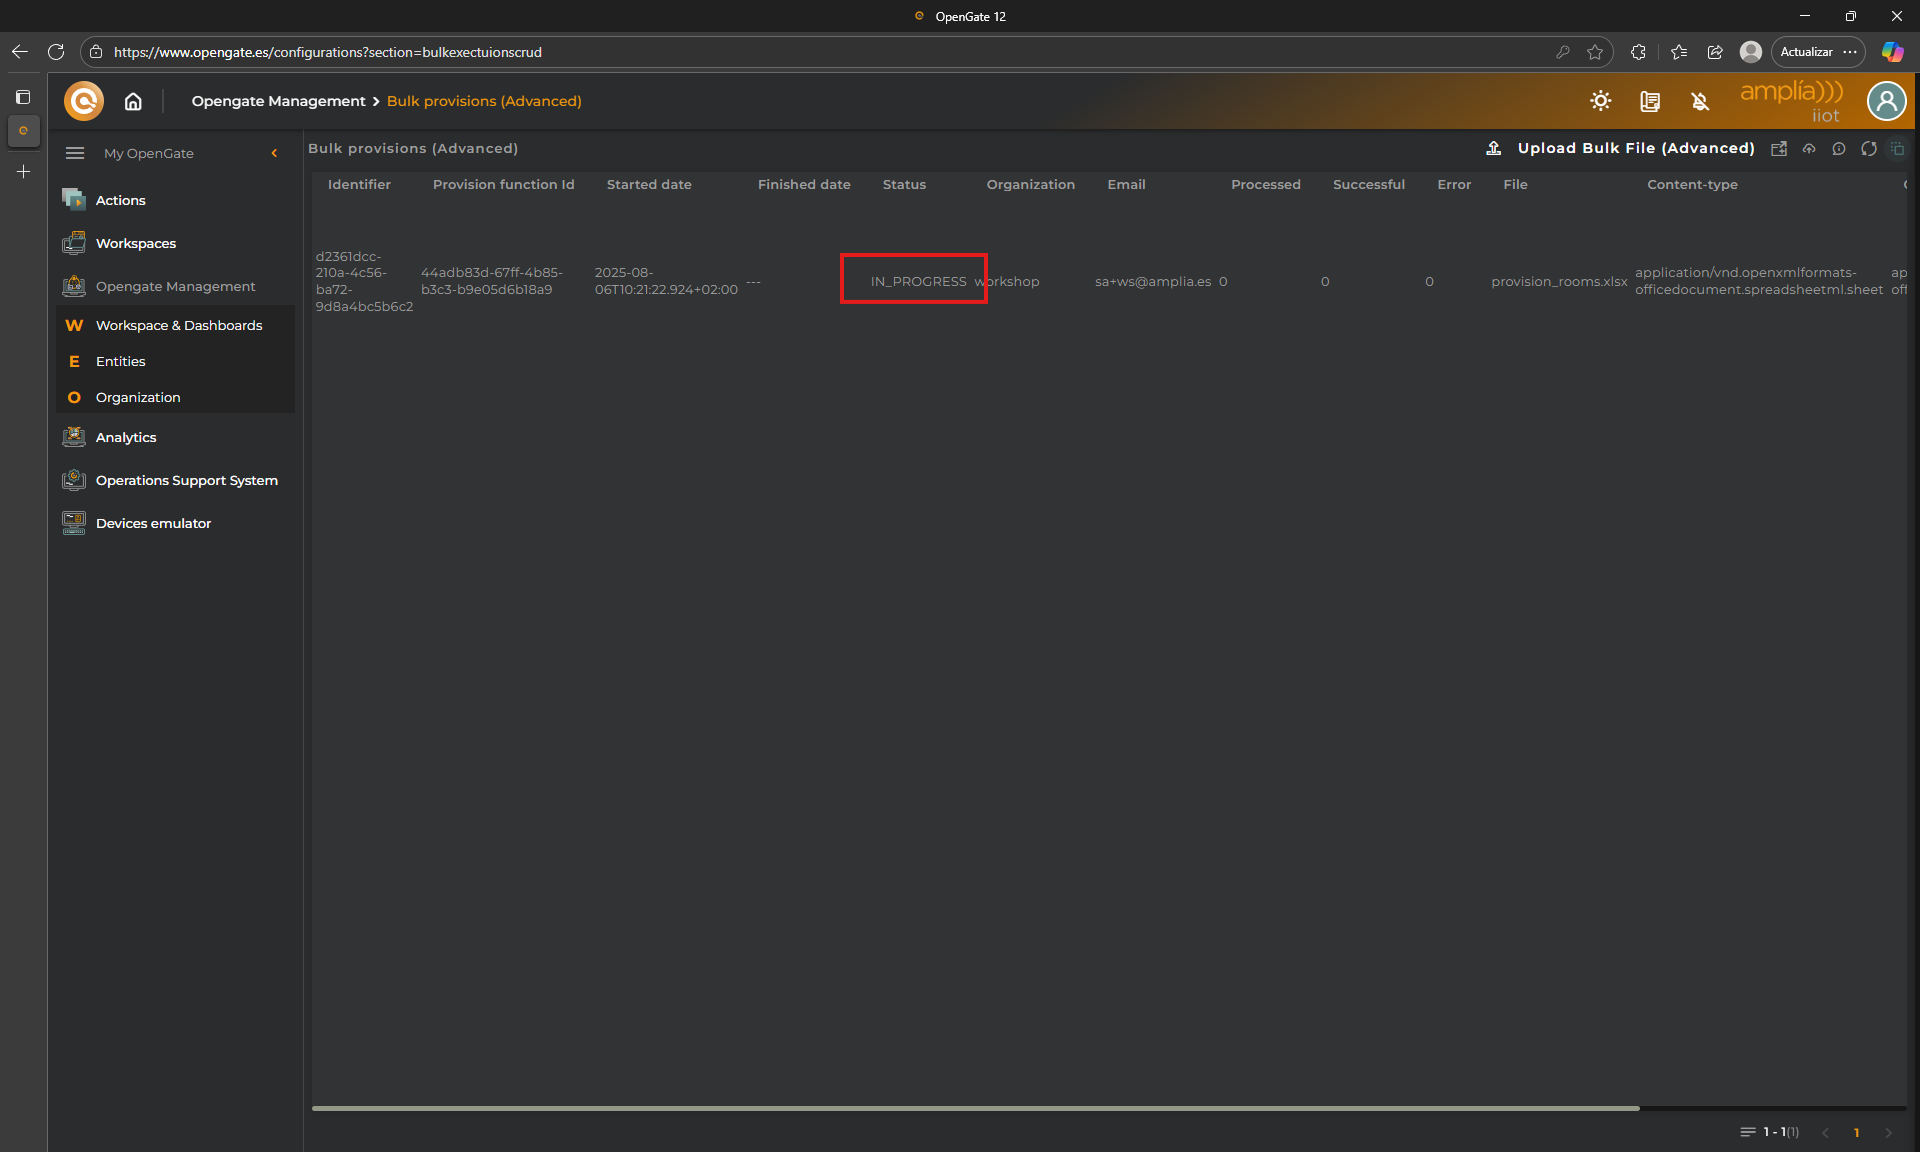
6. Check the process result
The execution of a Provision function may take some minutes depending on the actions, rows and so on. For that, the process will execute in background and the execution is shown on the screen, Check that the status is “IN_PROGRESS”
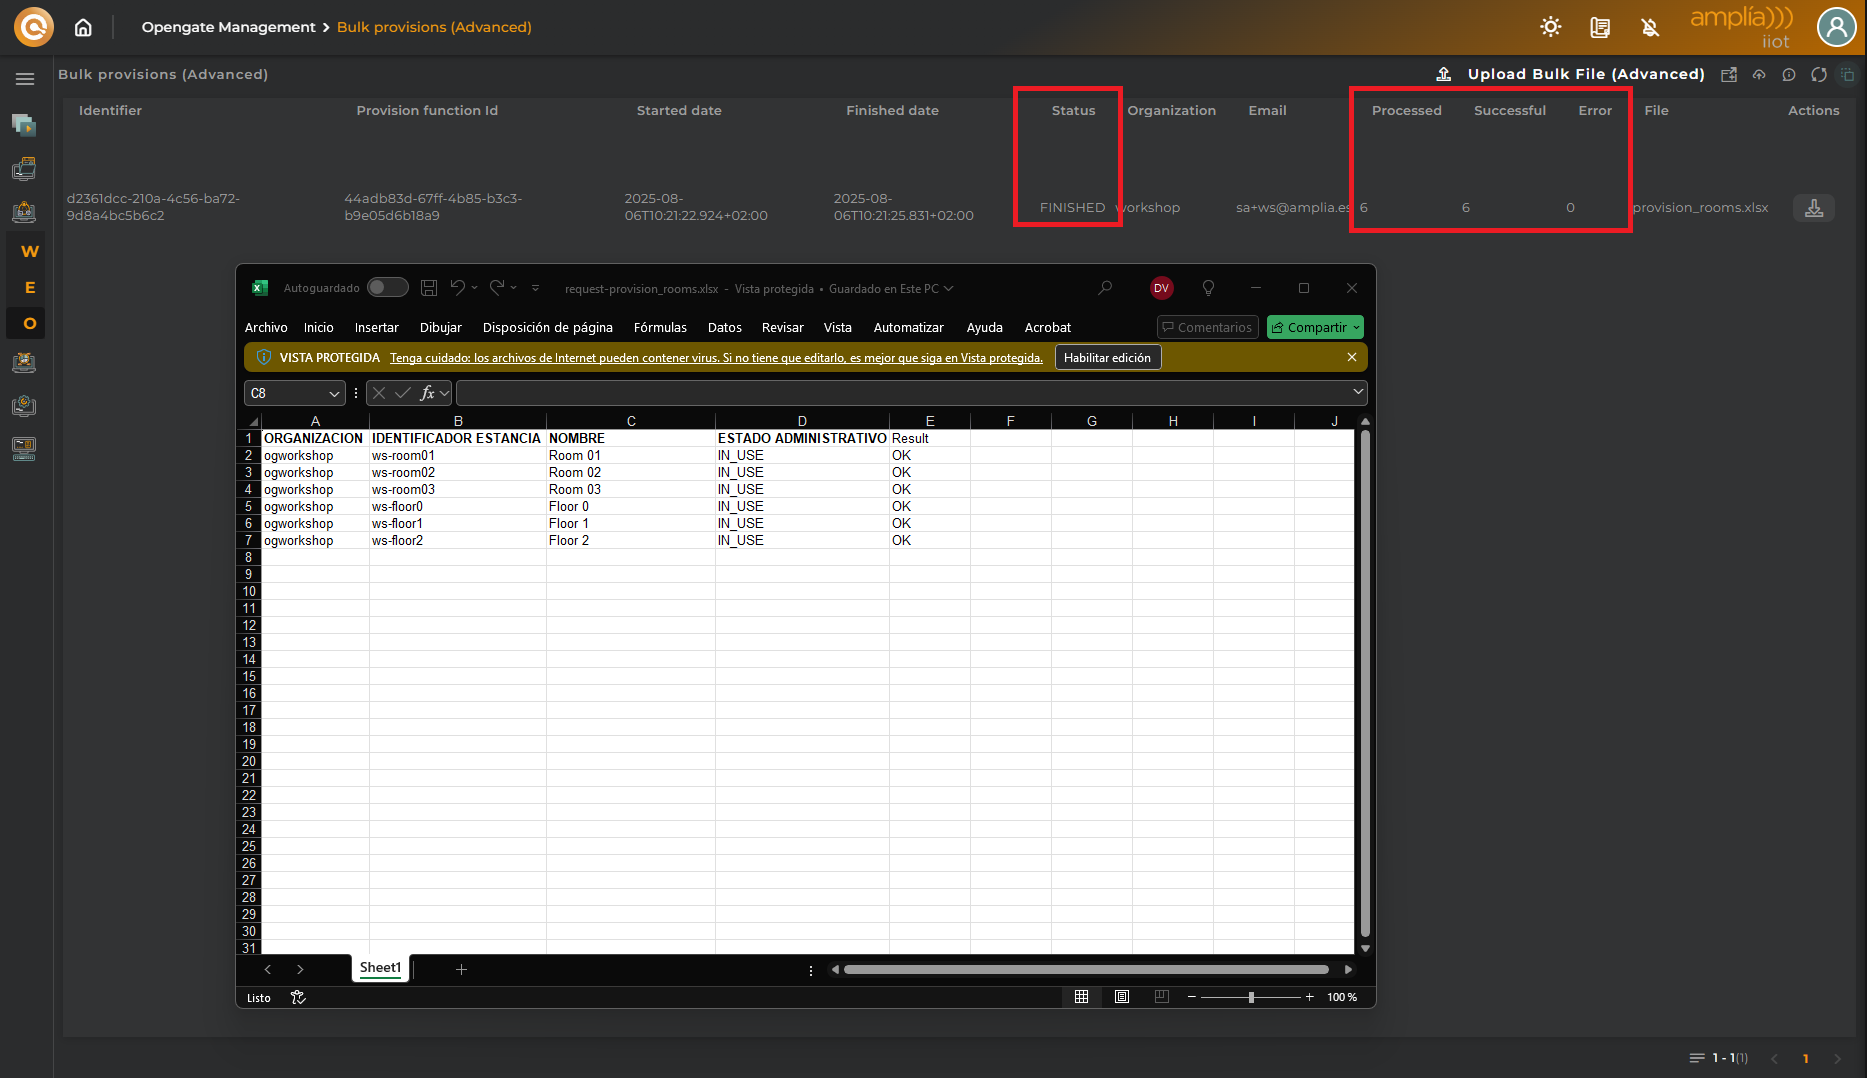
Click on refresh to check if the process is “FINISHED” and check the results on columns “Processed”, “Successfull” and “Error”. Remember, you can download the result file to check the process row by row. You will se something like this:
🚀 When to use this method:
Perfect for mass onboarding, data migrations, or applying business logic during entity creation and modification, o even to delete groups of entities.
🏗️ Continue the tutorial
To finish the tutorial properly, use the method you prefer, wizard or bulk creating another provision function, to create the entities containted in this files:
- 🗒️prov_function_sensors.js: This contains the javascript code of the provision function to populate sensors and link them (as related entity) to the assets created previously.
- 🗒️provision_rooms.xlsx: This file contains some rooms for our warehouse that will represent our facilities for the tutorial.
- 🗒️provision_sensors.xlsx : Here you can find the devices that will be assigned to the different rooms
Check our new entities
When you finish this chapter, you should see the following entities:
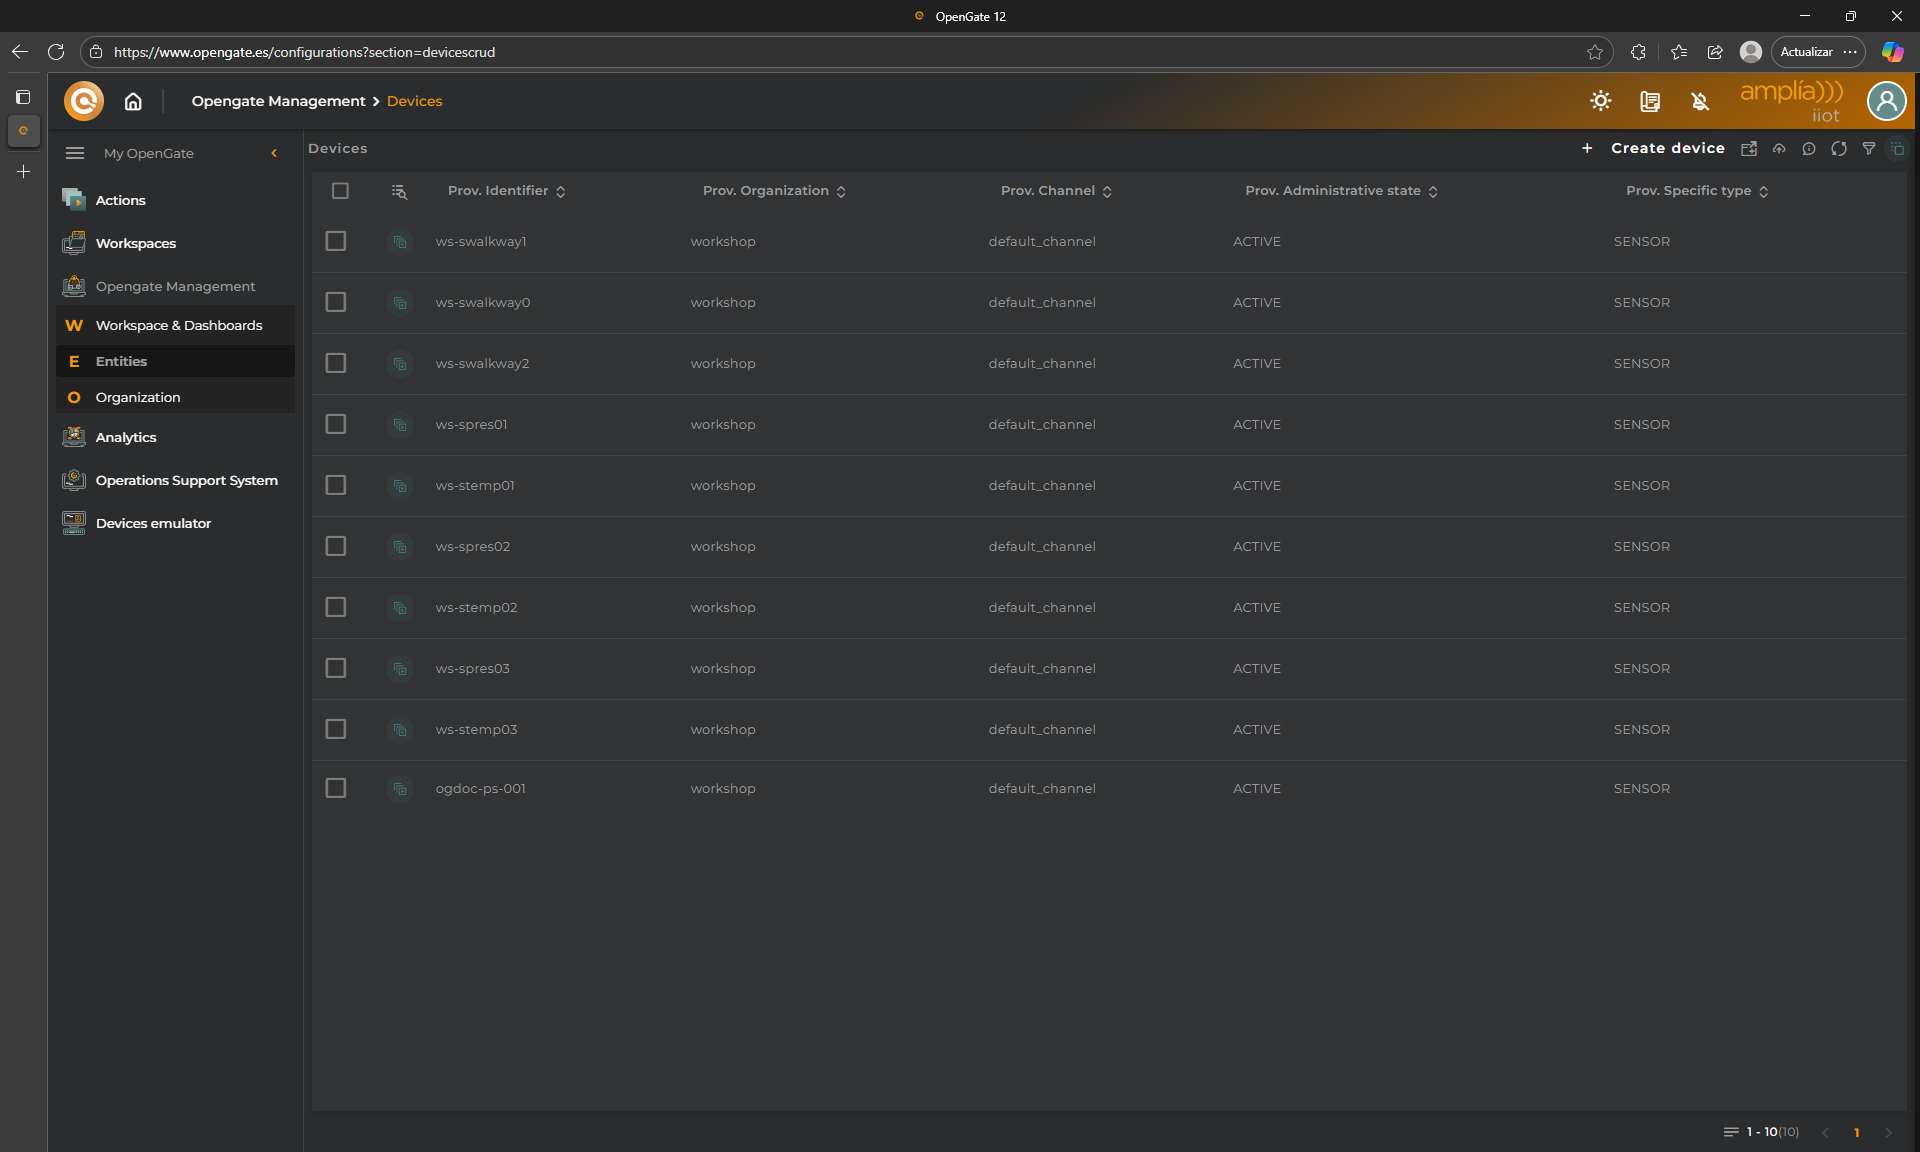
Devices:
Go to “OpenGate Management > Devices” and you should see your devices
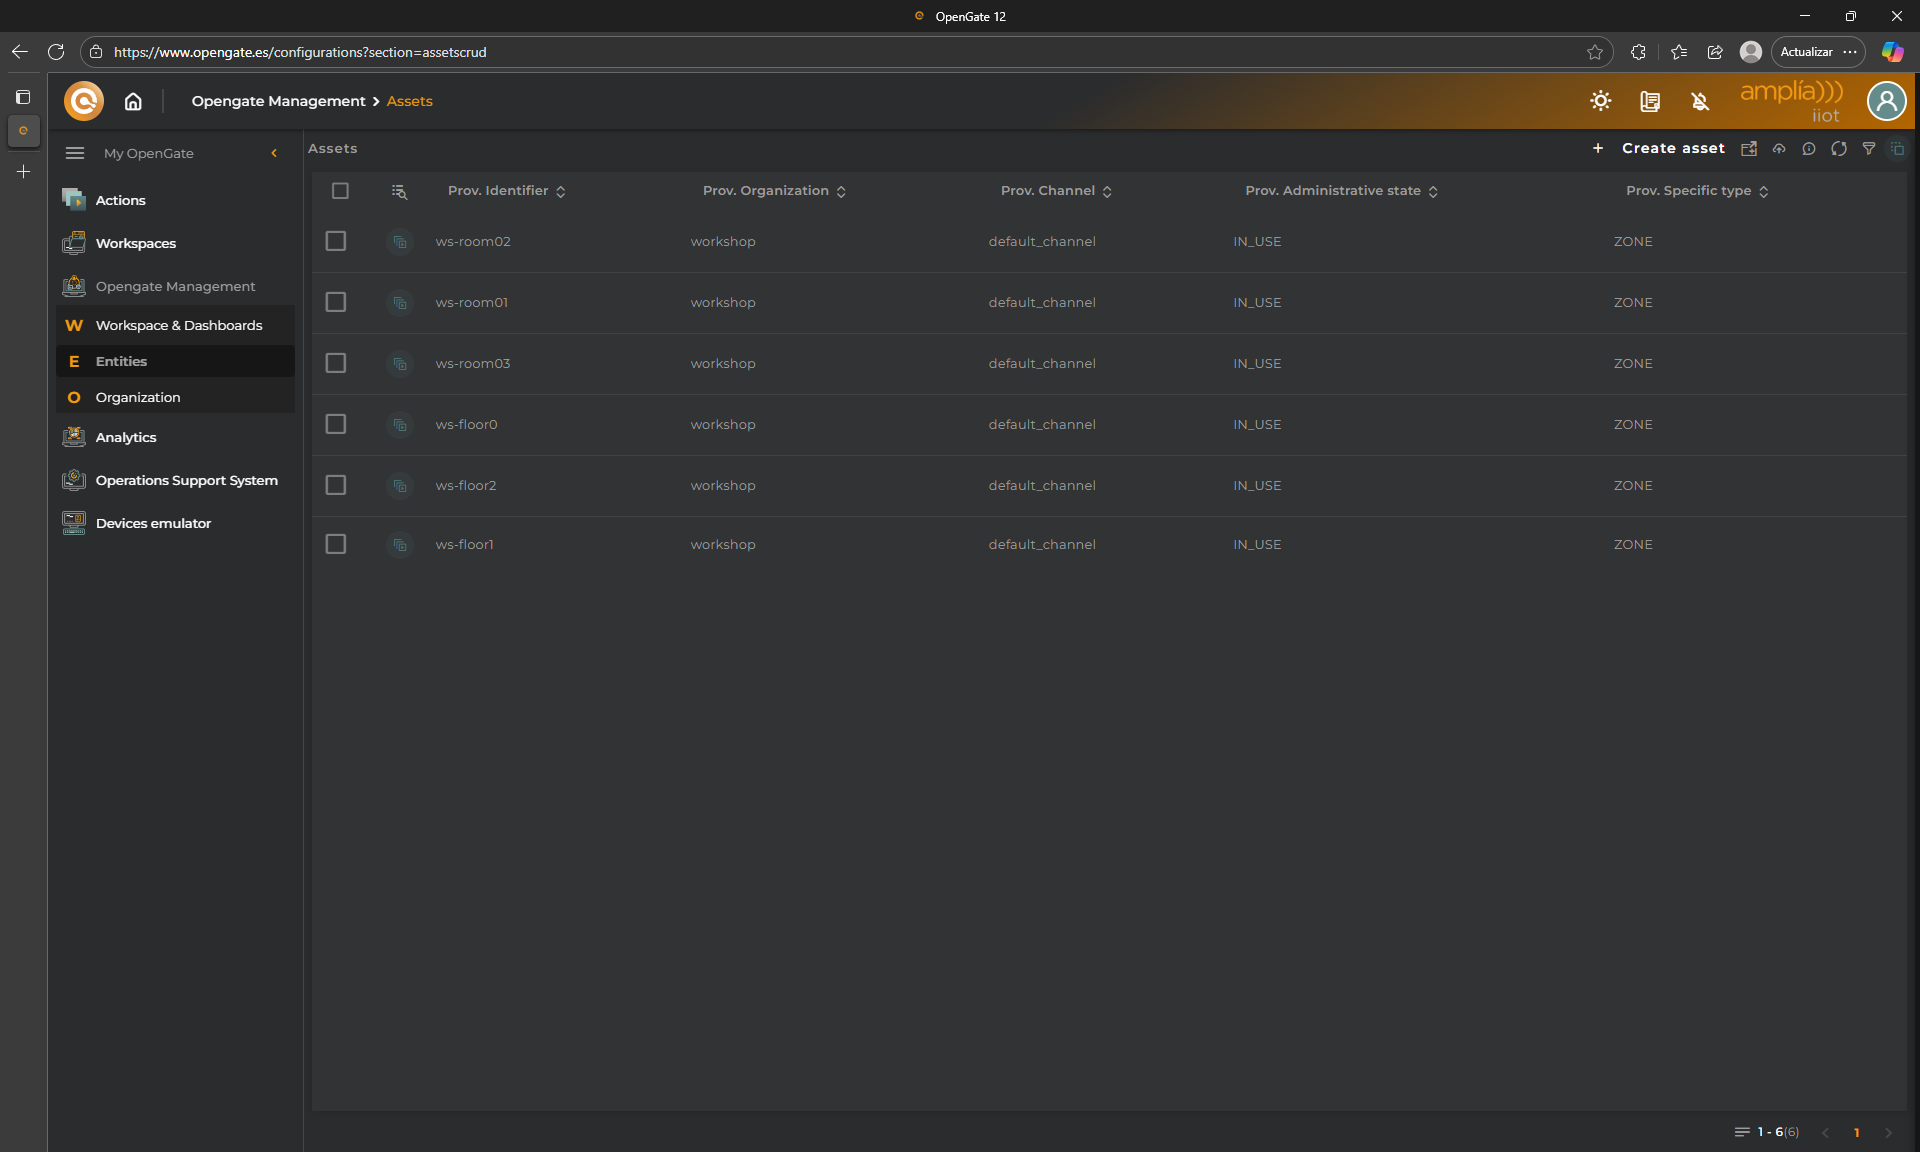
Assets:
Go to “OpenGate Management > Assets” and you should see your assets
🚨 Important notes
🆚 Provision vs Collection
The data or information that we entered during this chapter is recorded in OpenGate as Provision Information in Provision Data Streams (OpenGate standard or custom data streams from your datamodels). This means that this information is entered by someone and is not collected from the device.
The data collected directly from the device through the south API, passing through all the workflow that we discussed in the OpenGate Introduction (Connector functions, Rules, and so on) is recorded in the platform as Collection data streams datapoints.
IMPORTANT: This functionality allows you to distinc the information provided vs the information collected, and is a powerful tool, because cometimes the inventory information differs from the collected information and you may detect missmatchs between the information of your entities what you think you have and the information that the entities realy have.
⚠️ Using bulk for delete
Is posible to use the provision functions to delete entities but remember… some actions that you perform on OpenGate sometimes can not be undone…
We provide you this two examples for provision functions to delete entities to clean your workshop entities if needed. You can download the javascript files and create new provision functions with the code provided:
- 🗒️prov_function_remove_sensors.js: Remove sensors from your account.
- 🗒️prov_function_remove_rooms.js: Remove rooms from your account.
🔌 Using the OpenGate API REST
Remember that OpenGate’s REST API offers all the functionality managed from the GUI so, for more control and automation, OpenGate’s REST API lets you create entities programmatically that is so powerful in serveral ways.
1. Prepare your provisioning JSON object according to the OpenGate schema.
You need to build a valid JSON following the specification of the OpenGate Provision API. Go to https://documentation.opengate.es/api/management/organizations/channels/entities/devices/index.html#api-specification
2. Retrieve your API key from the platform.
For security concers, each OpenGate user, has its own API KEY. Your can obtain your API KEY directly from the OpenGate GUI. Just go to the OpenGate web console and click on the top right user icon button, then click on copy next to APY KEY
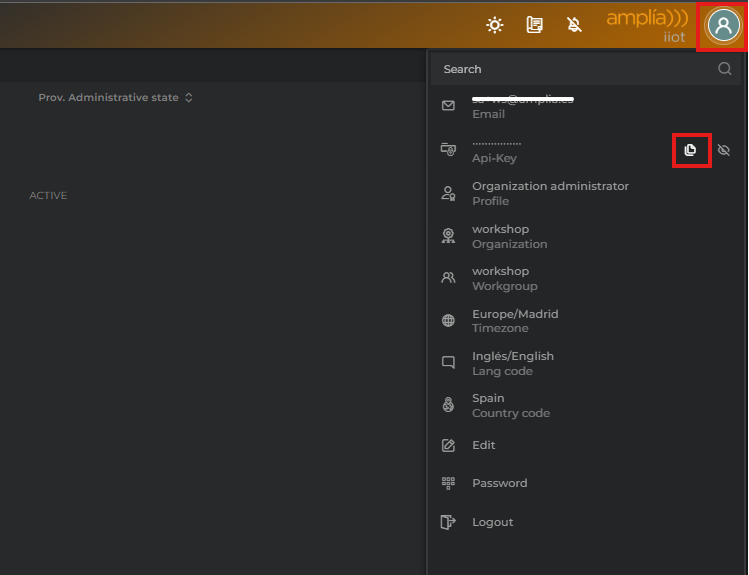
Annotate this API KEY and… of course, do not share it with anyone…
3. Send the request to OpenGate.
Send the request to the provision endpoint: https://api.opengate.es/north/v80/provision/organizations/[YourOrganization]/devices/[YourEntityID]?flattened=true
4. 🎉 Entity created!
If you recibe a 200 as response, all is fine, if not, fix the errors and repeat the process
🚀 When to use this method:
Ideal for backend integrations, automated deployments, or provisioning at scale when combined with external systems.